When taking a digital image, you are not only capturing the scene in front of you, but you are also storing specific details about the photo you take, known as Exif data. Whenever you capture an image, particular details of the camera and settings you used are stored within the file.
The amount of information stored in the image file depends on the type of camera you use. Smartphones keep certain details, but professional cameras with separate lenses store even more information.
When it comes to this data, you may be wondering what information is stored in the photo file, how you can view it, and what happens if you want to remove it from an image to reduce the file size or protect your photography techniques. I have all the answers you need about Exif data right here.
Table of Contents
What Is Exif Data
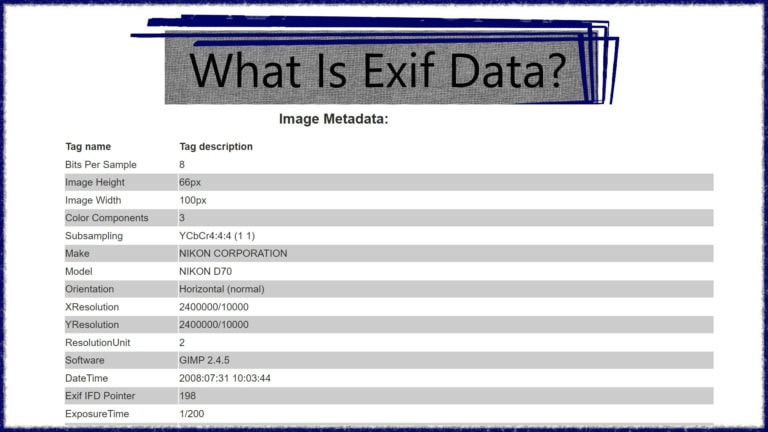
Exif data, which stands for Exchangeable Image File Format, is embedded into almost every photo file and contains important details about the image. The metadata (as it is sometimes referred to) can provide various information about the camera and the image depending on how the picture was taken.
The Exif data contains various details, including the camera used, the active settings when the picture was taken, and other technical information about the image.
The metadata is stored in the photo’s properties. People can use this information to determine specific details about the picture. These details include the date and time the photo was taken, the camera make and model, the lens used when taking the photo, and even the GPS location where the image was taken if the camera has that capability.
The Exif data is sometimes necessary for photographers to keep track of their images and to look back on specific settings. It also helps photographers improve their techniques or share the details of the image with others. However, in some cases, you may want to remove this information.
Example of Exif Data
Exif data contains various information and details about a photo, and not every image will have the same details. The standard information included in Exif data is:
- Camera make and model
- ISO
- Aperture Value
- Shutter speed
- GPS location (if the camera has GPS capabilities)
- Date and time the photo was taken
- Orientation of the camera (landscape or portrait)
- Software used to process the image
- Copyright information (if available from the camera)
There are several ways to view the Exif data on an image file. However, you may be looking for images to use as tests to see the Exif data. There are several examples of Exif data on GitHub for you to look at.
How to Find Exif Data
To view the Exif data for a photo, you can use various free or paid online tools, photo editing software, or even your computer's built-in file explorer. Here are a few different methods to view the Exif data for a photo depending on the device you are using.
Check Exif Data Online
One of the simplest ways to view the Exif data is to use an online Exif viewer program. However, you may be cautious about uploading your image files to other servers. Luckily, we have an Exif Data Viewer app on our site.
Our app doesn’t upload your image to our own servers, and your file remains on your own server in your internet browser. Our servers don’t have access to your file during the entire process, so you can be assured that your personal data remains private.
To check the Exif data online, first, navigate to the Imagy Exif Data Viewer Tool. You will see the simple tool page where you can upload your image.
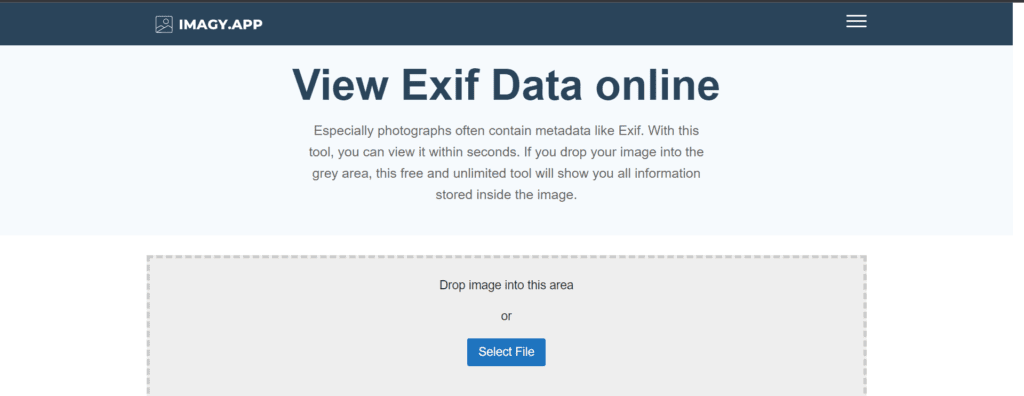
You can now either click on Select File to choose the file on your device or drag and drop the image file onto the upload area. Once you add the file, it will appear in the block with the basic details of the image.

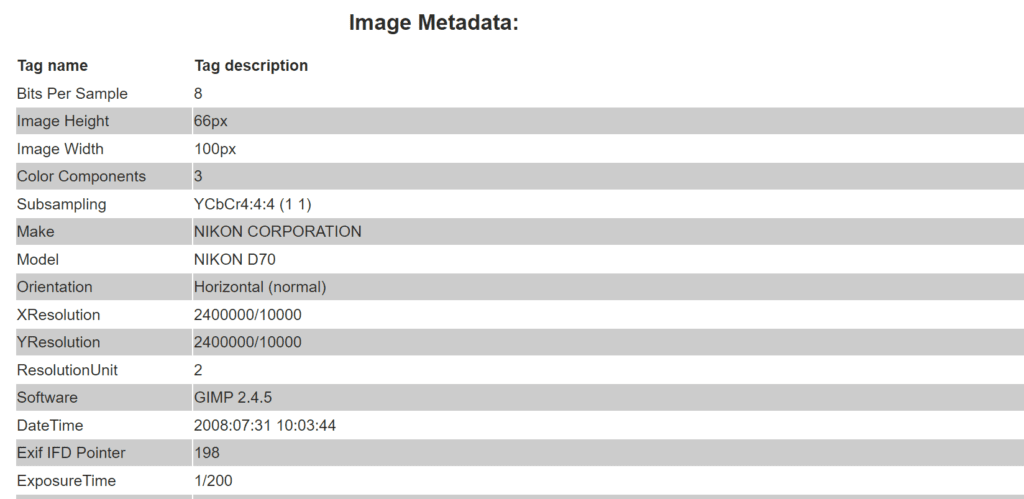
To view the full Exif data details, simply scroll down once the tool has loaded the information (it only takes a few seconds). You will find all the Exif data that is available. Remember that not every file contains Exif data, as the owner of the image may have removed it.
Here are the first few details of my example image, but if I keep scrolling, this file has much more metadata information.
Check Exif Data on Windows
If you don’t have access to the internet or just want to view the basic Exif data, you can easily do this if you are using a Windows device. However, this method doesn’t show as many details as the previous online tool method.
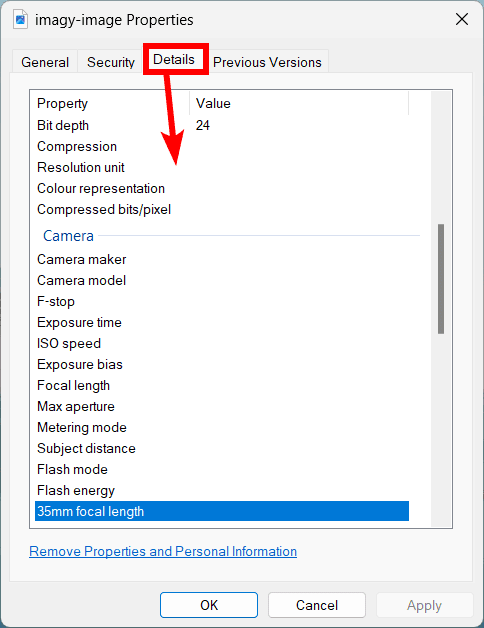
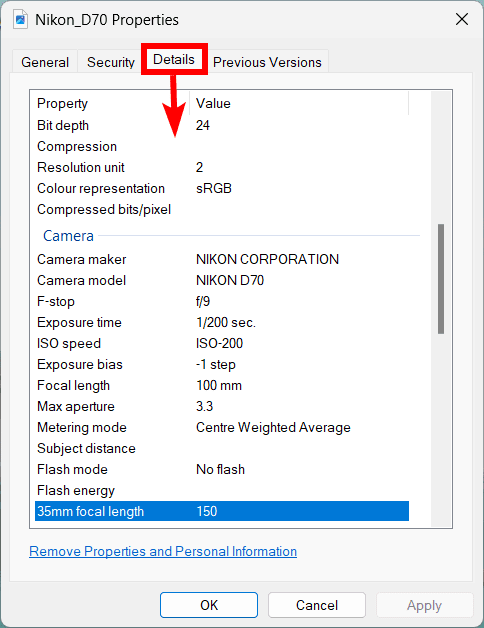
To view the Exif data on Windows, right-click on the image file and select Properties.

Then, click on the Details tab and scroll down to view the Exif data.
Check Exif Data on Mac
If you are using a Mac device, you can also easily view some of the Exif data through your operating system. To view the Exif data on a Mac, open the image in the Photo App. Then click on the information button at the top of the window, which is the “i” icon.
You will then see the available Exif data. Another method you could use is to right-click on the image and click on Get Info or use the shortcut Command + I.
How to Remove Exif Data From a Photo?
In some cases, photographers prefer to remove the Exif data from their images for many reasons. Removing the metadata can help photographers keep their techniques secret to protect their specific style of photography and prevent others from copying their images.
In other cases, you may want to remove the data to reduce the file size, especially when uploading the photos to your website, since Exif data increases the size of the file.
You will need to use a program to remove the Exif data from a photo, which can be expensive if you use paid software. Luckily, we have a free Remove Exif Data Tool you can use to remove this data.
To use our tool, open the tool’s page in your browser. You will notice it looks similar to the tool you used to check the Exif data.
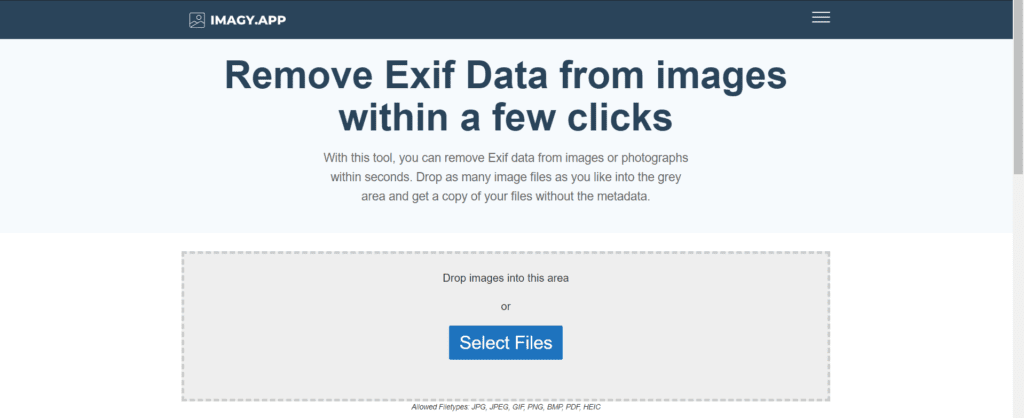
Upload your image by clicking Select Files, or drag and drop your image into the block. You can add multiple photos at a time if you’d like.

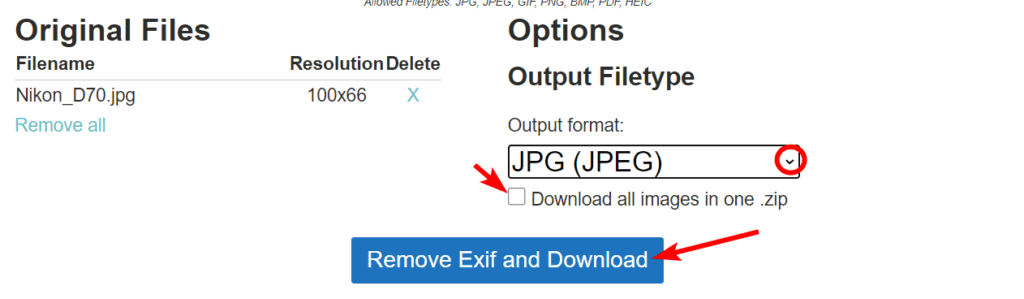
Once you have uploaded your file(s), scroll down to where you can adjust a few settings.
You can use the Output Format drop-down list to select the file type you want to save the new image as. Then, if you have uploaded multiple files, you can download all the images into one zip folder if you’d like by checking the checkbox.
Once you have the settings you’d like, click on Remove Exif and Download.
You will then have the chance to select a save location on your device for the new file. Once you have saved the image, you can use the online tool or your device method to check if the Exif data was removed.
Using the Windows method, you can see that the details that were shown previously are now gone on the image I have used as an example.