
If you're working in MS Word and need to crop an image, there's no need to switch to another application. MS Word offers a convenient and efficient way to crop images directly within the program. Here's a streamlined guide to help you through the process:
- Choose the image you wish to edit
- Access the Crop Tool located on the Toolbar
- Adjust the borders by dragging them to achieve your desired crop
- Press enter to finalize and save your changes
Throughout this article, we provide detailed examples for each step. Additionally, if you're in a hurry and prefer not to install any extra software, our online cropping tool is a quick and effective alternative.
Total Time: 12 minutes
Table of Contents
Crop the Picture with Crop Tool on the Toolbar
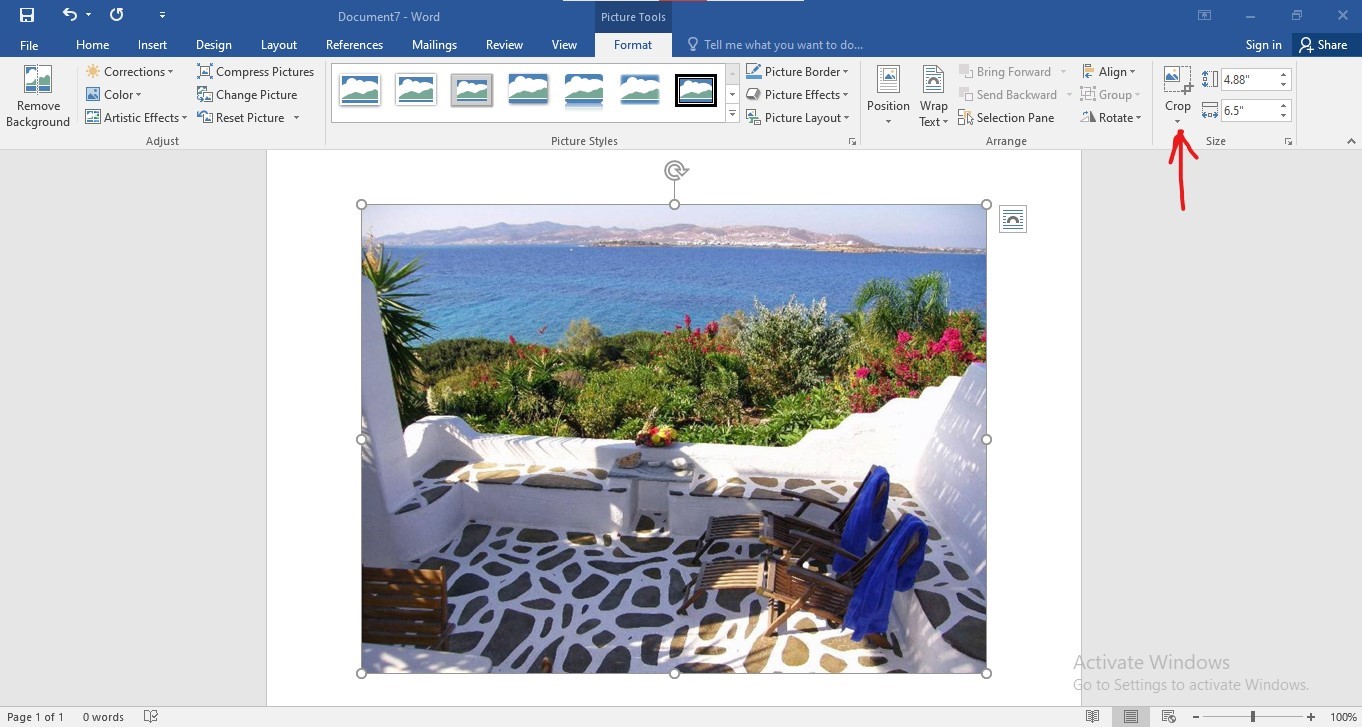
Once you have the picture loaded and selected on MS Word, there are a couple of ways through which you can get the cropping tool.
On your Word document, you will see the toolbar above the image. If you go through the list, you will see that the "Crop" button is part of the list of options available to you.
You can find the crop icon near the end of the list on the upper right-hand side of your Word window.
Drag the Borders to Crop Image
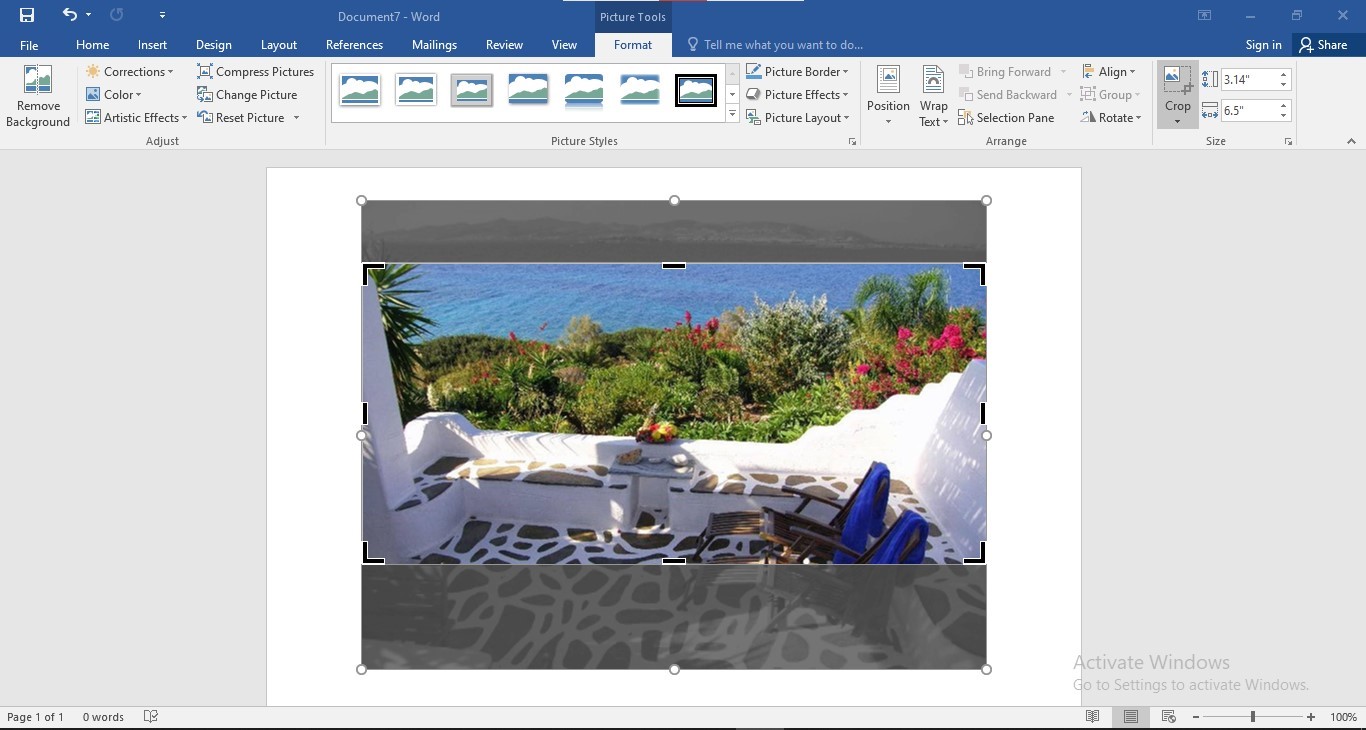
As soon as you click on it, you will see new borders appear around your image. These borders are movable and can be dragged through the image to crop it as desired.
Click "Enter"
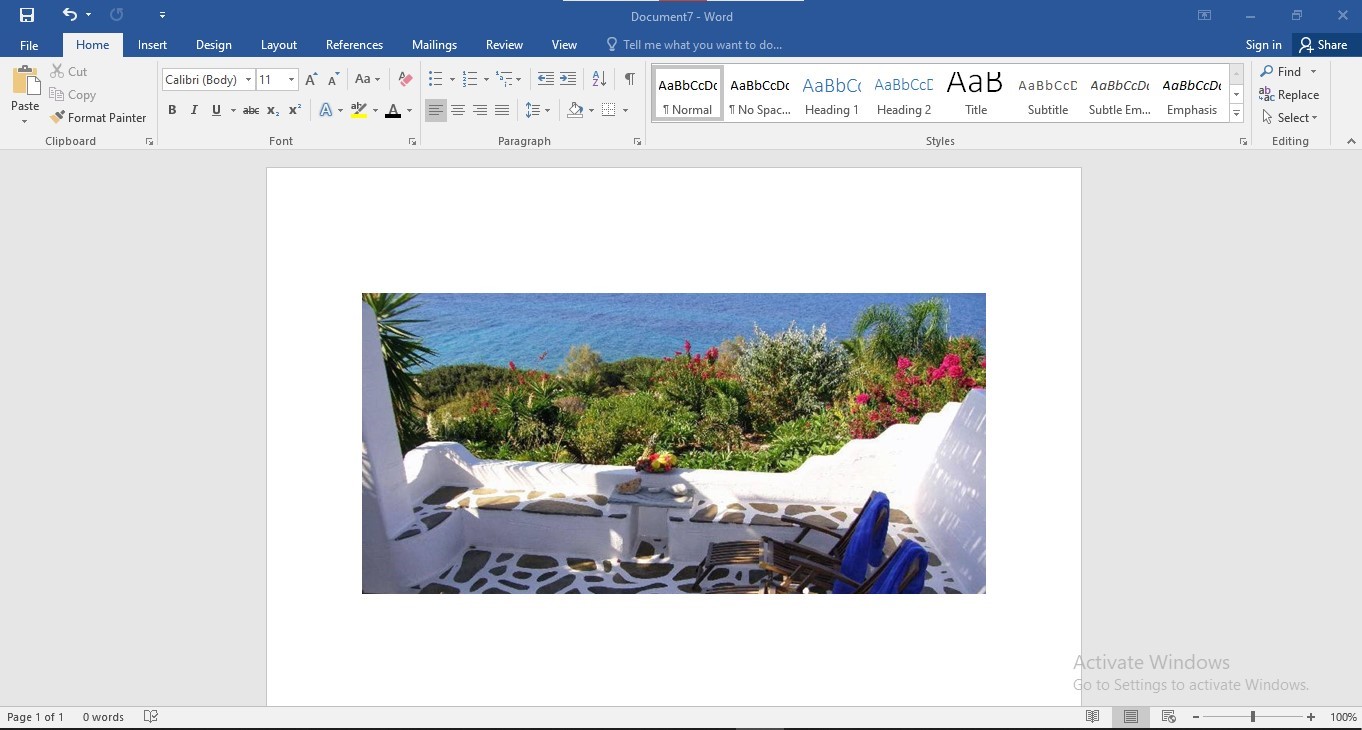
Once you have what seems like the desired cropping effect, all you have to do is hit "Enter," The tool will execute the order cropping the image as desired.
From then on, it's just a matter of saving it to the Word document and moving on to the next image or project.
Note: If, for some reason, you aren't satisfied with the results of the cropping process, you don't have to load a new image onto your Word document. All you have to do is right-click on the currently cropped image, and the drop-down menu will appear again - click on the "Crop" option again, and the cropped-out part of the image will reappear, giving you back the original image. You can then rework the process to get the desired effect.
Cropping Images into Shapes in Microsoft Word
Now that we have covered how to crop an image in Word, let's go a step further and look at what it takes to crop the same image into fancy shapes in Word. The process is very much the same, with a slight variation somewhere near the end.
-Load the image on Word
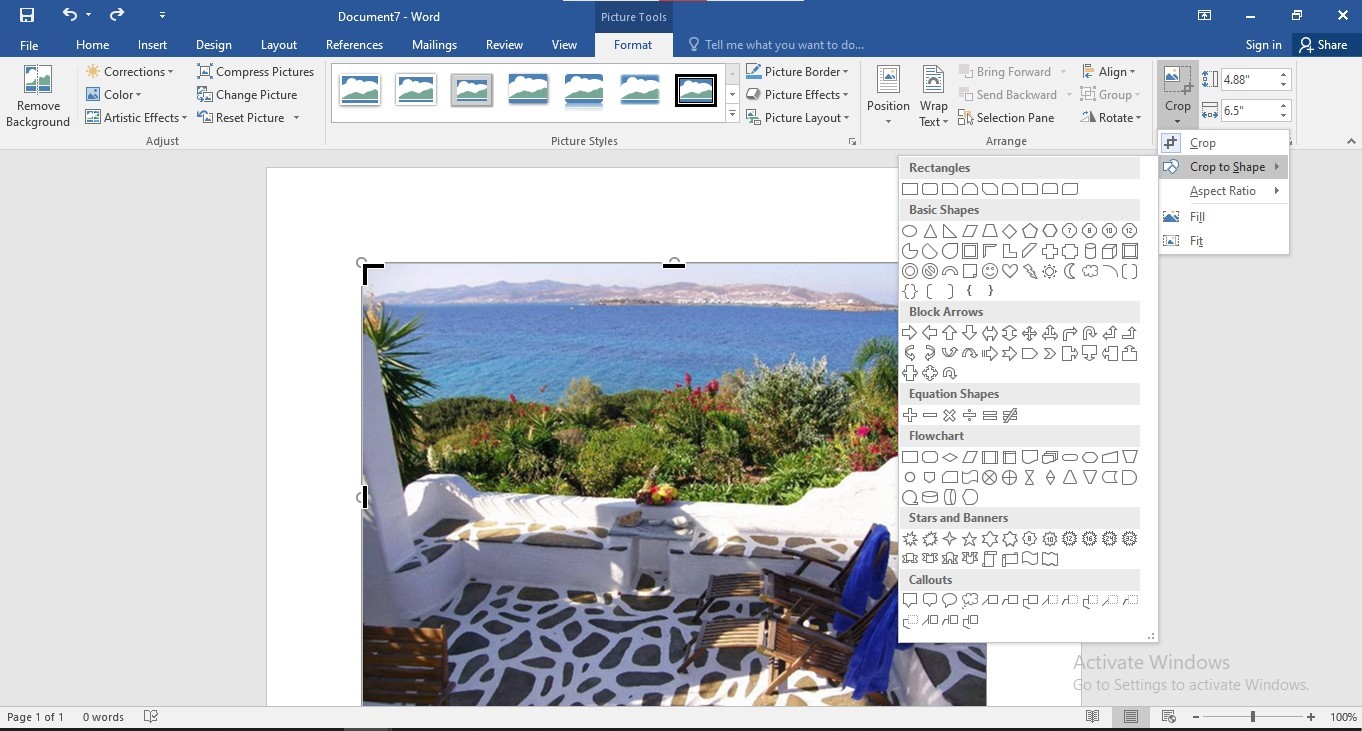
-Click on the "Crop" tool
This time around, go to the toolbar above the image and move your cursor to the "Crop" option near the upper top right corner. You will see that it has a small arrow indicating that it has a drop-down menu of its own.
If you click on that arrow, the list that appears will have a few options you can use. One of those options is "Crop to Shape."
If you click on the "Crop to Shape" option, you will see a long list of shape options that you can choose to crop pictures. Every one of these options allows you to crop the image to the corresponding choice you have made.
Clicking on any of these options will give you the same kind of borders you got when you clicked on the "Crop" tool. You can play around with these borders and shapes until you find the kind of result you want to achieve with the final image.
From then on, it's just a matter of saving the word document. These are the simple yet effective steps you need to follow to learn how to crop a picture in Word.