
Cropping in IrfanView is pretty straightforward. To cut out a part of your image, you simply need to select it and use IrfanView's cropping feature.
If you simply want to crop an image quickly, consider using our free online image cropper as an alternative, which doesn't require any registration.
Table of Contents
Step by Step guide

IrfanView is a compact graphic viewer, converter, organizer, and editor and works with a wide range of operating systems. It is quite popular among beginners and professionals because of its powerful editing capabilities and its low system resource requirements. This tutorial explores how to crop in IrfanView in 4 easy steps.
Total Time: 1 minute
Upload the Image File

First, open IrfanView and go to the File menu on the main toolbar. Click Open and navigate to the location of your saved image in your file repository. Select the image in question and click Open to upload it to your workspace.
Select the Area of the Image to Crop Out
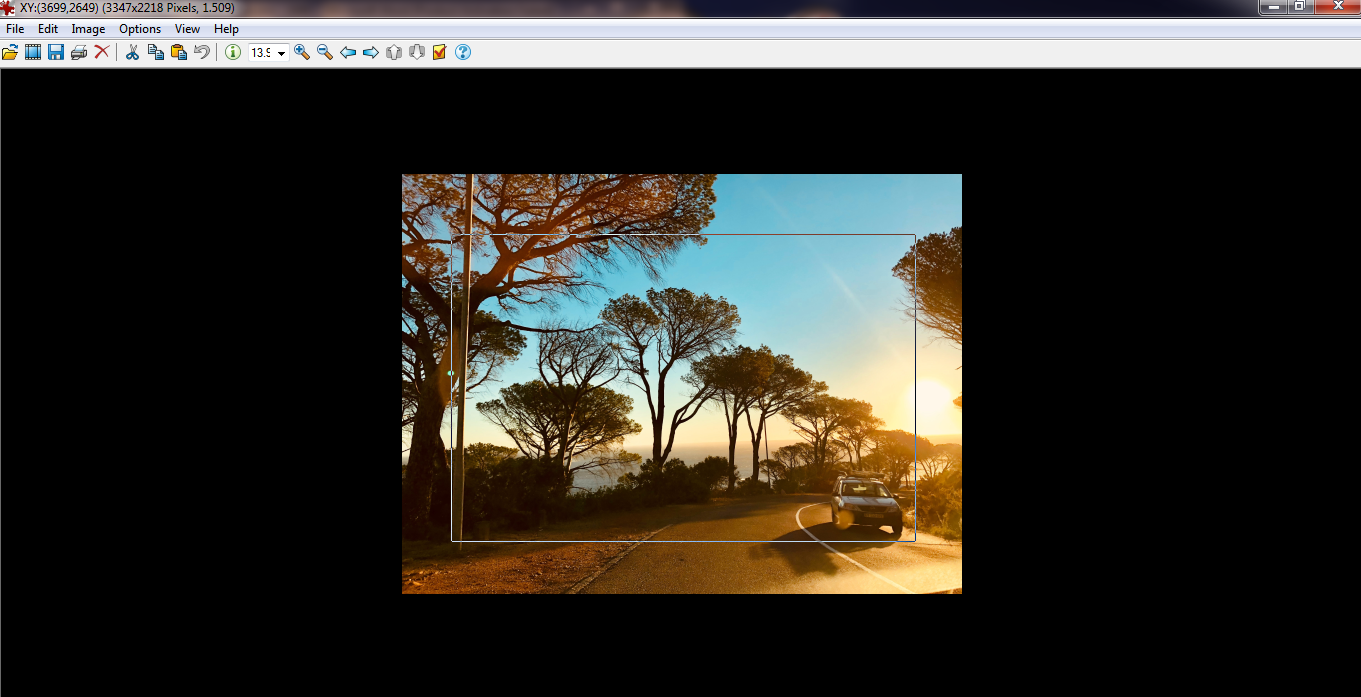
Next, click and drag to select the area of the image you want to crop.
Crop the Image
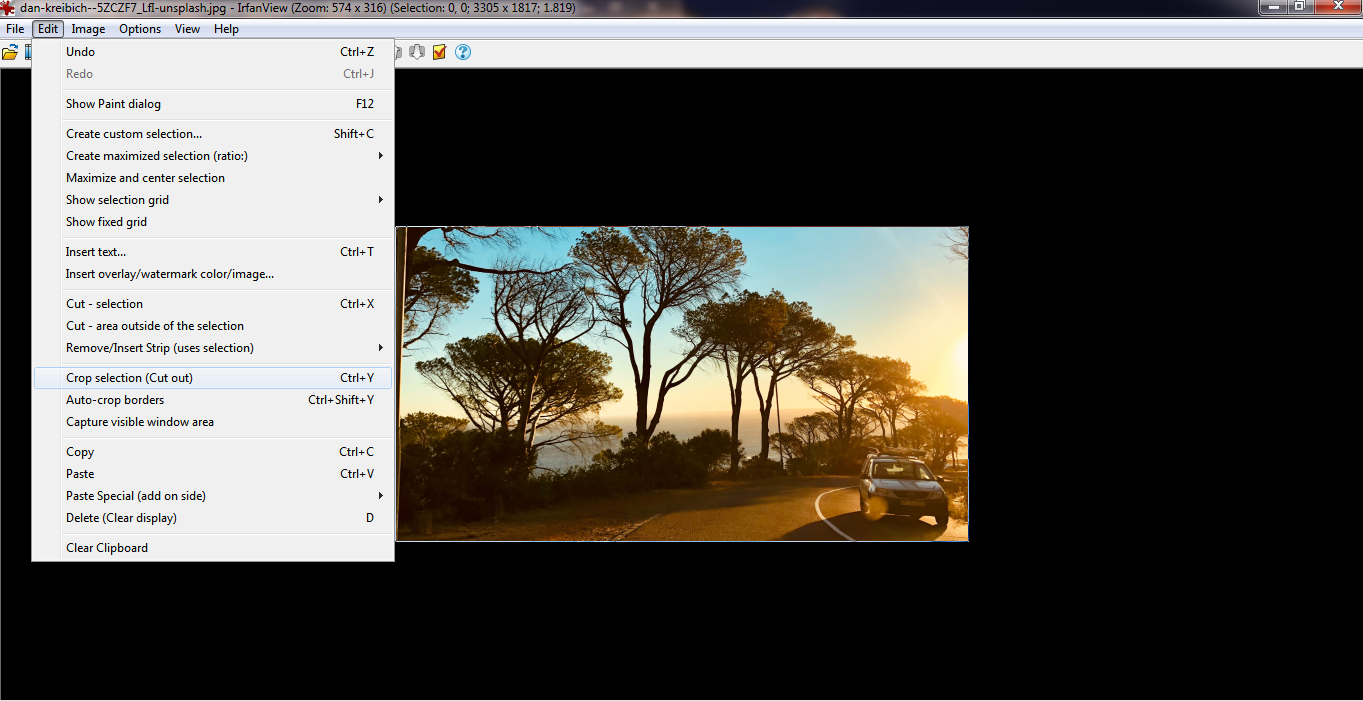
Then, go to the Edit menu on the main toolbar, and click Crop selection to cut out the parts of the image you don’t want to keep. The new image displayed is the cropped version of the original.
Save the Image
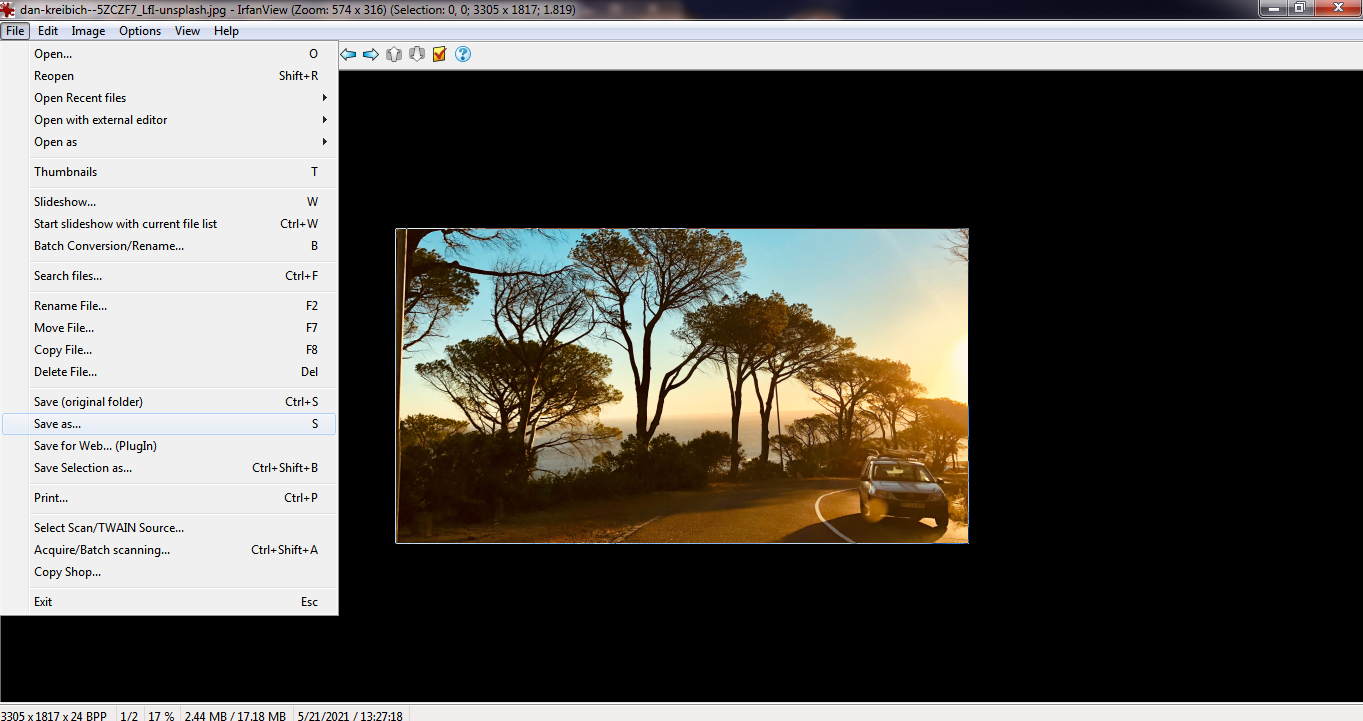
Finally, go to the File menu on the main toolbar and select Save As. Keep the existing file name to overwrite the previous version, or create a new name for it to keep both versions of the files. Select the file format you want it saved in, and then click on the Save button to complete the process.
That’s how to crop in IrfanView. We hope you found this tutorial helpful for your next photo editing project.
Tools:
- IrfanView