
What stands out about MS Paint is that it's free (included with your Windows installation) and mimics many of the best image manipulation software programs on the market. Among the tasks you can accomplish with Paint is cropping images into a circle by using a workaround.
Keep in mind that, unfortunately, MS Paint is not designed to easily crop circles. Therefore, we recommend using our online circle cropper, which is free and does not require any registration.
If you still want to do it within MS Paint, please keep reading.
Table of Contents
How to Crop a Circle in Paint
In this guide, we will review step-by-step how to crop a circle in paint.
The steps are as follows:
1) select the shape,
2) bold the edges,
3) choose your color,
4) erase, and
5) save your image.
Total Time: 10 minutes
Load MS Paint
The first step to circle cropping in Paint is to load MS Paint from your computer. You can easily do this by searching for it in the Windows search box. Once it shows up, click on it, and the program will load.
Search for and Load the Image
Once the tool is live, the next step is to load the image you want to manipulate onto it. There are two ways through which you can do this:
Option 1:
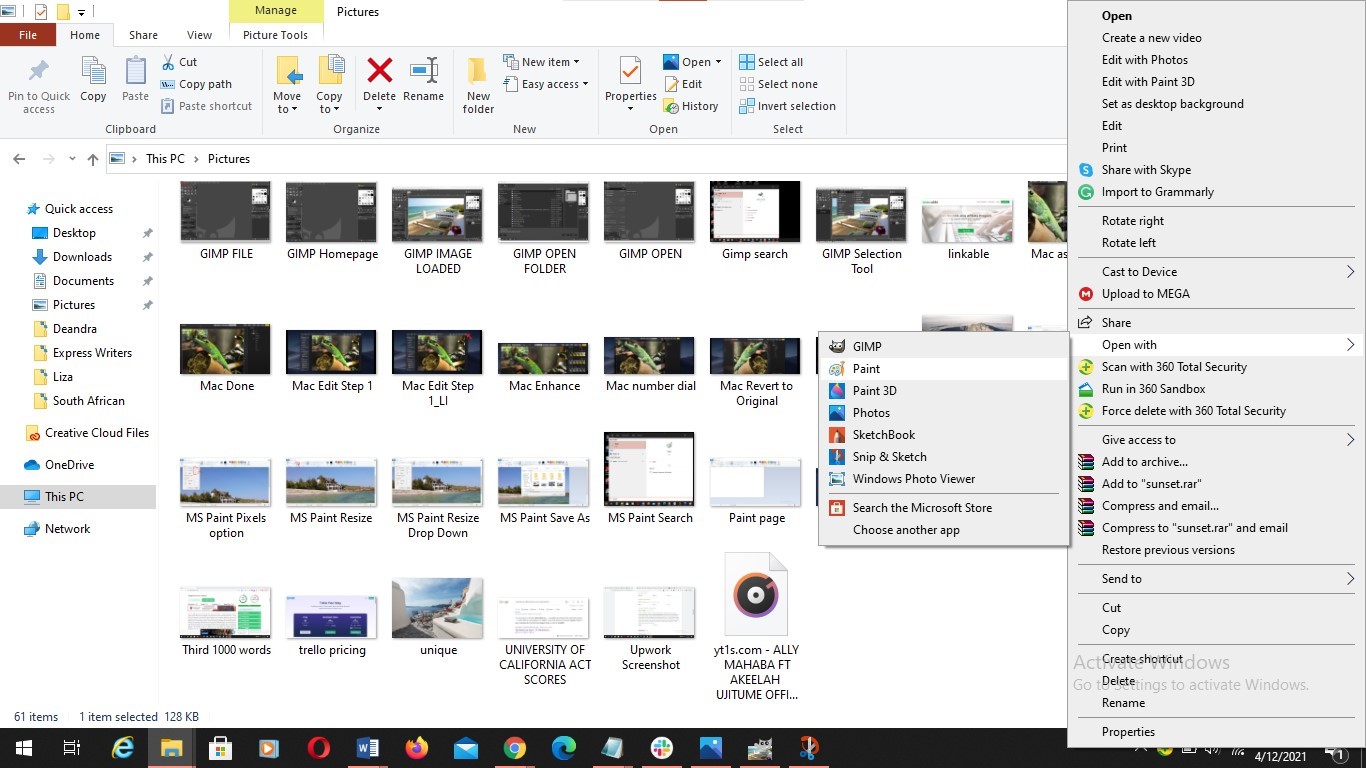
Start by finding the image and then loading it in Paint. This option actually helps you skip the first step, which involves searching for and loading the tool through the Windows search box.
The process involved here is simple enough:
- Find the image you want to manipulate in your hard drive
- Right-click on that image
- From the drop-down menu that comes up, select Open with
- Choose Paint
Option 2:
The second option involves loading the image through the already open Paint tool. The process for this is equally as simple.
Click on the File button at the uppermost top left corner of the tool.
That will lead you to a page where all the images on your hard drive can be found.
Once you have identified the image you want to load onto the program and manipulate, simply click on it once to highlight it and then click on Open.
Select Shape
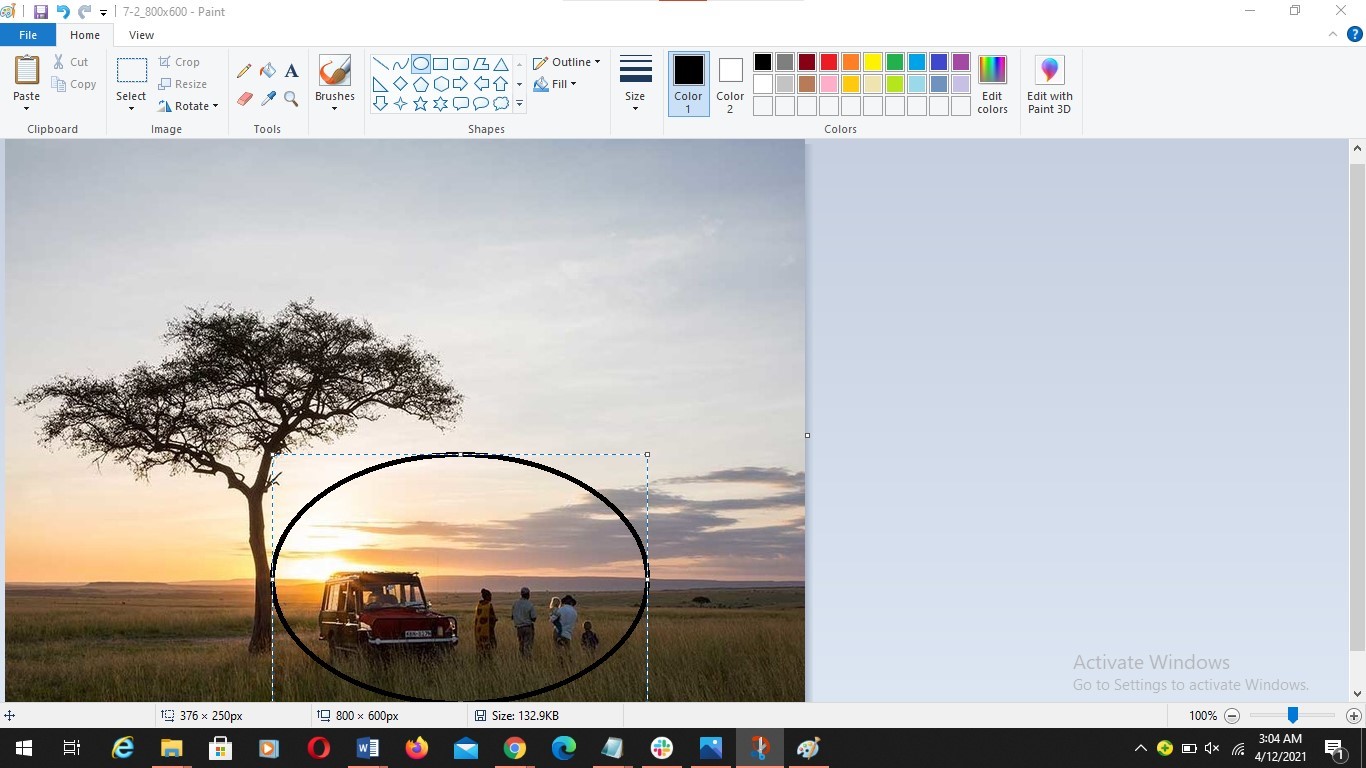
Now, the thing about MS Paint is that it gives you quite a few various options when it comes to the cropping tool for your images. If you look at the top toolbar on the program, you will see a host of options or settings that you can choose from for cropping.
Since you are looking to learn how to crop a circle in paint, your main interest area will be in the toolbar marked Shapes. That can be found right around the middle of the pack, right next to Brushes.
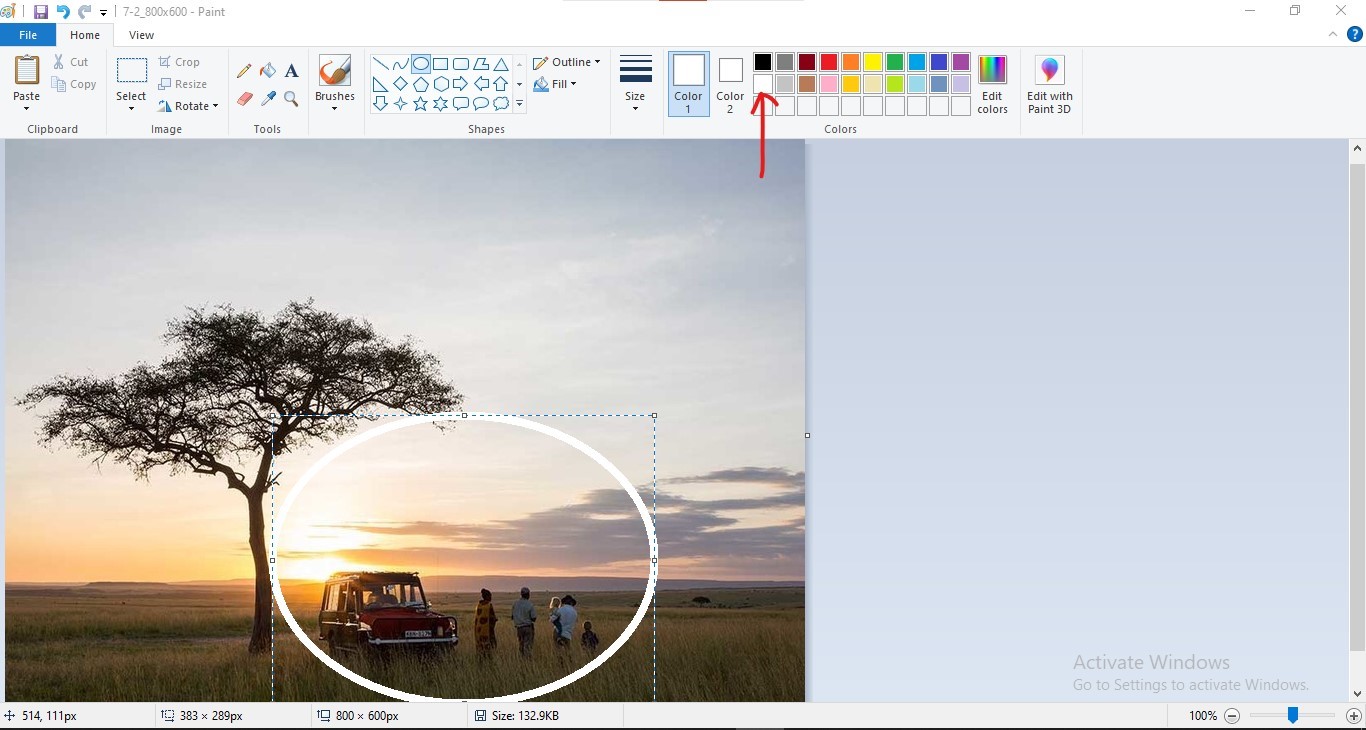
In the options available to you, choose the Oval one, which would be the third option in the top line. All you have to do is click on it once, and it loads the shape onto your cursor.
From then on, simply go to the image you want to manipulate and then drag the cursor around to cover the area you want to include within the circle crop.
As is the case with most image manipulation tools, you can reshape this oval image into a circle crop depending on how you drag the corners of the rectangle that appears on the cropped image. You can also choose to do your own custom shape if you don't want just a circle cropped image.
Bold the Edges
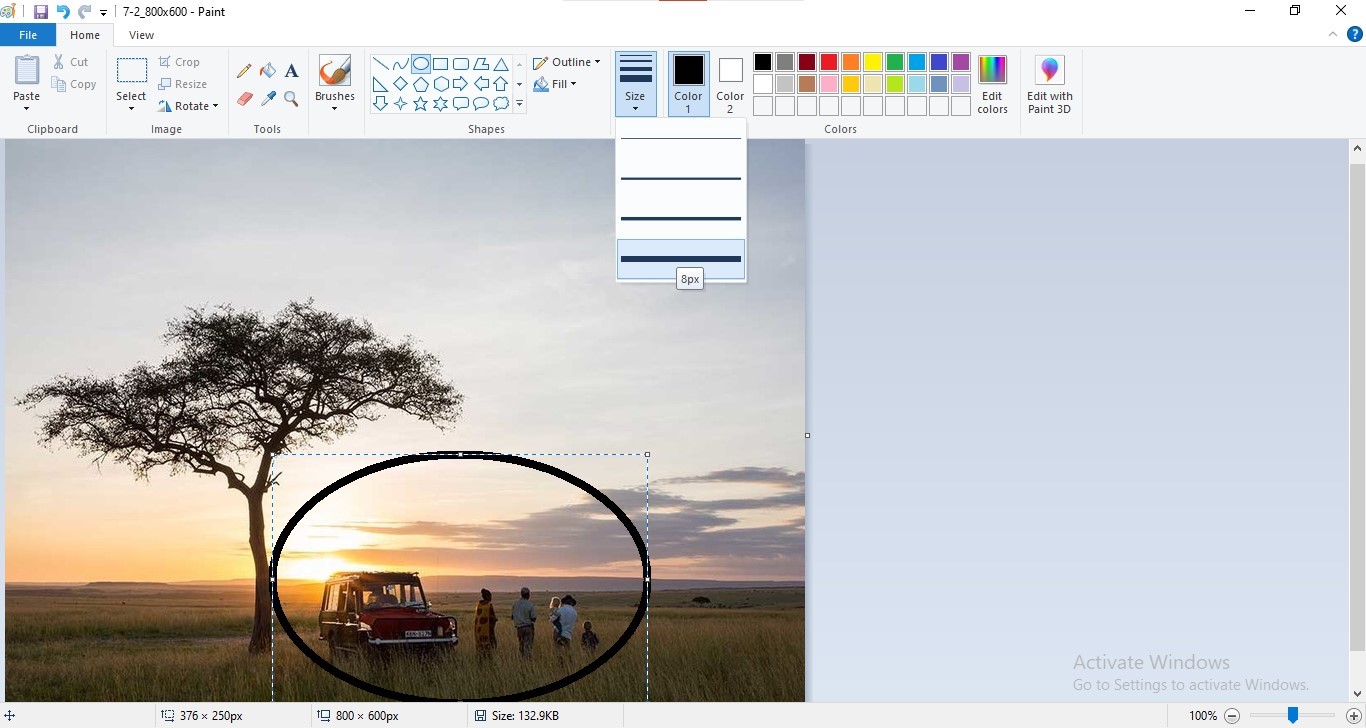
Once you have created the circle shape you want around the image, the next step is to bold the edges of the circle shape. This will help with what comes a little later on as you finish the image manipulation process.
To bold the edges of the circle shape, simply take your cursor to the top toolbar again, next to the box labeled Shapes. Where you found the Oval, there are a few tools named Outline and Fill.
Next to those, you will see a tool named Size. If you click on it, a small drop-down menu appears, which offers you different sizes. These are the options you have as far as bolding the edges of your circle image are concerned.
You can choose whichever one you want, but the better option is to pick the boldest one for your circle image, which will be the final option down the line.
Choose Color
Once you have chosen the bold edge you want - without doing anything else, click on the color White. These color options will be next to the size options on the toolbar.
Once you click that color white, you will see the bolding on the edges of your circle turn white. The next step will highlight why this step is necessary.
Select Eraser
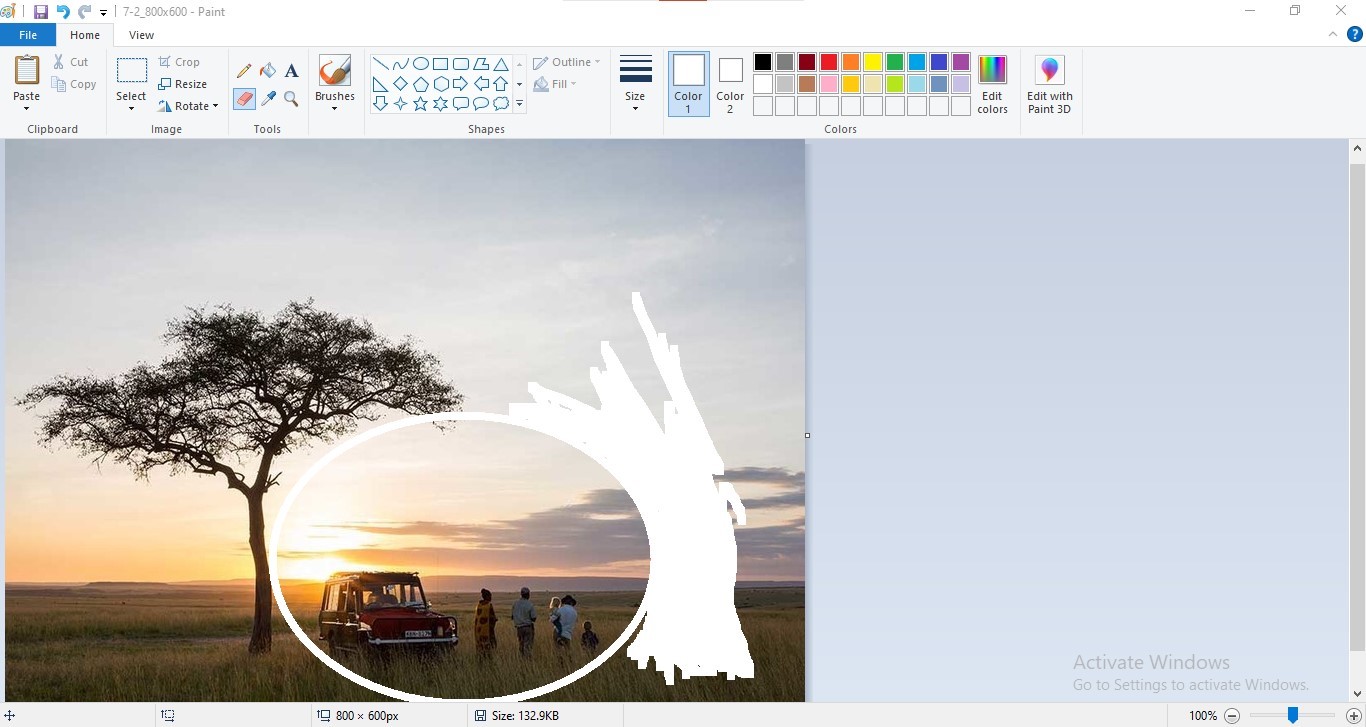
The next step is to select the Eraser tool, which can incidentally be found within the toolbar labeled Tools. This bar has a couple of rows, with the Eraser tool being the second row's first option.
Once you have selected the Eraser tool, the rest of the project relies on how well you can erase the rest of the image. This will call for quite a bit of patience as you shouldn't touch anything within the original circle you had already made.
As you can see, the Eraser leaves everything white, and that's why you needed to both bold the edges and choose the color white so that you have an easier time matching that to what the Eraser is doing.
Save Your Image
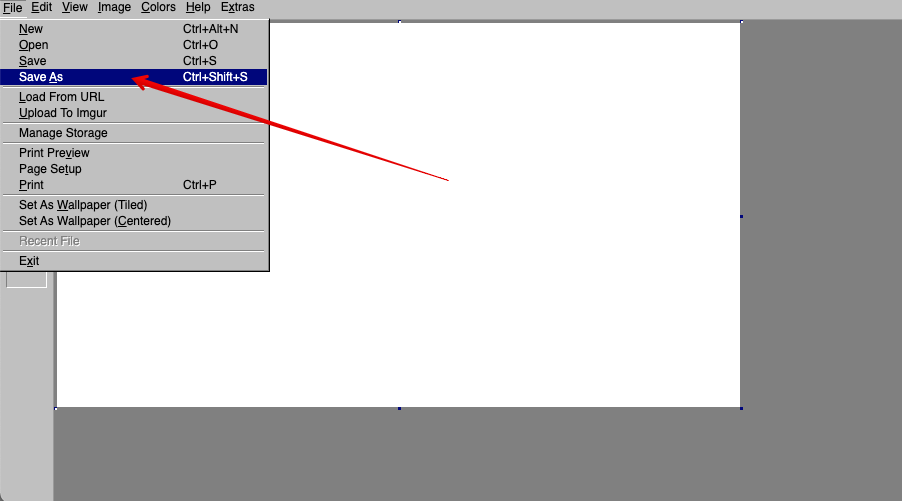
Once you have erased every other part of the image outside the circle, the only thing left to do is to save the image. This is simple enough. All you have to do is click on the button File, still at the top left corner of the tool window.
Once the drop-down menu appears, click on the option Save As and simply save the image however and wherever you want to save it.
Granted, this won't be as elegant as using other complicated image manipulation tools, but once you know how to crop a circle in paint using the crop tool, you are well on your way to learning how to crop a circle in pretty much any other tool.