
You don’t always need fancy software to do the most basic tasks as far as photo editing goes. Case in point: Flipping an image. This tutorial provides a detailed guide on how to flip an image in Google Docs.

Total Time: 3 minutes
Table of Contents
Open Your Document on Google Docs
You’ll need to open the document that contains the photo you wish to flip or where you intend to upload the image in question. To do this, you first need to sign in to your Google account. Next, navigate to the Google Docs homepage.
Proceed to select the desired file under Recent Documents. If, on the other hand, you don't have an existing document with an image, you can always create a new one by clicking on the Blank document labeled “+” or use any of the already-existing templates.
Upload Your Image (Optional)
If the document you’ve opened already has the image you want to flip, you can skip this step. If it doesn’t, you’ll need to upload the image into your document.
One way to do this would be to open the explorer window, navigate to the location where the image is saved, then drag and drop it into your Google Docs document. This is the easiest and most convenient method.
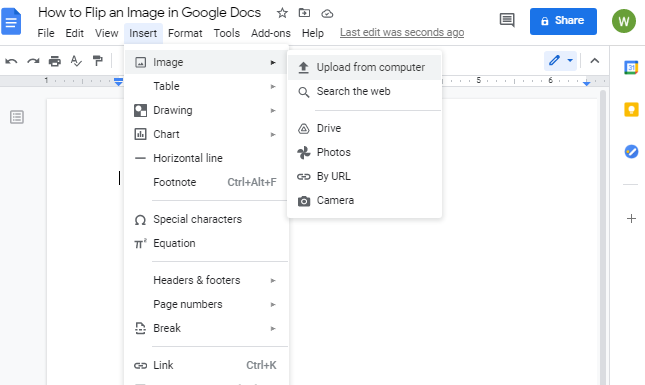
The other way would be to select the Insert tab on the toolbar and then choose Image from the list of options displayed.
Next, from the drop-down menu that appears, choose from any of the several available methods to upload your image, depending on where it is located.
For instance, if your image is saved on your computer, then you'll need to select the Upload from the computer option. If you have the URL of the site where it is located, select By URL instead.
Cut the Image
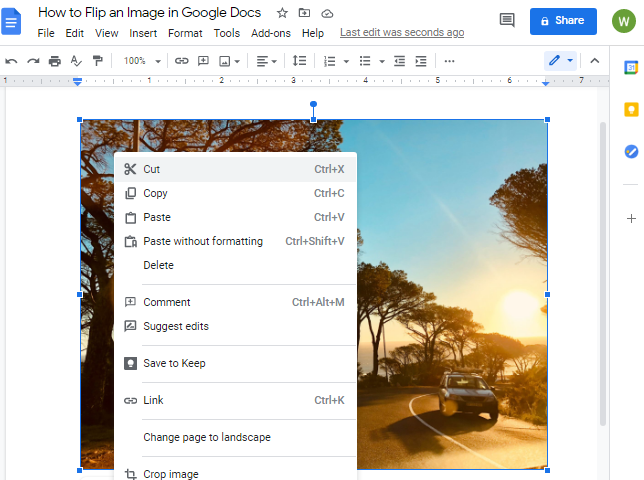
Once you’ve successfully uploaded your image to your Google Docs document, click on it to highlight it, and then right-click on it and select Cut.
Alternatively, once you’ve clicked on the image in question, press Ctrl + X (or Command + X for Mac) for a faster way to cut the image.
Paste the Image in the Drawings Window
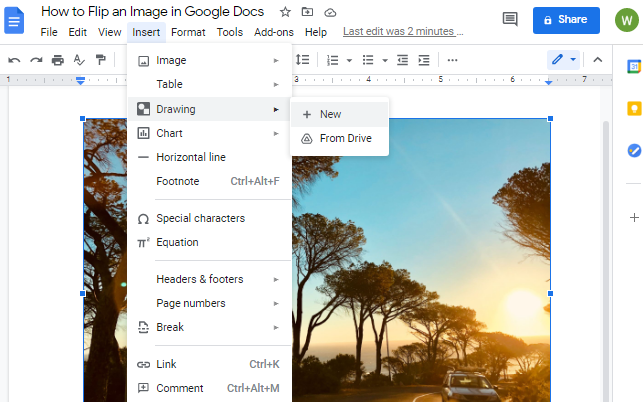
Click on the Insert tab on the Google Docs toolbar, select Drawings from the drop-down menu that appears, and then choose New. This will open the Drawings window.
Next, right-click anywhere inside this window and Paste the image you had cut in the previous step. A quicker way to do this would be to use the Ctrl + V shortcut combination on your keyboard (or Command + V if you’re using a Mac).
You could also open your image directly to the Drawings window if you want a faster way to do it. All you have to do is select the image in your Google Docs document to display a small menu next to it.
Then, select Edit, which is the first option in this mini-menu. This action opens the Drawings window with your image in it. A quick disclaimer, though: This option may not always work, in which case, you’re better off using the longer method.
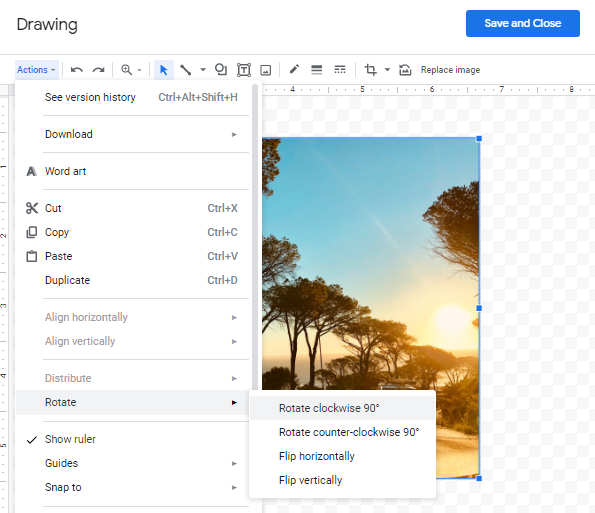
Flip the Image
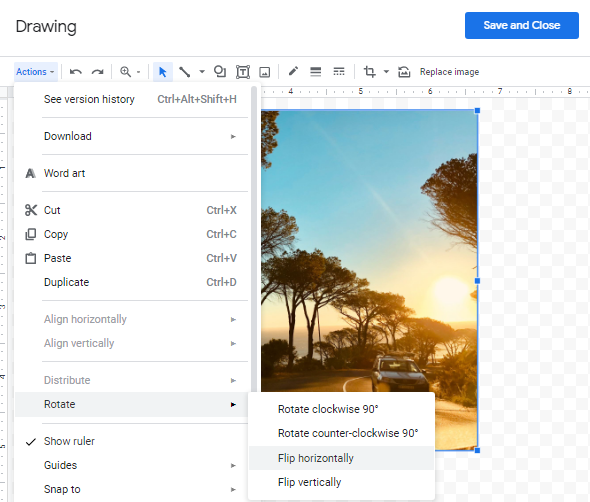
Once your image is displayed in the Drawings window, click on the Actions tab located on the top left corner of the Drawings toolbar. From the drop-down menu that appears, select Rotate to display another sub-menu.
You will then be presented with two options for flipping your image: Flip horizontally or Flip vertically. Select the option you prefer, and Google Docs will mirror your image in your desired direction.
Save Your Image
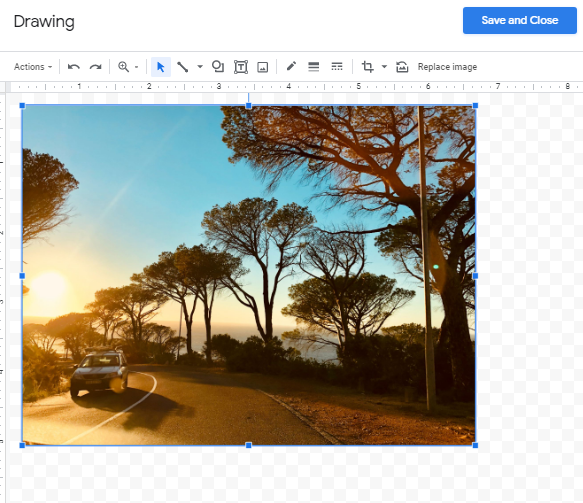
Once you’re satisfied with the new image, click on the Save and Close button at the top right corner of the Drawings window. You’ll have successfully flipped the image in the document.
Alternate Method: How to Flip an Image by Rotating It
There's an alternative method available for flipping images on Google Docs. Keep in mind that this method only works if you want to flip images vertically. For horizontal flips, follow the steps outlined in Option 1 above.
1. Import the Image to the Drawings Window

Cut the image from the document. Then, click on the Insert tab in the toolbar menu, select Drawings, and then click New. Paste the image in the Drawings window that appears.
Alternatively, click on the existing image in your Google Docs document, and then select Edit in the small menu displayed next to it. Again, this option may not always work, so use the longer method above instead.
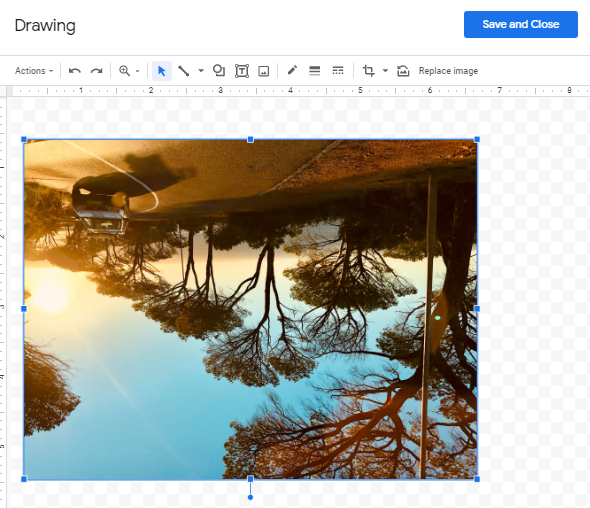
2. Rotate the Image
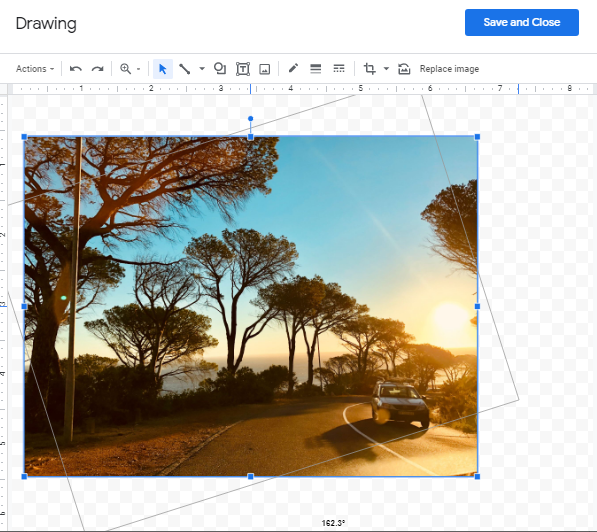
Once you've pasted your image in the Drawings window, select it to display its anchor points. Click on the topmost anchor and drag it in a clockwise or counter-clockwise manner until it is at the bottom.
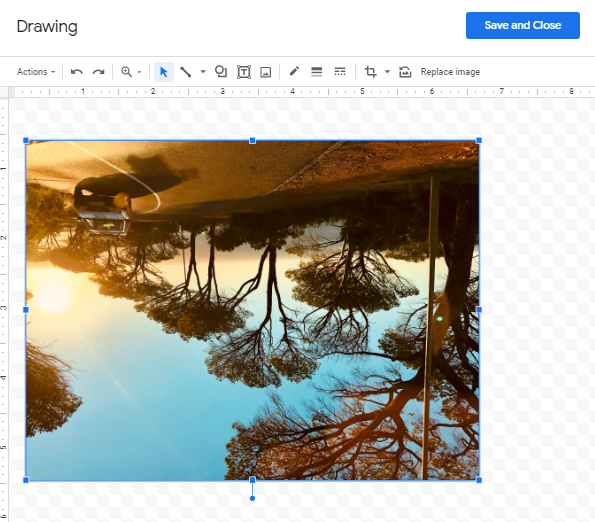
Another option would be to rotate the image using the Rotate function in the Actions menu of the Drawings window. To do this, select the image, click on the Actions tab, and choose Rotate from the list of options provided.
Next, click on either the Rotate clockwise 90° or Rotate counter-clockwise 90° option. Repeat this step one more time to get a vertically flipped image.
3. Save the Image
Once you’re satisfied with the flipped image, click on the Save and Close button to insert the new version into your Google Docs document. To reiterate, this option only works for vertically flipping an image and not for horizontal flips.
There you have it – How to flip an image in Google Docs. We hope you found this tutorial helpful.