How often do you use Google Docs, and do you know how to resize an image in Google Docs? There are several good reasons you should consider using Google Docs as your day-to-day go-to Word processing program.
With that in mind, here are some simple steps on how to resize an image in Google Docs.
In this guide, we will review step-by-step how to resize an image in Google Docs. The steps are as follows:
1) open the document
2) Insert the image, and
3) resize the image.
Total Time: 10 minutes
Table of Contents
Open the Document

Google Docs is simple enough to load. All you have to do is search for Google Docs on Google, and you will land on a page that looks like this:
From there, simply click on Go to Google Docs, and it will direct you to a page that looks the image above.
Once you get there, all you have to do is click on the Blank option to load a new page.
Insert the Image

The beauty of Google Docs is that it is quite similar to Microsoft Word, which means that if you already know how to use Word, you won't have difficulty learning how to use Google Docs.
When it comes to loading the image you want to manipulate to a Google Doc, the process is almost identical to Microsoft Word. There is a toolbar at the top of the document with buttons such as File, Edit, View, Insert, etc.
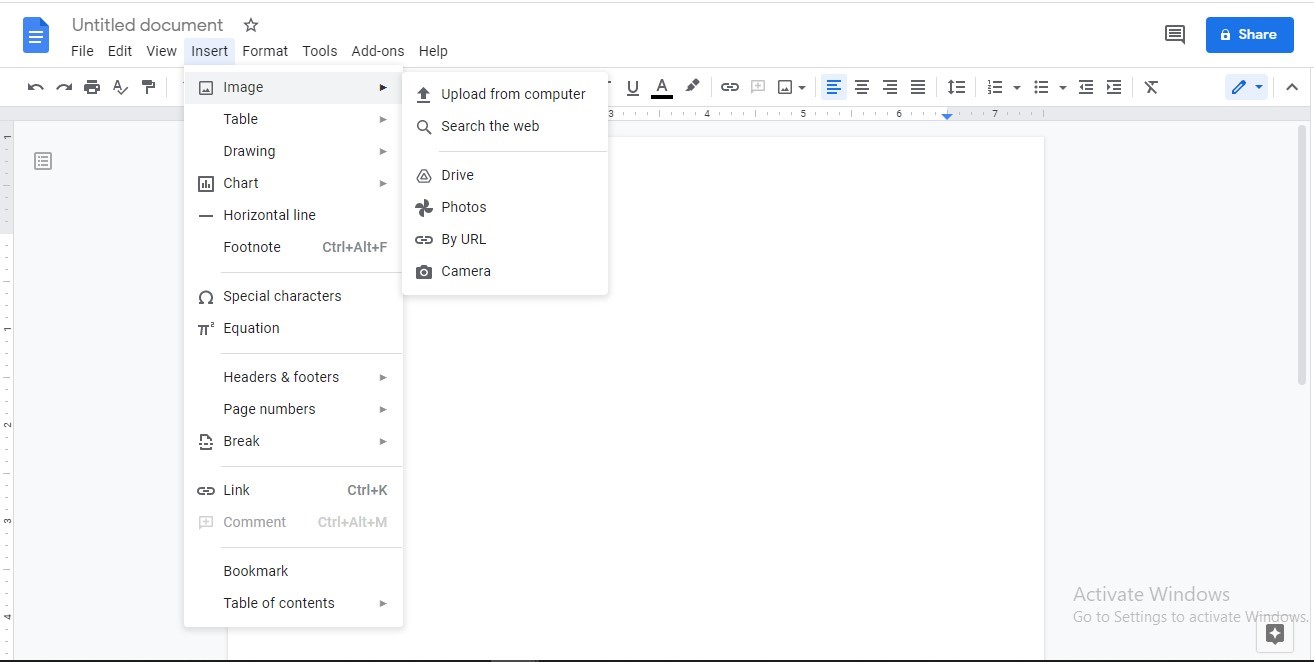
Click on the Insert button. That will give you a drop-down menu that allows you to insert a host of features into the document, including images, charts, drawings, and so on.
Since our focus today is on resizing images on Google Docs, simply click on the Image option, which should be first on the list.
This action will introduce you to another drop-down menu that offers you options from where you can fetch the original image you want to insert into the document and manipulate.
You have a wide variety of options such as Upload from Computer, Search the Web, and so on. This is to illustrate how versatile this tool is in general.
If you already have the image on your hard drive, then simply click on Upload from Computer.
All you have to do here is find the image you want to upload, click on it and then click Open. The image will be uploaded onto the document.
Resize the Image Using Image Options

If you look at the top of your document, just under the toolbar that has: File, Edit, View, and so on, you will see another one with a host of options allowing you to manipulate elements within the document.
One of the options available here is Image Options. It can be found on the far right upper corner of the document just before the button that says Replace Image.
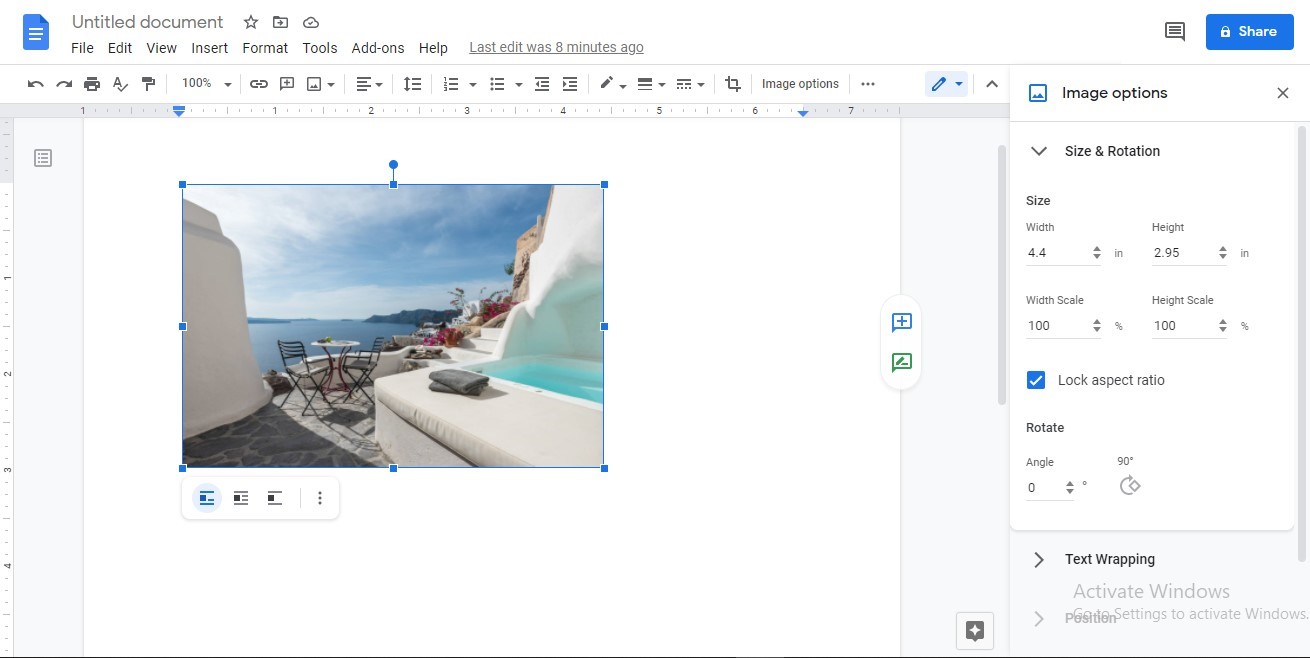
When you click on that button that says, Image Options, you will be presented with an array of options on the far right side of the document.
These options allow you to do things like Size & Rotation, Text Wrapping, Recolor, and Adjustment. Click on Size & Rotation.
You will come to a drop-down menu that looks like this:
Ensure that the Lock Aspect Ratio box is checked so that your image isn't distorted. You can simply manipulate the values of width, height, width scale, and height scale as much as you want.
The beauty of using Google Docs as opposed to most other document programs is you don't have to keep saving your work as the system saves it for you online.
The image will remain in its current state until you or someone else who has editing rights to the document changes it. And that's how you resize an image in a Google Doc.
Now, when it comes to resizing the image in Google Docs, you have more than just one way of doing it. For the sake of learning how to resize in Google Docs, let's take a look at the alternate method too.
Alternate Method: Using Drag Image Borders

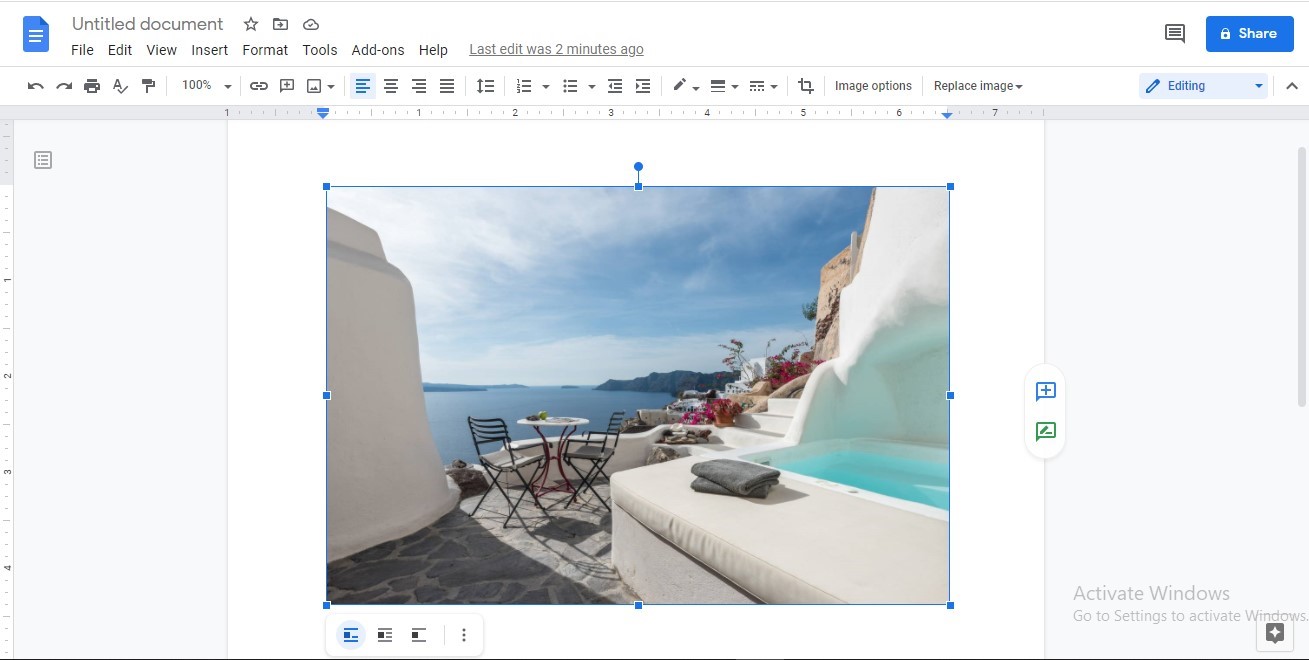
This is probably the simplest option available. Once you have loaded the image onto the Google Docs page, simply click inside the image.
When you do that, the borders of the image will change and look like this:
The borders of the image (highlighted in blue) are movable. To resize the image, simply click on any one corner, hold down the cursor and drag it to the size that you want.
