To write on a path in GIMP, first, create a path for your text. Use the Paths Tool, click to start and end your path, then drag to curve. Add text using the Text tool. Make a new layer for curved text, apply 'Text along Path,' and fill the curved text on this layer.
Overview
- Create a Path for the Text
- Add Your Text
- Create a New Layer for the Curve Text
- Curve the Text
- Adding the Curved Text to the New Layer and Filling it
- Finishing Touches
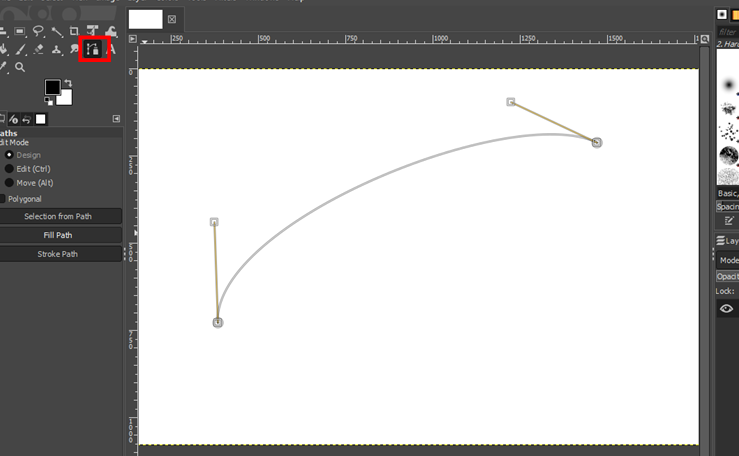
Create a Path for the Text
First, you want to create a path that suits the type of curve you want.
To do that:
- Click the Paths Tool from the toolbox (highlighted in red in the screenshot above).
- Click on the first point in the blank canvas where you want the text path to start.
- Click again on the location where you want to end the path. This creates a straight line.
- Click and drag somewhere along the middle of the line to curve it. Drag the line up or down depending on your preferred direction.
- Use the adjusting point at both ends of the path to fine-tune the line into a nice arc.
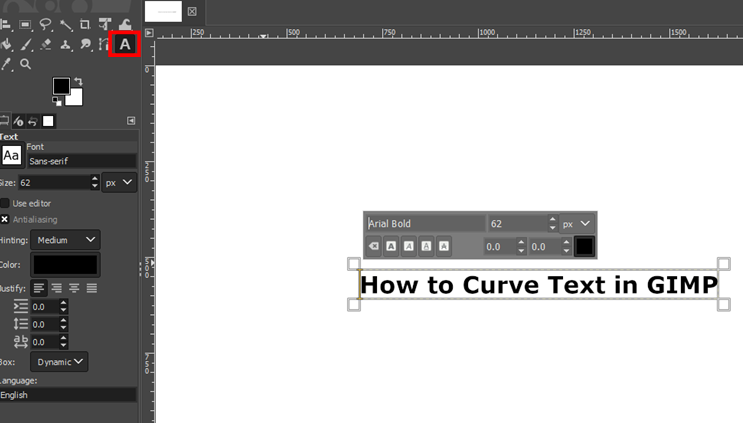
Add Your Text
Next, add your text to any location of the canvas.
To do this:
- Select the Text tool options from the toolbox (highlighted in red).
- Click any part of the canvas and type the text in the text box.
- Choose the font and font size you want.
Create a New Layer for the Curve Text
Whether you are just learning how to curve text in GIMP or performing some other operation, it is a great idea to create separate layers for your design elements. This will allow you to turn different layers on or off to easily manipulate elements.
To do this:
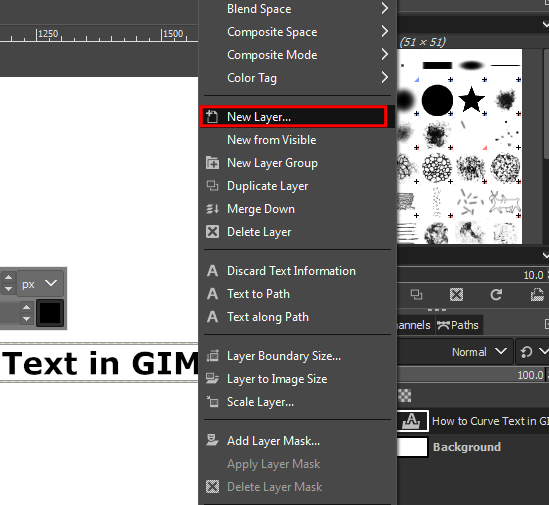
- Right-click on a blank space on the panel at the right.
- Select the New Layer… from the list of options
- Enter a name for the new layer in the Create a New Layer dialog box. For example, “Curved Text 1.”
- Click OK.
While naming layers is not compulsory, it makes it easier to identify the different layers you work with.
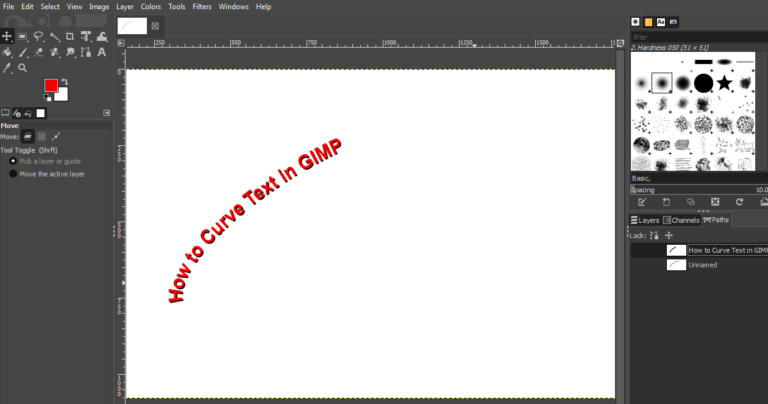
Curve the Text
Now, it’s time to actually curve the text. You should have at least three layers in your project. These include the background layer, the layer containing the original text, and the new layer you created for the curved text.
To curve the text:
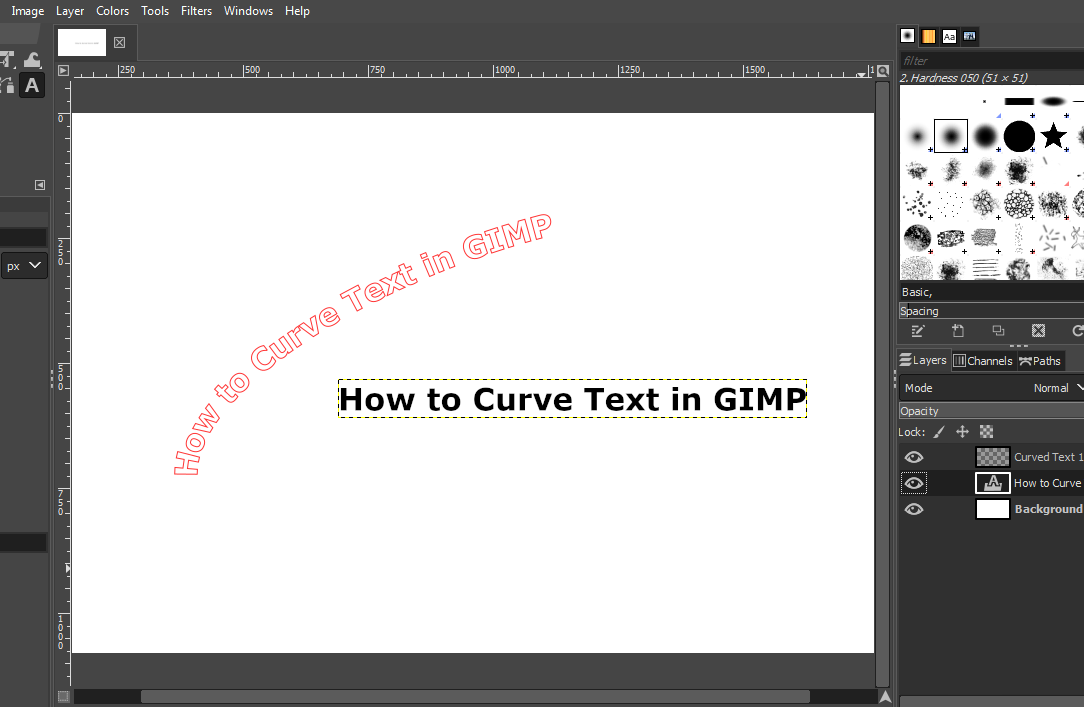
- Right-click the layer containing your text.
- Select Text along Path from the list of options displayed. This will bend or warp the text along the path you created.
The curved text is usually in outline form. You can turn off the other layers to see the curved text.
It can take a few tries to curve the text exactly how you want it. If your text seems a bit out of shape, you can undo your actions and try again.
Adding the Curved Text to the New Layer and Filling it
This step places the curved text on the new layer you created to allow you to manipulate it separately.
To do this:
- Click the new layer you created.
- Click the Paths tab.
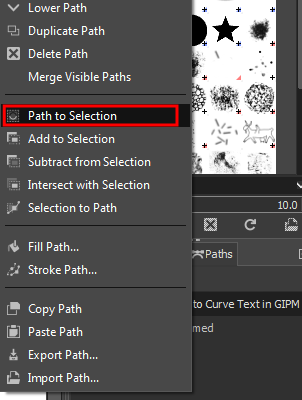
- Right-click the layer with the curved text.
- Note the original path you created at the beginning is turned off by default. Leave it that way.
- Select Path to Selection from the options displayed. This will highlight the curved text.
- Click on the Bucket Fill Tool from the toolbox.
- Select the foreground color you want.
- Click the curved text to fill it with the color.
- Turn off the layer containing the original text to allow you to see the curved text clearly.
Finishing Touches
This last step for how to curve text in GIMP is optional. Use it to make the curved text more presentable.
To do this:
- Click the Layers tab and select the layer with the original text (not the layer you created).
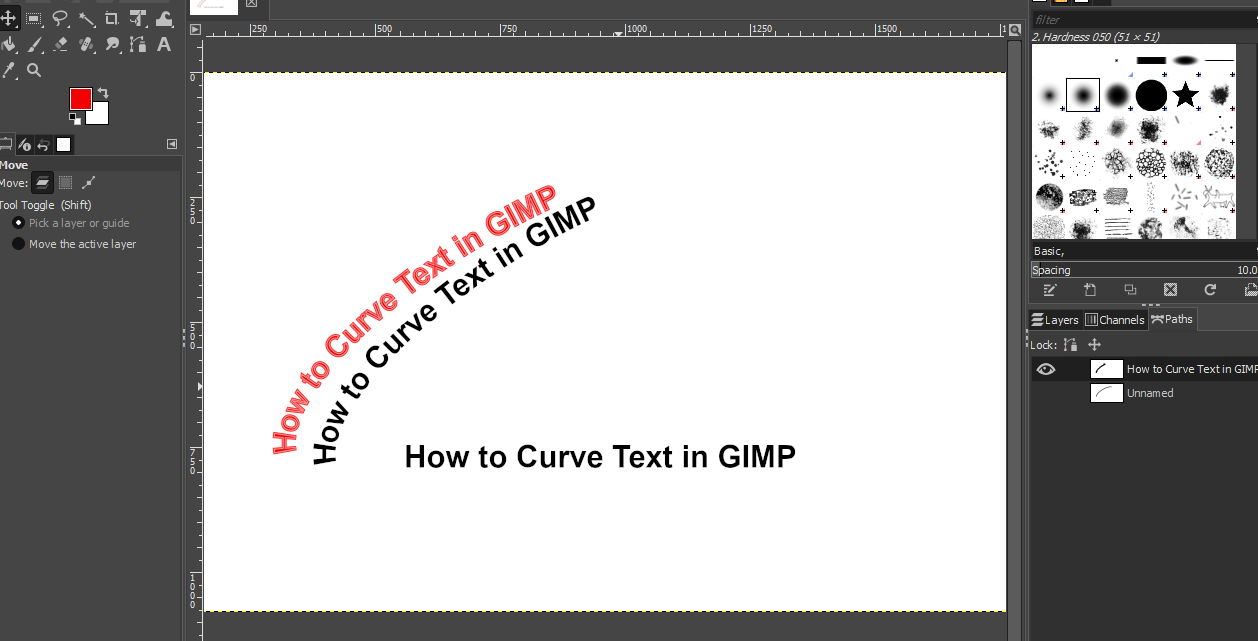
- Move the curved text away from the outline a bit using the Move tool.
- Create a new layer and name it (for example, “Curved Text 2).
- Follow the bucket fill procedure and fill the curved text with a different color.
You now have the curved text in two different colors. Overlay both curved text layers create a shaded or shadow effect. If necessary, drag one layer above the other to reorder them and give you the result you want.
You can turn off the other original text layer from the Layers tab. Also, turn off the path highlight from the Paths tab.
👍 Support Us: Subscribe to our channel and help us continue providing these tutorials.
🌟 Regular Updates: We publish how-to videos for GIMP regularly!
🔧 Expert Guidance: Learn GIMP from our professionals and uncover exclusive tips!