You may have realized that if you use Save as... in GIMP, there is no option to save your image as a JPG file.
This article shows you quickly what you need to do instead.
How to save your Image as JPG in GIMP
- Open the Export As Dialog Box
- Assign a File Name
- Choose the File Type
- Select JPEG Image
- Export the Image
- Select Optional Settings
XCF is the standard file format in GIMP. However, you can only use it to edit images within the program. This tutorial gives a detailed breakdown of how to save GIMP as JPEG.
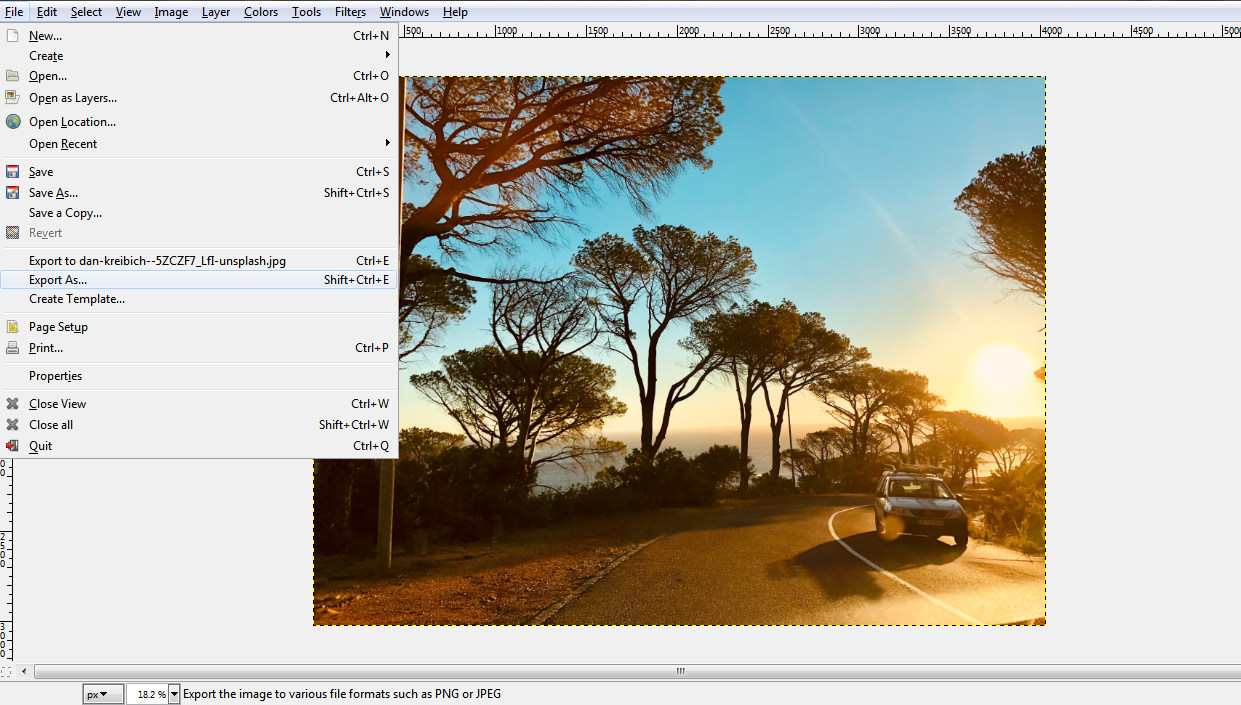
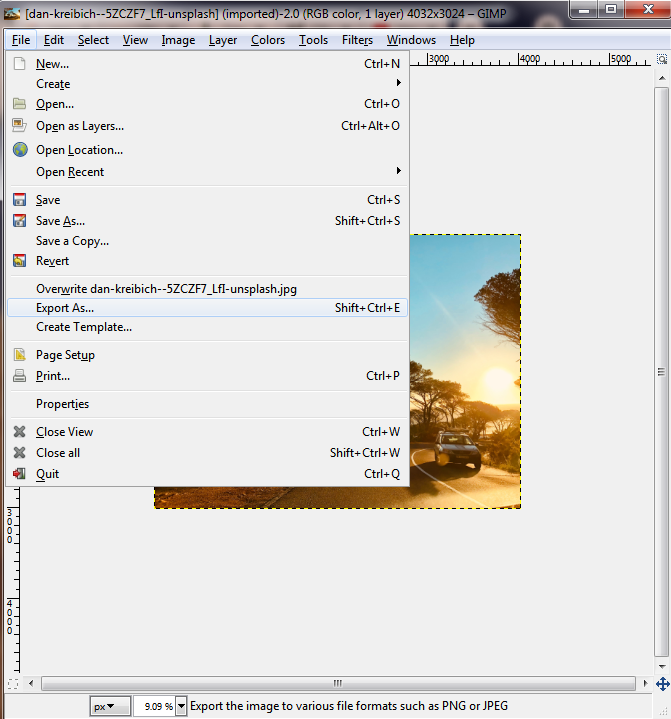
Open the Export As Dialog Box
Go to the File menu in the main toolbar and then select Export As.
Assign a File Name
In the dialog box that appears, edit the file name and choose the location you want to save the image in.
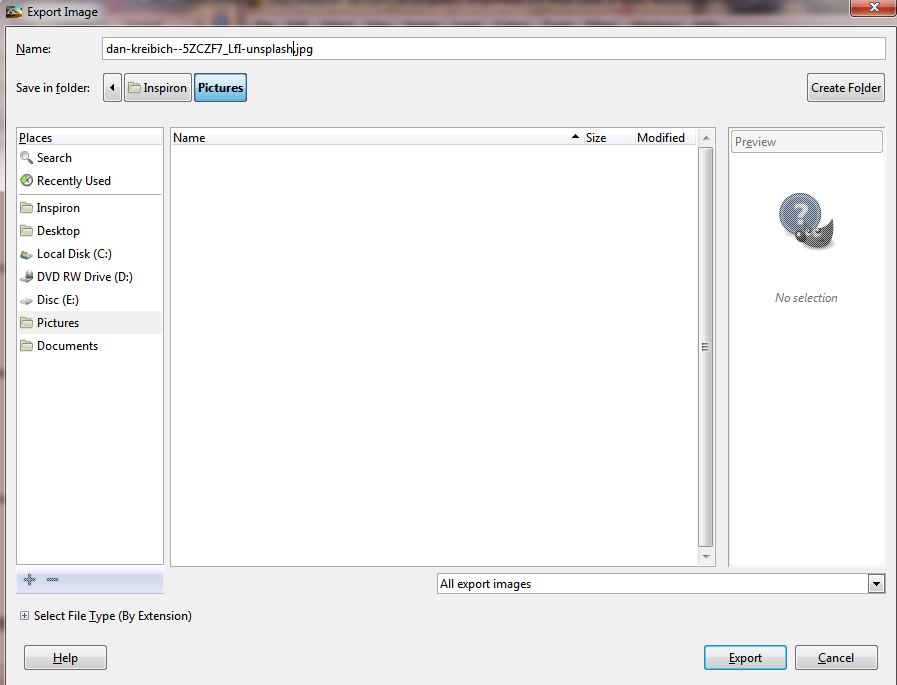
Choose the File Type
At the bottom of the dialog box, select click on the “+” symbol next to the Select File Type field.

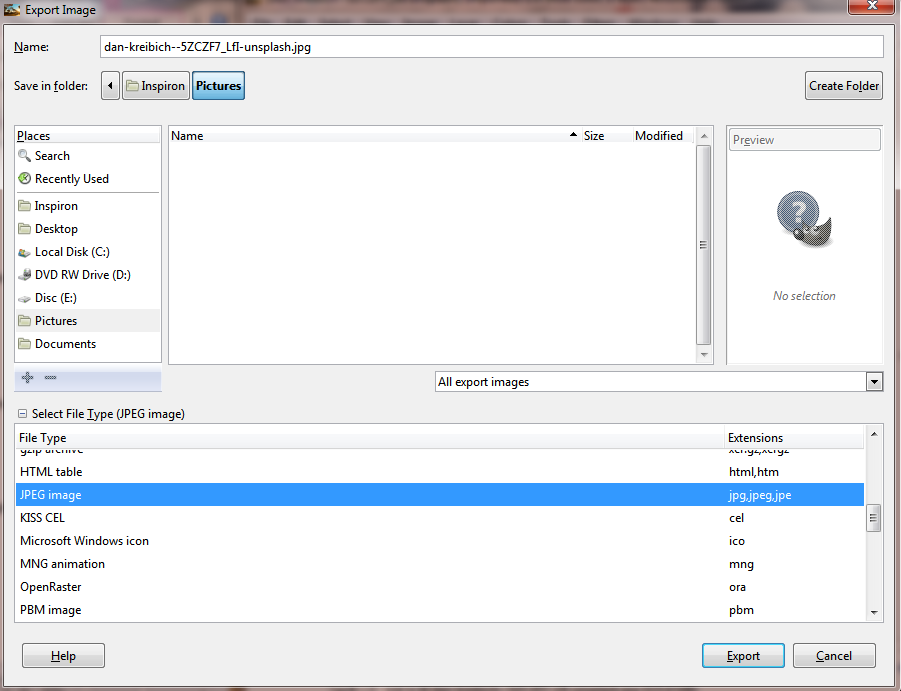
Select JPEG Image
Scroll down the list and click on the JPEG Image option.
Export the Image
Next, click on the Export button to save GIMP as JPEG.

Select Optional Settings
Once you click Export, the Export Image as JPEG dialog will pop up. Here, you can adjust the Quality slider settings to your liking, although the default 90 works just fine. Click Export to complete the process.
That’s how to save GIMP as JPEG. We hope you found this tutorial helpful.

👍 Support Us: Subscribe to our channel and help us continue providing these tutorials.
🌟 Regular Updates: We publish how-to videos for GIMP regularly!
🔧 Expert Guidance: Learn GIMP from our professionals and uncover exclusive tips!