To scale multiple layers in GIMP, you need to group the layers together or link them since you can’t select multiple layers in the program. Working with layers allows you to add depth to your design, and scaling (or transforming) several layers simultaneously saves you time.
Whether you want to reduce the size of multiple large layers quickly so you can begin resizing the individual layers or you need to resize a group of layers to fit the same size for a gallery or GIF, here are the two easiest ways to do this.
Table of Contents
Option 1: Scale Multiple Layers in GIMP Using a Layer Group
The first way to scale multiple layers is to group the layers together first. Once you have added layers to a group, you can transform all the grouped layers together by scaling, moving, or rotating the layers. Follow these steps to group and scale your layers.
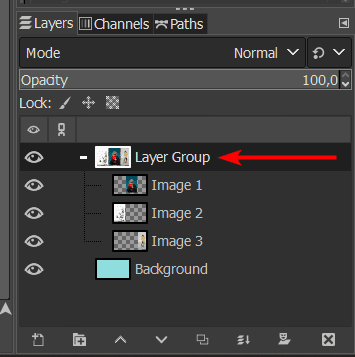
1. Create a New Layer Group
First, you must create a new layer group to add the layers. You can create a new layer group by clicking on the Create a new layer group icon at the bottom of the Layers Docker.
Note: If you can see the Layers Docker, go to Windows > Dockable Dialogs > Layers or use the shortcut Control + L on Windows or Command + L on Mac to open the docker.
2. Move Your Layers Into the Group
Once the new group has been created, move the layers you want to scale into the group. You can move a layer inside by clicking on it and dragging it onto the layer group.
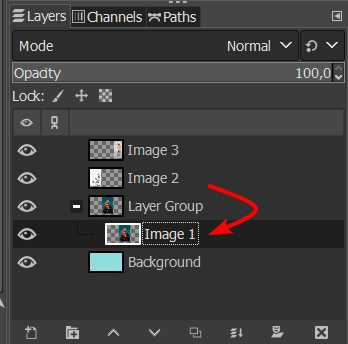
Repeat this to move all the layers you want to scale into the group.
3. Select the Layer Group
Once you have moved the layers into the layer group, select the group by clicking on it.
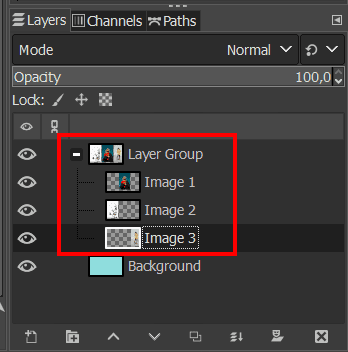
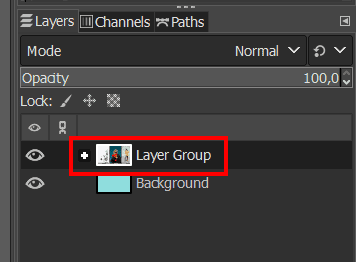
You can click the minus icon if you want to collapse the group and hide the layers to keep the Layers docker tidy.
The layers will be hidden, but you will still be able to edit them simultaneously with the group selected.
4. Activate the Scale Tool (Shift + S)
Next, to scale the layers, you need to select the Scale Tool. You will find the Scale Tool hidden in the drop-down menu under the Unified Transform Tool. Click and hold down on the tool to open the menu and select the Scale Tool. You can also use the shortcut Shift + S on Windows and Mac.

Once the tool is active, click once on any of the grouped layers to bring up the transform box.
5. Drag the Handles to Scale the Layer
You can now click and drag any corner handles to scale the layers up or down, depending on how you want to resize them.
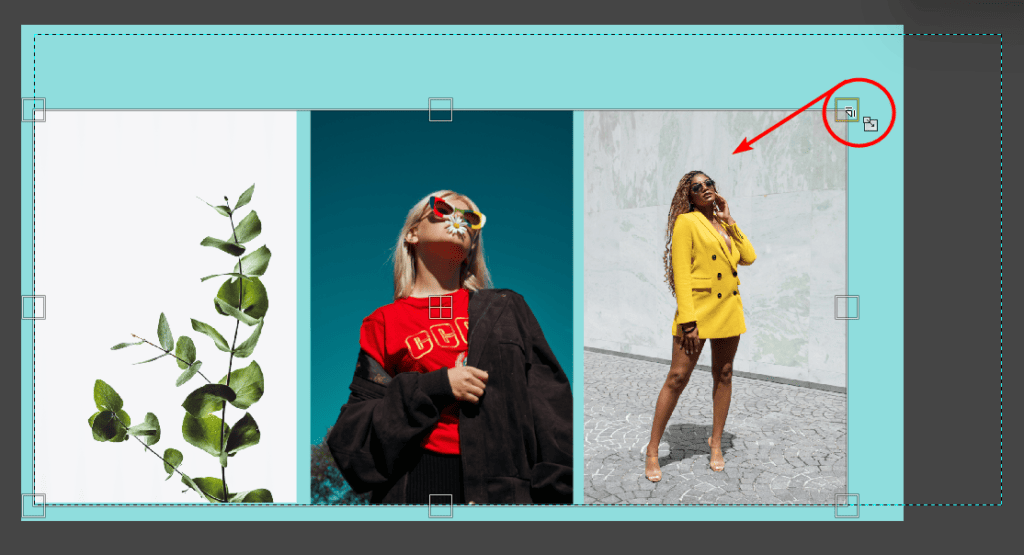
6. Press Enter to Confirm the Transform
Once you have scaled, moved, and rotated the layers as needed, press Enter to confirm the changes.

Option 2: Use Links to Scale Multiple Layers in GIMP
The other way to scale multiple layers in GIMP is to link the layers before transforming them. This method works by locking layers together, meaning any changes, such as moving, scaling, and rotating, will be applied to all the linked layers.
Note: If one locked layer is amongst the linked layer, this will prevent you from editing any linked layers depending on the lock type.
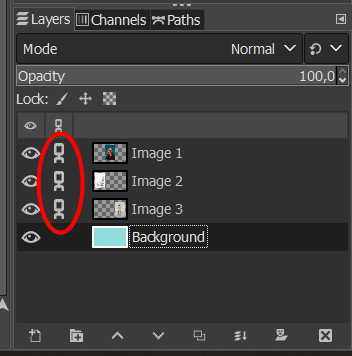
1. Link the Layers You Want to Scale
To begin, link the layers you want to scale simultaneously. To link layers, click on the space between the eye icon and the layer thumbnail. A link icon will appear.
Click this space for all the layers you want to be linked together.
2. Select the Scale Tool
Next, activate the Scale Tool by clicking and holding on the Uniform Transform tool under the menu that appears and select Scale.
Then, click on any of the linked layers to bring up the transform box.

3. Drag the Handle to Scale the Layers
Next, click on one of the corner handles and drag it inwards or outwards to scale the layers. You will notice only one layer is resized, and the other layers remain the same. Don’t worry because this will be fixed in the next step.

4. Press Enter to Confirm the Transform
Press Enter to confirm the transformation. Even though only one layer was resized, as soon as you press Enter to confirm the transformation, all the linked layers will automatically be resized.

👍 Support Us: Subscribe to our channel and help us continue providing these tutorials.
🌟 Regular Updates: We publish how-to videos for GIMP regularly!
🔧 Expert Guidance: Learn GIMP from our professionals and uncover exclusive tips!