To make an image black and white in GIMP, the easiest way is by using the grayscale conversion method. You can do this by clicking on the "Image" menu at the top, then choose "Mode" and select "Grayscale" from the options.
There's also a quicker way by right-clicking on the image, which brings up a menu where you can follow the same steps. The image will immediately turn into black and white, or more accurately, grayscale, without any color.
All Methods you can use to make your image black and white:
- Using the Grayscale Method
- Using Desaturate Method
- Using the Mono Mixer Method
- Using the Extra Component Method
This tutorial will show you how to make an image black and white in GIMP. There are several ways to accomplish this, but we will look at four different methods. This will allow you to choose the technique that works best for you.
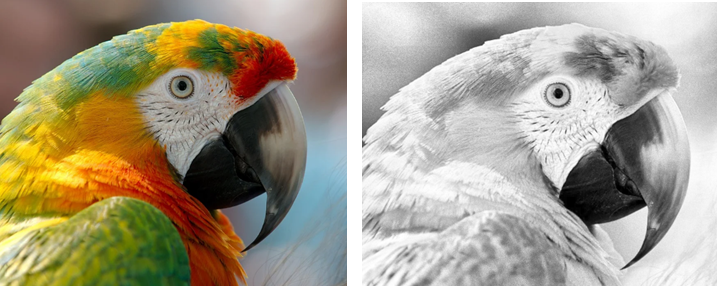
Table of Contents
Using the Grayscale Method
How to make an image black and white in GIMP doesn’t get any easier than using the grayscale conversion method. Use this method for quick color removal.
To do that:
1. Insert the colored image you want to make black and white. You can drag and drop it from another window or copy and paste the image into the GIMP image window.
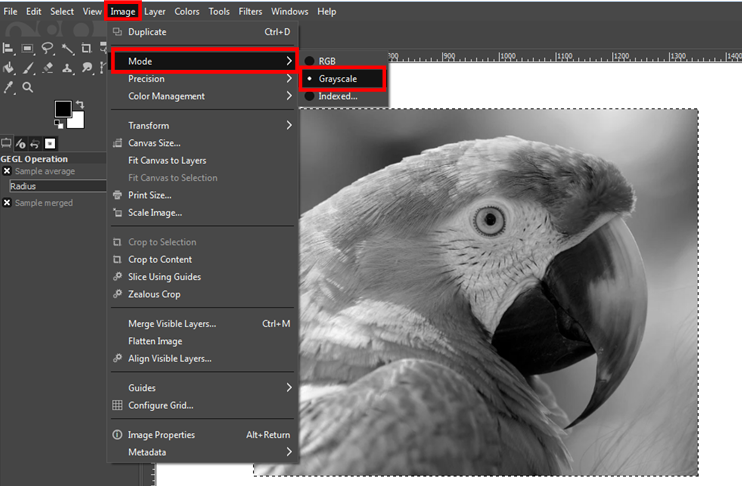
2. Click the Image menu.
3. Select Mode > Grayscale.
Alternatively, you can right-click the image to bring up a floating menu and follow steps 3 and 4.
The colored image will instantly convert to grayscale.
Using Desaturate Method
The desaturate operation will produce a grayscale image with a visually different result than the previous method. The image will have more noise and higher contrast.
To use the desaturate method:
1. Insert the colored image you want to change to black and white.
2. Click the Colors menu or right-click the image and select Colors from the floating menu.
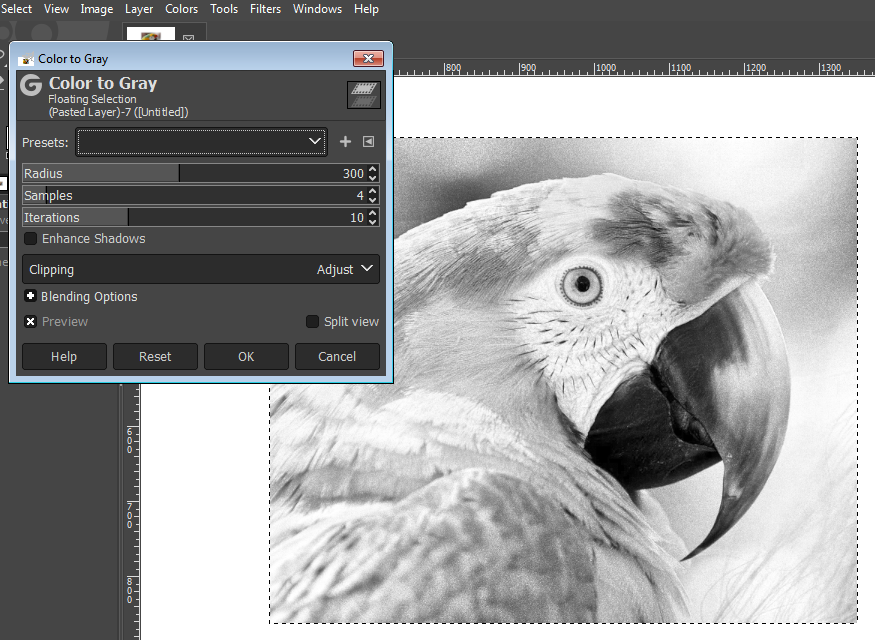
3. Select Desaturate > Color to Gray…
A preview of the black and white image is generated, and a Color to Gray floating selection dialog box pops up. In the dialog box, adjust any of the following settings:
a. Preview: This option is close to the bottom of the dialog, but you should select it first. This will allow you to see how the color photo changes will appear when you apply them.
b. Split view: Select this option to compare the original image color with the new black and white or gray color.
c. Radius, Samples, and Iterations: Use the sliding bars on these parameters to adjust the options. You can also enter numbers directly or use the up/down arrow buttons to increase or decrease the levels.
d. Enhance Shadows: Use this option to boost the details of the shadows in your image. Keep in mind that enhancing the shadows will reduce the image noise.
e. Blending Options: Click the plus (+) sign to expand the Blending Options and access the Mode and Opacity functions.
- Mode: This optionallows you to select from several blending parameters, including dissolve, behind, color erase, burn, screen, lighten only, dodge, and more.
- Opacity: Use the sliding bar to change the opacity level of the image layer. You can also enter a number directly or up/down arrows to increase or decrease the opacity.
- Plus (+): Click the plus (+) button in front of the Presets option (first option in the dialog box) to save the changes you have made. You can quickly apply them to future colored images you want to change to black and white.
- Presets: If you already have a saved setting, click the pull-down arrow on the Presets option and select it.
4. Click the OK button to apply the new changes.
Note that at step 3, you can skip any or all of the options in the floating selection dialog box and click the OK button. This will apply the default Color to Gray setting in GIMP.
Using the Mono Mixer Method
This method allows you to play around with the RGB (red channel, green channel, and blue channel) but in monochrome.
To do this:
1. Insert the image into the GIMP window.
2. Click the Colors menu or right-click the image and select Colors from the floating menu.
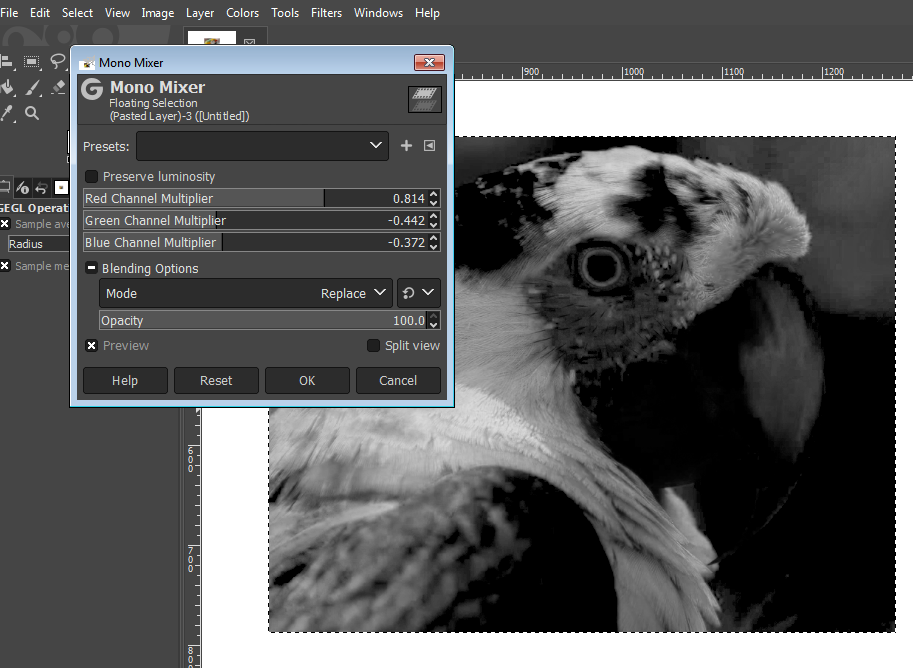
3. Select Components > Mono Mixer…
A preview of the black and white image is generated with the Mono Mixer floating selection dialog box.
4. Select the Preview option in the dialog box to give you current visuals as you make adjustments. You can also select the Split view option to enable you to compare the original image to any monochrome adjustments you make to the image file.
5. Slide the bars back and forth on the red channel, green channel, and blue channel to see how it affects the monochrome image.
6. Adjust the Opacity and choose your preferred Mode parameter from the Blending Options. This is optional.
7. Save the changes you’ve made if you want to use it again for other images. To do this:
- Click the plus (+) button in front of the Presets option.
- Enter a name for the setting.
- Click OK.
8. Click the OK button to apply the monochrome settings.
Using the Extra Component Method
You can make a color photo image black and white in GIMP by extracting a specific color model component. The components that make up a color model are the individual colors in several color channels, including but not limited to:
-RGB channels (red, green, blue)
-HSV saturation (hue, saturation, value)
-CMYK (cyan, magenta, yellow, key)
Removing or extracting a color component from the image will result in a black and white image.
To do this:
1. Insert the colored image you want to change to black and white.
2. Click the Colors menu or right-click the image and select Colors from the floating menu bar.
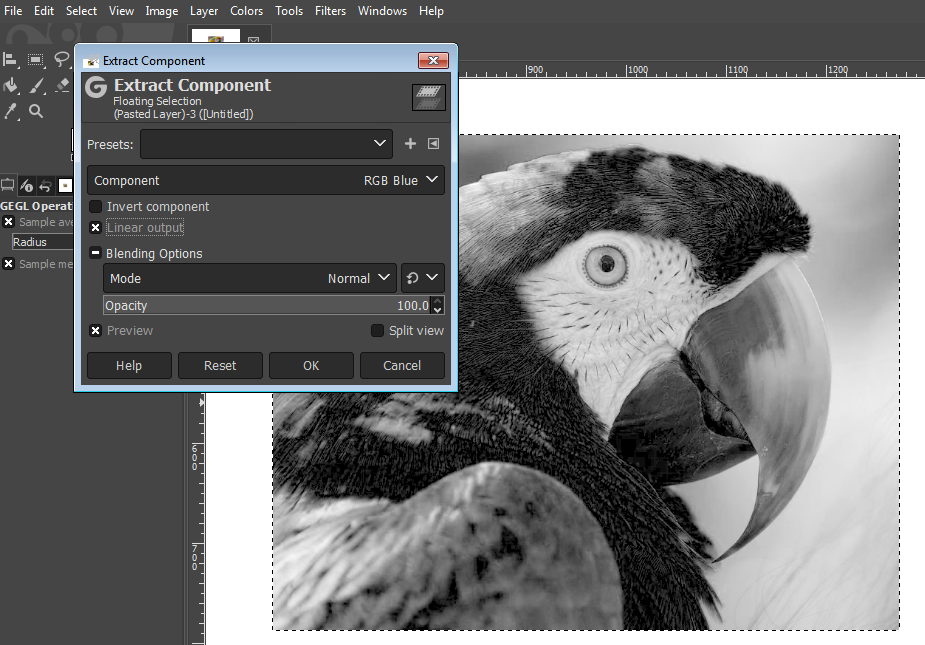
3. Select Components> Extract Component…
A preview of the black and white image is generated, and the Extract Component floating selection dialog box pops up.
4. As usual, enable the Preview option in the dialog box to see real-time results of adjustments. Use the Split view to help you compare your results to the original image.
5. Click the pull-down arrow on the Component option.
6. Select one of the several components to extract. For example, select RGB Red to remove the red color from the RGB channel. Or select CMYK Cyan to extract the cyan color from the CMYK channel.
👍 Support Us: Subscribe to our channel and help us continue providing these tutorials.
🌟 Regular Updates: We publish how-to videos for GIMP regularly!
🔧 Expert Guidance: Learn GIMP from our professionals and uncover exclusive tips!