To add crop marks in Photoshop, you can use the Print to PDF function and add the marks when saving the document. Since Photoshop isn’t primarily used for printed materials, there isn’t a straightforward way to add the printing marks as you would in InDesign.
However, since the program is such a great tool for graphic design and has the tools and features necessary to create designs for print, here’s how you can add the marks.
Table of Contents
Overview of Adding Crop Marks in Photoshop
- Add bleed to the document
- Go to File > Print (Control/Command + P)
- Set the printer to Microsoft Print to PDF/Save as PDF
- Check Corner Crop Marks
- Click on Bleed settings
- Add the bleed amount
- Click Print
- Save the PDF on your device
Step-by-Step to Add Crop Marks in Photoshop

If you design something for print in Photoshop, you can add a bleed area while working on the design and then add crop marks when saving the file as a PDF. However, you need to use the print function to ensure you add the marks to the PDF.
Note: For this demonstration, I am keeping a white space around the design to show where the crop marks should sit. However, I advise you to extend the background color and objects on the edges of the design into the bleed to prevent printing errors.
Add Bleed to the Document
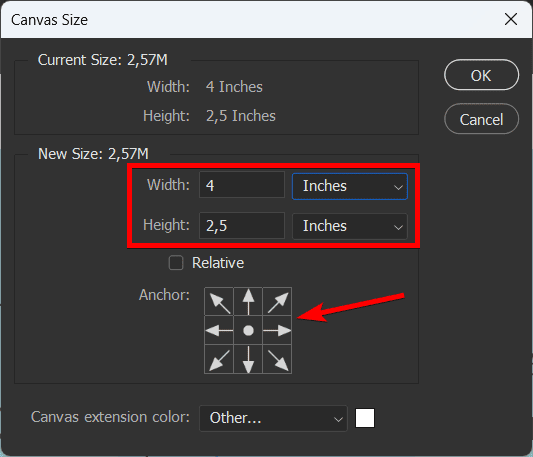
First, you need to add bleed to the document yourself to show where the crop marks should sit. You can add as much bleed as you need for your project. To add bleed, ensure you have your file open at the size you want it printed (after trimming), then go to Image > Canvas Size.
In the Canvas Size Panel, increase the canvas by the amount of bleed you want on each side. I will add 0.25 inches of bleed to each side, so my width and height both increase by 0.5 inches. Make sure the anchor is in the center to increase the canvas from the middle.
Note: Ensure your design is centered on the page after increasing the canvas size for the bleed.
Go to File > Print (Control/Command + P)
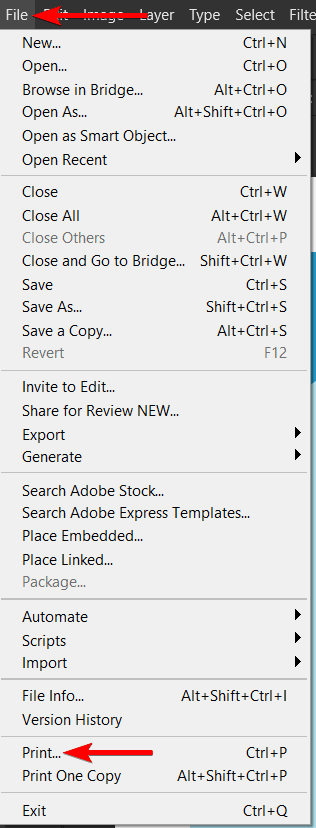
Once you’ve added the bleed and centered the design, go to File > Print or use the shortcut Control + P on Windows or Command + P on Mac.
Set the Printer to Microsoft Print to PDF/Save as PDF
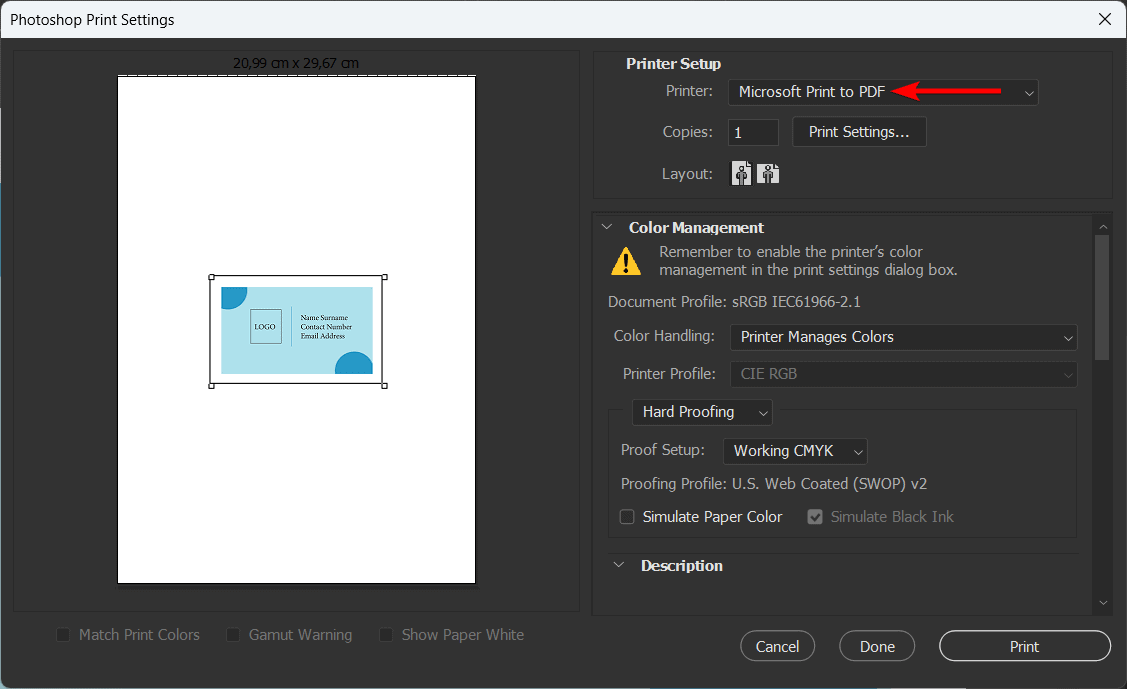
When the Photoshop Print Settings window opens, set the Printer to Microsoft Print to PDF (On Mac, this may show as Save as PDF).
Check Corner Crop Marks
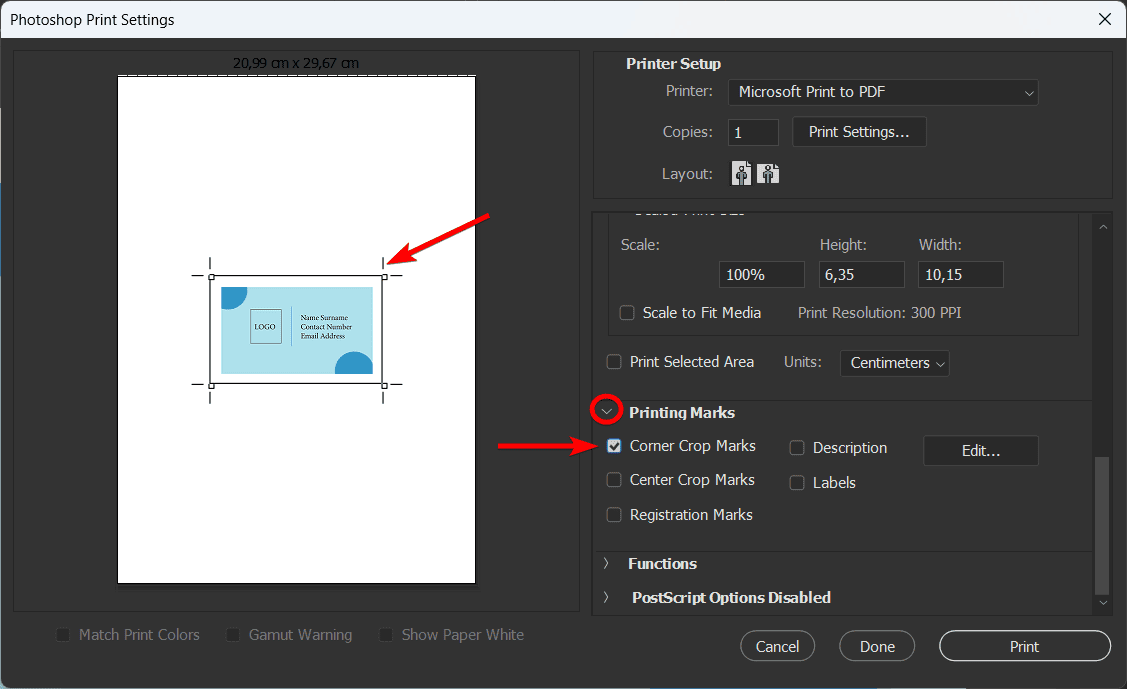
Next, scroll down the printing settings until you find the Printing Marks section. Click on the arrow to open the tab and check the box next to Corner Crop Marks. This will add the crop marks to the preview of your document.
Click on Bleed Settings
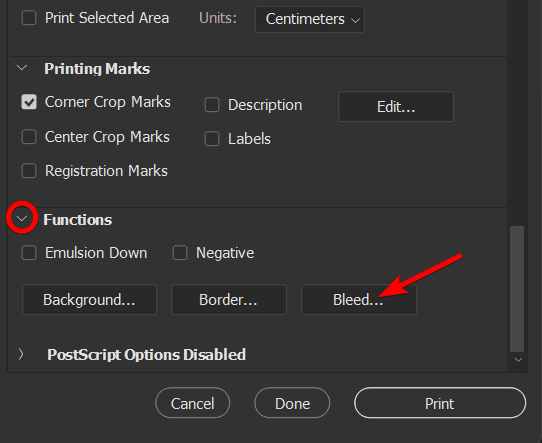
Since the crop marks are sitting on the edge of the entire canvas, you need to set the bleed to show where the crop marks should sit. Open the Functions section below the Printing Marks section, then click the Bleed button.
Add the Bleed Amount
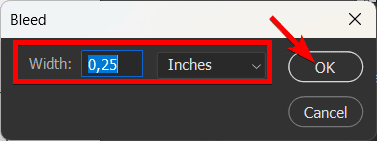
In the pop-up window, enter the bleed amount you added to the document when increasing the canvas size. Add the amount that was added to each side. In my case, I added 0.25 inches to each side of the document, which means I must add this amount to the box.
Click OK to add the bleed to the print preview.
Click Print
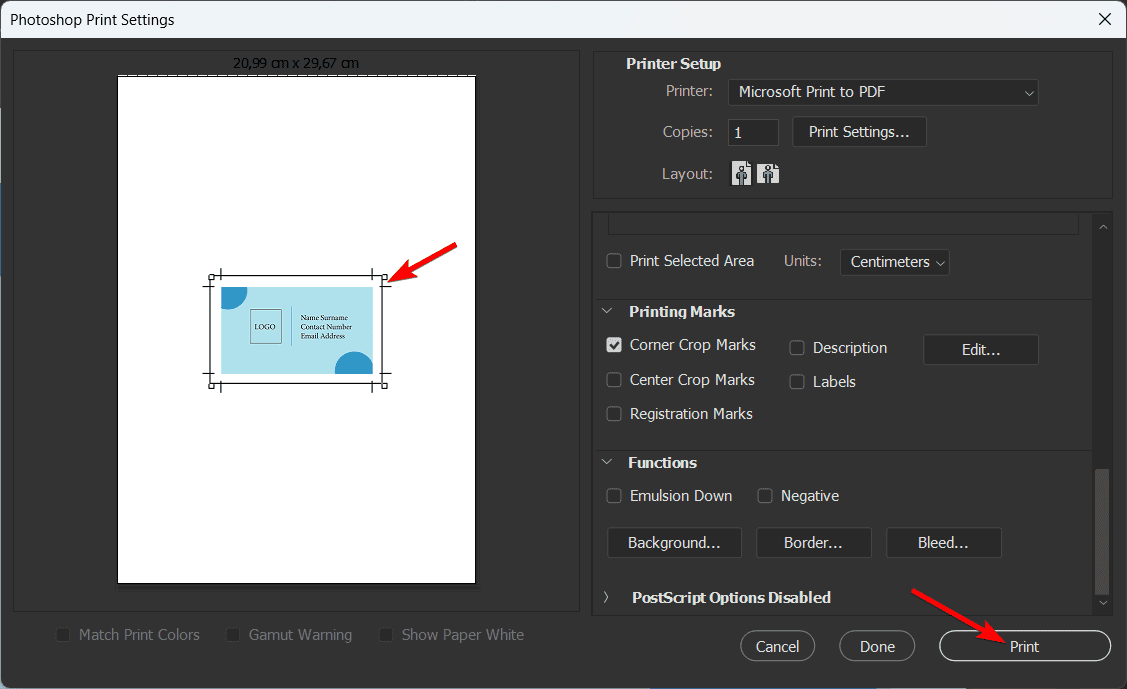
You will see the new positioning of the crop marks in the printing preview. Ensure the marks are in the correct position, then click Print to save the PDF.
Save the PDF on Your Device

Your Finder or Explorer will open, where you can select a save location for the PDF. Name your file, then ensure the type is set to PDF, and click Save.
Check the PDF
When you open the PDF on your device, you will see the crop marks, and you can send the file to print.
Tools:
- Photoshop
👍 Support Us: Subscribe to our channel and help us continue providing these tutorials.
🌟 Regular Updates: We publish how-to videos for Photoshop regularly!
🔧 Expert Guidance: Learn Photoshop from our professionals and uncover exclusive tips!