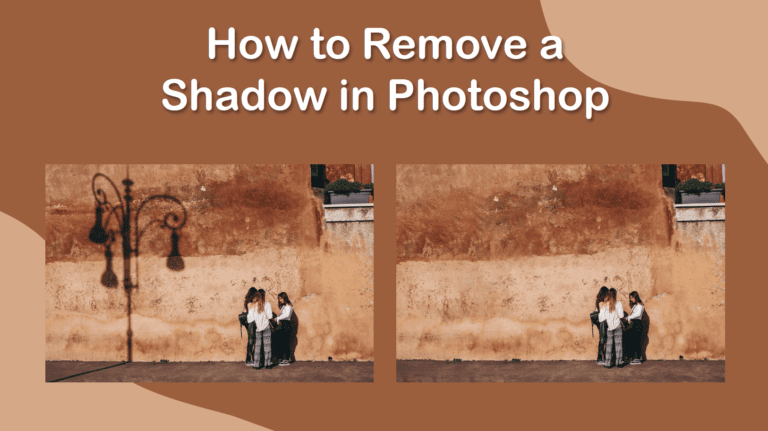
There are two top ways in Photoshop to remove shadows. You can either use the new Remove Tool, which is an easy method for images with simple backgrounds, or you can use the Content-Aware Fill method, which gives you more control over the replacement pixels.
If you took the image at the wrong angle or you sourced an image that has a shadow that you don't want, here are my two favorite ways to get rid of unwanted shadows.
Table of Contents
2 Ways to Remove Shadows in Photoshop
These two methods will work best on different types of images depending on the background complexity behind the shadow. In some cases, you may need to use a mix of more than one method to get the best result.
Option 1: Using The Remove Tool
My favorite tool when removing shadows is the Remove Tool (J), which was added in the 2023 update of Photoshop. This tool is an AI-driven tool that expertly removes objects from your image after you “paint” over them. While this tool works in most cases, there are certain limitations.
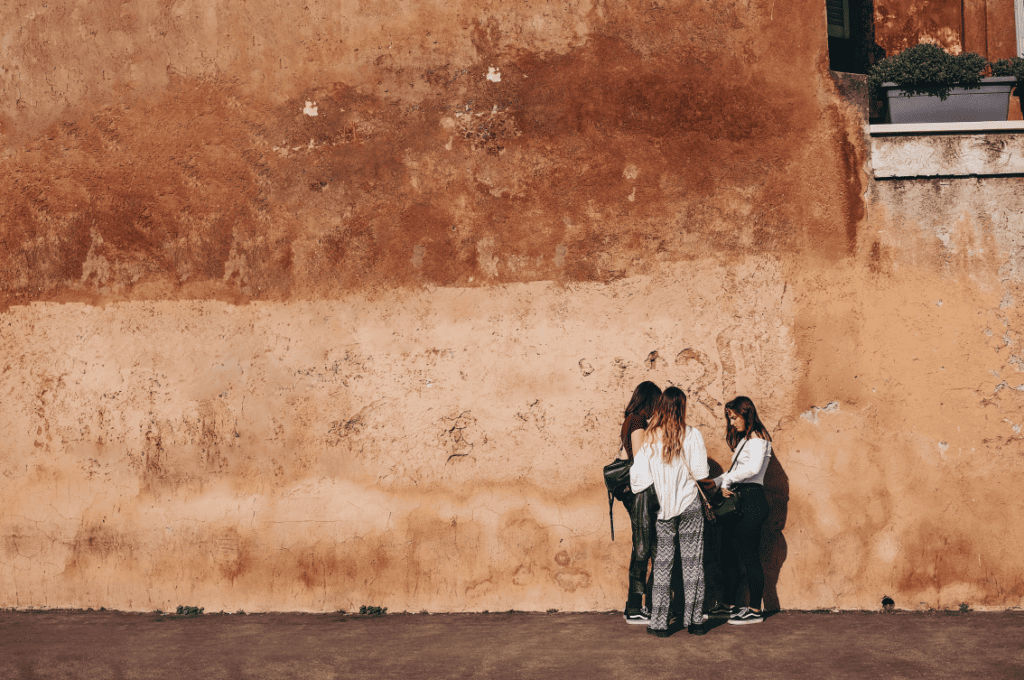
Here, I will use the Remove Tool to remove the shadow of the lamp post on the wall.

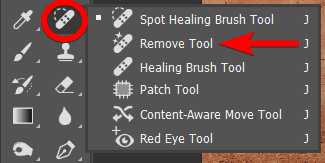
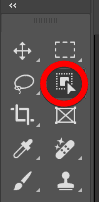
First, select the Remove Tool from the toolbar. You will find it in the fly-out menu underneath the Spot Healing Brush Tool, or you can press Shift + J to scroll through the tools until you access it.
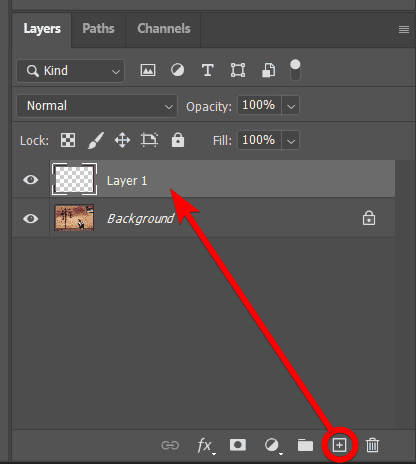
Then, add a new layer by clicking on the Add new layer icon at the bottom of the Layers Panel. This enables you to work non-destructively.
Adjust the Remove Tool’s settings in the Upper settings bar. Since you are working on a new layer, ensure that Sample All Layers is checked. Then, if you want the tool to work after each brush stroke, check the box next to Remove after each stroke. Otherwise, leave the second box unchecked and press Enter to activate the tool after painting.

Now, you can use the brush to paint over the areas you want to remove. The painted areas show as a magenta mask. Paint slightly over the background to show Photoshop what you want to replace the removed object with.
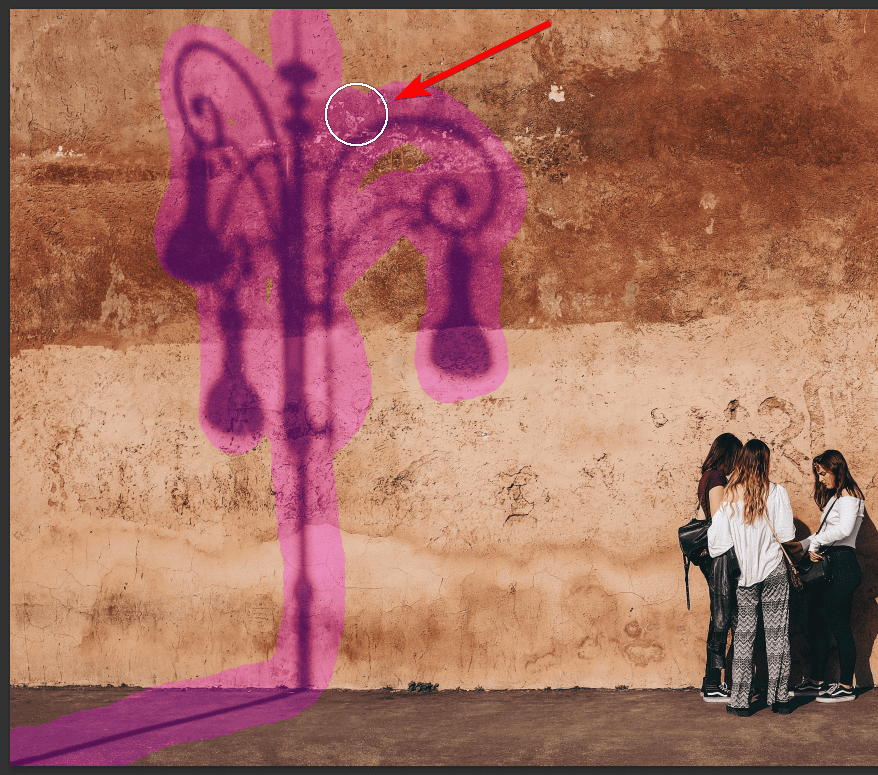
When you lift the mouse or press Enter (if you unchecked the remove after each stroke option), Photoshop’s AI will remove the object you painted over and replace it with the surrounding pixels that best match the area.
The tool may leave some slight inconsistencies in the area. You can fix these by brushing over these areas again with the tool.

Once you have painted over the areas with slight errors, you will have successfully removed the shadow from the image.
Option 2: Using Content-Aware Fill
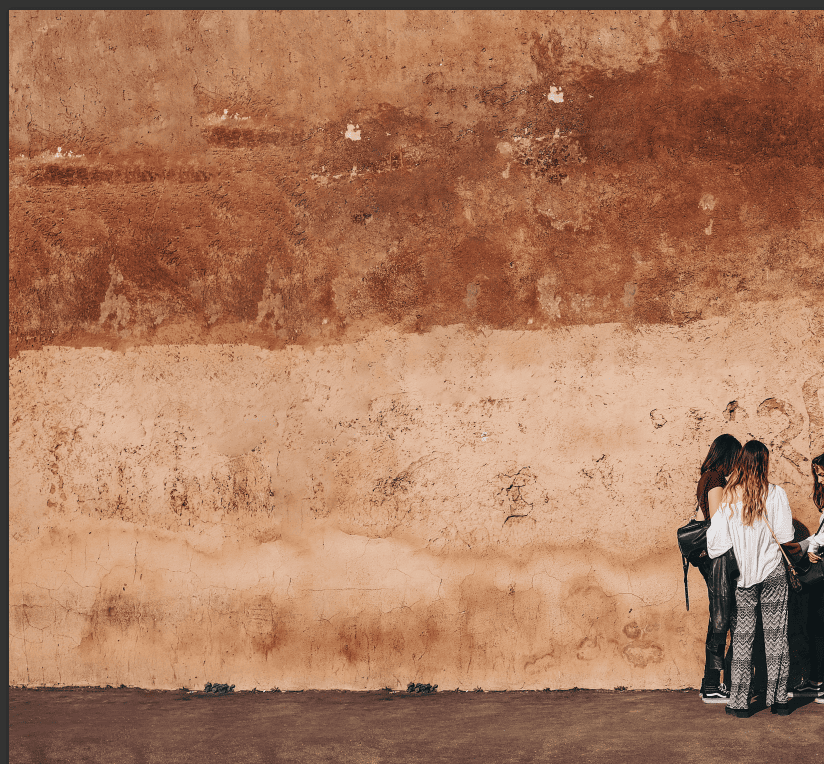
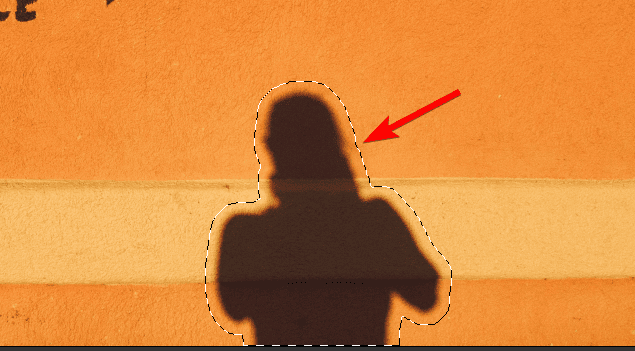
The next method works similarly to the remove tool but gives you more control over the sample pixels that Photoshop uses to replace the area where the shadow is. I will remove the shadow on the right of this image, leaving the one on the left.

To use this method, you must first select the shadow using a selection tool. You can use any of the selection tools based on your image. For instance, select the Object Selection Tool (W) from the toolbar.
Then, click and drag to create a block around the shadow. When you release the mouse, Photoshop will select the prominent subject in the block you made.

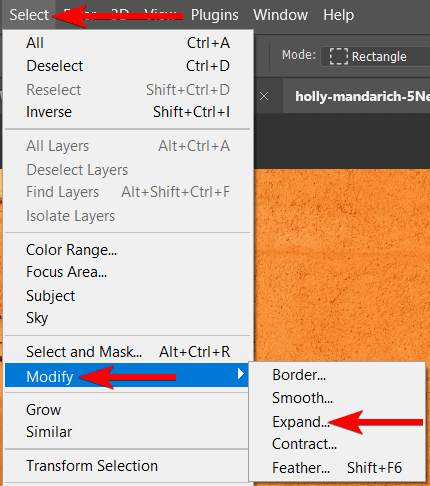
You should now expand the selection to include some of the background (much like the remove tool method) to ensure a clean removal. To extend the selection, go to Select > Modify > Expand.
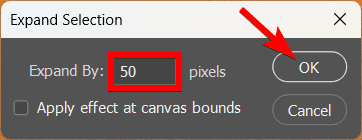
You can then input a pixel value to expand the selection depending on how wide you want to expand it. I will add 50 pixels to the box. Click OK to confirm the expansion.
You will see the selection include some of the background after expanding it.
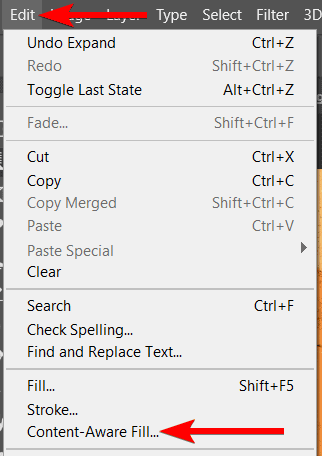
You can now start with the Content-Aware Fill process. To use this feature, go to Edit > Content-Aware Fill.
You will see a new window open consisting of the sample panel on the left. The green mask in the sample panel shows what pixels Photoshop is sampling to fill the selection with. The panel on the right shows a preview of the selection filled in. Use the brushes on the left to add or subtract from the sample areas until the preview looks as you want it to.

When you’re happy with the preview, you can set the Output you’d like, such as adding the changes to a new layer to work non-destructively, then click Apply. Once the effect is applied, click OK to close the panel.

The shadow is now removed from your image. You can deselect the area by pressing Control + D on Windows or Command + D on Mac.

The images used in this article were sourced from:
- Three women standing near a brown wall from Unsplash
- Silhouette of two people against an orange wall from Unsplash
👍 Support Us: Subscribe to our channel and help us continue providing these tutorials.
🌟 Regular Updates: We publish how-to videos for Photoshop regularly!
🔧 Expert Guidance: Learn Photoshop from our professionals and uncover exclusive tips!