Table of Contents
Want to add a drop shadow in Photoshop?
Effects are a great way to quickly add a little flare to text, images, or shapes inside Adobe Photoshop — and the drop shadow effect is probably my favorite!
In this mini-tutorial on how to add a drop shadow in Photoshop, we will look at how to apply a drop shadow to any object or layer.
Tips on How to Add a Drop Shadow in Photoshop
To create a drop shadow with Adobe Photoshop, you need to apply the shadow to a layer through adjustment layers. The procedure can be simple and systematic enough.
Here are some steps you can follow:
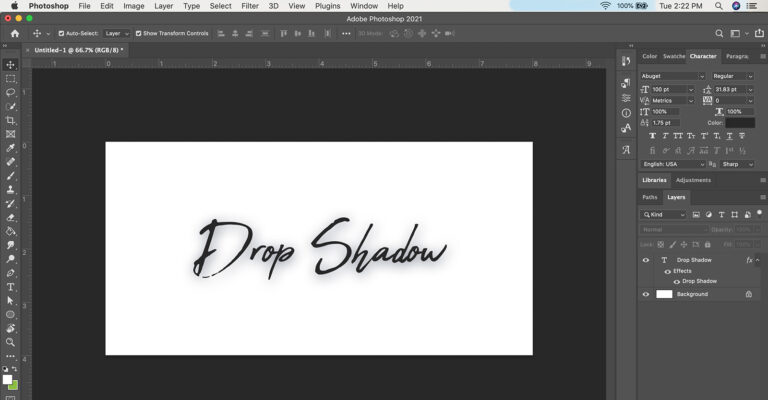
- Start by identifying the layer to which you would like to add a drop shadow. Once you have identified the layer, go to the Layers menu, which can be found at the bottom-right corner of your screen. Right-click on the layer you would like to apply the drop shadow and select Blending Options. Once you get to the Blending Options, you will see an option labeled Drop Shadow.
- Click on the box to add the drop shadow to the selected layer. Once you are done, click on the menu item. This will bring up the properties. At this point, you can adjust the properties of the drop shadow layer.
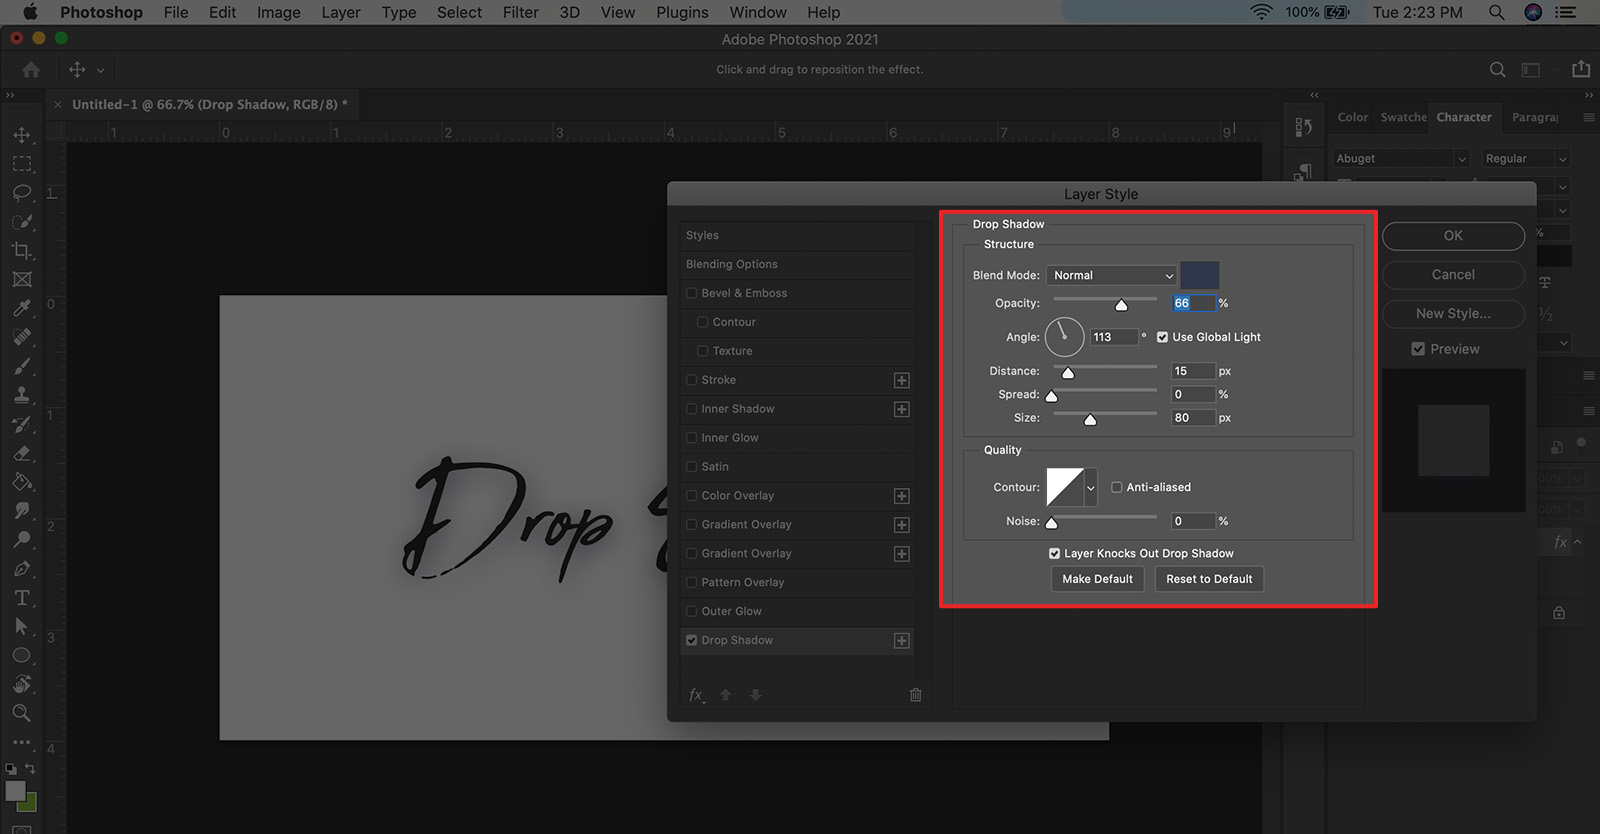
Here are some of the key drop shadow properties you can adjust:
- Blend Mode: This will determine how the added drop shadow interacts with anything beneath it. It's default setting is "Multiply," which works perfectly for those who want to create drop shadows regularly.
- Opacity: This is the setting you use when you want to increase or decrease the opacity of your drop shadow. Increasing it will make the drop shadow more opaque while decreasing it will make it more transparent.
- Distance: This determines the distance between the original object and your drop shadow. Increasing the distance will essentially move the drop shadow further from the object and vice versa.
- Angle: This setting allows you to change the position of the drop shadow. Changing it will change the position of the drop shadow relative to the original object.
- Size: This is the setting you use when you want to achieve a Gaussian blur effect. It determines just how soft or hard the edges of the drop shadow will be. By increasing it, you will make the edges softer and vice versa.
Note: If you want to change the color of the drop shadow, all you have to do is click on the black stripe that can be found near the very top of the menu. Doing that will give you a color picker that allows you to choose different colors instead of the default black color.
Once you are done, simply click "OK" to accept the new changes, and the drop shadow layer will be added as an effects layer to your document.
Here's a quick rundown of how to do it:
- Open your Photoshop project file and select the layer you want to apply a shadow to
- From the top menu panel by selecting Layer > Layer Style > Drop Shadow
- In the Layer Style settings window, select the color of the color (next to Blend Mode), Opacity, Distance, Spread, and Size of the shadow effect. You will see the style changes in real-time if you enable the Preview option.
- Click OK
Quick Tip: If you want to apply the same shadow effect to multiple layers, choose the Make Default button from the Layer Style window before clicking OK.
Then, when you go to add a drop shadow to another layer, click the Reset to Default button, and all of your previous settings will appear!
Here's a video giving you a step-by-step tutorial on how to get it done:
How to Edit Drop Shadows
Here are some simple tips on how to edit drop shadow effects in Photoshop:
- Double click on the drop shadow effects layer
- Once that is done, double-click on the adjustment layer, which will open the Blending Options menu
- Simply go through the different drop shadow settings and press OK once you have achieved the desired effect
How to Delete Drop Shadows
There are two main methods for deleting drop shadows.
Method 1: Temporarily Delete Drop Shadows
To do this, simply click the "eyeball icon," which can be found in the Layers menu. That will turn off the drop shadow visibility and effectively delete it temporarily. To turn it back on, click the eyeball icon again. That will bring back the drop shadow with all its original drop shadow settings.
Method 2: Permanently Delete Drop Shadows
There are two ways to permanently delete drop shadows from your Adobe Photoshop. The first and simplest option is to go back to the Blending Options menu and simply deselect Drop Shadow. This will remove all the new layers of drop shadow effects.
Press OK to complete the process.
The second, much quicker option is to click and drag the drop shadow effects layer and drop it in the trash icon, which can be found at the bottom of your Layers menu.
Adding a Shadow to Photoshop CC
Photoshop CC or Photoshop Creative Cloud is the updated version of Photoshop. It is the same as the previous versions because it can still produce the same content. However, it now has far more features, including photo editing and 3D.
To quickly add drop shadows to Photoshop CC, the steps are pretty much the same as in the original version of Photoshop.
- Identify the layer you want to add the drop shadow to. It doesn't have to be an image; you can also add a drop shadow to a text layer
- Locate the layers panel in the bottom right-hand corner of the screen
- Right-click the new layer you want to cast shadow to
- Select Blending Options
- Navigate to Drop Shadow Option
- Click the menu item to bring up its properties. You can add the shadow to your product image or text layer and then adjust the drop shadow settings, including the shadow color
- Click the black stripe near the top of the menu to adjust the properties
- Choose whatever color you want. The solid color black is the default for drop shadows in Photoshop.
- After you add shadow and are done with the drop shadow option window, click OK to complete the changes to your text layer or image layer
- Your drop layer has now been applied to your original as an effects layer.
How Do You Add Multiple Drop Shadows in Photoshop?
To add multiple drop shadows in Photoshop, follow these steps:
- Go to the Layers panel and double-click the Drop Shadow effect applied to the layer
- Click the + button next to the drop shadow effect
- Select the second Drop Shadow effect
- Now, you can adjust the second drop shadow to change the color, size, and opacity of the shadow
To add a drop shadow to all layers, apply the drop shadow to a single layer, make the adjustments you need to make, and then select Drop Shadow and Edit > Copy with Property Links. Then, multi-select the other layers you have to add the drop shadow to and then paste.
How Do You Add a Drop Shadow to a Shape Layer in After Effects?
To add a drop shadow to multiple layers in After Effects, right-click the image layer, go to layer styles, and select drop shadow. You will then see that a drop shadow has been added to that layer.
Why Drop Shadow May Not Be Working in Photoshop
If drop shadow is not working in Adobe Photoshop, it may need to be reset. You can do this by going to the Shadow/Highlight dialogue box. Click on the Show Me More Options checkbox.
Now, hold the shift button. Once you do this, you will see something that says Save As Defaults at the bottom of the dialog box once it has expanded. You can then change the Reset Defaults.
Why Is the Photoshop Drop Shadow Effect Important?
The Photoshop Drop Shadow Effect is important because it allows you to enhance the visuals of an image. Among all the drop shadow effects, the realistic drop shadow is the most used. It makes your images look more natural professional and even trustworthy.
👍 Support Us: Subscribe to our channel and help us continue providing these tutorials.
🌟 Regular Updates: We publish how-to videos for Photoshop regularly!
🔧 Expert Guidance: Learn Photoshop from our professionals and uncover exclusive tips!