One of the biggest reasons millions of people worldwide use Photoshop on a day-to-day basis is the simple fact that it's a highly versatile tool.
This essentially means that not only can you use it to manipulate images in a myriad of ways but also take many different paths to achieve any given single process.
Take, for example, if you wanted to learn how to crop a layer in Photoshop; there is more than just one way to this and achieve the same results.
With that in mind, let's take a quick look at a couple of the simplest ways to crop a layer in Photoshop, just to highlight how versatile a tool it can be.
Table of Contents
How to Crop a Layer in Photoshop: Method 1
In this step-by-step guide, we will review hot to crop a layer in Photoshop. There are multiple options to cropping in Photoshop so will review both. Guide to Step by Step crop Layer in Photoshop.
Total Time: 19 minutes
Step 1: Layer the Images
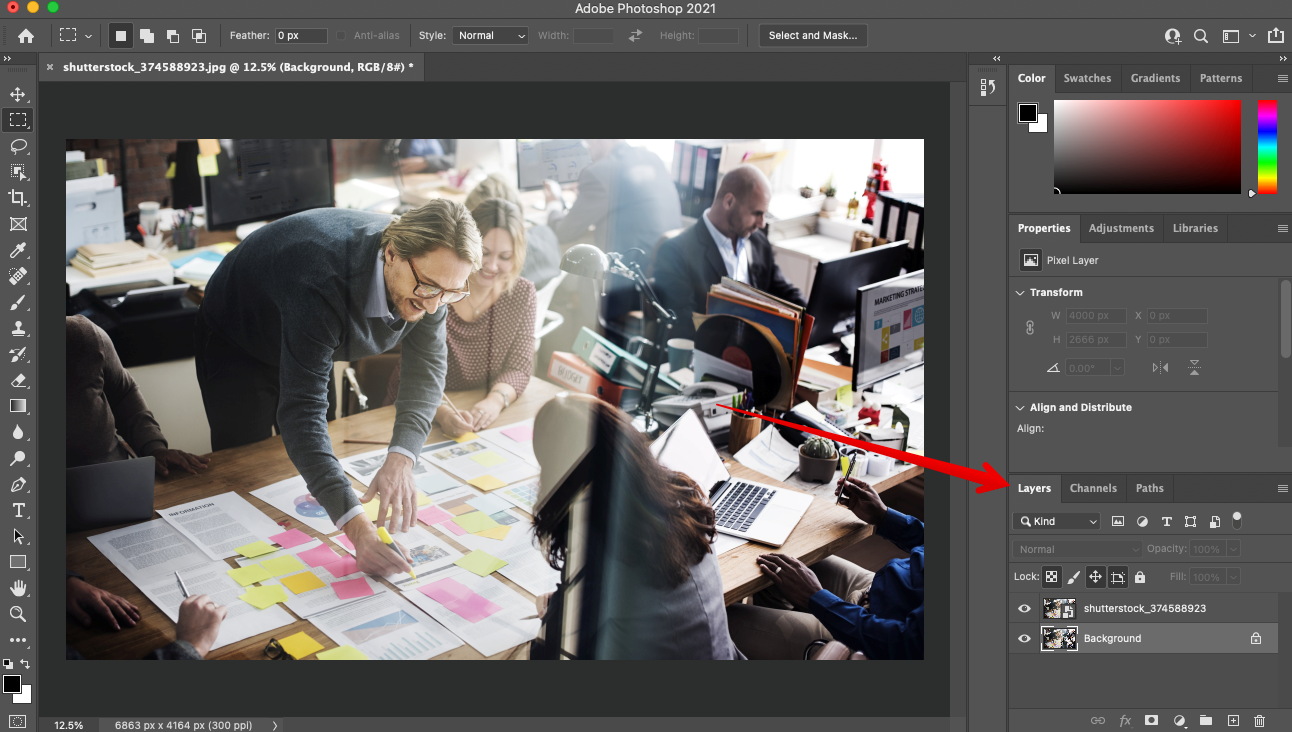
In this option, the first approach is to load the same image onto Photoshop twice. You can start by opening the image onto your Photoshop window by going through the usual process:
File - Open - Choose Image - Click Open
Once the image is loaded onto the Photoshop page, simply drag the same image onto the same page. This will give you layers of the same image. Now, to the right of your program window, you will see a toolbar with the term Layer (it should be part of the bottom toolbar).
Step 2: Make Both Layers Smart Objects

If you are going to manipulate these images without running into too many roadblocks, first, you need to convert them into smart images or a smart object. To do this, simply right-click on the individual images.
A drop-down menu will appear and from that menu, choose Convert to Smart Object.
Once done, double click inside the Smart Object window on your images still on the right bottom toolbar. This will open up the image in a new tab.
Step 3: Use the Crop Tool

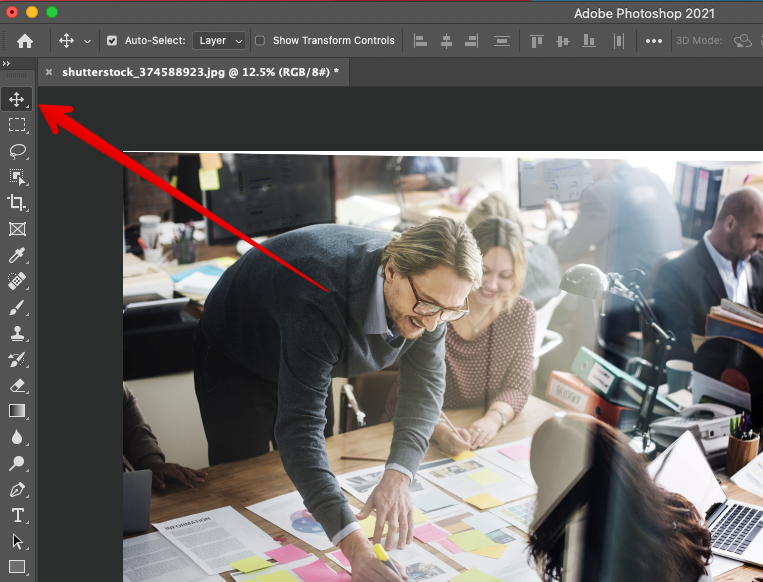
On the left-hand side of your program window, you will find the Crop Tool. Click on it and drag it over the top image layer.
With the crop tool, you can drag across the image and crop it to your heart's desire. Do that with the top layer.
Once you have cropped it as you would like it to be, simply save the cropped layer by clicking on keyboard shortcut CTRL+S.
Step 4: Use the Crop Tool on the Other Layer

The next step is to do the same thing to the other layer. Simply go back to the toolbar on the right-hand side of your program window and double-click on the original image layer you have not edited yet.
That will open it in a new tab. Click the Crop Tool selection tool and drag it across that image to achieve the desired effect.
Once you are done with that image, simply click Enter then keyboard shortcut CTRL+S to save it.
Step 5: Go Back to the Main Tab
When you are done with the cropping, simply go back to the main tab. You will see that both images have been cropped to your specific settings. Simply select the Move Tool and grab whichever layer you want to move to merge them.
And there you have it. One of the simplest and most straightforward methods of cropping layers in Photoshop.
How to Crop a Layer in Photoshop: Method 2
As mentioned earlier, Photoshop offers you a wide variety of methods to do the same things. This is to improve user experience as well as increase program versatility.
With that in mind, here is another method through which you can crop layers in Photoshop.
The video below walks you through "Method 2."
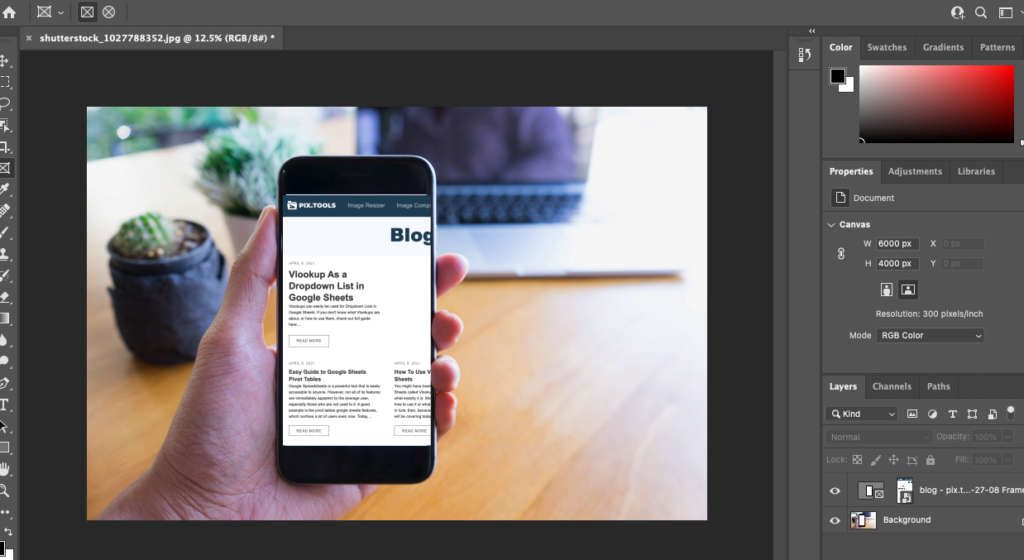
Step 1: Load Your Images
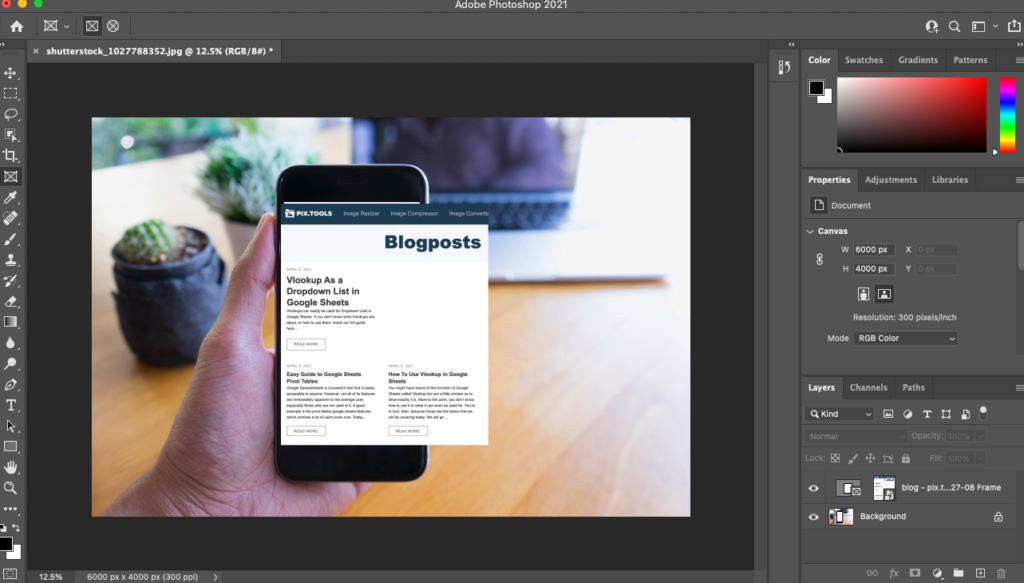
For example, you want to load and crop something into the cellphone screen on the image below.
The first thing you need to do is load the image you want to crop onto the cellphone. Simply grab the image you want to load from its respective tab and place it above the cellphone in the below image.
Be sure to check the box that says Show Transform Controls, so you can manipulate the new, added-on image.
Step 2: Manipulate Image Onto Cellphone Screen
Holding down your keyboard shortcut SHIFT + ALT buttons, you can easily manipulate the new image to make sure that it fits onto the cellphone screen as closely as possible. This is akin to cropping it onto the screen.
Press Enter to accept the closest possible results.
Step 3: Remove the Overhanging Piece
Once you click Enter, you will notice that the top end of the image works, but it still has some of the previous, original image hanging over the cellphone (not fitting onto the screen).
The issue here is that you simply can't just crop out that part since it will crop out the entire image. Your next step, therefore, is to:
Click on the image you want to manipulate. Its tab should be available on the right side of your screen on the toolbar that says Layers.
Once you click on it, at the bottom of that toolbar, you will see an option labeled Mask. Click on the clipping mask to add a Layer Mask to the image.
From there, click on the Marquee Tool, which can be found on the left-hand side toolbar of your program.
👍 Support Us: Subscribe to our channel and help us continue providing these tutorials.
🌟 Regular Updates: We publish how-to videos for Photoshop regularly!
🔧 Expert Guidance: Learn Photoshop from our professionals and uncover exclusive tips!