Borders can add to a photo you want to place in a larger frame or separate images from the background. Either way, adding a simple border in GIMP is relatively easy.
There are two ways to create a simple border. Which one to choose depends on where you want the border.
You can add a border for a layer that borders the entire canvas, or you can use a workaround to add a border to a separate layer, which is useful if you want to border smaller images on the canvas.
Table of Contents
How to Add a Border for a Layer: Short Overview
- Go to Filters > Decor > Add Border
- Add the border X size (left and right edge)
- Add the border Y size (top and bottom edge)
- Change the border color
- Change the Delta Value on the color
How to Add a Border for a Layer: Step by Step
If you want to add a border for a layer, this will go around the entire canvas. Use this method if you are working with one image and want to create a border around it or if you want to border the entire page you are working on.
However, don’t use this method and rather skip to the next method if you have multiple images that you want to add a border to.
Check the Canvas
Make sure your image and canvas are the proper sizes before you continue. If you want the border around the image, ensure the photo is the same size as your canvas, the border will increase the canvas size slightly to avoid hiding the edges of the picture.
Select the Border Filter

Once your image is in place, and the canvas is the right size, add a new border filter by going to Filters > Decor > Add Border.
Add the Border X and Y Size
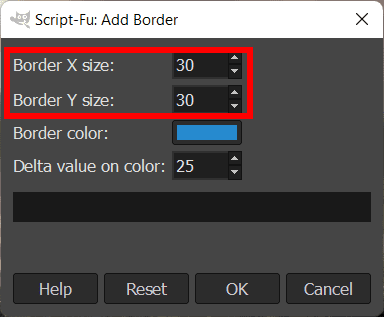
In the Add Border window that appears, you can adjust a few settings to customize the border. The first is setting the X and Y sizes. These two boxes determine how thick the border will be around the image.
The X size is the left and right edge, while the Y size is the top and bottom edge. This allows you to create a thicker border on the sides, wider on the top and bottom, or a uniform frame around the photo.
I will add a uniform border at 30 pixels, so you can easily see the new frame. Set the values based on how thick or thin you want the edges.
Open the Color Selection Window
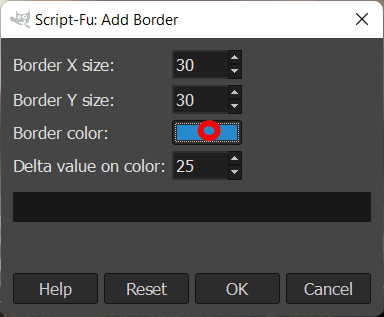
Next, you can set the color you want the border to be. To do this, click on the Color Block to open the Color Selection Window.
Change the Border Color
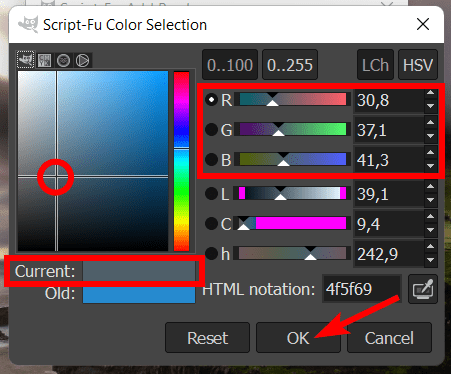
The Color Selection Window offers you multiple ways to change the color. You can use the color picker box, the slider containing all the hues, or add specific RGB values. Select the color you want and click OK.
Change the Delta Value on the Color
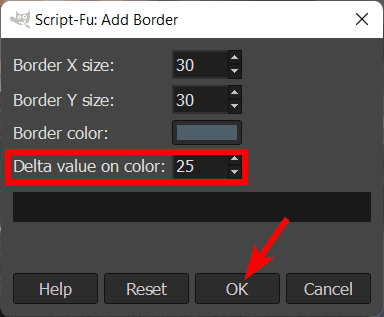
Lastly, you can change the Delta Value on Color. The Delta Value adds a raised effect to the border, changing the shades of the border sides to varying degrees to create the effect.
Set this value to 0 if you want a flat border with no color differences. Increase the amount depending on how much variation you want. I will set it to 25 to show you the effect it creates, but you can set it up to 255, which increases the effect and completely changes each side of the border.
Click OK to apply the border.
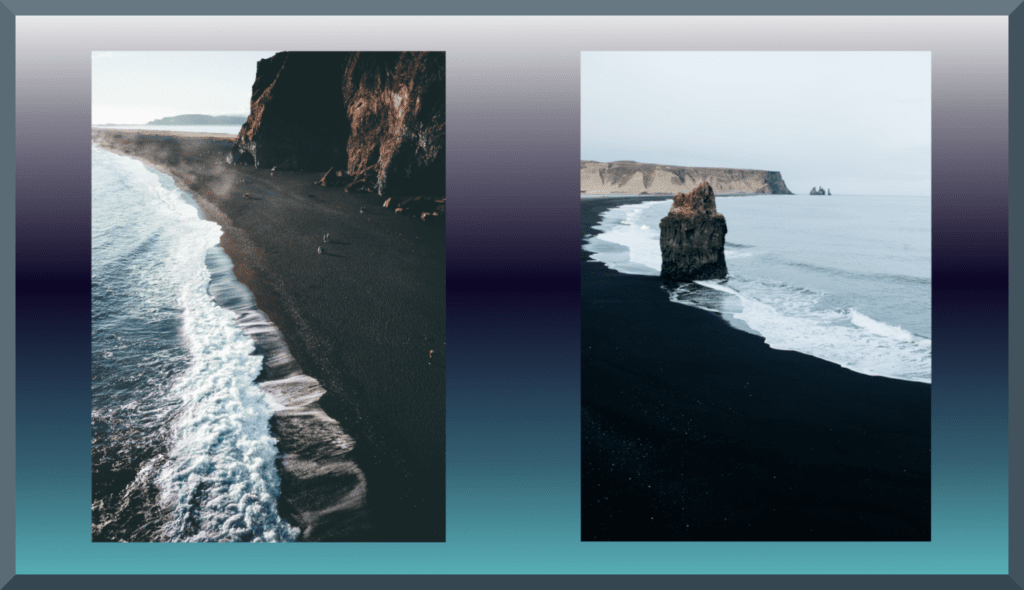
Check the Canvas
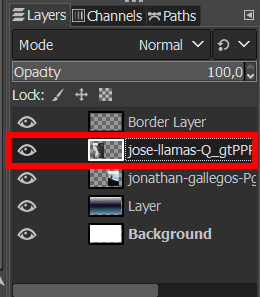
The border is added around the entire canvas, slightly increasing the size of the canvas. The frame is also added as a new layer in the Layers Docker, which you can turn on and off using the eye icon next to the layer.
Tools:
- GIMP
How to Add a Stroke Border to a Single Layer
If you have more than one image on the canvas that you want to be placed against a background, adding the border using the first method will add the frame around the entire canvas. This isn’t helpful if you want to add separate borders around each image.
Luckily, there is a way around this. To add the border to the first image, select the image layer in the Layers Docker.
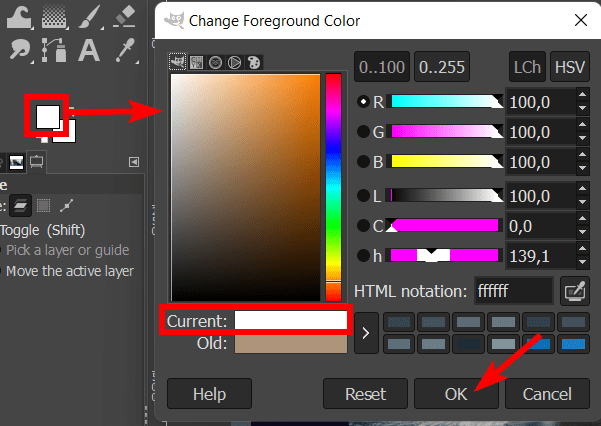
Then, set the Foreground Color to what you want the border color. Your border automatically takes on the foreground color. Set the foreground color by clicking on the foreground color swatch in the left-hand panel, then select your color from the Color Selection window.
Once the color is set, go to Select > All or use the shortcut Control + A on Windows or Command + A on Mac.

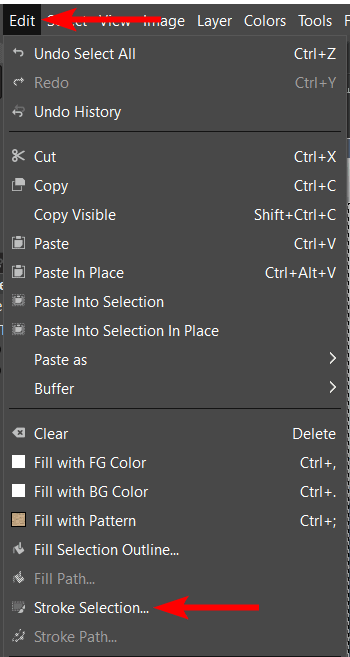
Then go to Edit > Stroke Selection. This tells GIMP only to apply the border around the selected layer since you created a selection around that layer.
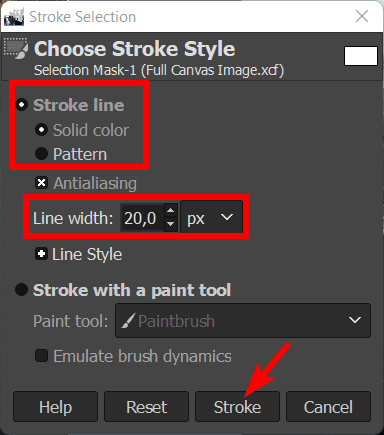
You can now adjust the settings as you want for your border. You can choose to use a solid color, your foreground color, or add a pattern to the frame.
You can also play around with the other settings, but I suggest focusing on the Line Width. Adjust the width to how thick you want your border. Then click Stroke.
Next, press Shift + Control + A on Windows or Shift + Command + A on Mac to deselect the selection you created. You have now added a border around the one image only.
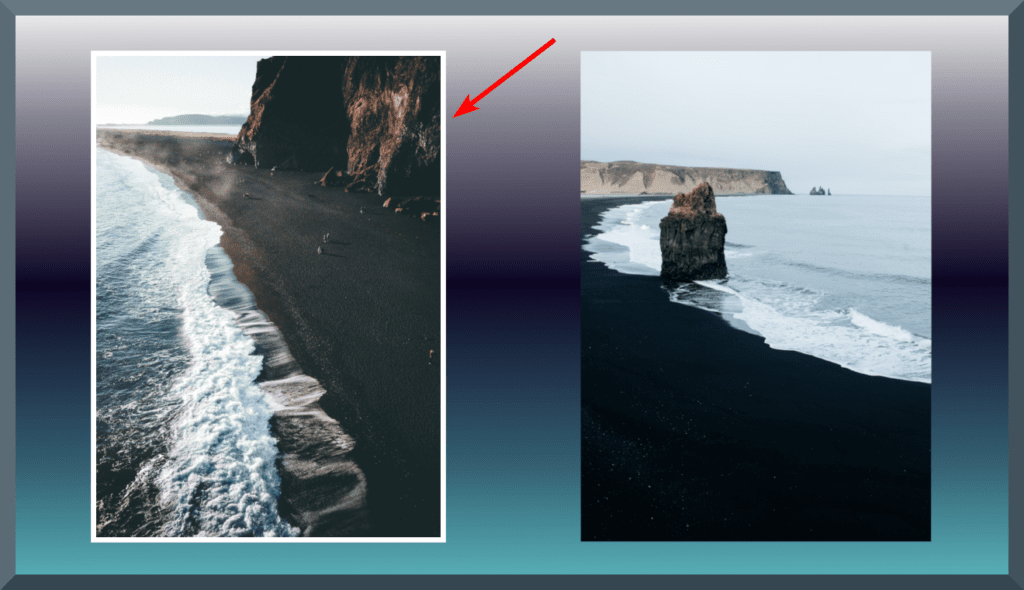
You can repeat the steps to add a separate border to the other images on the canvas. You can use the same settings or try new settings.
👍 Support Us: Subscribe to our channel and help us continue providing these tutorials.
🌟 Regular Updates: We publish how-to videos for GIMP regularly!
🔧 Expert Guidance: Learn GIMP from our professionals and uncover exclusive tips!