GIMP is not as intuitive as other image processing programs, so the software doesn’t assume you are trying to make certain areas transparent and instead fills the areas with black or white.
Keep reading to note essential steps to ensure the deleted area turns and stays transparent.
Table of Contents
Overview of How to Make a Background Transparent
- Open your image in GIMP
- Add an Alpha Channel to the layer
- Select the areas to remove using a selection tool
- Delete the background or add a layer mask
- Export the file as a PNG
Step-by-Step of How to Remove a Background in GIMP
When it comes to removing a background and making it transparent in GIMP, there are a few ways to go about it, and the method you choose depends on how simple or complex the image you are working with is.
You can try out the different selection options to see which works best for your image or graphic. There are also two ways to remove the background, one is destructive, and you can’t retrieve the background later on, while the other is non-destructive and hides the background, so you can bring it back later if needed.
Open Your Image in GIMP
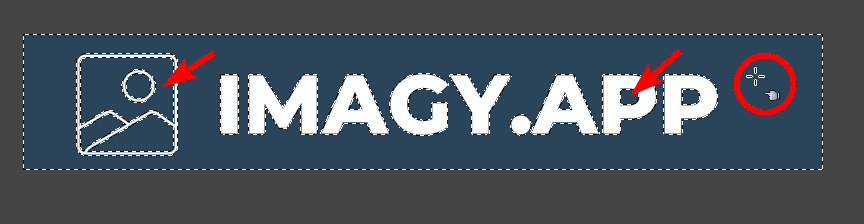
To remove the background, you must open the image you want to work on in GIMP. For the color-based selection methods, I will demonstrate with this Imagy.app logo that I want to remove the blue background from.
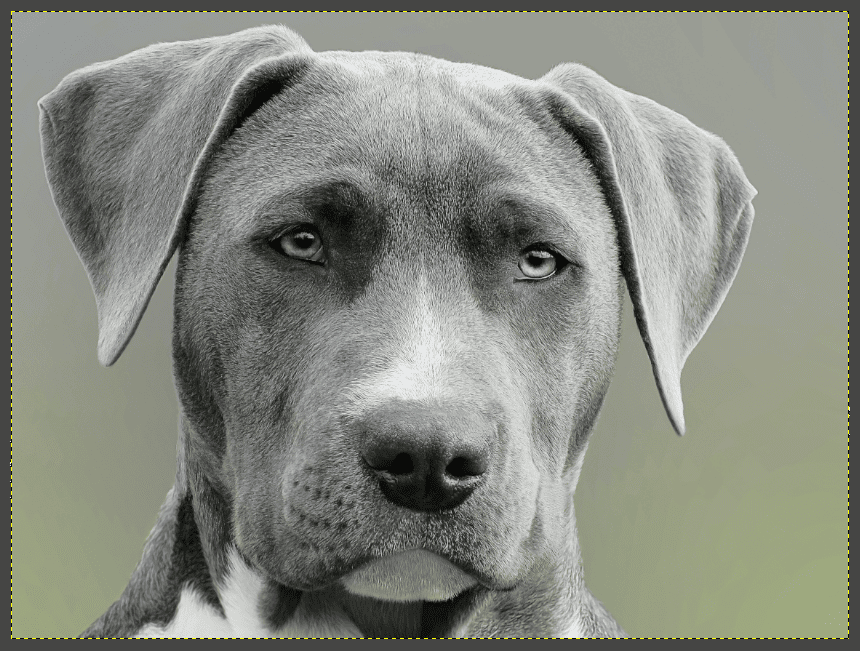
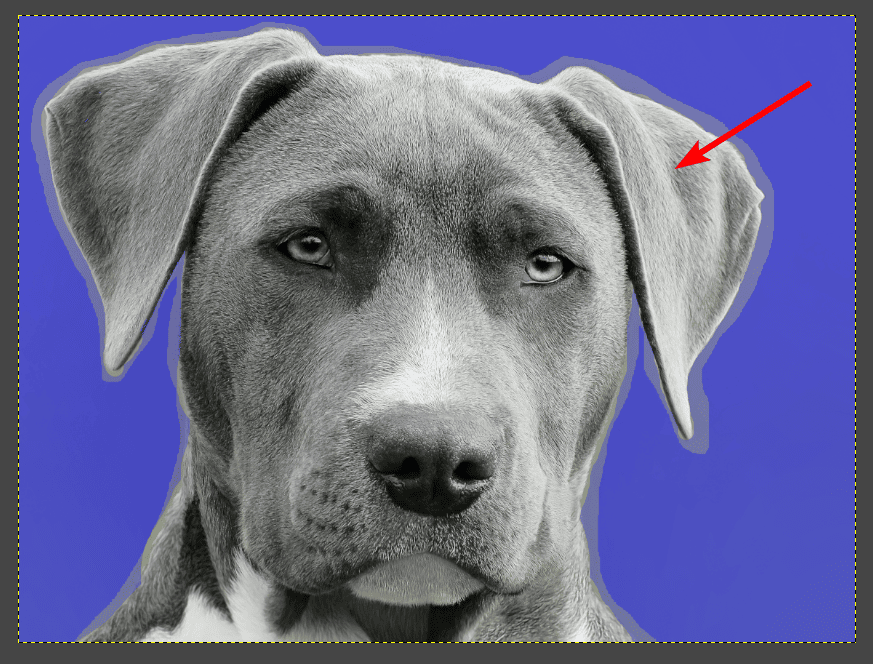
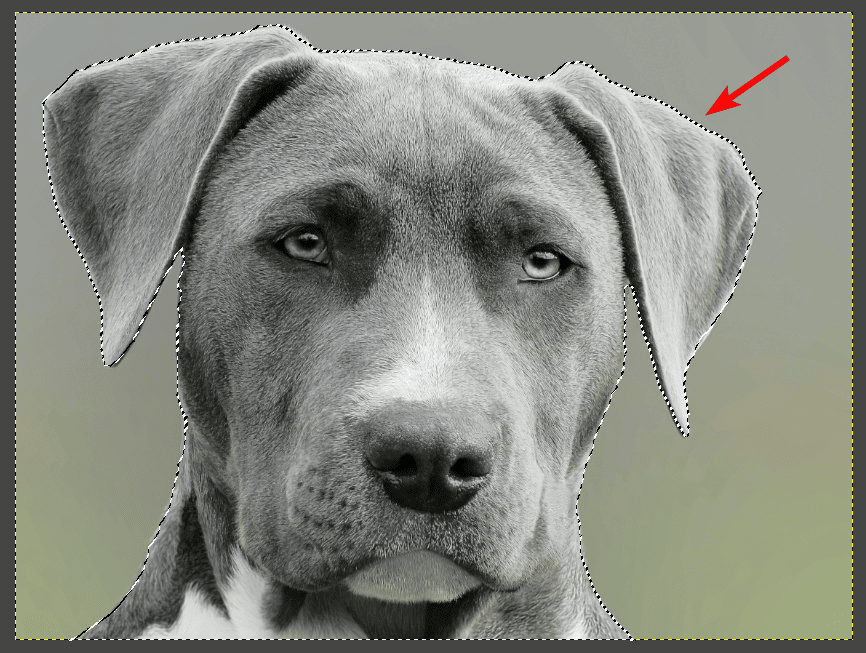
For the more complex selection options, I have opened this Focus photography of grey dog image from Unsplash.
Add an Alpha Channel to the Layer
Once your photo is open in GIMP, you must ensure the image layer has an alpha channel. This step is important since GIMP doesn’t automatically set layers to include transparency.
To ensure the deleted or masked areas will be transparent, add an alpha channel to the layer. To do this, right-click or Control + click on the layer in the Layers panel. Then select Add Alpha Channel from the options. If the option is greyed out, the layer is already set correctly.
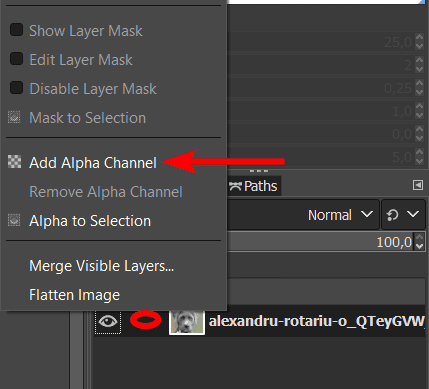
There is no obvious indication that the layer has an alpha channel added, except for the option being greyed out.
Select the Areas to Remove Using a Selection Tool
Now that you have added an alpha channel to the layer, you can select the areas you want to be removed from the photo to make the background transparent.
The method you use to select the areas depends on how complex your photo is, the colors in the image, and what works best for your workflow. Here are 4 of the best ways to create a selection in GIMP to make the background transparent.
Option 1: Using a Basic Square or Circle Selection
The first selection method is the easiest, but the selection is limited to a square, rectangle, or ellipse shape. This selection option is best if you want to crop the photo into a square or circular shape.
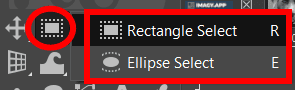
To select using this method, activate the Rectangle Select Tool (R) or the Ellipse Select Tool (E) from the toolbar.
You can then click and drag it out on the canvas to create the selection in your chosen shape around the subject.
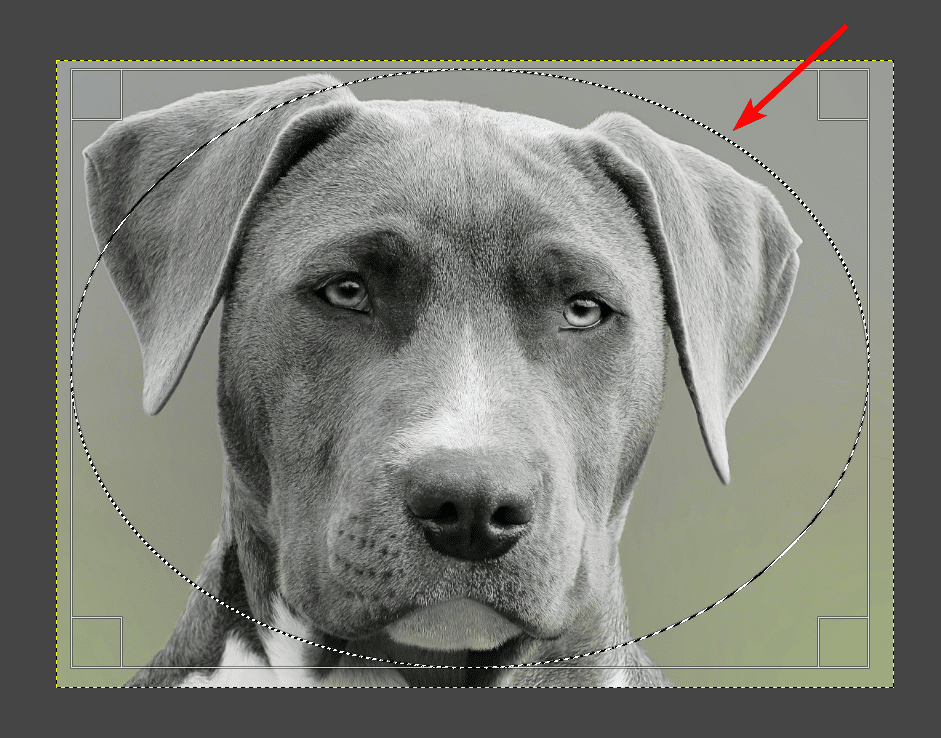
Everything inside the circle or square shape will remain, and the rest of the image will become transparent when you follow the instructions in the next step.
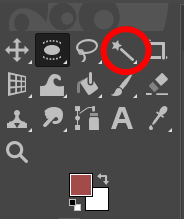
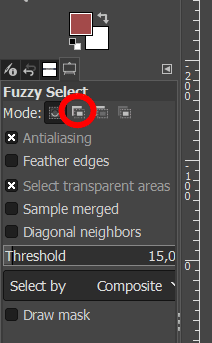
Option 2: Using the Fuzzy Select Tool
If the background of your image is all one color, then the Fuzzy Select Tool is an excellent way to select the background to make it transparent. This tool selects pixels of the same color that are located next to your selected pixels.
This means that if you click the background color, the entire background will be selected, except for any pixels of the same color that aren’t directly connected to the background.
This tool works well for the logo since the background is all one color. To use the tool, click the Fuzzy Select Tool from the toolbar or press U.
Then, you can click on one spot on the background of your logo or image to select the color. You can see that all the blue connected to the spot I clicked on is selected. The middle bits of blue aren’t selected since they aren’t connected.

To add in new areas, such as the middle parts of blue in my example, you can select the Add to current selection option in the tool settings or hold in Shift while clicking on the extra areas.
Continue clicking on the closed-off areas of the background to select them all. You can leave any areas you don’t want to be selected.

You now have the entire background selected, which will turn transparent after following the instructions in the next step.

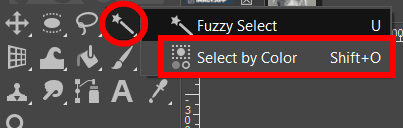
Option 3: Using the Select by Color Tool
The third option is to use the Select by Color Tool, which works similarly to the Fuzzy Select Tool, although this method selects the same color whether it’s connected to the point you click on or not.
To use this method, select the Select by Color Tool from the toolbar, hidden in the Fuzzy Select Tool pop-out, or press Shift + O (Windows and Mac).
You can then click on the color you want to be selected. It will select all the areas with that color. The entire background, including the closed-off areas, is selected in my example.
You can then follow the next step to make the selection transparent.
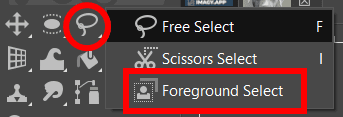
Option 4: Using the Foreground Select Tool
The last selection method is complex, and I only recommend this if you have some experience with the program. The process is tedious and requires a steady hand to get the selection right. This method works for complex backgrounds that are the same color as the foreground or not all one color.
To use this method, activate the Foreground Select Tool from the toolbar, which is accessible by clicking and holding on to the Free Select Tool.
Once the tool is active, click and drag around the object you want to keep to create a rough outline to show GIMP what the foreground is.
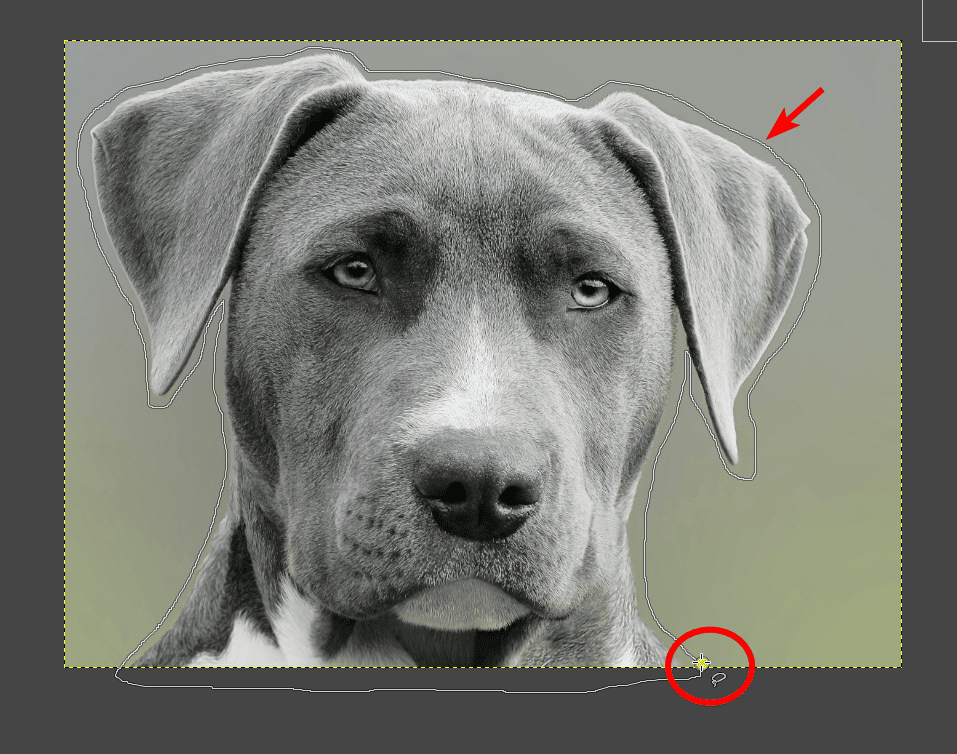
Once the rough outline is created, double-click inside the outline you made. This adds a dark blue mask on the background and a light blue mask around your selection, which it deems as the unknown area.
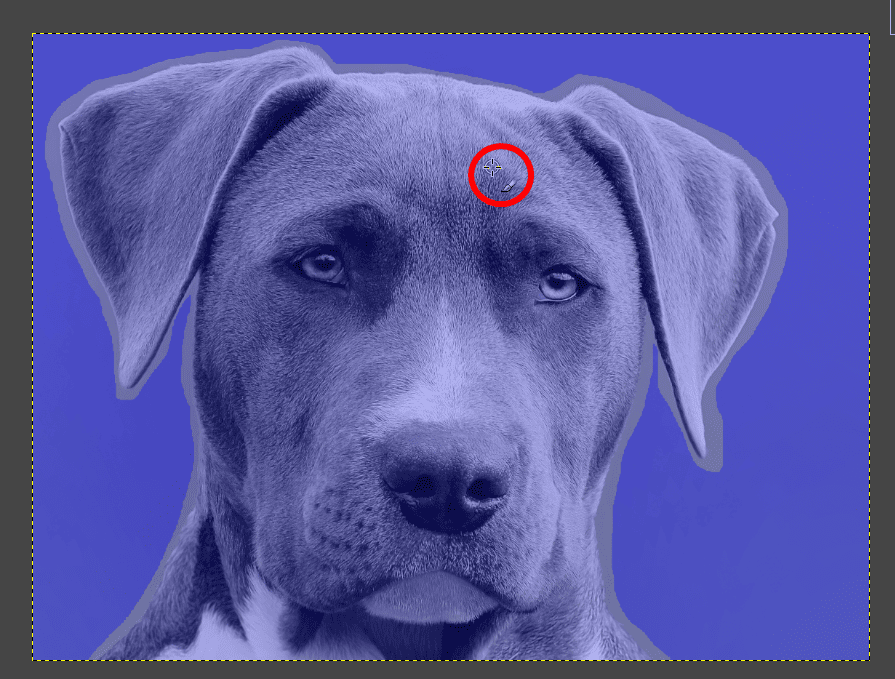
Ensure the Draw Foreground option is set under the Draw Mode in the tool settings.
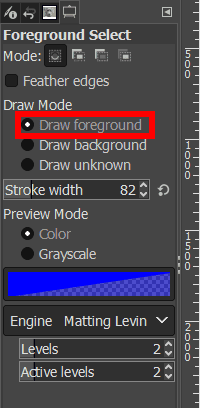
Then use the brush to paint over the areas you want to keep. You may need to adjust the brush size using [ to decrease the size and ] to increase the size. Try to be as accurate as possible. When you brush over it, the foreground will change back to the original image colors.
Next, switch the Draw Mode to Draw Background.
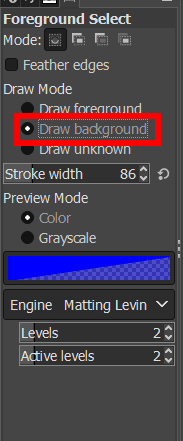
Repeat the process by bushing over the background areas to show GIMP what to include in the background.
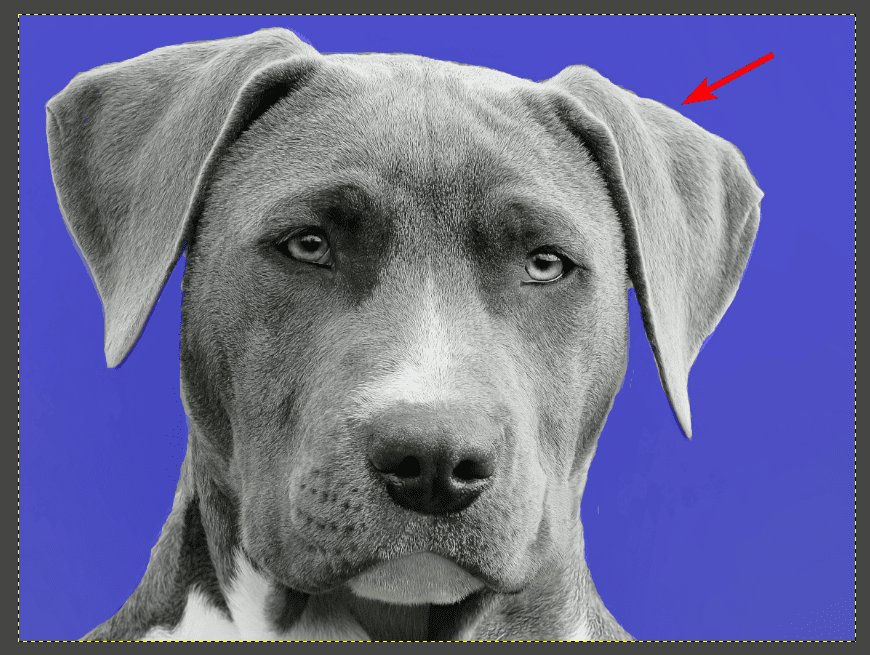
Try to be as accurate as possible when painting over the foreground and background. The background should be covered with the blue mask, and the foreground (the areas you want to keep) must be the original color.
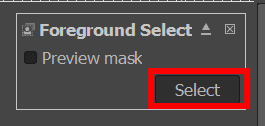
Once you have selected the areas as best as possible, click on Select in the pop-up panel that appeared next to the canvas when you selected the tool.
After a few moments, GIMP will create a selection around the foreground you painted.
You can now continue by removing the background to make it transparent using one of the options in the next step.
Delete the Background or Add a Layer Mask
When you have selected the area you want to keep or delete, you can now make the background transparent. There are two ways to achieve this. You can either delete the background pixels, which is destructive and means you can’t bring the background back later on.
If you want a non-destructive method, add a layer mask to the background, which hides the pixels. You can leave these hidden or bring the background back later if needed. This method is also useful because you can fix the selection after hiding the background by revealing some of the hidden pixels or hiding more pixels.
Option 1: Press Delete to Remove the Background
The first method is the simplest, but you can’t bring the background back later. To use this method, ensure you have selected the pixels you want deleted. For instance, the background pixels are selected when using the Fuzzy Select and Select by Color methods.
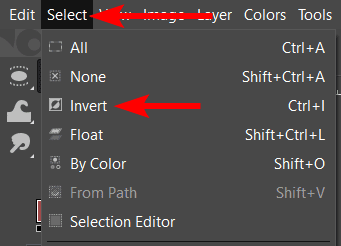
If you used the Basic selection tools or the foreground selection method, you have the pixels you want to keep selected. In these cases, select the background by going to Select > Invert or using the shortcut Control + I on Windows or Command + I on Mac.
Once you have the correct pixels selected, go to Edit > Clear or press Delete on your keyboard. Then press Control + Shift + A on Windows or Command + Shift + A on Mac to deselect the selection.
The selected pixels will be deleted, leaving you with a transparent background. The checkerboard pattern shows transparency.
Option 2: Add a Layer Mask to Hide the Background Temporarily
The second method uses a layer mask to hide the background pixels. You can have either the background pixels you want to be removed selected or the foreground pixels you want to keep selected.
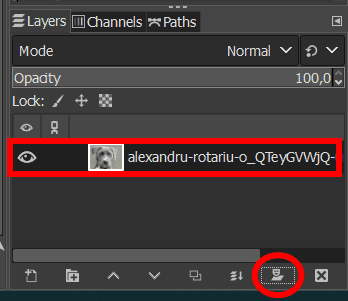
Once you have the areas selected, select the image layer in the Layers panel. Then, click the Add a Mask button at the bottom of the panel.
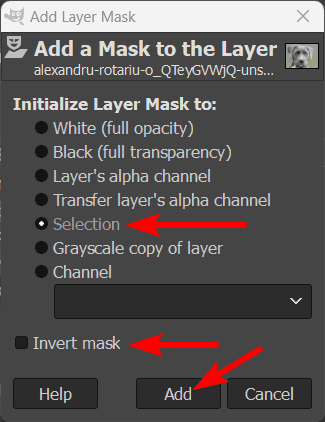
In the mask options that appear, click on Selection. Now if you have the foreground pixels that you want to keep selected, then that’s all you need to check. If you have the background pixels that you want hidden selected, then ensure you check the Invert Mask option as well.
Click on Add to create the mask.
The background will turn transparent shown by the checkerboard pattern. Press Control + Shift + A on Windows or Command + Shift + A on Mac to deselect the selection.

If you want to edit the mask, you can do so by ensuring the mask is selected in the layer’s panel. The white border shows that it’s selected.
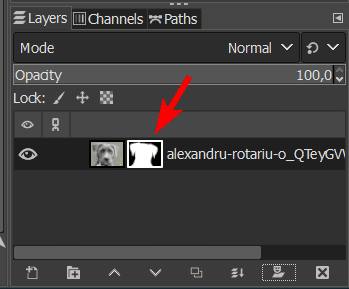
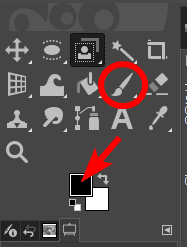
You can then use the Paintbrush Tool and brush over areas on the image to add them to the mask, which hides those pixels. Or remove areas from the mask that reveal those pixels. Make the foreground color white to remove pixels from the mask, and make the foreground color black to add pixels to the mask.
For instance, I select the Paintbrush Tool (P) and set the foreground to black.
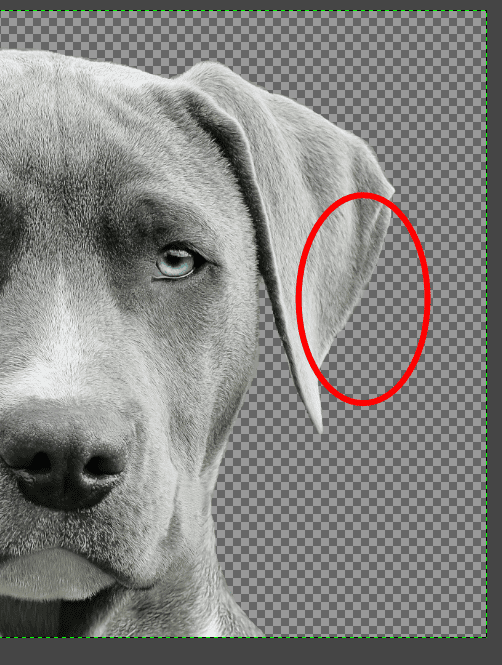
I can then paint over areas where the background remains visible to hide those minor inconsistencies.
You will see the pixels immediately hidden by the mask as you brush over them.
Export the File as a PNG
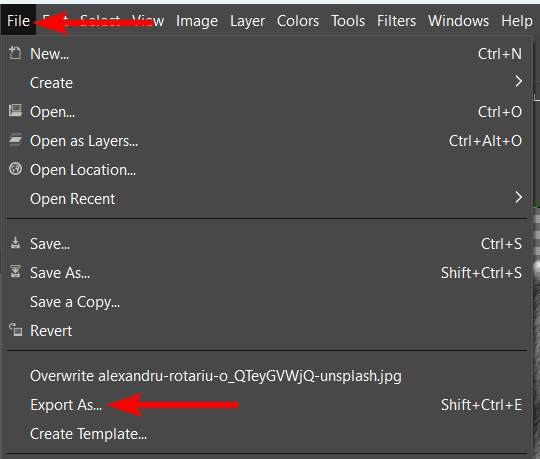
Once you have a transparent background, you must save the file as a PNG to ensure the background remains transparent.
To do this, go to File > Export As or use the shortcut Shift + Control + E on Windows or Shift + Command + E on Mac.
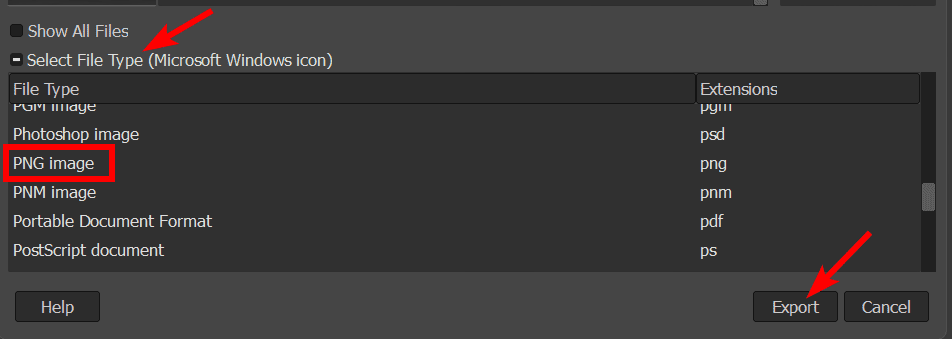
Then, in the panel, open the Select File Type menu and select PNG Image from the options. Click on Export to save the image as a PNG.
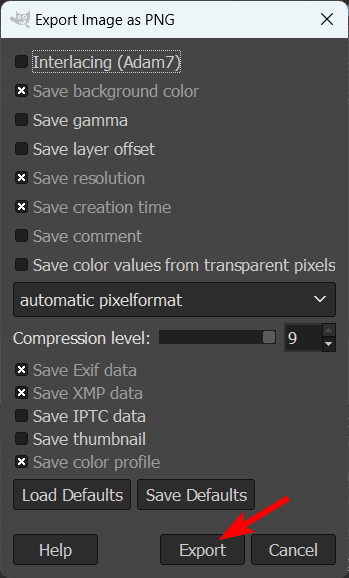
Leave the export settings as the defaults and click Export again. Your image will now keep the background transparent, and you can add it to other projects without the background.
👍 Support Us: Subscribe to our channel and help us continue providing these tutorials.
🌟 Regular Updates: We publish how-to videos for GIMP regularly!
🔧 Expert Guidance: Learn GIMP from our professionals and uncover exclusive tips!