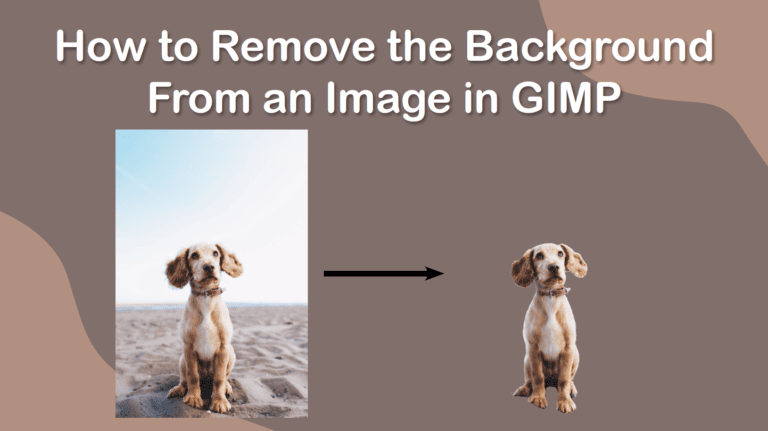
There are various ways to remove the background in GIMP, and the selection tool you use depends on multiple factors of the photo, such as the background's complexity, the subject's shape, and the colors in the foreground and background.
Here are the various selection techniques and destructive and non-destructive methods for removing a background.
If you want an easy method to strip the background from an image using color selection or AI, try our free background remover tool.
Table of Contents
How to Remove the Background in GIMP
Step 1: Add an Alpha Channel to the Layer
To begin, open the image you want to work on in GIMP.
GIMP doesn't automatically set layers to include transparency, so adding an alpha channel to the layer is essential. This step ensures that deleted or masked areas will become transparent.
To add an alpha channel, right-click or Control + click on the layer in the Layers Panel. Then, select Add Alpha Channel from the options.
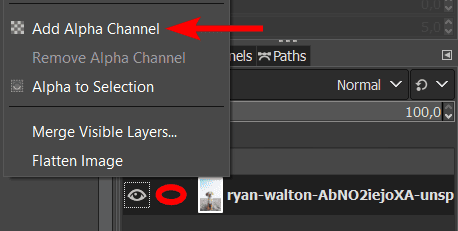
Note: The layer already has an alpha channel if the option is grayed out.
Step 2: Choose a Selection Tool to Select the Foreground
Now, you can select the areas you want to remove from the photo. The selection method you use depends on the image's complexity and your workflow.
- Using the Foreground Select Tool is a good method for experienced users and is the most accurate if used correctly
- The Basic Square or Circle Selection is best used when you want to select an area in a specific shape
- Using the Paths Tool Method works for any selection but is a long method requiring precision and patience
- Use the Fuzzy Select Tool when selecting a connected area made up of a color or similar colors (similar to the Magic Wand Tool in Photoshop)
- If the object you want to cut out has one specific color (even unconnected areas), use the Select by Color Tool
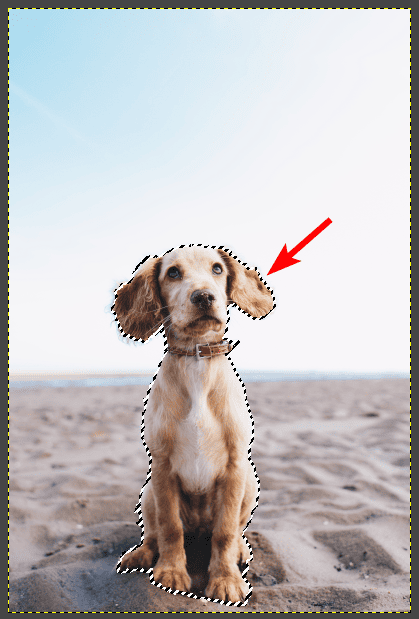
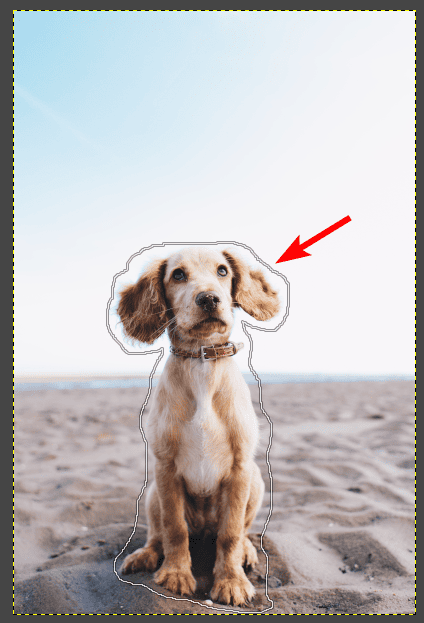
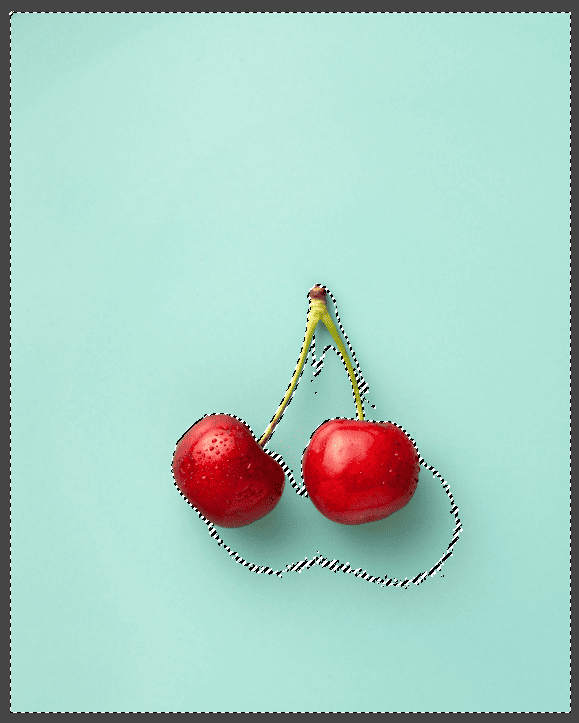
Here is the selection made using the Foreground Select method.
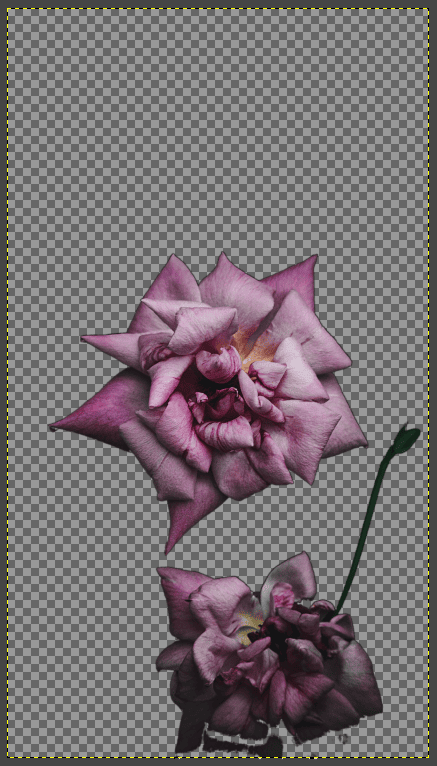
Step 3: Remove the Background by Deleting It or Using a Layer Mask
Once you have selected the areas to keep or delete, you can make the background transparent. There are two methods to achieve this, each with its advantages:
Option 1: Press Delete to Remove the Background
This method is simple but destructive, as you can’t bring the background back at a later stage. First, ensure you have the correct pixels selected that you want to delete (background pixels or foreground pixels).
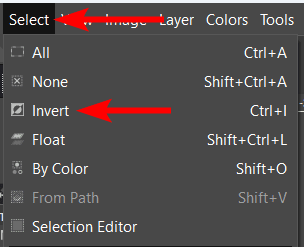
Go to Select > Invert to change the selection to the foreground/background if necessary. You can also use the shortcut Control + I on Windows or Command + I on Mac.
Press Delete or go to Edit > Clear to delete the selected pixels.
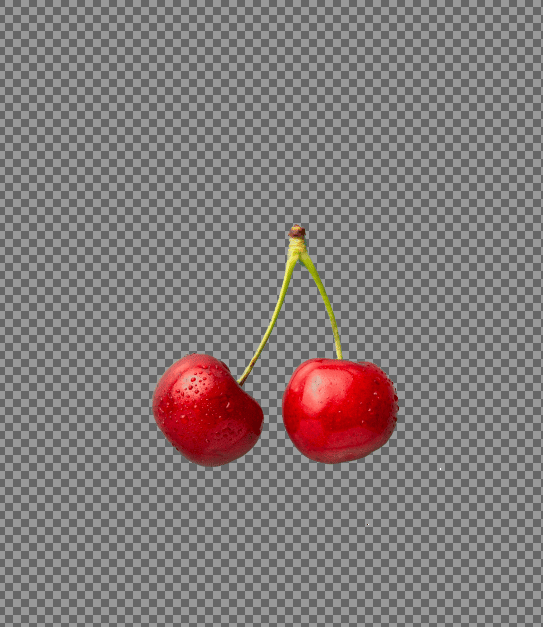
Deselect by pressing Control + Shift + A on Windows or Command + Shift + A on Mac. You will now have your foreground on a transparent background.
Option 2: Add a Layer Mask to Hide the Background Temporarily
This method is non-destructive and allows you to bring the background back if needed. First, ensure you have the right pixels selected. You need to have the foreground pixels (that you want to keep) selected to remove the background.
Select the image layer in the Layers Panel by clicking on it. Then, click the Add a Mask icon at the bottom of the panel.
In the mask options that appear, select Selection.
Note: If you have the background pixels selected, you can click on Invert Mask to ensure the background is removed.
Lastly, click Add to create the mask.

The background will turn transparent. Deselect the foreground by pressing Control + Shift + A on Windows or Command + Shift + A on Mac.
Step 4: Export the Image in PNG Format
To preserve the transparent background when exporting, save the file as a PNG.
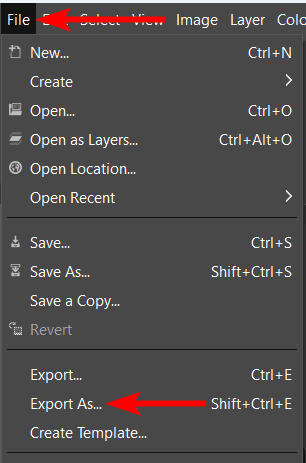
Go to File > Export As or use the shortcut Shift + Control + E on Windows or Shift + Command + E on Mac.
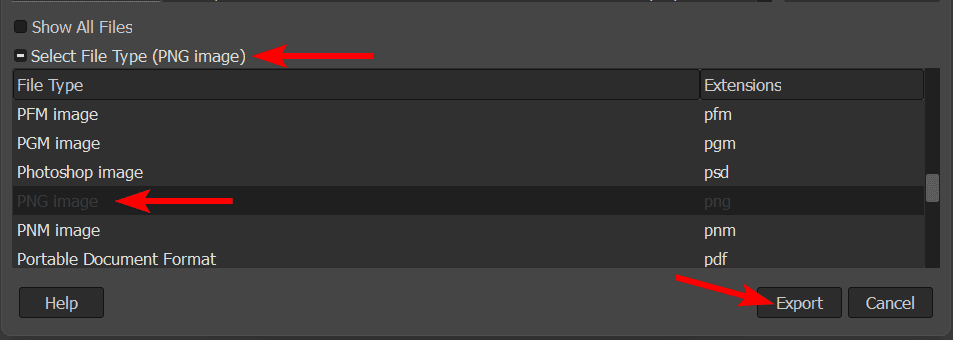
In the file export panel, select PNG Image from the Select File Type menu. Click Export to save the image as a PNG.
You can now use the image with its transparent background in other projects.
The Five Top Selection Methods to Use
Option 1: Using the Foreground Select Tool
This method is complex and recommended for experienced users when removing a complex background with similar colors to the foreground.
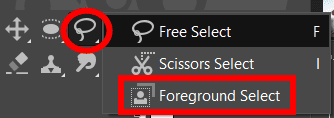
To use the Foreground Select method, activate the Foreground Select Tool by clicking and holding the Free Select Tool.
Draw a rough outline around the subject you want to keep when the background is removed. You can click and drag to create the outline or keep clicking to add straight lines.
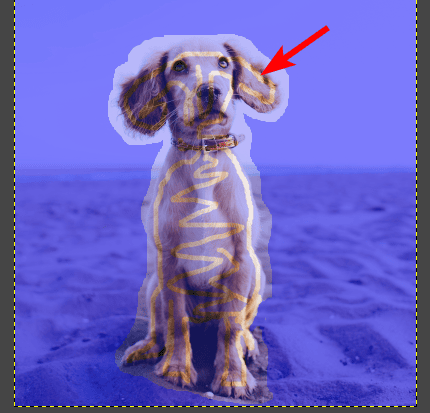
Double-click inside the outline to create masks for the background and foreground. The masks include a dark blue mask on the background and a light blue mask around your selection, which is an unknown area at this stage. You can change these colors in the Tool Options panel.

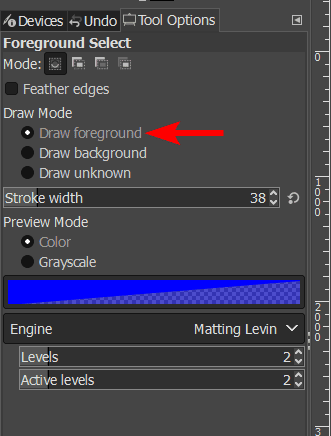
Set the Draw Mode to Draw Foreground in the Tool Options panel.
Then, paint over all the colors that should be included in the foreground selection. You can paint roughly over the different color groups.
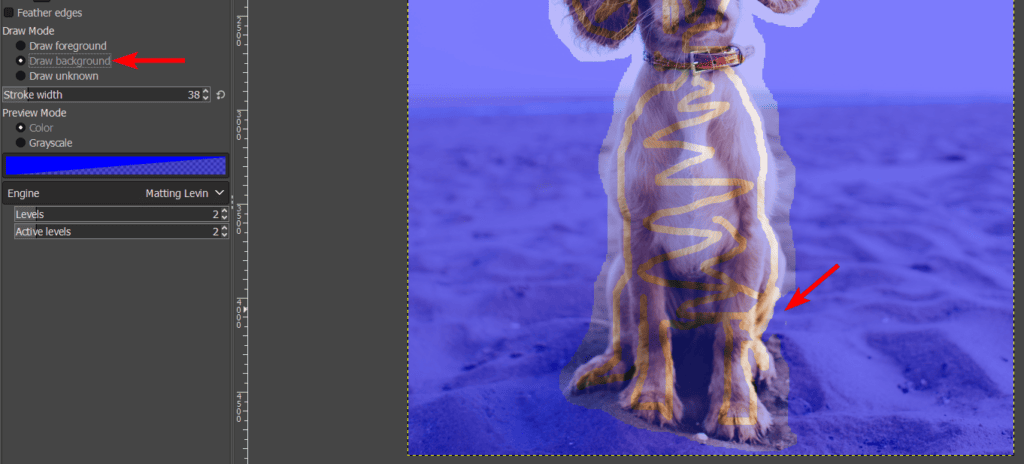
Switch to Draw Background mode and paint over background areas if needed.
Turn on the Preview Mask option in the Foreground Select Tool pop-up window. This process may take a while, depending on your device and the image’s size.
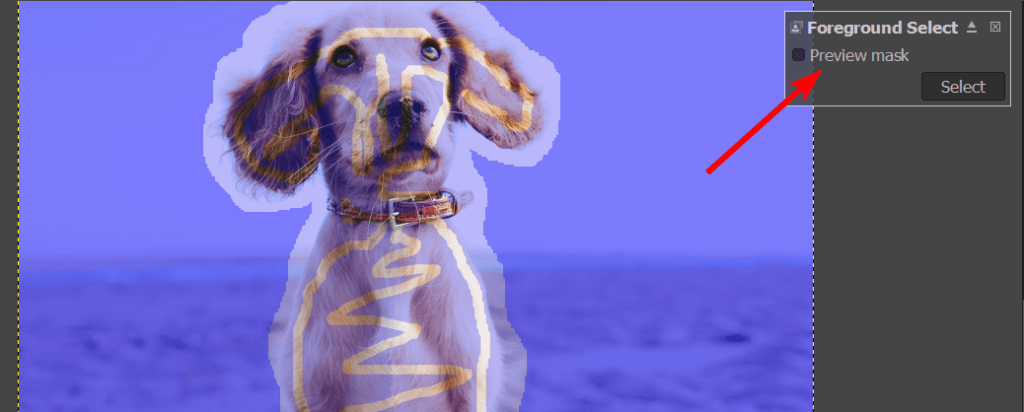
You should now see the foreground in color and check whether the correct areas were selected. You can correct any areas using the Draw Foreground/Background options.
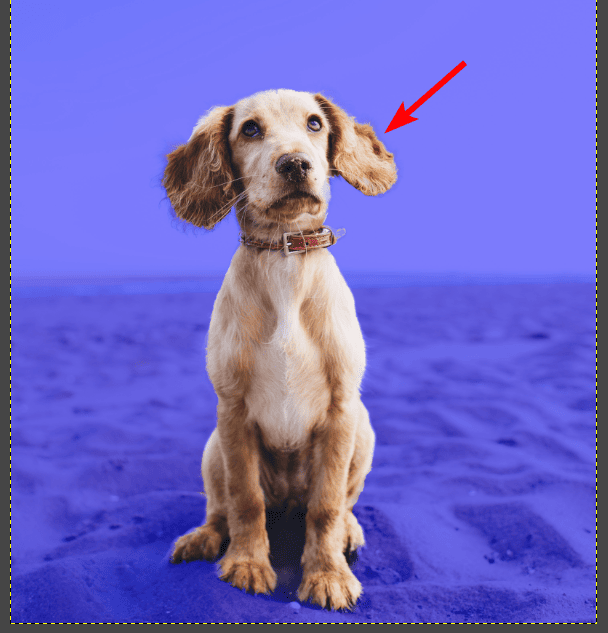
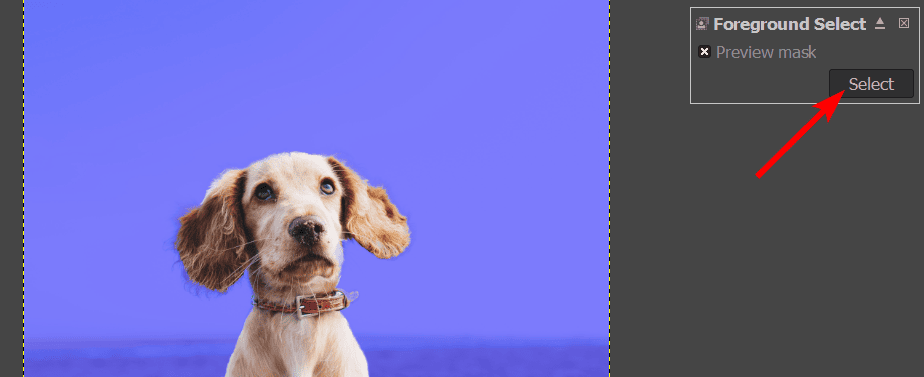
Click Select in the pop-up panel to create a selection around the foreground.
You will see the selection around the subject with the marching ants pattern.
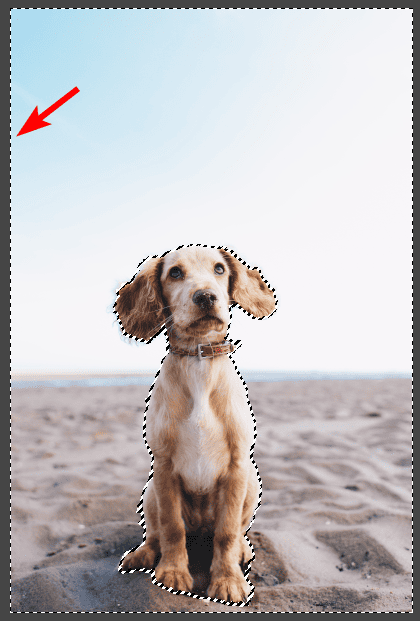
Next, invert the selection (if you plan to delete the background using the delete method in the previous section) using Control + I on Windows or Command + I on Mac. The background around the subject will now be selected.
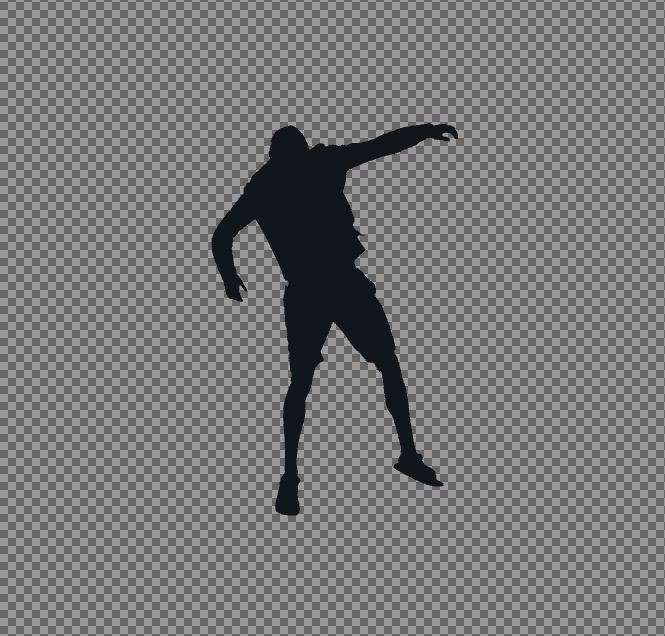
Delete the background using the Delete key. You will now have your subject on a transparent background.
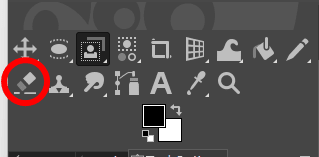
You can use the Eraser Tool by pressing Shift + E on Windows and Mac to remove any excess background left on the image to clean it up.
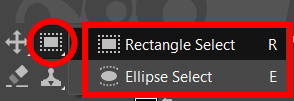
Option 2: Using a Basic Square or Circle Selection
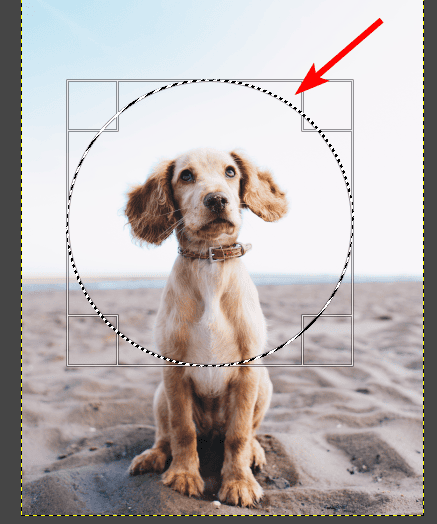
This method is suitable for creating square or circular selections. First, activate the Rectangle Select Tool (R) or the Ellipse Select Tool (E) from the toolbar.
Click and drag to create a selection in your chosen shape around the subject.
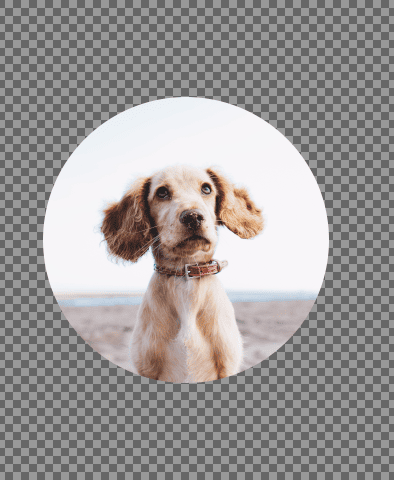
Use the Delete or Layer Mask method to remove the background. The pixels within the ellipse selection will remain.
Option 3: Using the Paths Tool Method
The Paths Tool is the most precise method for removing backgrounds in GIMP, making it perfect for complex selections but is more complicated than the other methods.
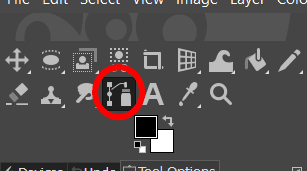
First, select the Paths Tool in the toolbox or use the keyboard shortcut B.
Then, create the path outline by carefully tracing the outline of the object you want to keep by clicking to create anchor points. Connect the last point to the first to close the path.
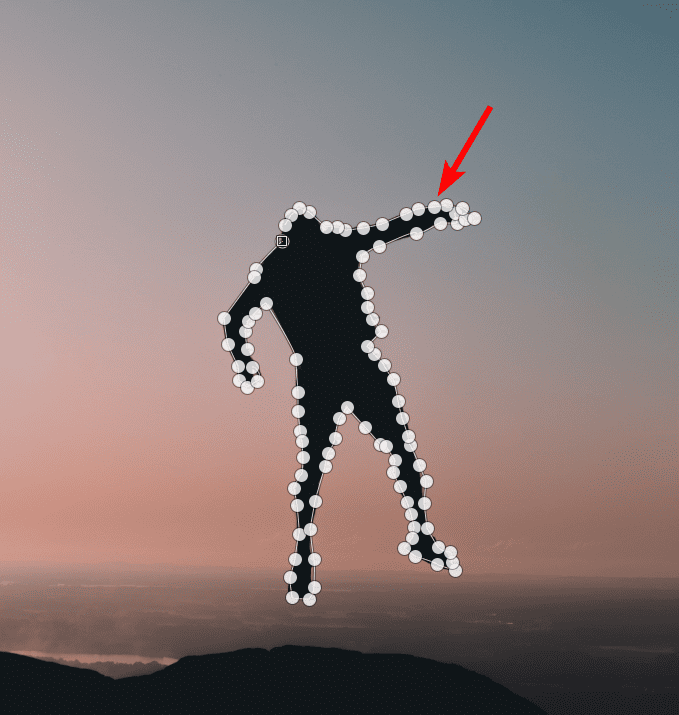
To convert the Path to a Selection, right-click on the path you've created and click on Select > From Path in the context menu. This action will transform your path into a selection. Invert the path using Control + I on Windows or Command + I on Mac.
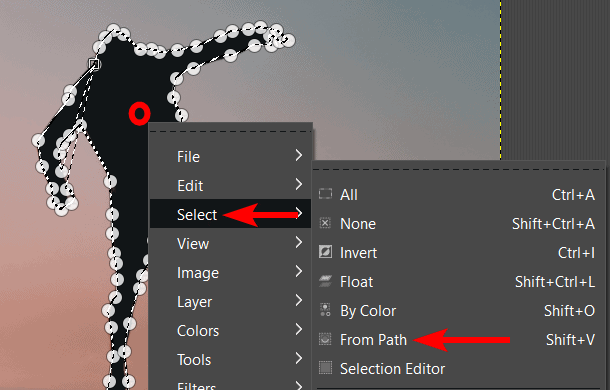
Then, delete or mask the background using one of the methods from the previous section.
Option 4: Using the Fuzzy Select Tool
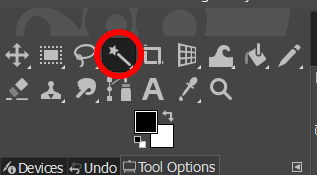
The Fuzzy Select Tool is ideal for selecting areas of the same color. To use this method, click the Fuzzy Select Tool from the toolbar or press U.
Adjust the tolerance before making your selection. To do this, adjust the Threshold value in the Tool Options. A lower threshold selects fewer colors, while a higher threshold selects more.
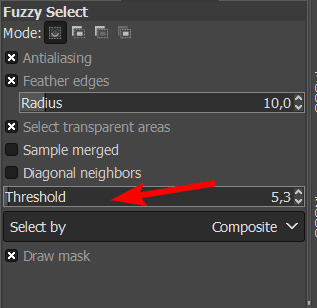
Click on a background color to select it. The tool will select all connected pixels of that color based on your selected threshold level.
You can then delete the background by using one of the methods in the previous section.
Option 5: Using the Select by Color Tool
The Select by Color Tool selects all instances of a color, whether connected or not. First, select the Select by Color Tool from the toolbar or press Shift + O on Windows and Mac.

Adjust the Threshold setting in the Tool Options. A lower threshold selects fewer tones of the color, while a higher threshold selects more.
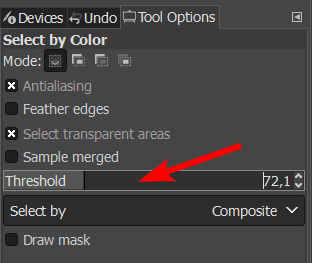
Click on the color you want to select. It will highlight all areas with that color.
You can now use a method to delete the background. Repeat this step to select the different colors and tonal values in the background. Delete each selection until the entire background is transparent.
Removing backgrounds in GIMP is essential for anyone involved in graphic design or photo editing. With these methods, you can confidently remove backgrounds in GIMP for various design and editing purposes.
Images used in the examples:
- A brown dog sitting on sand from Unsplash
- Silhouette of a man jumping on rocks from Unsplash
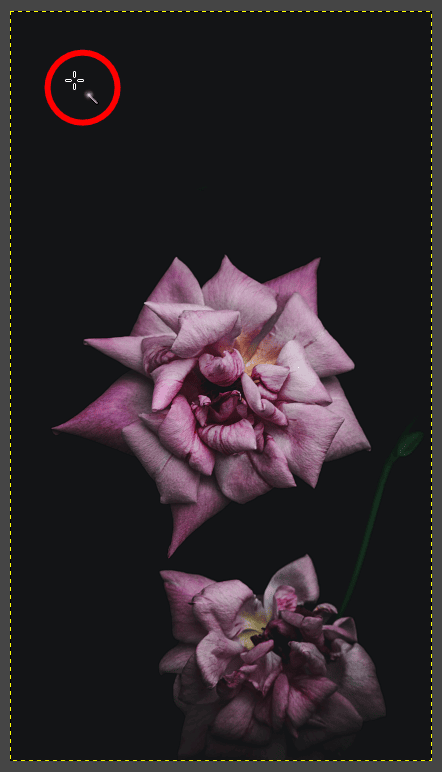
- Two pink flowers on a black background from Unsplash
- Two cherries photo from Unsplash
👍 Support Us: Subscribe to our channel and help us continue providing these tutorials.
🌟 Regular Updates: We publish how-to videos for GIMP regularly!
🔧 Expert Guidance: Learn GIMP from our professionals and uncover exclusive tips!