
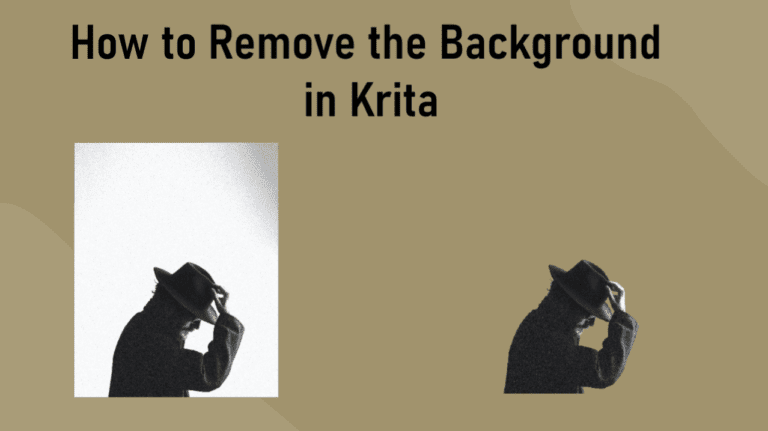
When you are working with raster images in Krita, you may need to remove the background at some point. This usually happens if you want to take an object from a photo and place it in a new project or if you want to replace the background behind the subject.
You may also want to remove a background of a graphic you found online to use it in an animation or video. Removing a background is also often used in product photography to use the product on a new background for the website or marketing materials.
Here is how to remove a background in a non-destructive way.
Want to remove an image background quickly with color detection or AI? Give our free online background remover a try.
Table of Contents
Overview of Removing the Background in Krita
- Open the image in Krita
- Activate a suitable selection tool
- Create the selection around the object
- Invert the selection (if needed)
- Add a new transparency mask layer
- Add a new paint layer
- Move the paint layer to the bottom and hide the other layers
- Use the paint bucket to add a new color to the canvas
- Select the Brush Tool
- Set the brush color and size
- Brush over areas with white to add to the object
- Brush over the areas with black to remove them from the background
- Check the final result
How to Remove the Background in Krita Step-by-Step
When removing a background in programs such as Photoshop, you can add a mask over the background to hide it. This offers a non-destructive technique that allows you to fix up any parts the mask didn’t remove properly or the areas that shouldn’t have been removed.
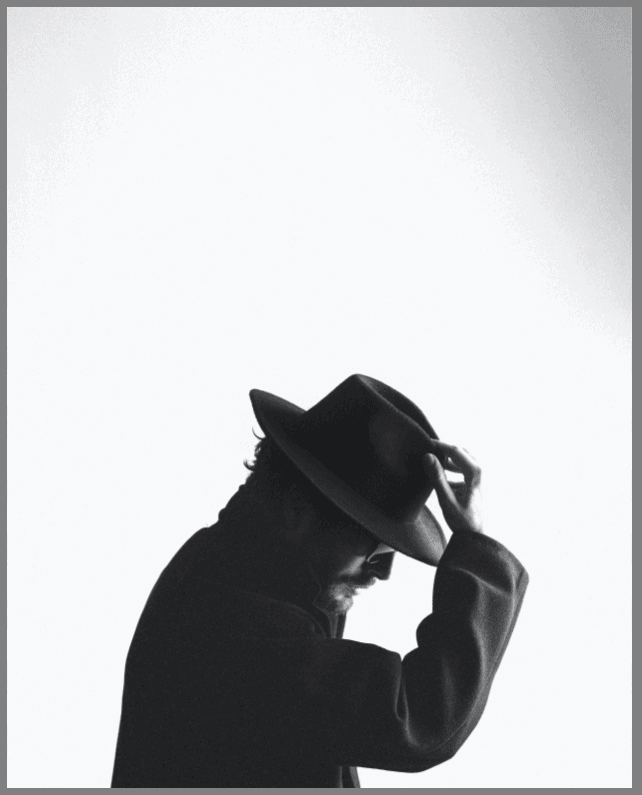
You can also use the same process in Krita. This method lets you easily bring back the background later on if needed, as the pixels aren’t deleted, just hidden. I will use this picture of a man in a black hat and jacket from Unsplash.
Open the Image in Krita
To remove the background, first, you need to open the image in Krita by pressing Control + O on Windows or Command + O on Mac. You can also apply this effect to a drawing you created if you drew the subject directly onto the background layer.
Activate a Suitable Selection Tool
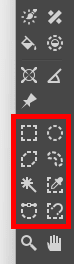
You can now use any of the selection tools for this step. The tool you choose depends on your subject. You can use the Rectangular or Elliptical selection tool if you have a perfect shape you want to cut out of the background.
Otherwise, you may need to use the Bezier Curve selection tool to draw a precise selection around the subject. The Bezier selection tool is complex and will take some practice to get right, but it does offer the most accurate selection.
Since my background is mostly one color, I will use the Similar Color Selection Tool. This allows me to click on the background color to select most of it.
Create the Selection Around the Object
With a selection tool active, create a selection around the subject or object you want to keep. You can click and drag to create shapes or use the Bezier selection tool, like a pen and draw around the object, adding anchor points to create curves.
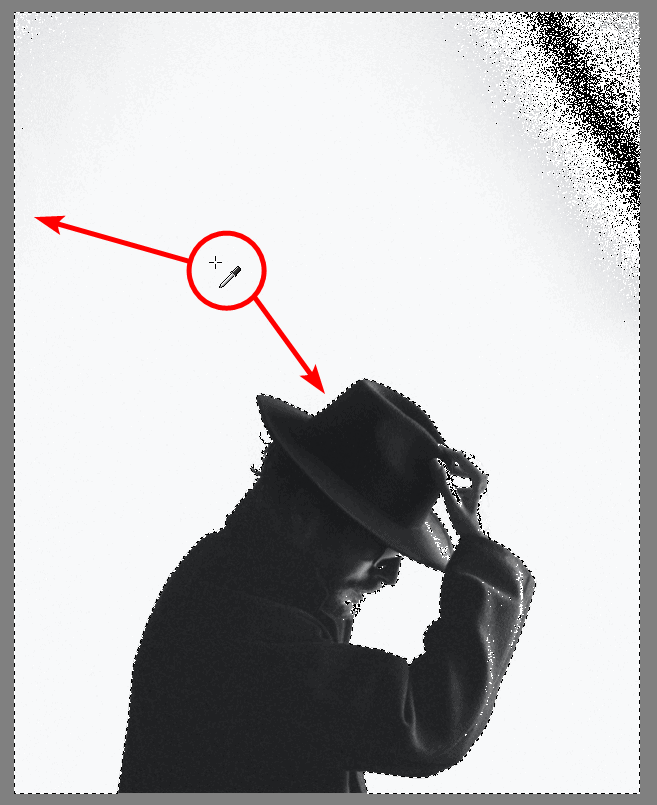
In my case, I can simply click on the background color, and the tool will select the background.
Invert the Selection (if Needed)
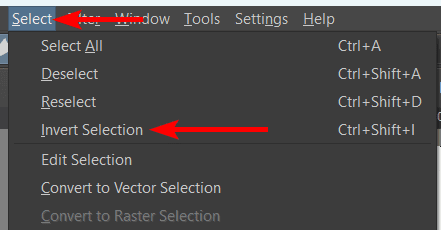
For this process to work correctly, you need to ensure that the subject or object you want to keep is selected. Since my tool selected the background, I need to invert the selection.
If this happens, you can invert the selection by going to Select > Invert Selection. You can also use the shortcut Shift + Control + I on Windows or Shift + Command + I on Mac.
Add a New Transparency Mask Layer
Once you have selected the subject or object(s) you want to keep, you can add a transparency mask layer to hide the background. To do this, click the arrow next to the Add New Layer icon at the bottom of the Layers Docker, then select Add Transparency Mask.
Your background will turn transparent immediately.
Add a New Paint Layer
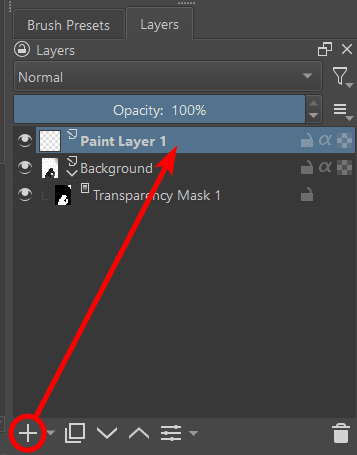
You have successfully removed the background by hiding it with the layer mask. However, it’s always good to check if everything was selected correctly. To do this, you can add a paint layer below the image and fill it with color.
To do this, add a new paint layer by clicking the Add New Layer icon, as the default layer added is a paint layer.
Move the Paint Layer to the Bottom and Hide the Other Layers
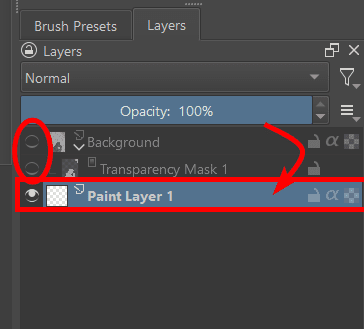
Once the paint layer is added, move it to the bottom of the layer stack by clicking and dragging it down. Then turn off the layer visibility of all the other layers by clicking on the eye icons next to each layer. This is to ensure the paint is added across the entire layer.
Use the Paint Bucket to Add a New Color to the Canvas
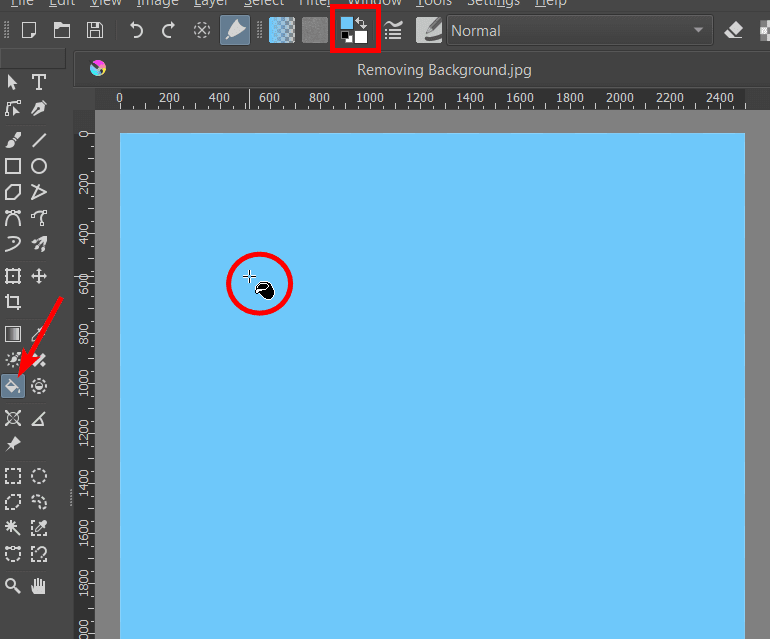
Now, stay on the new paint layer, select the Fill an area tool, which looks like a paint bucket, and select a color in the top settings bar. Choose a color that you can clearly see any problems with the subject or objects you cut out.
Then, click once on the canvas to fill the entire layer with your chosen color. You can then turn the visibility of the other layers back on. Now you can see any inconsistencies where the mask didn’t remove some of the background or the mask removed some of the subject/object accidentally.
Select the Freehand Brush Tool
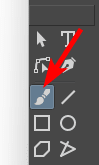
Next, activate the Freehand Brush Tool by selecting it from the toolbar or pressing B.
Set the Brush Color and Size
Now, you can set the brush color and size. You will be working on a layer mask, so you only need to work with white and black when painting onto the mask. The white areas show what’s on the layer, so in this case, the subject and black hides the layer, so this is hiding the background.
Select the color based on what areas you are fixing up. You can first select white to add in any areas of the subject that are hidden. Then set the brush size based on the area you will paint over.
Brush Over Areas With White to Add to the Object
Next, ensure you have selected the transparency mask layer before continuing. Then, brush over areas with a plain brush and white to reveal more of the subject if the mask hid it.
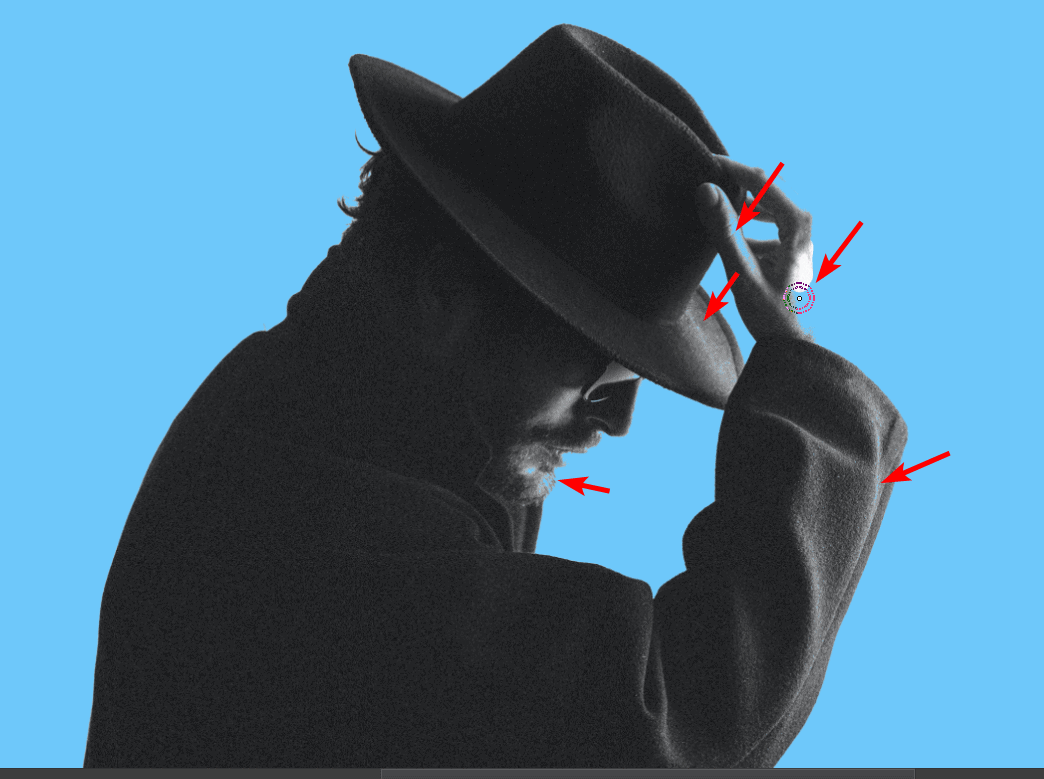
For instance, I have a few areas on the hand, chin, hat, and arm that aren’t correct. I can paint over these with white to add them back in.
Brush Over Areas With Black to Remove Them From the Background
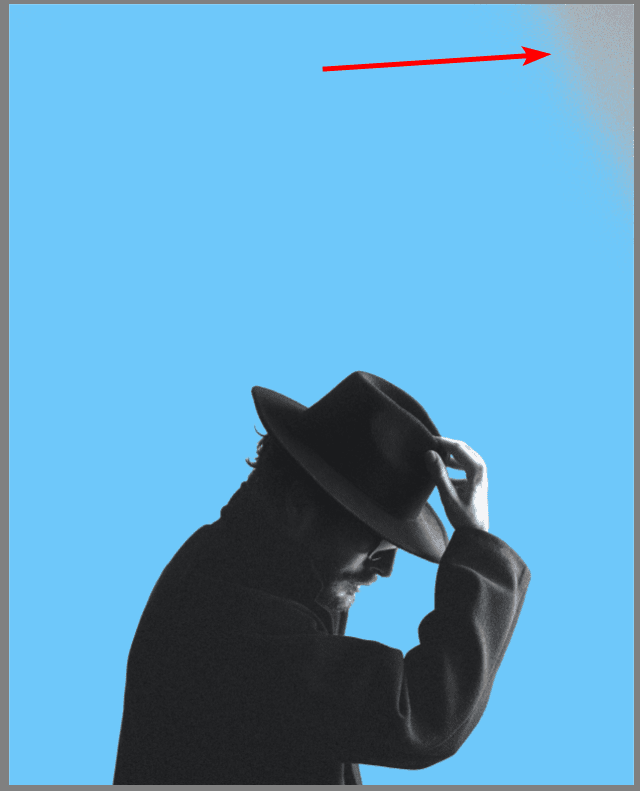
Next, repeat the above steps, using black to hide any of the background that is still visible. For instance, I still have a background patch visible at the canvas's top right-hand corner—painting over this with black hides the area.
Check the Final Result
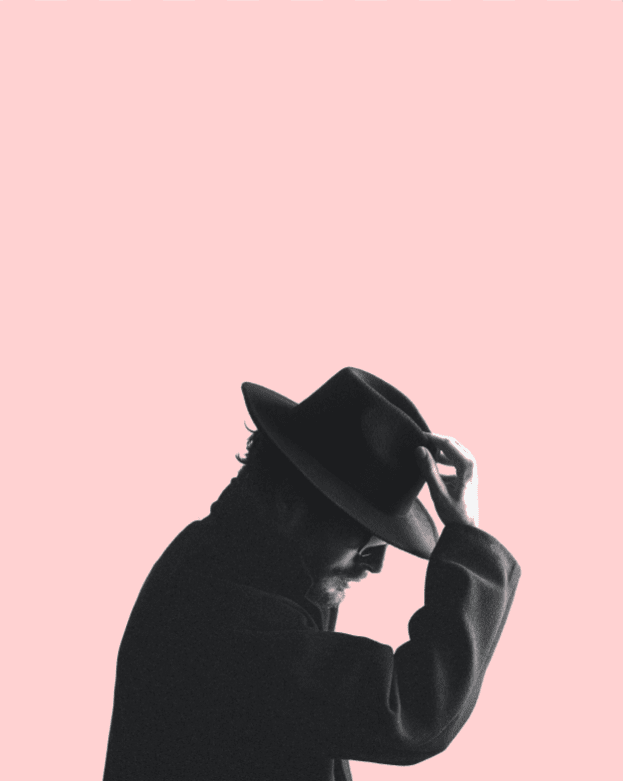
You should now have your subject on its own with the background successfully removed. You can now remove the paint layer and keep the subject on a transparent background, change the background color, or add the subject to a new project.
Tools:
- Krita
👍 Support Us: Subscribe to our channel and help us continue providing these tutorials.
🌟 Regular Updates: We publish how-to videos for Krita regularly!
🔧 Expert Guidance: Learn Krita from our professionals and uncover exclusive tips!
