
Liquify is a method to warp your image or drawing to create a new effect. This function is useful if you want to edit a photo of a person to enhance or minimize certain features or while drawing to manipulate your character or other drawn elements.
You can easily use the Liquify effect in Krita in one of two ways. Either use the Liquify option with the Transform Tool or select one of the Distort Brushes depending on the end result you want and how much control over the effect you need.
Table of Contents
How to Liquify Using the Distort Brush
There are three Distort brush presets you can use in Krita to create a liquifying effect on your image. Liquify is a method used to either correct distortions on pictures or graphics or to manipulate photos or drawings to create a new look.
For instance, if you draw a landscape but you added a curve in the mountain that you want to correct, instead of re-drawing the mountain, you can use the liquify effect to fix it.
You can also use this function to make creative layouts or to manipulate a person’s features, such as making their eyes slightly bigger or smaller. This is often used in portraits to enhance facial features or to reduce wrinkles and other distortions.
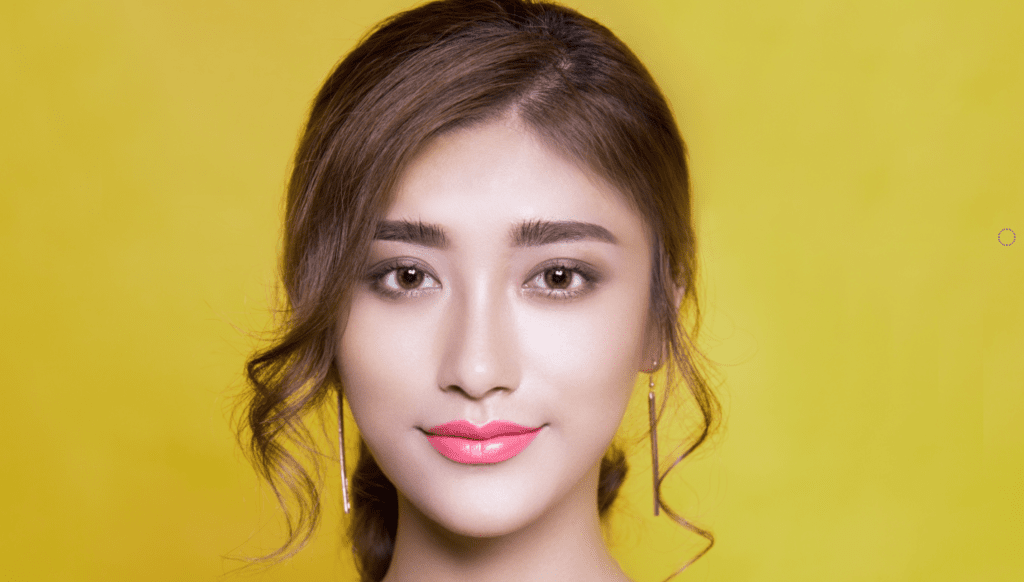
If you want to make minor adjustments, you can use one of the brush presets. Here I will show you this effect using this photo of a Woman Wearing Black Spaghetti Strap Top sourced from Pexels. I will enhance her facial features using the different brush presets available.
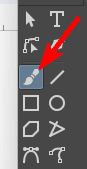
To add the liquify effect, activate the Freehand Brush Tool from the toolbar or press B.
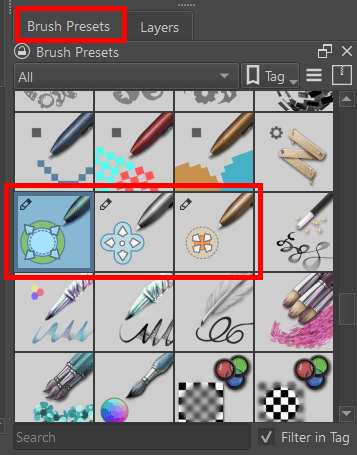
Then, find the Distort brushes in the Brush Preset Docker. You will find (from left to right) the Distort Grow, Distort Move, and Distor Shrink brush presets.
You can use each brush for what the name suggests. If you want to enhance something, use the Distort Grow brush. For instance, I can increase the size of the woman’s eyes. This is a popular editing tool used in fashion images and can be used to enhance a cartoon or anime character’s eyes.
Once the brush is selected, use the size slider in the top settings bar to increase the size of the brush.

You want the brush larger than the eye or object you are growing.
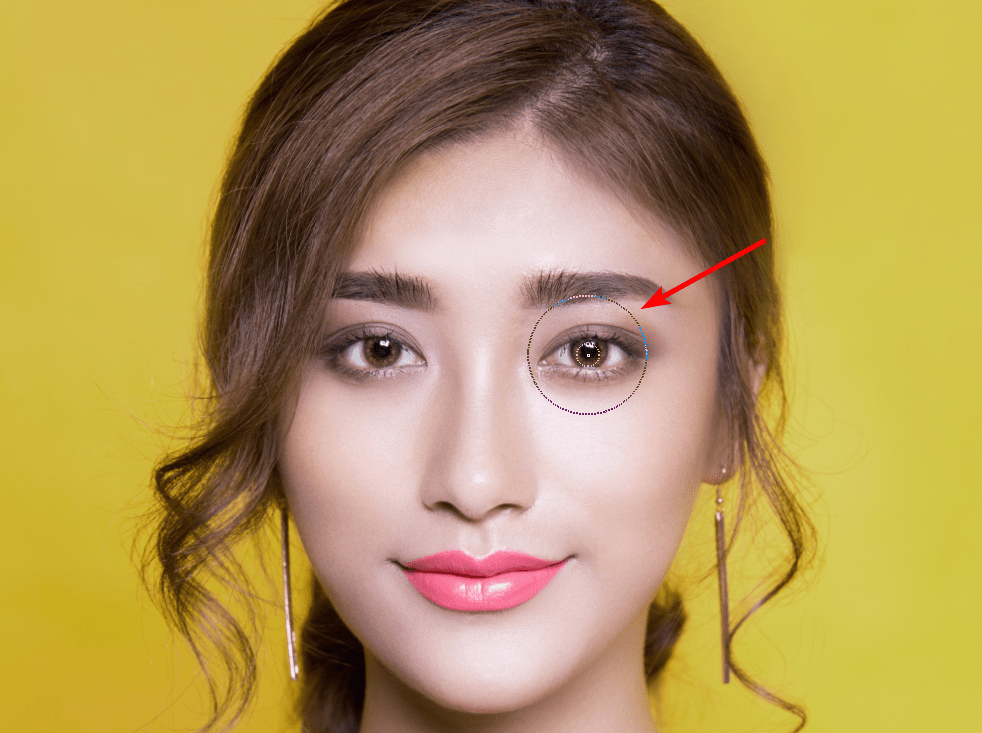
Then click to increase the size of the eye. Click as many times as you need to achieve the result you want.

You can repeat the same on the other eye.
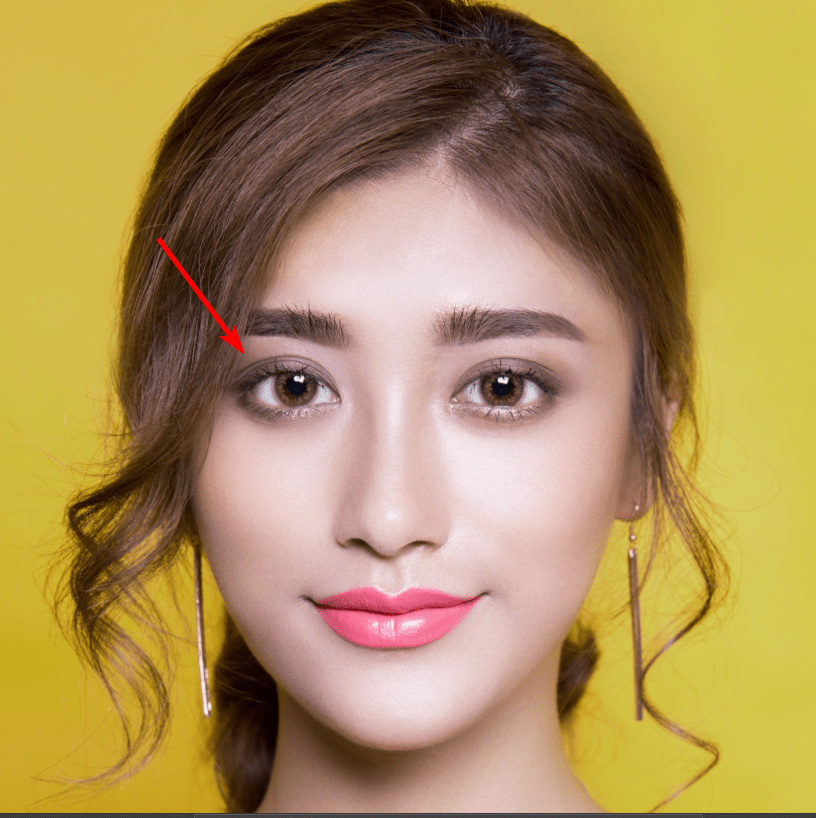
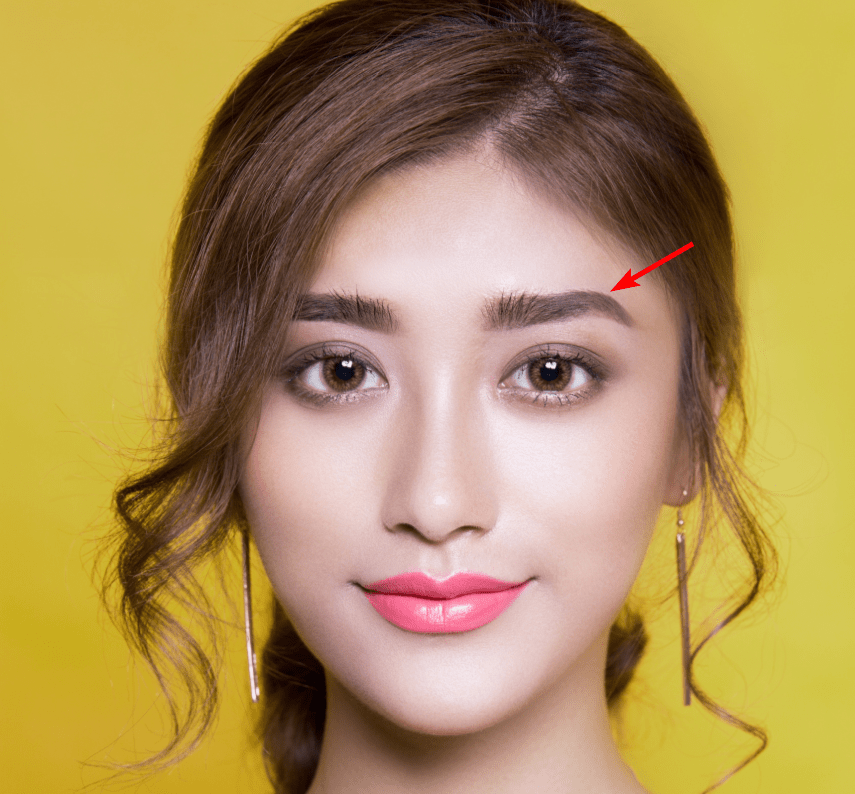
You can use the Distort Move brush to warp features into new positions. For instance, I can use the brush and drag it up on the woman’s eyebrow to create a slight kink in it.
You can also use the Distort Shrink brush to reduce the size of certain features. For instance, I can slightly reduce the size of the woman’s nose by selecting the brush and clicking on the nose.
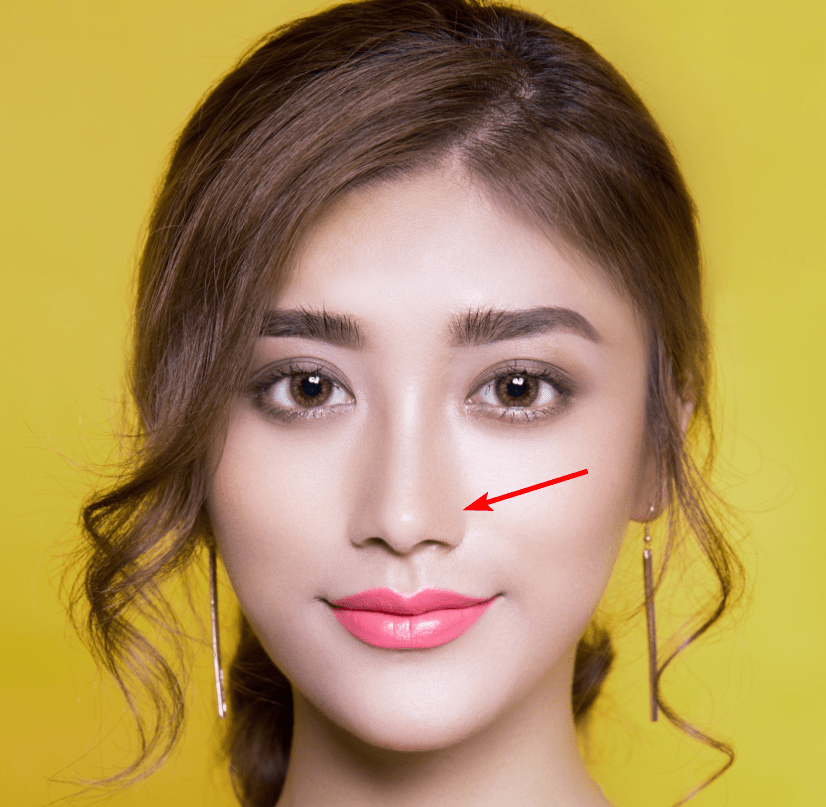
I have used the brushes to create slight enhancements since I am working with a photo and want to keep it realistic. However, you can make more drastic adjustments using the brushes to create a cartoon-like effect.
How to Use Liquify Using the Transform Tool
The other option to access the Liquify feature is to use the Transform Tool. Once the tool is active, you can select the right option and then adjust the Liquify settings before making changes on the canvas.
This method produces much more drastic results, and you can’t make subtle changes as I did when using the brush method. The liquifying effects from this method are more creative and best used on non-realistic projects.
Here I will show you how to use this method by demonstrating on this Color Text image sourced from Pexels.
Open the image or select the layer to which you want to add the liquifying effect. You need to have the correct layer selected for this to work. You can activate the right layer in the Layers Docker.

Then, you can activate the Transform a layer or selection tool from the toolbar or press Control + T on Windows or Command + T on Mac.
Once the Transform Tool is activated, go to the Tool Options Docker. Here you will find the icons for different types of transform effects you can use, including Liquify.
Select the Liquify option, which looks like a drop of water with a dot inside it.
Once the liquify is active, you can adjust the different settings depending on how you want to manipulate your drawing or image.
The various settings work as follows.
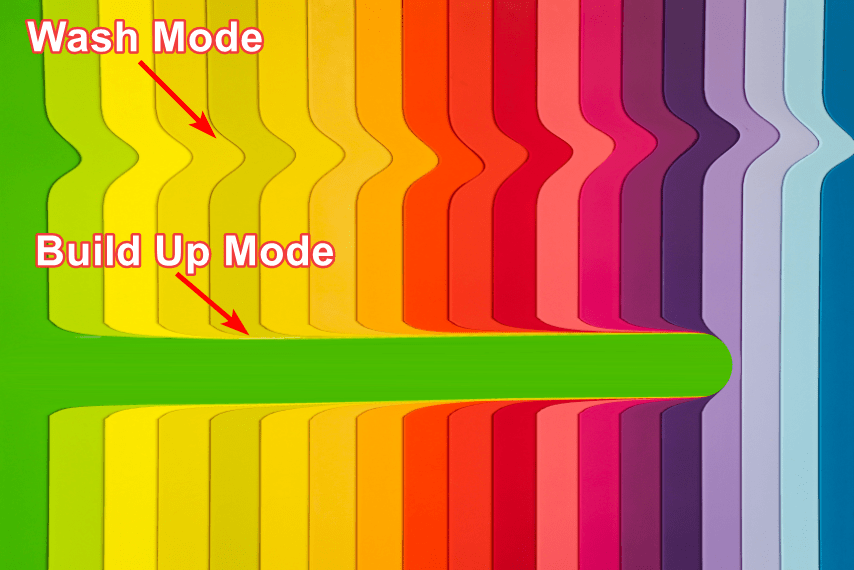
Mode: You can choose between Wash and Build Up. The Wash mode will move the liquify effect across different pixels, warping new areas as you brush. Build Up will drag the original pixels as far as possible.
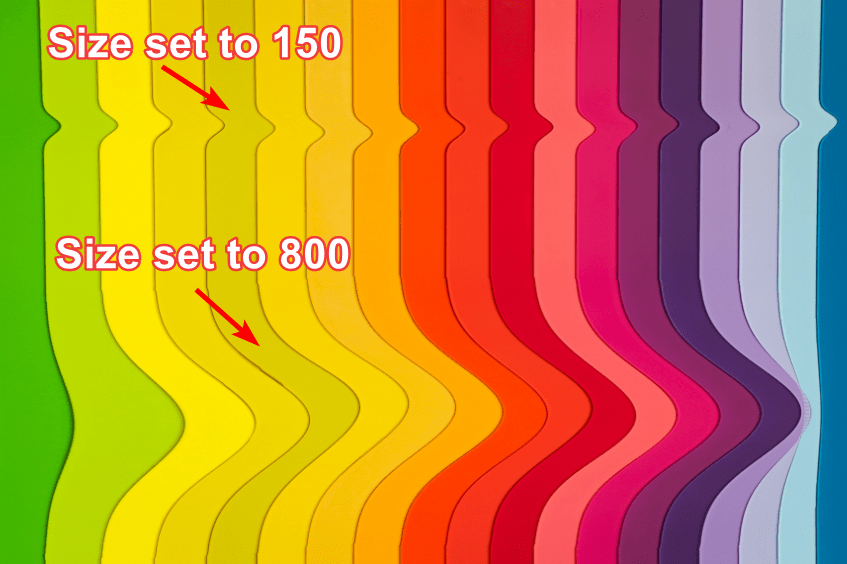
Size: This determines how small or large the brush will be on the canvas. A smaller brush size affects a smaller region, while a larger brush size affects more pixels.
You can also set the Pressure option to determine the brush size based on the pen pressure if you use a stylus by activating the icon to the right of the size slider.
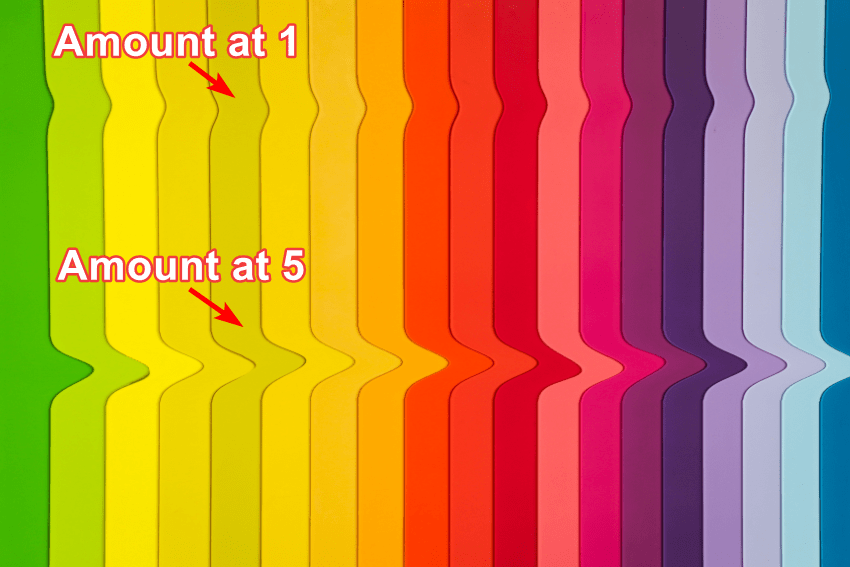
Amount: This option determines the strength of the liquify effect. You can use the icon on the right to link the strength to the pen pressure when using a tablet or drawing pad.
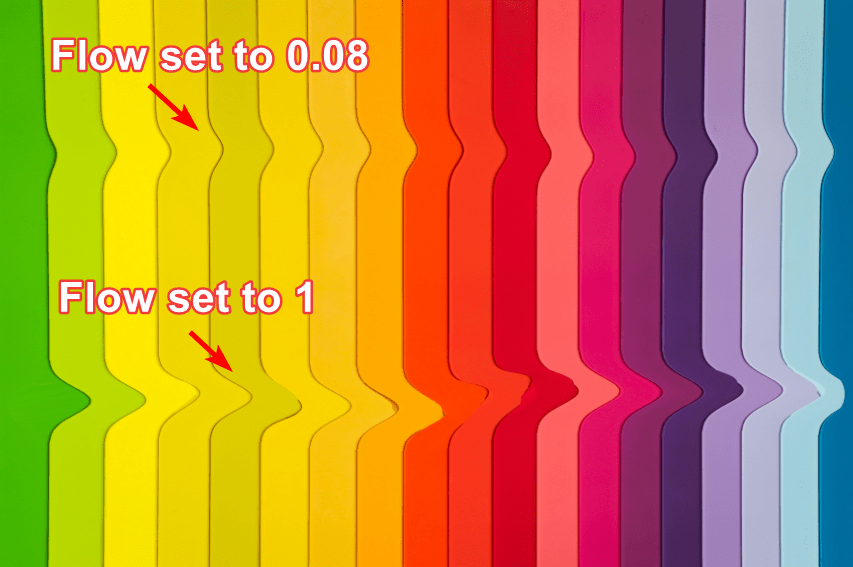
Flow: This option is only active for the Wash mode and determines how far the pixels will drag before altering new pixels. A low flow moves onto new pixels faster than a high flow.
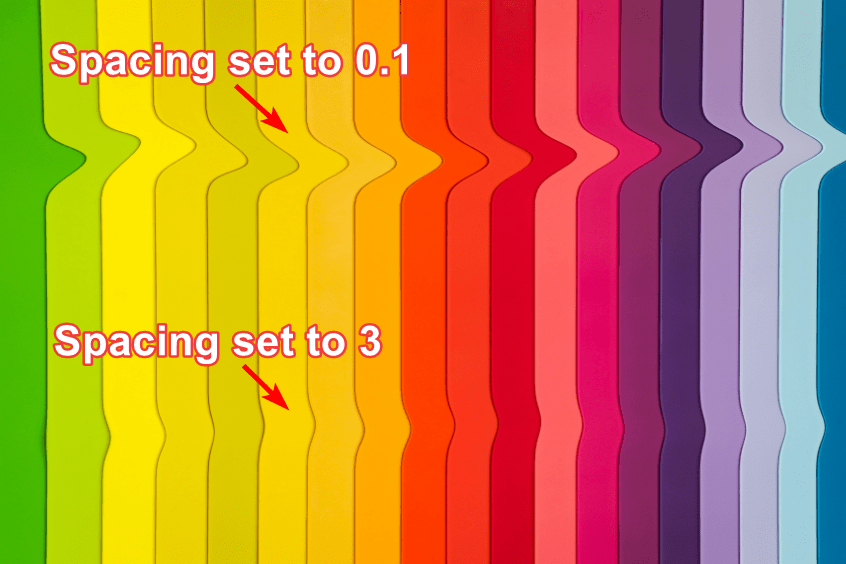
Spacing: Determines how much space is left between the liquify effect. The larger the spacing, the less the effect is added to the canvas.
Reverse: Check this option to add the effect in the opposite way. So dragging the brush from left to right when Reverse is checked means the effect is created in the opposite direction.

The Liquify mode in the Transform Tool can cause lagging if the layer you are transforming is large and contains multiple elements. To speed up the effect, work within a selection or on a layer containing minimal objects and pixels.
👍 Support Us: Subscribe to our channel and help us continue providing these tutorials.
🌟 Regular Updates: We publish how-to videos for Krita regularly!
🔧 Expert Guidance: Learn Krita from our professionals and uncover exclusive tips!
