
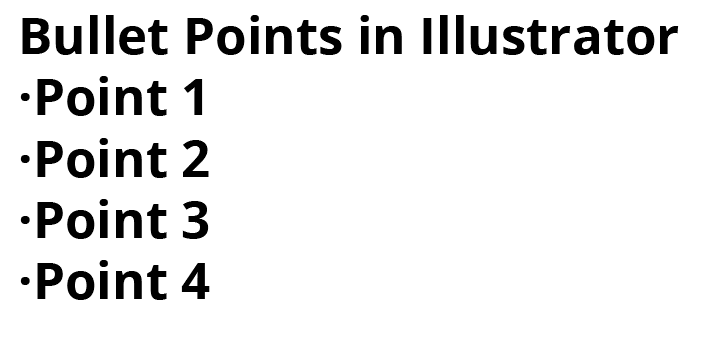
There are three main ways to add bullet points in Illustrator:
- Use the Glyphs Panel for a range of bullet point styles to match your design
- Use the Character Panel for the standard text bullet points
- Use the Type on a Path Tool to create unique bullet points
Your technique depends on where you place the bullet points in your design and how much customization you want for the points. The quickest way is to use the shortcut Alt + 0149 on Windows or Option + 8 on Mac when typing in a text box. However, here is a breakdown of each method to help you complete your design.
Method 1: Using the Glyphs Panel
- Select the Type Tool and Add Text to the Canvas, Creating Lines for Each Bullet Point
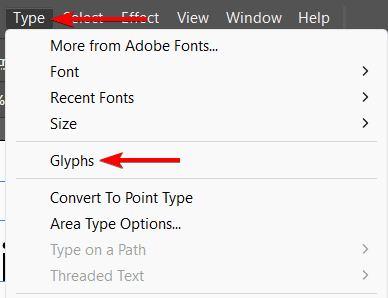
- Open the Glyphs Panel From the Type Menu
- Place the Cursor at the Start of the Line and Add a Glyph
- Repeat the Above Step to Add Multiple Bullet Points
- Customize the Bullet Points Using the Character Panel
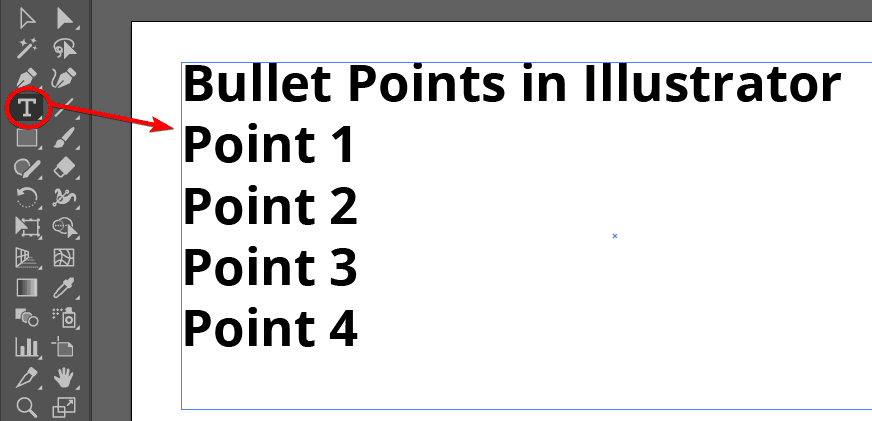
Select the Type Tool and Add Text to the Canvas, Creating Lines for Each Bullet Point
Create a new document in Illustrator and select the Type Tool from the Toolbar. Click and drag on the artboard to create a text box. Type your text and press Enter to start a new line for each bullet point.
Open the Glyphs Panel From the Type Menu
Select the text and go to the Glyphs Panel. You can access it by going to Type > Glyphs. You will see a grid of characters and symbols for your selected font.
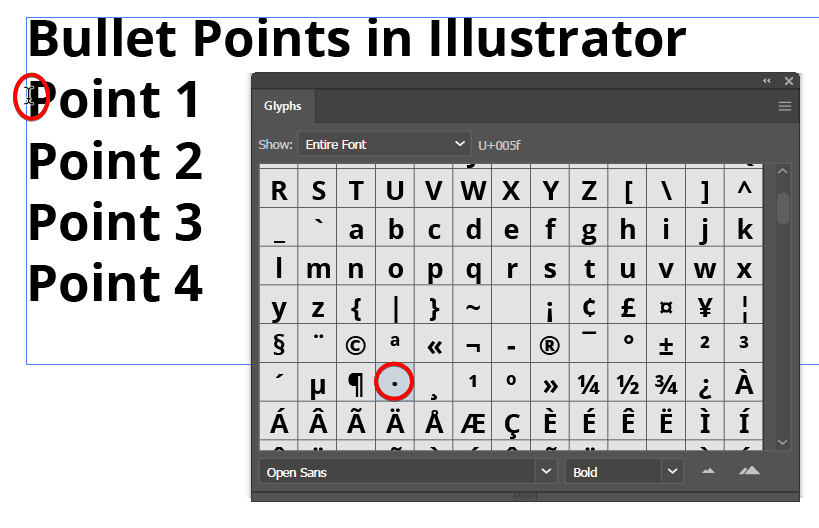
Place the Cursor at the Start of the Line and Add a Glyph
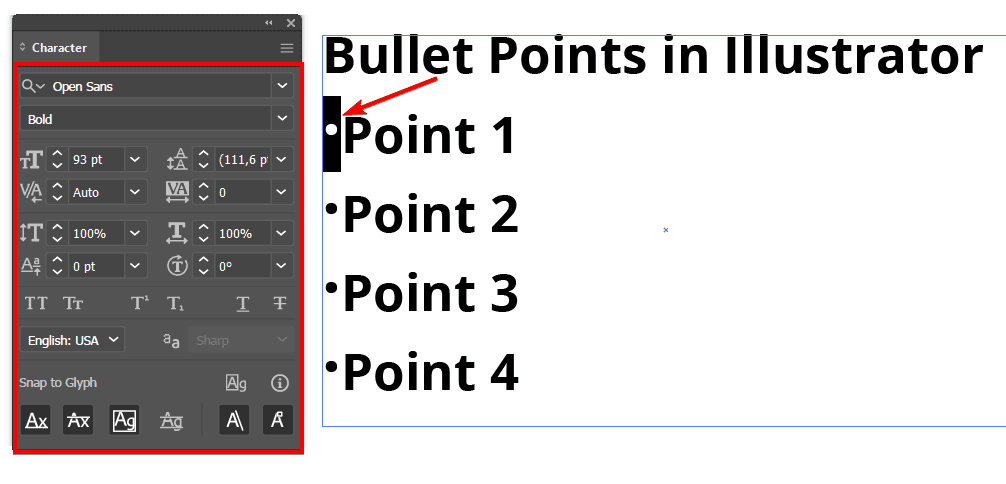
To add a bullet point, place the cursor at the beginning of a line and double-click on the bullet symbol in the Glyphs Panel. It looks like a small black circle. Alternatively, drag and drop the bullet symbol from the Glyphs Panel to the text box.
Repeat the Above Step to Add Multiple Bullet Points
Repeat the same step for each line of text to which you want to add a bullet point. You should have a list of bullet points in your text box.
Customize the Bullet Points Using the Character Panel
To change the font, size, or color of your bullet points, select them and use the Character Panel or the Properties Panel. You can also apply gradients, patterns, or effects to your bullet points using the Appearance Panel.
Method 2: Using the Character Panel
- Add Text to the Canvas Using the Type Tool
- Open the Character Panel From the Window Menu
- Place the Cursor at the Start of the Line and Press Alt + 0149/Option + 8
- Repeat the Step Above to Add Multiple Bullet Points
- Customize the Bullet Points Using the Character Panel
Add Text to the Canvas Using the Type Tool
Create a new document in Illustrator and select the Type Tool from the Toolbar. Click and drag on the artboard to create a text box. Type your text and press Enter to start a new line for each bullet point.

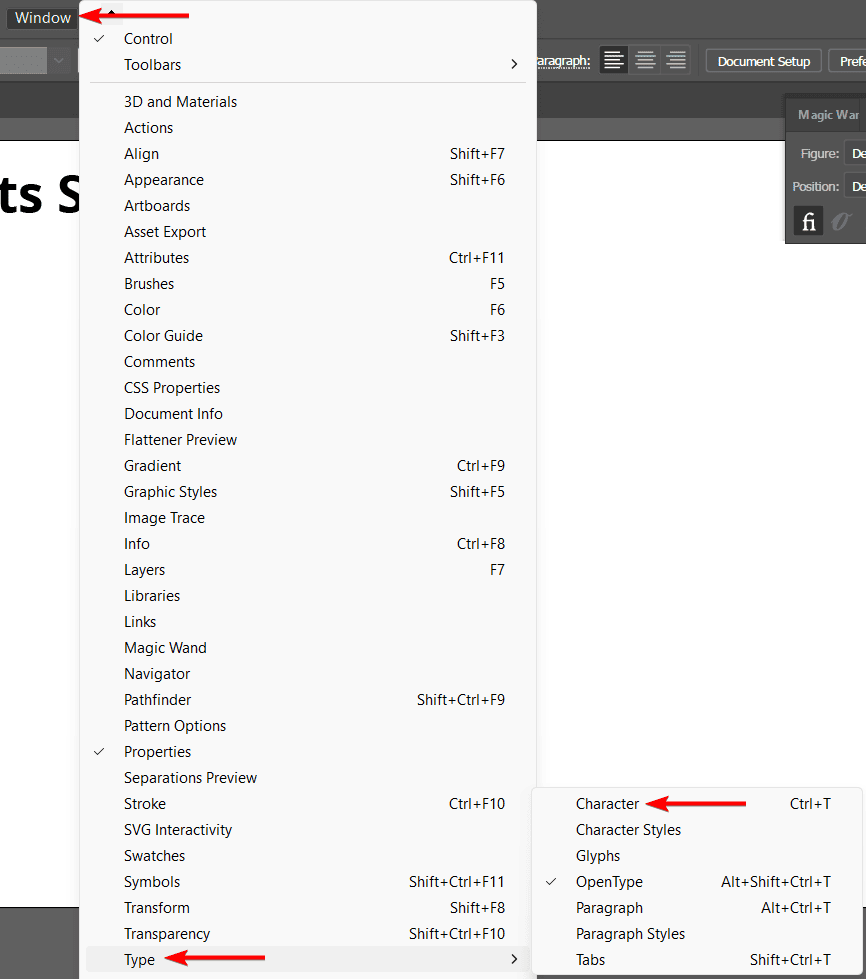
Open the Character Panel From the Window Menu
Select the text and go to the Character Panel. You can access it from the Window menu by going to Window > Type > Character or pressing Control + T on Windows or Command + T on Mac. In the Character Panel, you will see a set of options and Tools related to your text.
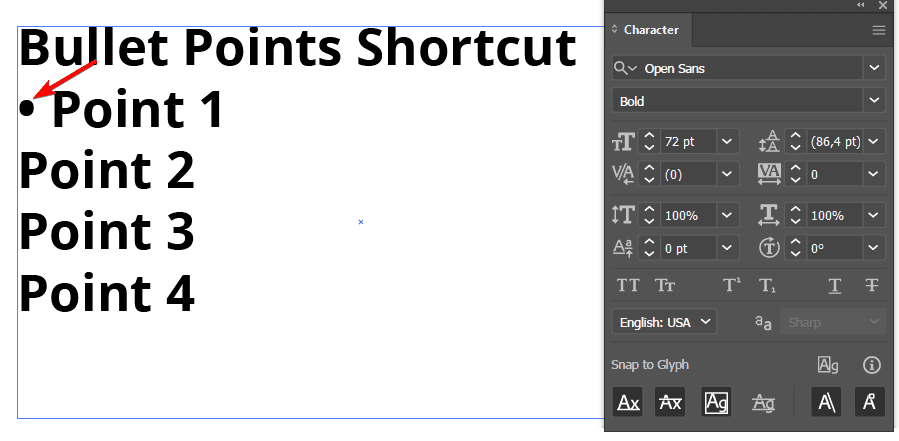
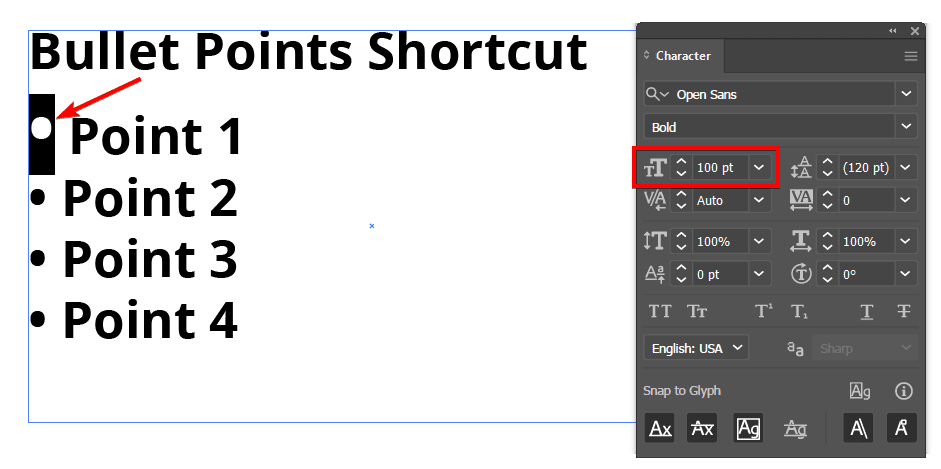
Place the Cursor at the Start of the Line and Press Alt + 0149/Option + 8
To add a bullet point, place the cursor at the beginning of a line and press Alt + 0149 on Windows or Option + 8 on Mac. This will insert a bullet symbol using the ASCII code. Alternatively, copy and paste the bullet symbol from another source, such as a web page or a word processor.
Repeat the Step Above to Add Multiple Bullet Points
Repeat the same step for each line of text that you want to add a bullet point to. You should have a list of bullet points in your text box.

Customize the Bullet Points Using the Character Panel
To change the font, size, or color of your bullet points, select them and use the Character Panel or the Properties Panel. You can also apply gradients, patterns, or effects to your bullet points using the Appearance Panel.
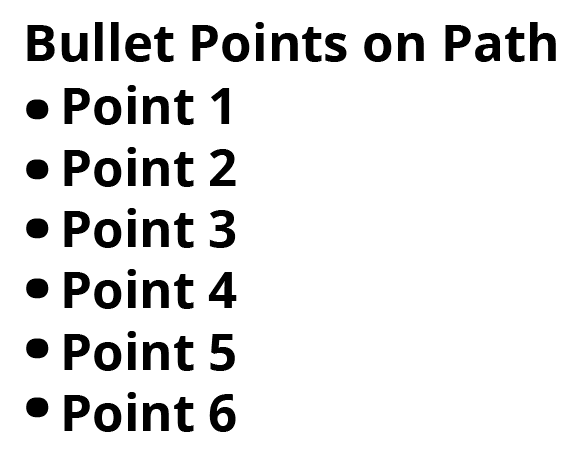
Method 3: Using the Type on a Path Tool
- Select the Line Tool and Draw a Straight Vertical Line on the Canvas
- Select the Type on a Path Tool and Click on the Line to Start a Text Box
- Add Bullet Points Using Alt + 0149/Option + 8
- Select All The Bullet Points By Pressing Control/Command + A
- Open the Character Panel and Increase the Tracking
- Add Your Text and Customize the Bullet Points
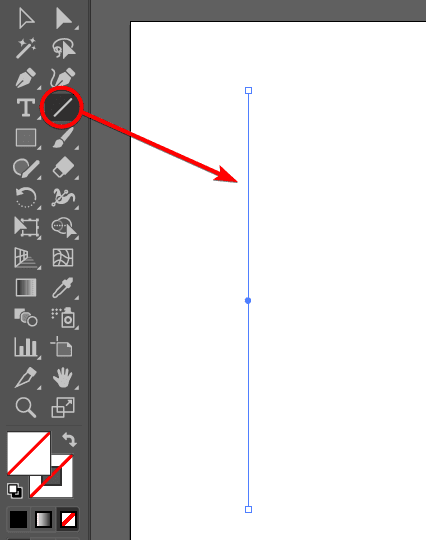
Select the Line Tool and Draw a Straight Vertical Line on the Canvas
Create a new document in Illustrator and select the Line Tool from the Toolbar. Click and drag on the artboard to draw a vertical line. Hold the Shift key to constrain the proportions and make a straight line.
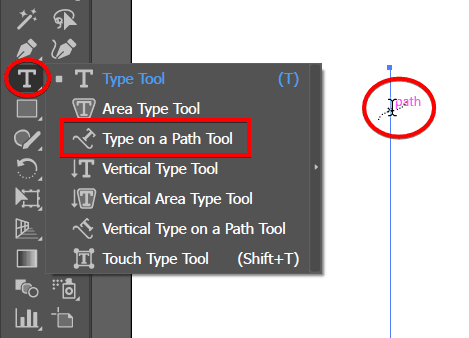
Select the Type on a Path Tool and Click on the Line to Start a Text Box
Select the Type on a Path Tool from the Toolbar. It is hidden under the Type Tool. Click on the line to create a text path.
Add Bullet Points Using Alt + 0149/Option + 8
To add a bullet point, press Alt + 0149 on Windows or Option + 8 on Mac. This will insert a bullet symbol using the ASCII code. Alternatively, copy and paste the bullet symbol from another source, such as a web page or a word processor.
Keep typing this to add several bullet points going down the line.

Select All The Bullet Points By Pressing Control/Command + A
Next, highlight all the bullet points by pressing Control + A on Windows or Command + A on Mac. Since the bullet points are so close together, you must spread them out slightly.
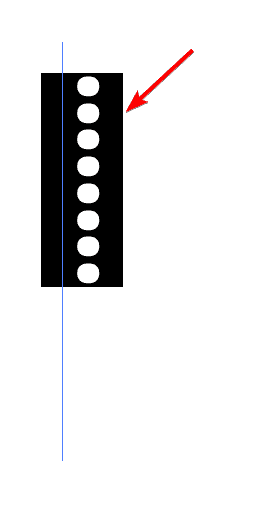
Open the Character Panel and Increase the Tracking
Open the Character Panel by going to Window > Type > Character. Then, increase the Tracking by increasing the value next to the VA icon. This will create larger spaces between the bullet points.
Add Your Text and Customize the Bullet Points
You can now add text in a separate text box and change the font, size, or color of your bullet points, select them, and use the Character Panel or the Properties Panel. You can also apply gradients, patterns, or effects to your bullet points using the Appearance Panel.
👍 Support Us: Subscribe to our channel and help us continue providing these tutorials.
🌟 Regular Updates: We publish how-to videos for Adobe Illustrator regularly!
🔧 Expert Guidance: Learn Illustrator from our professionals and uncover exclusive tips!
