
To Italicize text in Illustrator, you can usually select the Italics option under the Font Style drop-down menu in the Options Bar. However, not all fonts have an italics variation. Here are the three top methods to use when creating italicized text.
- Use the Italics Font Style in the Character Panel if the font has an Italics option
- Use the Shear Tool to angle the text at 45 degrees
- Use the Free Transform Tool for complete control over the slant degree
Each method creates italics but with varying degrees of control over the result. Here is a breakdown of each technique.
Method 1: Using the Character Panel
- Add Text to the Canvas Using the Type Tool
- Highlight the Text and Open the Character Panel
- Click on the Font Style Drop-Down Menu and Select Italic
Add Text to the Canvas Using the Type Tool
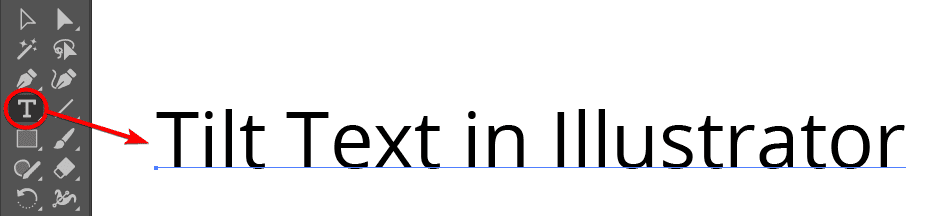
Create a new document in Illustrator and select the Type Tool from the Toolbar. Click and drag on the artboard to create a text box and type in your desired text. Set the font you want to use in the Options Bar.

Highlight the Text and Open the Character Panel
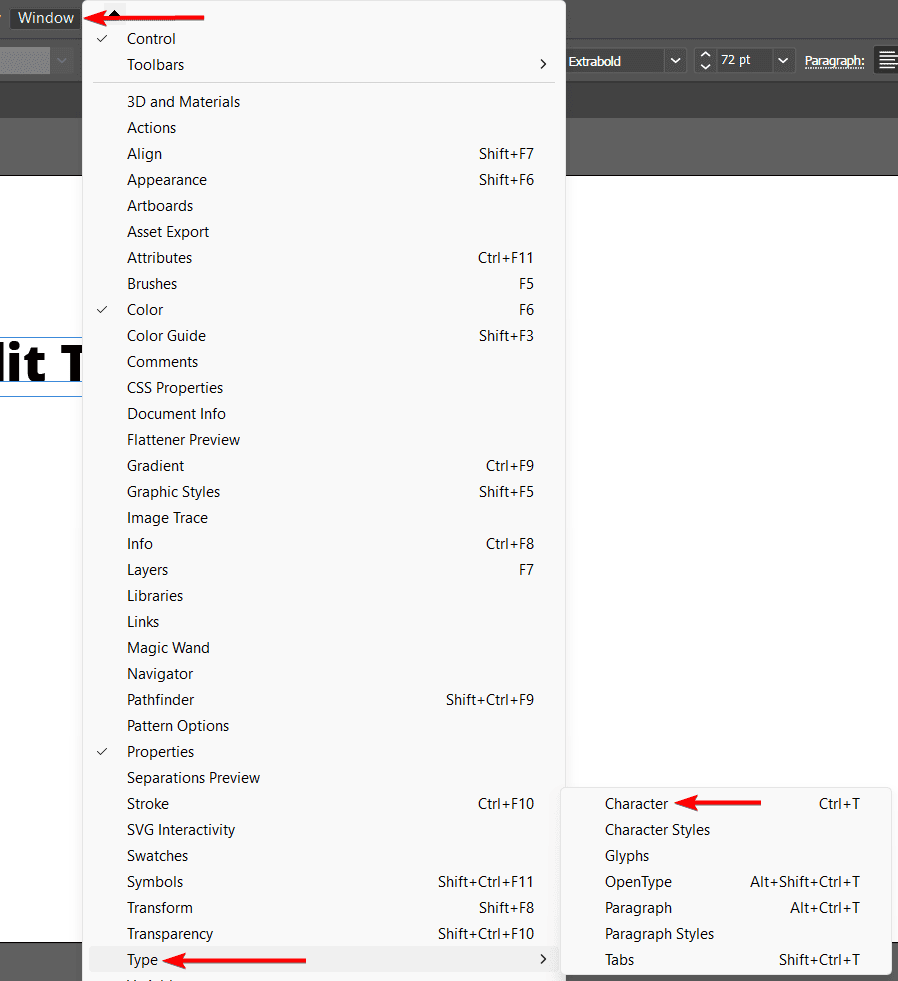
Select the text and go to the Character Panel. You can access it by going to Window > Type > Character or pressing Control + T on Windows or Command + T on Mac. In the Character Panel, you will see a set of options and tools related to your text.
Click on the Font Style Drop-Down Menu and Select Italic
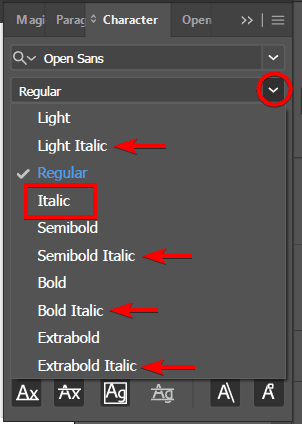
To italicize the text, click on the Font Style drop-down menu and select the Italic option if the font has the option available. There may be multiple Italic options for some fonts.
Your text will change to italics on the canvas.

Method 2: Using the Shear Tool
- Activate the Text Tool and Type the Text on the Canvas
- Go to Object > Transform > Shear
- Set the Angle to 45 Degrees
Activate the Text Tool and Type the Text on the Canvas
Open your document in Illustrator and select the Type Tool from the Toolbar. Click on the canvas and type in your desired text. Select the font from the Options Bar and format it as needed.
Go to Object > Transform > Shear
Ensure the text box is selected and go to Object > Transform > Shear to open the tilt options.
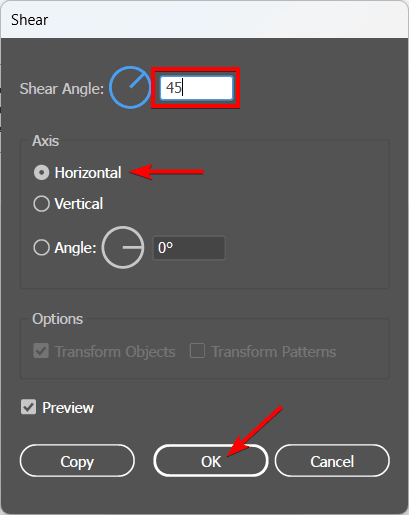
Set the Angle to 45 Degrees
In the Shear Tool options, set the Angle to 45 degrees. Ensure that Horizontal is enabled under Axis and click OK to confirm the settings. You can also adjust the angle depending on how tilted you want the text to be.
You will now have tilted text on the canvas that replicates Italics.

Method 3: Using the Free Transform Tool
- Add Text Using the Type Tool
- Activate the Free Transform Tool
- Drag the Top Middle Anchor to the Right
Add Text Using the Type Tool
First, activate the Type Tool from the Toolbar. Click once on the canvas to add a text box and type your desired text.

Activate the Free Transform Tool
Select the text box and activate the Free Transform Tool from the Toolbar. You can also press E for a shortcut. Ensure it’s set to Free Transform in the floating panel.
Drag the Top Middle Anchor to the Right
To italicize the text, hover over the middle anchor point at the top of the bounding box until you see a four-point arrow. Click and drag to the right to distort the text. You can skew the text as much as you’d like to create an italic effect. You can also drag the anchor point upward to create a slimmer text effect.

You will see the text change from regular to italic on your artboard based on how much you tilt the text.
👍 Support Us: Subscribe to our channel and help us continue providing these tutorials.
🌟 Regular Updates: We publish how-to videos for Adobe Illustrator regularly!
🔧 Expert Guidance: Learn Illustrator from our professionals and uncover exclusive tips!
