
There are several ways to make a heart shape in Illustrator, depending on how you want to customize the shape. Here are my top three ways:
- Use the Rounded Rectangle Tool and the Shapebuilder to create a perfect heart shape.
- Use the Pen Tool to create a unique and custom heart shape
- Use the Rectangle Tool and the Anchor Point Tool to create a smoother heart shape
All the methods are easy once you follow these step by step processes. Once you have a basic heart shape, you can follow the last section to customize the heart shape as you’d like.
Method 1: Using the Rounded Rectangle Tool
- Select the Rounded Rectangle Tool and Create a Rectangle
- Select the Curvature Point and Curve the Edges
- Go to Object > Transform > Rotate to Turn the Shape 45 Degrees
- Duplicate and Flip the Shape to Create an Overlapping V-Shape
- Select Both Shapes and Click on the Shape Builder Tool
- Delete the Two Bottom Sections
- Use the Shape Builder to Combine the Remaining Shapes Into One
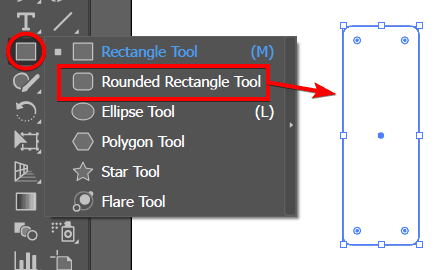
Select the Rounded Rectangle Tool and Create a Rectangle
Select the Rounded Rectangle Tool from the Toolbar and create a rectangle on the canvas by clicking and dragging out.
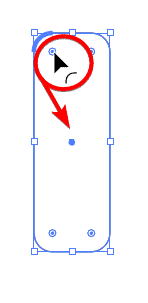
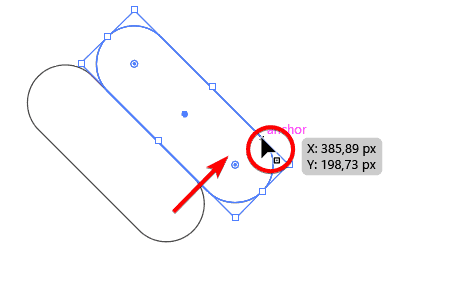
Select the Curvature Point and Curve the Edges
Select one of the curvature points inside the shape and drag it inward to curve the short sides of the rectangle into a circle shape.
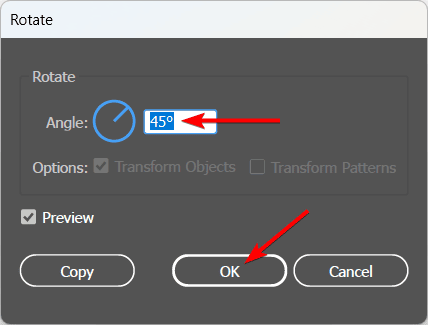
Go to Object > Transform > Rotate to Turn the Shape 45 Degrees
Select the rectangle and go to Object > Transform > Rotate.
Enter 45 degrees in the angle field and click OK to rotate the rectangle. Alternatively, you can use the Free Transform Tool to rotate the rectangle manually.
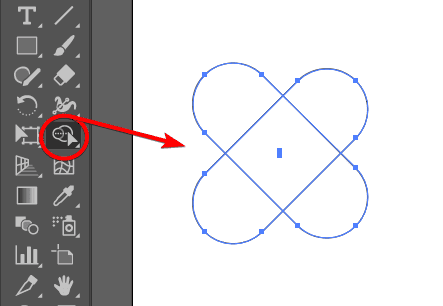
Duplicate and Flip the Shape to Create an Overlapping Crisscross Shape
Duplicate the rectangle by holding the Alt key on Windows or the Option key on Mac and dragging out from the first object.
Then, flip the second shape by going to Object > Transform > Reflect.
Select the Vertical option, set it to 90 degrees, and click OK.

You should have two overlapping shapes that form a crisscross shape.

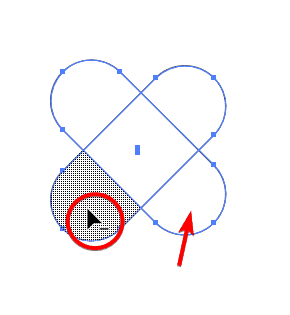
Select Both Shapes and Click on the Shape Builder Tool
Select both shapes and activate the Shape Builder Tool. You can press Shift + M to activate the tool.
Delete the Two Bottom Sections
With the tool active, hold Alt on Windows or Option on Mac and click on the two bottom sections to remove them from the shape. You will start to see the heart shape now.
Use the Shape Builder to Combine the Remaining Shapes Into One
Next, click and drag through the shapes with the Shape Builder Tool to combine them.
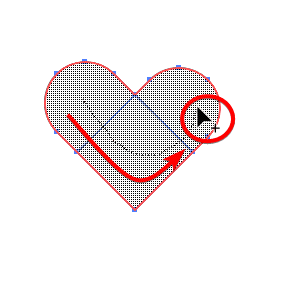
You now have a customizable heart shape.

Method 2: Using the Pen Tool
- Select the Pen Tool and Add an Anchor Point
- Click New Anchor Points to Create Straight Lines in a Heart Shape
- Select the Anchor Point Tool and Curve the Lines
- Use the Direct Selection Tool to Clean up the Shape
Select the Pen Tool and Add an Anchor Point
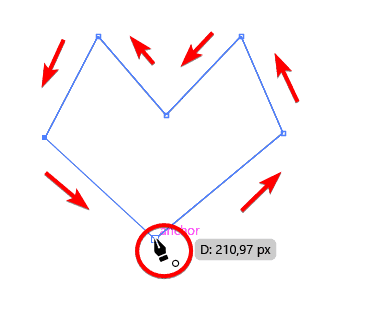
First, select the Pen Tool (P) from the Toolbar. Click once on the artboard to create the first anchor point of your heart shape. This will be the bottom tip of your heart.

Click New Anchor Points to Create Straight Lines in a Heart Shape
You can use the Pen Tool in the manner that works best for you by clicking to add new anchor points, holding the mouse down, and dragging to create curved lines. If you are new to the tool, I recommend you draw a jagged heart by adding straight-line anchor points. Click back on the first anchor point to close the shape.
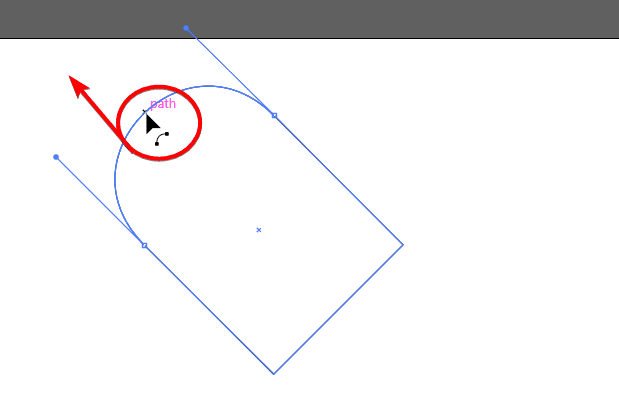
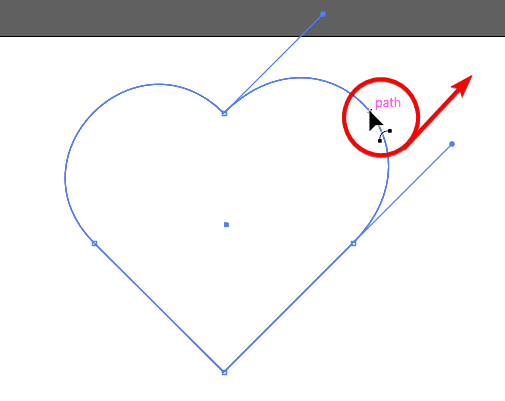
Select the Anchor Point Tool and Curve the Lines
Next, select the Anchor Point Tool found in the fly-out menu under the Pen Tool.
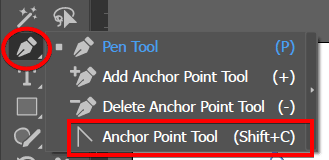
You can now click on any anchor point and drag it around to curve the lines in the areas you would like. It may take some practice and a few tries to get the shape how you’d like it.
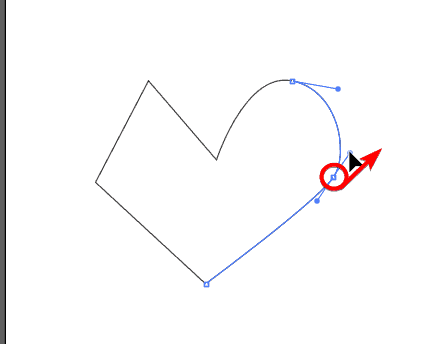
Use the Direct Selection Tool to Clean up the Shape
You can also use the Direct Selection Tool (A) to move anchor points to create the unique heart shape you are after.
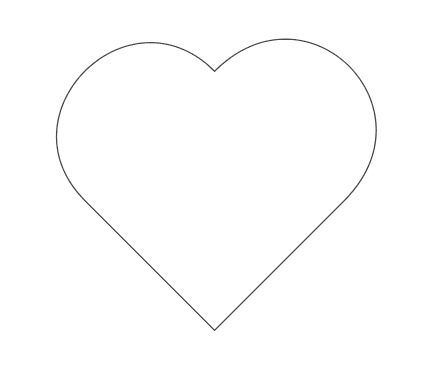
You now have a completely unique heart shape.

Method 3: Using the Rectangle Tool
- Select the Rectangle Tool and Create a Square on the Page
- Rotate the Square to 45 Degrees (Object > Transform > Rotate)
- Activate the Anchor Point Tool and Drag the Top Lines Upwards
Select the Rectangle Tool and Create a Square on the Page
Start by activating the Rectangle Tool from the Toolbar. Click and drag on the artboard to draw a square. Hold the Shift key to constrain the proportions and make a perfect square.

Rotate the Square to 45 Degrees
Next, go to Object > Transform > Rotate.
Then, set the Angle to 45 degrees and click OK.
Activate the Anchor Point Tool and Drag the Top Lines Upwards
Next, select the Anchor Point Tool found in the Pen Tool fly-out menu.
Then, hold Shift and click in the middle of the top left line of the square. Drag the line up and to the left until it creates a curved shape.
Repeat this on the line on the top right, holding Shift and pulling the line up and to the right.
You have now created a heart shape that you can customize as you’d like.
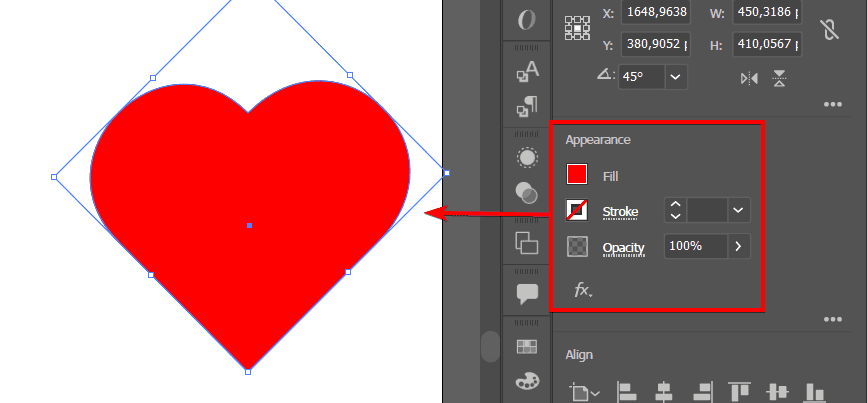
How to Customize Your Heart Shape
To change the color of your heart shape, select it and use the Fill and Stroke options in the Properties Panel or the Color Panel. You can also apply gradients, patterns, or effects to your heart shape using the Appearance Panel.
To resize your heart shape, select it and use the Bounding Box handles to scale it up or down. Hold the Shift key to maintain the proportions. You can also use the Transform Panel to enter the exact width and height values for your heart shape.
To rotate your heart shape, select it and use the Bounding Box handles to rotate it clockwise or counterclockwise. Hold the Shift key to constrain the angle to 45 degrees. You can also use the Transform Panel to enter the exact angle value for your heart shape.

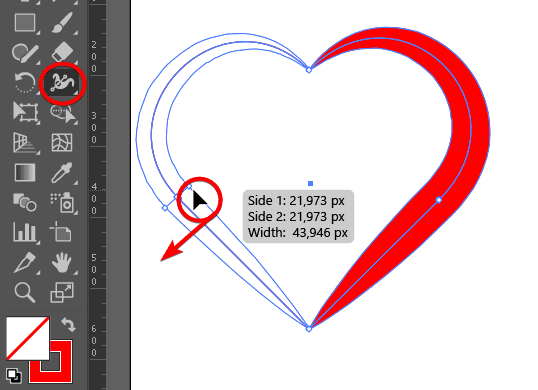
To style your heart shape, select it and use the Stroke Panel to adjust the weight, cap, and corner of your stroke. You can also use the Dashed Line option to create a dotted or dashed outline for your heart shape. You can also use the Width Tool to create a variable-width stroke for your heart shape.
You now have a fully customized heart shape.

👍 Support Us: Subscribe to our channel and help us continue providing these tutorials.
🌟 Regular Updates: We publish how-to videos for Adobe Illustrator regularly!
🔧 Expert Guidance: Learn Illustrator from our professionals and uncover exclusive tips!
