
There are three main methods you can use to create outlines in Illustrator, depending on the result you are looking for.
- Use the Create Outlines Command to turn text into editable paths that can be manipulated further.
- Use the Stroke Panel to adjust the outline around a vector object by adding or changing the width and the color.
- Use the Offset Path Effect to create a layered look to add depth and dimension to your design.
Follow along to learn the three best ways to make and edit outlines.
Method 1: Using the Create Outlines Command
The Create Outlines command is a quick way to convert text or any other object into a vector outline. This allows you to edit the outline as a shape and share the file without worrying about font compatibility. To use this method, follow these steps:
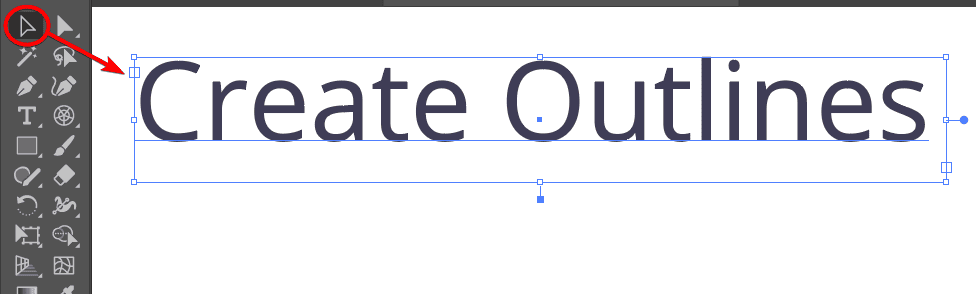
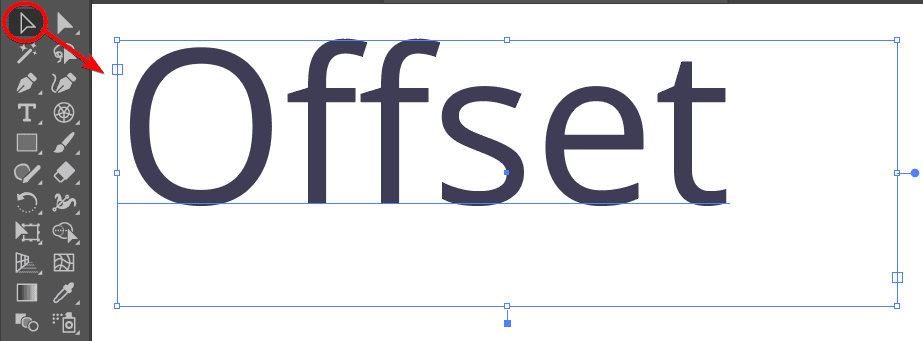
Select the text you want to create an outline for using the Selection Tool (V).
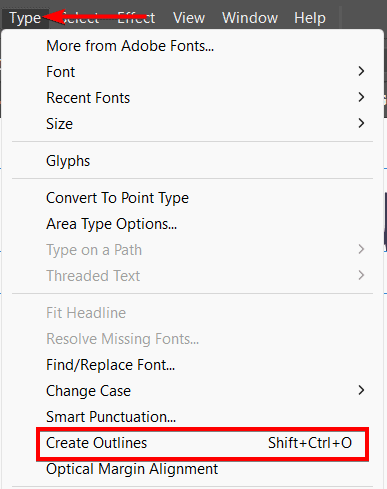
Go to Type > Create Outlines or press Control + Shift + O on Windows or Command + Shift + O on Mac.
Remember: You won’t be able to edit the text after this step, so be sure you’re happy with the text first.
This will convert the text or object into a vector outline. You will see anchor points and paths around the outline once you select the Direct Selection Tool (A).
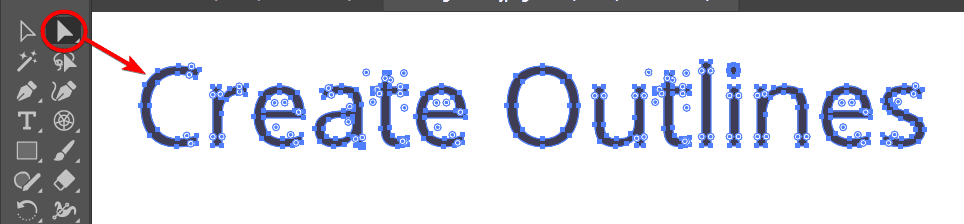
Use the Direct Selection Tool (A) to select and modify the outline. You can change the fill and stroke color, resize, rotate, or distort the outline as you wish.

Method 2: Using the Stroke Panel
The Stroke panel is handy for creating and adjusting outlines around any object. You can use it to change the weight, color, alignment, and corner style of the outline. To use this method, follow these steps:
Select the object for which you want to create an outline using the Selection Tool (V).
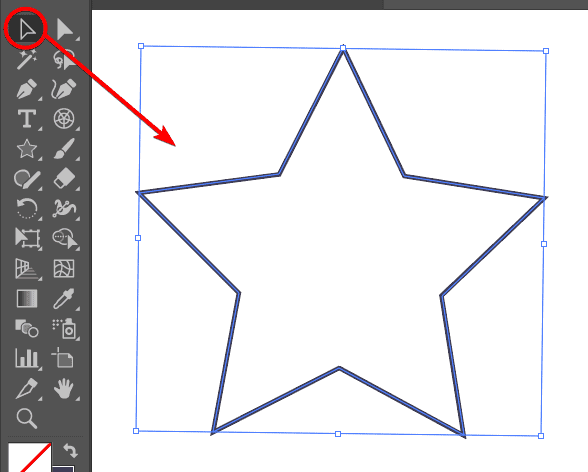
Go to Window > Stroke or press Control + F10 on Windows or Command + F10 on Mac to open the Stroke panel. You will see various options for the outline.
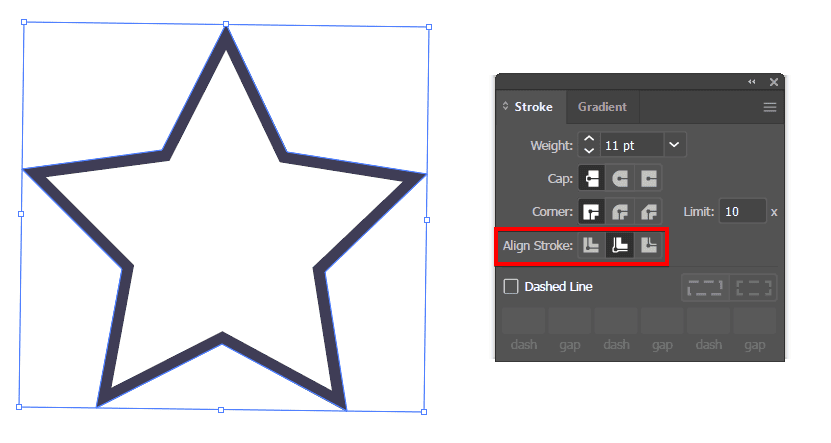
Use the Weight input to set the thickness of the outline. You can type a value or use the up and down arrows to increase or decrease the weight.

Use the Align Stroke buttons to set the position of the outline. You can choose to align the outline to the center, inside or outside of the object.
Use the Corner buttons to set the style of the corners. You can choose to have rounded, inset, or beveled corners.

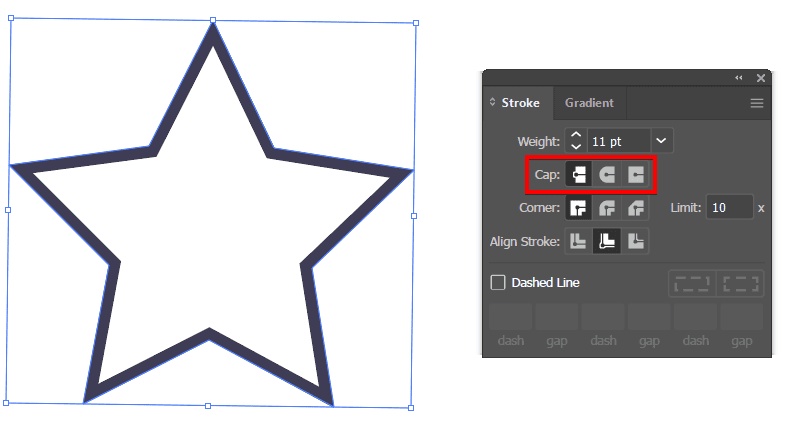
Use the Cap buttons to set the style of the ends. You can choose to have butt, round, or projecting ends.
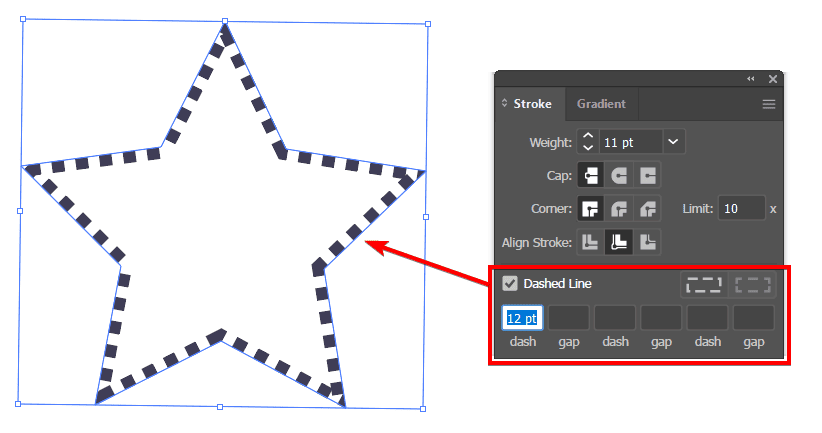
Use the Dashed Line option to create a dashed or dotted outline. You can specify the dash and gap length, as well as the dash pattern.
Method 3: Using the Offset Path Effect
The Offset Path effect is useful for creating multiple outlines around an object. You can use it to make a layered or 3D effect or add depth and dimension to your design. To use this method, follow these steps:
Select the text you want to create an outline for with the Selection Tool (V).
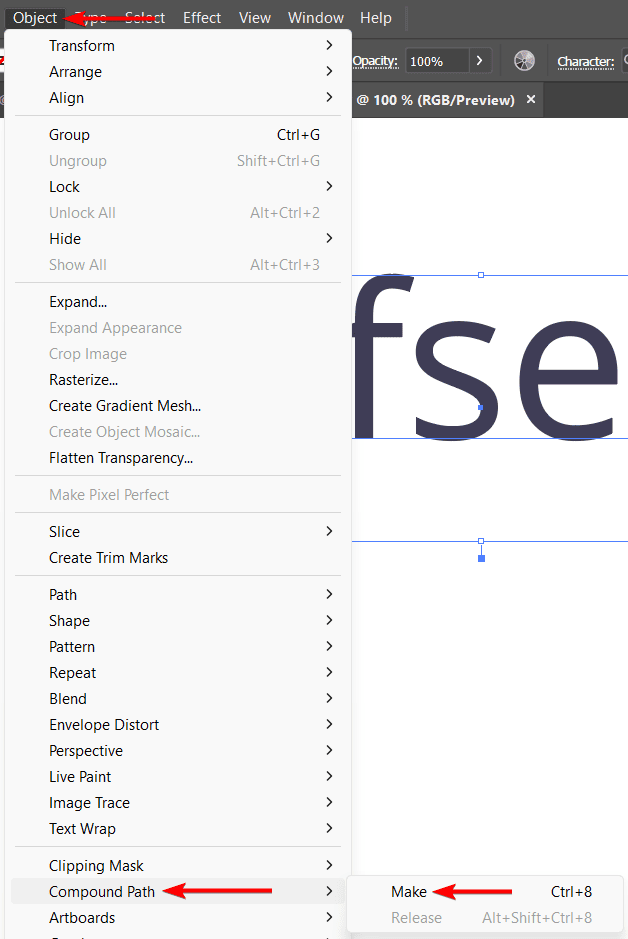
Turn the text into an outline by pressing Shift + Control + O on Windows or Shift + Command + O on Mac. Then, turn the text into a compound path by going to Object > Compound Path > Make or pressing Control + 8 on Windows or Command + 8 on Mac.
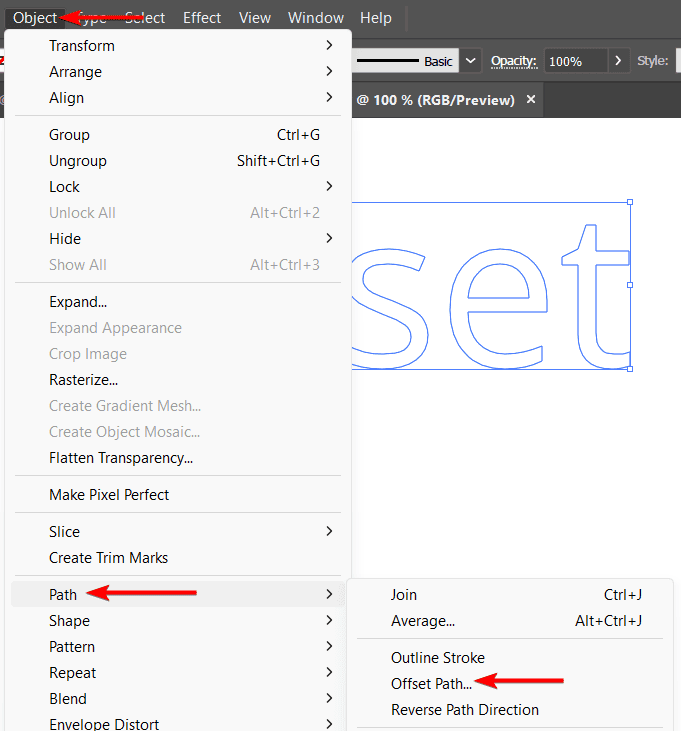
Go to Object > Path > Offset Path. This will open the Offset Path dialog box.
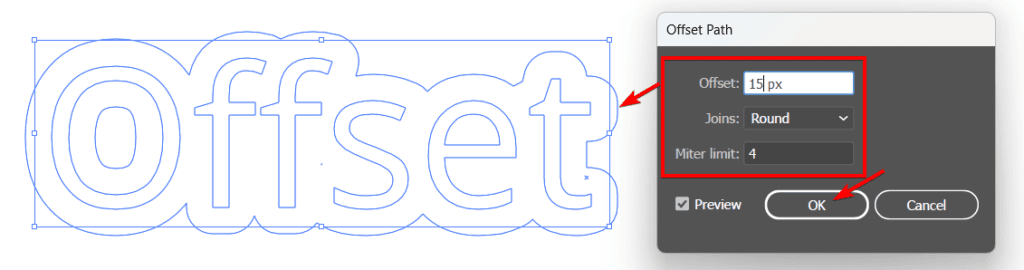
- Use the Offset input to set the distance of the outline from the object. You can type a positive or negative value or use the up and down arrows to increase or decrease the offset.
- Use the Joins buttons to set the style of the corners. You can choose to have miter, round, or bevel joins.
- Use the Miter Limit input to set the maximum length of the miter join. You can type a value or use the up and down arrows to increase or decrease the miter limit.
Click OK to apply the effect.
You will see a new outline around the object. Next, select each path and use the Swatches or Color Panel to add different colors to each path.

👍 Support Us: Subscribe to our channel and help us continue providing these tutorials.
🌟 Regular Updates: We publish how-to videos for Adobe Illustrator regularly!
🔧 Expert Guidance: Learn Illustrator from our professionals and uncover exclusive tips!
