
There are three main ways to make an arrow in Illustrator.
- Use basic shapes to create a uniform but simple arrow
- Use the Pen Tool for the most customizable method
- Use the stroke Panel for the quickest method to create an arrow
The method you choose to create an arrow depends on how much control you want over the final result. Here is a breakdown of each technique.
Method 1: Using Basic Shapes to Make an Arrow in Illustrator
- Select the Rectangle Tool And Draw A Rectangle
- Select the Polygon Tool and Draw a Triangle
- Go to Object > Transform > Rotate and Set it to 90 Degrees
- Align the Triangle and Rectangle Using the Align Panel
- Combine the Shapes Using the Unite Option in the Pathfinder
- Customize the Arrow by Changing the Fill and Stroke in the Properties Panel
Select the Rectangle Tool And Draw A Rectangle
Create a new document in Illustrator and select the Rectangle Tool from the Toolbar. Click and drag on the artboard to draw a rectangle. This will be the shaft of your arrow.
Select the Polygon Tool and Draw a Triangle
Select the Polygon Tool from the Toolbar.
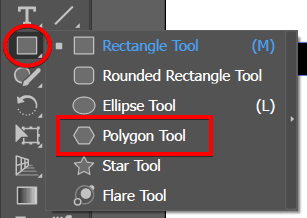
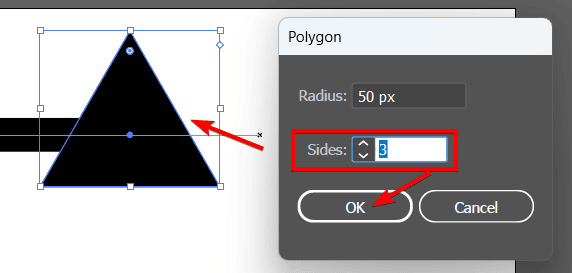
Click once on the artboard. A dialog box will appear where you can set the number of sides and the radius of your polygon.
Set the number of sides to 3 and the radius to a value that matches the width of your rectangle. Click OK to create a triangle. This will be the head of your arrow.
Go to Object > Transform > Rotate and Set it to 90 Degrees
Select the triangle and go to Object > Transform > Rotate.
Enter 90 or -90 degrees in the angle field, depending on which way you want it to face, and click OK to rotate the triangle clockwise. Alternatively, you can manually turn the triangle using the Free Transform Tool.

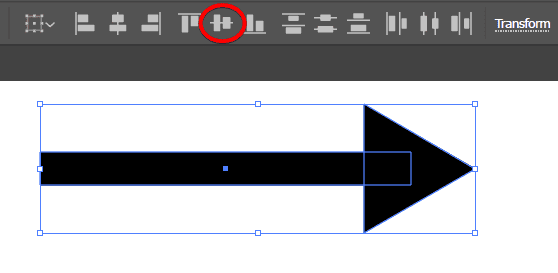
Align the Triangle and Rectangle Using the Align Panel
Move the triangle to the right end (or left end) of the rectangle and align them using the Vertical Align Center options in the Options Bar. You can also use the arrow keys on your keyboard to nudge the triangle into place.
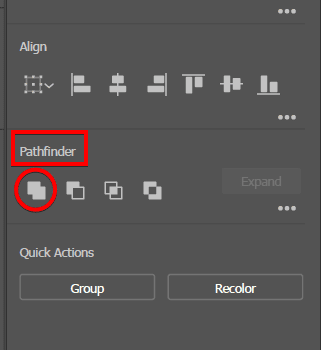
Combine the Shapes Using the Unite Option in the Pathfinder
Select both the rectangle and the triangle and find the Pathfinder section near the bottom of the Properties Panel. Select the Unite option to combine the shapes into one compound shape.
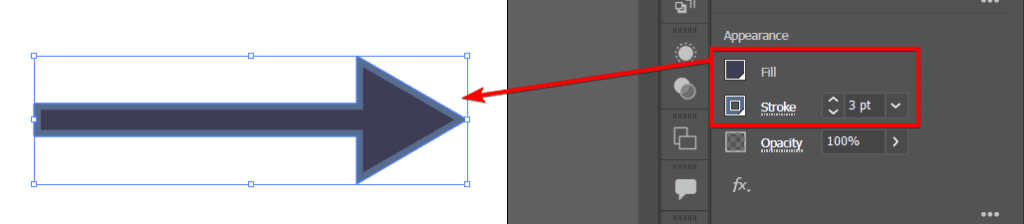
Customize the Arrow by Changing the Fill and Stroke in the Properties Panel
To change the color of your arrow, select it and use the Fill and Stroke options in the Properties Panel or the Color Panel. You can also apply gradients, patterns, or effects to your arrow using the Appearance Panel.
You now have an arrow created using basic shapes.
Method 2: Using the Pen Tool to Create an Arrow in Illustrator
- Select the Pen Tool (P) and Add the First Anchor Point
- Click to Add More Anchor Points in the Shape of an Arrow
- Press Escape or Click on the First Anchor Point to Close the Path
- Select the Direct Selection Tool (A) and Move Anchor Points to Customize the Shape
- Customize the Arrow by Changing the Fill and Stroke
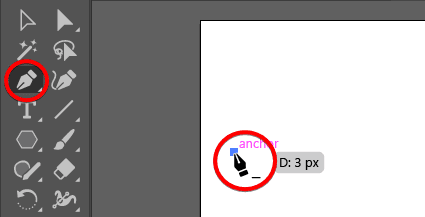
Select the Pen Tool (P) and Add the First Anchor Point
Create a new document in Illustrator and select the Pen Tool (P) from the Toolbar. Click once on the artboard to create the first anchor point of your arrow. This will be the tip of your arrowhead.
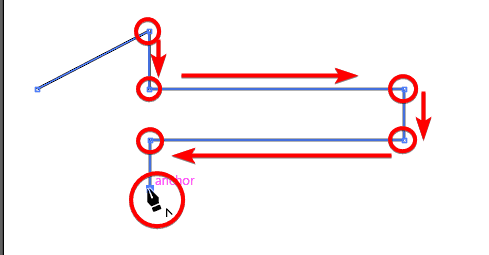
Click to Add More Anchor Points in the Shape of an Arrow
Click on a new spot at an angle above the first point to create the upper edge of the arrowhead. Continue adding straight line points in the shape of an arrow. It doesn’t need to be a perfect arrow at this stage. You can also click and drag to create curved lines if you want a curved arrow.
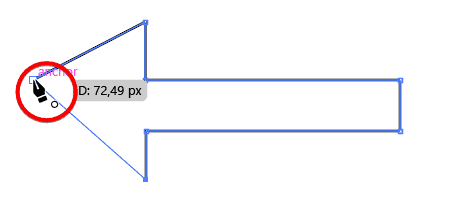
Press Escape or Click on the First Anchor Point to Close the Path
To finish drawing, press Esc on your keyboard or click on the first anchor point to close the path.
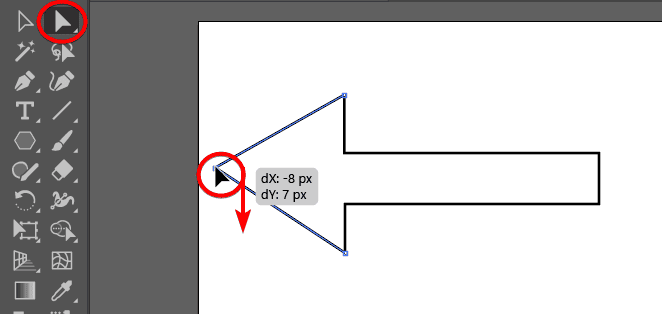
Select the Direct Selection Tool (A) and Move Anchor Points to Customize the Shape
To adjust the shape of your arrow, you can use the Direct Selection Tool (A) to move the anchor points and handles or the Curvature Tool to bend and smooth the segments. You can also use the Pathfinder Panel or the Shape Builder Tool to combine, subtract, or intersect shapes.
Customize the Arrow by Changing the Fill and Stroke
To change the color of your arrow, select it and use the Fill and Stroke options in the Properties Panel or the Color Panel. You can also apply gradients, patterns, or effects to your arrow using the Appearance Panel.
You now have an arrow created using the Pen Tool.
Method 3: Using the Stroke Panel to Make an Arrow in Illustrator
- Select the Line Tool and Draw a Line on the Canvas
- Select the Line and Open the Stroke Panel from the Properties Panel
- Click on the Arrowhead Drop-Downs to Add an Arrowhead(s) to the Line
- Customize the Arrow Using the Properties Panel
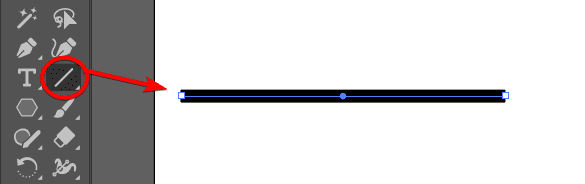
Select the Line Tool and Draw a Line on the Canvas
Create a new document in Illustrator and select the Line Segment Tool from the Toolbar. Click and drag on the artboard to draw a line to create the arrow shaft. Hold in Shift to draw a straight line.
Select the Line and Open the Stroke Panel from the Properties Panel
Select the line and go to the Stroke Panel. You can access it from the Window menu or the Properties Panel. In the Stroke Panel, you can adjust the weight, cap, and corner of your stroke.
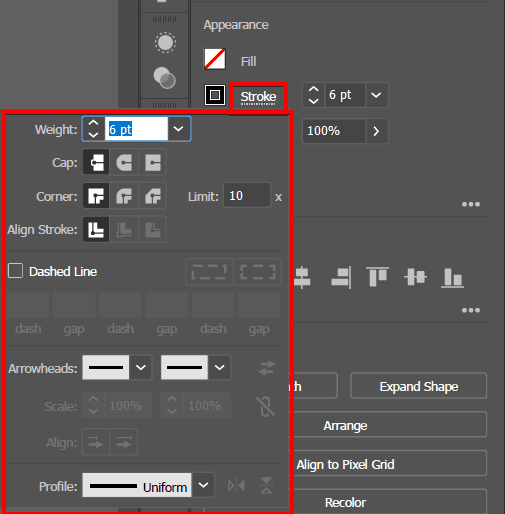
Click on the Arrowhead Drop-Downs to Add an Arrowhead(s) to the Line
To add an arrowhead to your line, click on one of the two drop-down menus labeled Arrowheads. The first one controls the arrowhead at the start of the path, and the second one controls the arrowhead at the end of the path.
To add an arrowhead to the end of your line, click on the second drop-down menu and choose one of the arrowhead presets. You can scroll through the list or use the arrow keys on your keyboard to preview the options. You can also use the Scale slider to adjust the size of your arrowhead relative to your stroke weight.
To add an arrowhead to the start of your line, use the same process as the first drop-down menu. You can add an arrowhead on one side or on both sides.

Customize the Arrow Using the Properties Panel
To change the color of your arrow, select it and use the Fill and Stroke options in the Properties Panel or the Color Panel. You can also apply gradients, patterns, or effects to your arrow using the Appearance Panel.
You now have an arrow created using the Line Tool.
You can use these methods to create various types of arrows for your projects, such as directional, curved, or decorative arrows. Have fun experimenting with different shapes and effects.
👍 Support Us: Subscribe to our channel and help us continue providing these tutorials.
🌟 Regular Updates: We publish how-to videos for Adobe Illustrator regularly!
🔧 Expert Guidance: Learn Illustrator from our professionals and uncover exclusive tips!
