To resize patterns in Illustrator, you can use one of three methods, depending on how much control you want and which elements of the pattern you want to resize.
- You can use the Scale Tool, which only allows you to scale the pattern.
- You can use the Transform Panel, which lets you edit the pattern in other ways, such as rotating it.
- You can use the Pattern Options settings, which enables you to resize specific elements within the pattern.
These methods are simple to use, but you need to ensure you access the tool settings to set it only to affect the pattern and not the object the pattern has been placed in. Here’s how you can scale a pattern.
Method 1: Using the Scale Tool
The Scale tool is a simple way to resize patterns in Illustrator. You can use it to change the size of the pattern without affecting the object itself. To use this method, follow these steps:
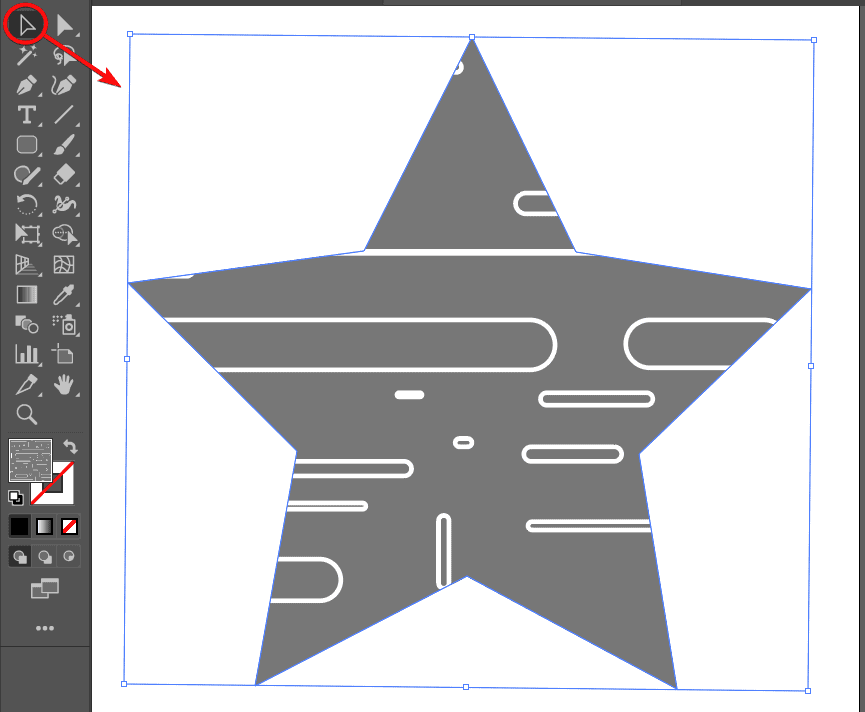
First, select the object that is filled with the pattern by clicking on the Selection Tool (V) and then the object itself.
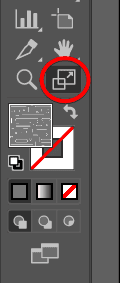
Double-click the Scale Tool in the Tools panel to open the Scale dialog box. You will see various options for scaling the object and the pattern.
Deselect the Transform Objects option and select the Transform Patterns option. This will allow you to scale only the pattern within the object.
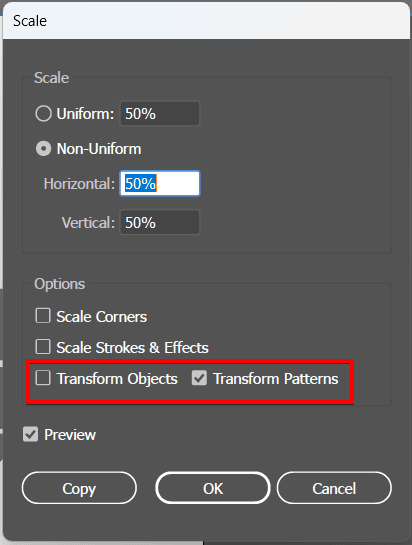
Select Uniform if you want to keep the pattern's aspect ratio, or select Non-uniform to change the width and height separately. Then, adjust the Horizontal and/or Vertical scale percent to change the size of the pattern.
Ensure that Preview is enabled to see the changes happen on the canvas, and click OK when you’ve resized the pattern.
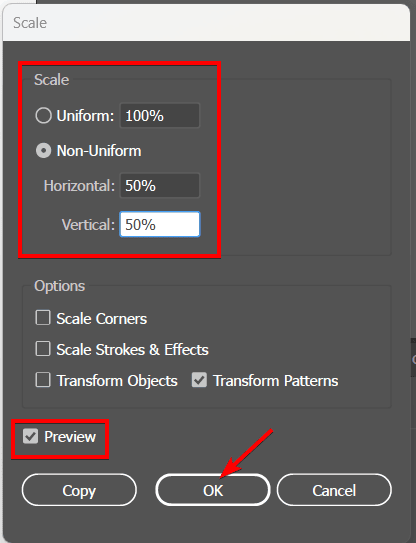
The pattern fill will now be resized without affecting the object.

Method 2: Using the Transform Panel
The Transform panel is a handy tool for resizing patterns in Illustrator using precise values. You can use it to change the size, position, and rotation of the pattern. To use this method, follow these steps:
Use the Selection Tool (V) to select the object that has the pattern fill inside it.

Go to Window > Transform or press Shift + F8 to open the Transform panel. You will see various options for transforming the object and the pattern.
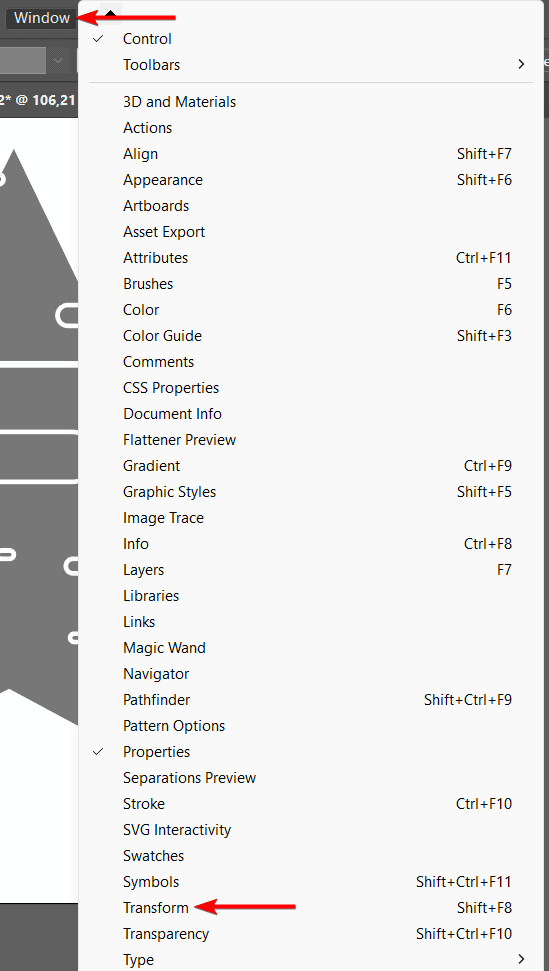
Click on the hamburger menu icon at the top of the panel and select Transform Pattern Only.
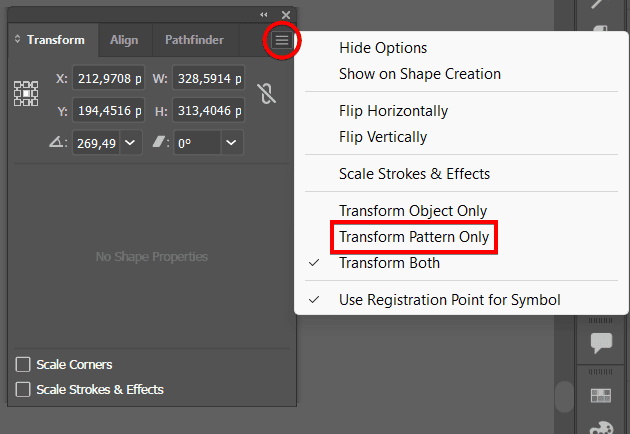
Use the Width and Height inputs to set the size of the pattern relative to the object. You can type a value or use the up and down arrows to increase or decrease the size.
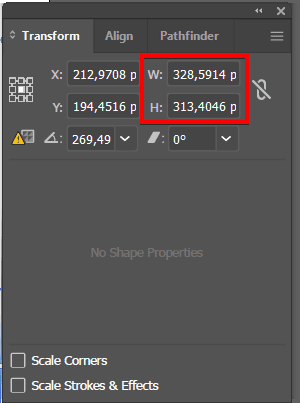
Method 3: Using the Pattern Options Panel
The Pattern Options panel is a helpful way to resize patterns in Illustrator using a visual interface. You can use it to change the size, spacing, tile type, and alignment of the pattern. To use this method, follow these steps:
Select the object using the Selection Tool (V) in the Tool panel.

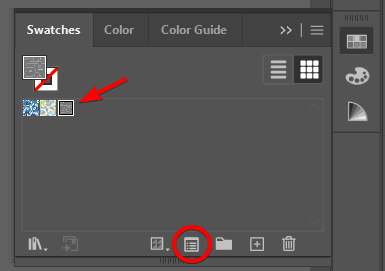
Go to the Swatches panel, ensure the pattern swatch is selected, and click on the Edit Pattern button.
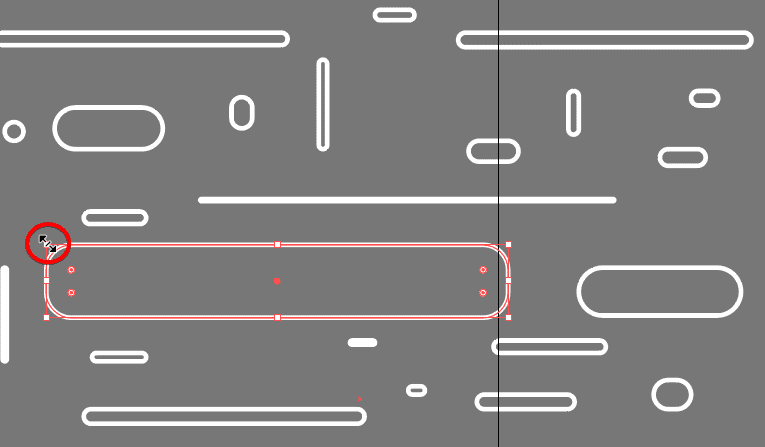
You can now select objects within the pattern and resize them by dragging the bounding box.
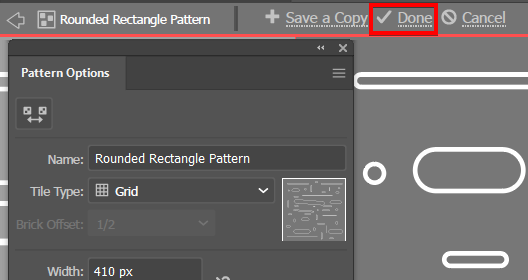
You can also use the Width and Height inputs to set the size of the pattern tile. You can type a value or use the up and down arrows to increase or decrease the size. You can edit the other settings as needed and click Done to confirm the changes.
You will now have resized the pattern within the shape.


