
Krita is a digital painting software that offers a variety of tools and techniques for creating digital art, whether it’s painting from scratch or editing images. One technique that is useful to learn in Krita is blurring. Using the blur filters, you can create depth, add texture, and give pictures a softer, more natural feel.
You can blur an entire layer of brush strokes you’ve painted or blur a selection on an image to emphasize certain areas of an image. I will show you how to use the blur filters to create both of these effects in your digital artwork.
Table of Contents
How to Blur: Quick Overview
- Select the layer you want to blur
- Add a Blur Filter by going to Filter > Blur
- Adjust the Blur Filter settings
- Apply the Blur
- Repeat if needed and check the result
Alternatively, you can blur a selected part of your image, such as a background.
- Create a selection around part of your image
- Copy the selection onto a new layer
- Select the background layer
- Add a Blur Filter
- Adjust the Blur Filter settings and apply the blur
How to Blur: Step by Step
Select the Layer You Want to Blur
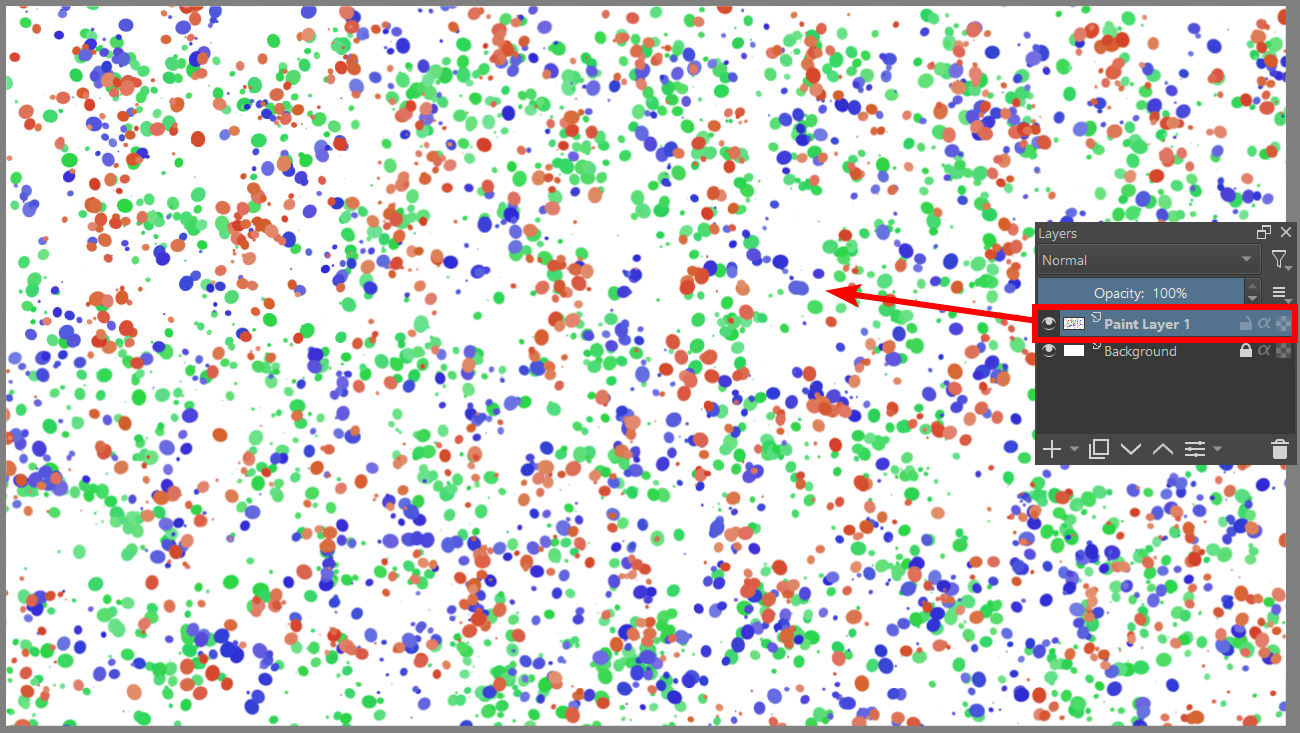
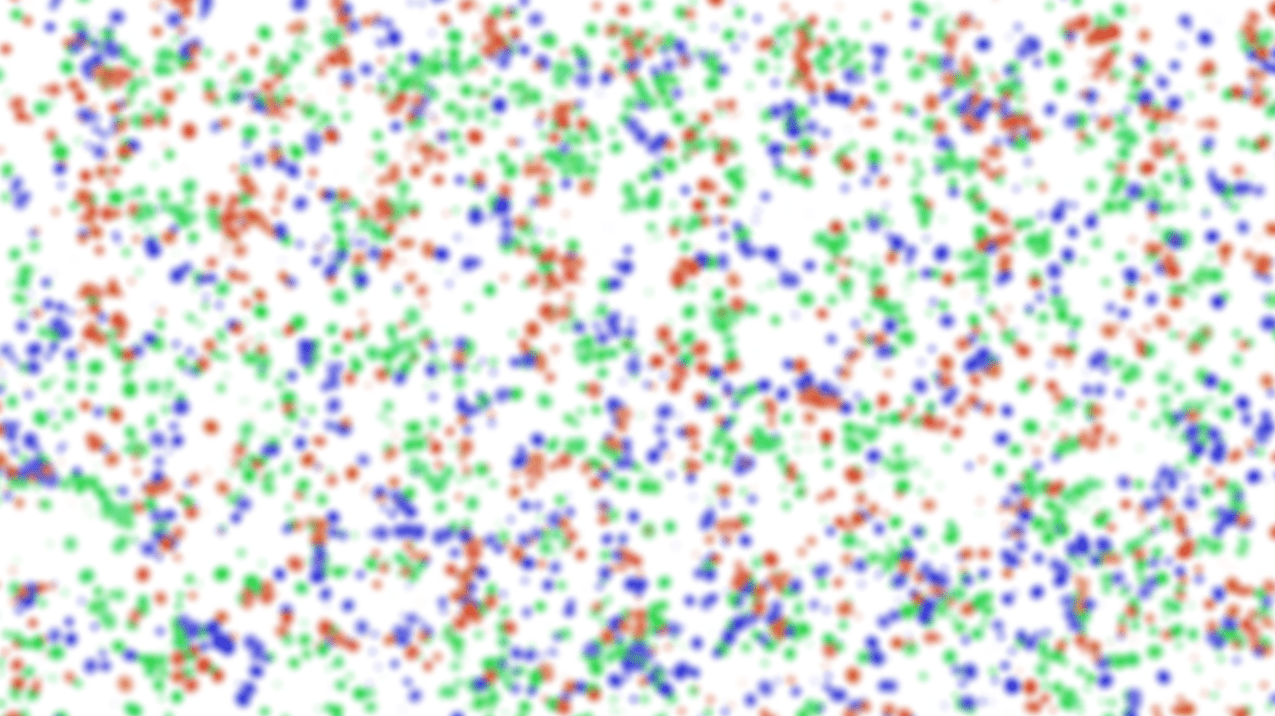
To blur an image or a painting you’ve created in Krita, you must select the layer you want to work with. You can either select an image layer or the paint layer containing the brush strokes you want to blur. For instance, I want to blur the paint spots to create a soft background, so I will select the paint layer.
Apply the Blur Filter
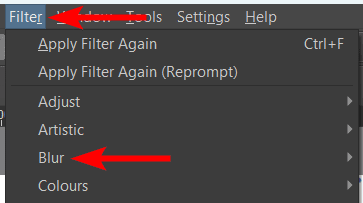
To apply the blur filter, open the Filter menu in the top menu bar and click on Blur.
Choose a Blur Type
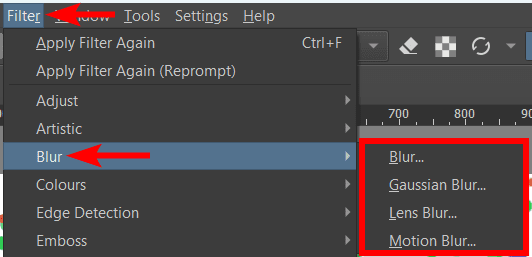
Krita offers different blur filters you can use in your artwork, such as Blur, Gaussian Blur, Lens Blur, and Motion Blur. Each filter creates a slightly different result, which you can test out. However, here is how each filter works.
Blur: This is the standard blur filter that creates a regular blur over the layer
Gaussian Blur: This allows you to set the vertical and horizontal blur amount while reducing the noise in an image. This blur option creates a softer and more accurate blur
Lens Blur: The Lens Blur option creates the effect of depth of field and bokeh as if the image was taken from a professional SLR camera. This filter creates a realistic blur effect
Motion Blur: This option lets you create the illusion of motion in the image by blurring elements in a predetermined direction. You can use this filter to create the feel of fast-moving objects in a photo or drawing
Choose the type of blur that best suits your needs and move to the next step to adjust the settings. For this example, I will use the standard Blur Filter.
Adjust the Blur Settings

The settings differ depending on the type of blur filter you choose. However, the options are relatively straightforward. For the Blur Filter, use the first two sliders to determine the amount of horizontal and vertical blur, which you can keep the same if you’d like.
Then, use the strength slider to increase or reduce the amount of blur and set the angle as you’d like. You can also change the shape of the blur between a Circle and a Rectangle.
Check the box next to Preview at the bottom to see the changes on your image or paint layer as you adjust the settings.
Apply the Blur
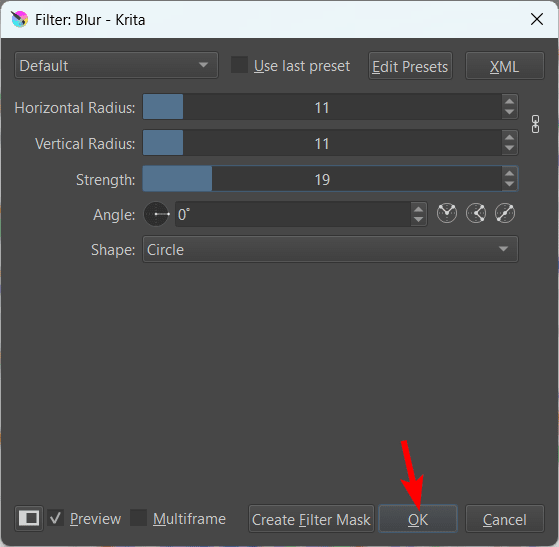
After you have adjusted the settings as needed, click OK to apply the blur effect to your image or paint layer.
Repeat as Needed and Check the Result
If you’d like, you can repeat the blurring process to achieve the desired effect if you want to add even more blur. You aren’t limited to only adding one blur filter to a layer. Once you are happy with the blur effect, you will have a blurred layer on your canvas.
Create a Selection on Your Image
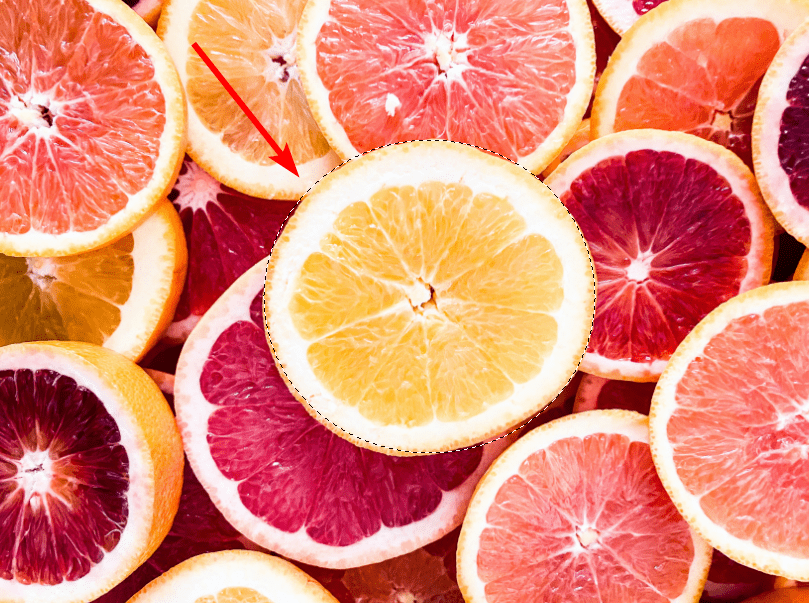
If you only want to blur parts of an image, such as blurring the background to keep one object in focus, you can do this using a few extra steps. First, use one of the selection tools to create a selection around your object.
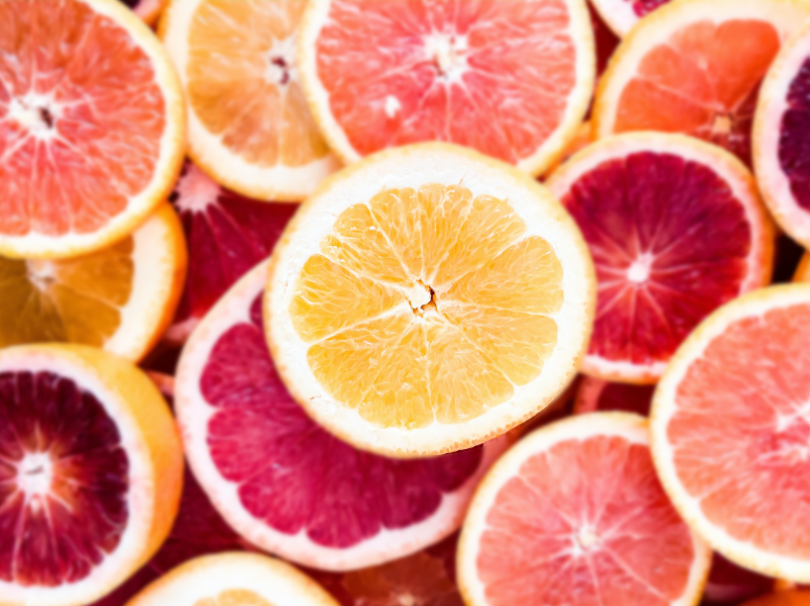
I used the Elliptical Selection Tool by pressing J and made a selection around one of the orange slices.
Copy the Selection Onto a New Layer
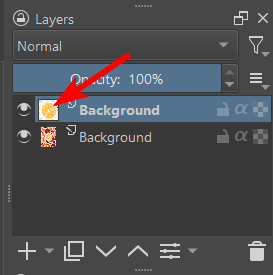
Now, to ensure I keep the selected area sharp and in focus, I need to copy it onto a new layer, so the blur will only affect the background. I can do this by pressing Control + C and then Control + V on Windows or Command + C and then Command + V on Mac.
You will see the selection is added to a new layer in the layers panel. Remove the selection from the image by pressing Control + Shift + A on Windows or Command + Shift + A on Mac.
Select the Background Layer
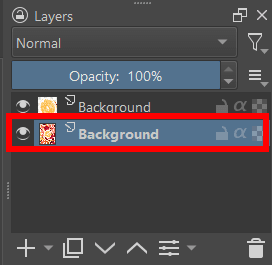
Since I want to apply the blur effect to the background without affecting the orange slice I selected, I need to activate the background layer by clicking on it in the Layers docker.
Add a Blur Filter
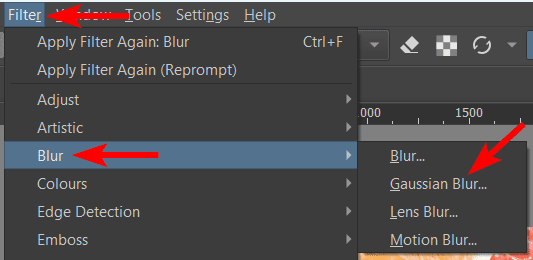
Next, add a blur filter of your choice by going to Filter > Blur and selecting the type you want on your image. For this example, I will select the Gaussian Blur.
Adjust the Blur Settings and Apply the Blur
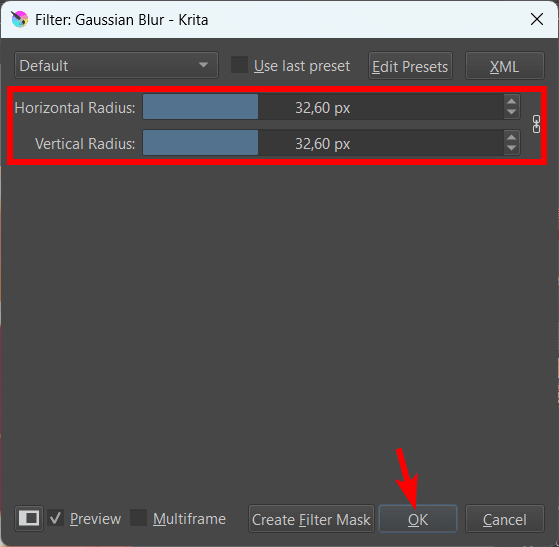
There are only two options for this blur filter to adjust the horizontal and vertical blur amounts. Adjust the sliders while watching the effect on your image. Once the settings are correct, click OK to apply the effect.
Check the Result
Your image will now have an added blur on the background without affecting the area you selected and pasted onto a new layer.
Tools:
- Krita
👍 Support Us: Subscribe to our channel and help us continue providing these tutorials.
🌟 Regular Updates: We publish how-to videos for Krita regularly!
🔧 Expert Guidance: Learn Krita from our professionals and uncover exclusive tips!
