
While Inkscape doesn’t have a straightforward crop tool which you will find in other editing software like Photoshop, Krita, or our online image cropper, there is a workaround to crop images by using a mask, which effectively hides the areas of the image you want to crop.
While this method may take a bit longer and require more steps than a standard crop tool, you can easily crop your image to any vector shape, including a rectangle, circle, star, or more. Here is the quickest method to crop an image in Inkscape.
Table of Contents
Overview of How to Crop in Inkscape
- Open your image in Inkscape
- Select a vector shape
- Add the shape to the canvas
- Select the shape and the image together
- Go to Object > Clip > Set Clip
- Resize the document to fit the crop
Steps to Crop in Inkscape
While there are many ways to crop an image in Inkscape, the quickest method is using a clipping mask. With this method, you can use any vector shape to create the crop, but it doesn’t offer many customization options. To further customize your crop, you can use text to crop an image or a mask to create a feathered crop, which I will explain in the next sections.
Open Your Image in Inkscape
Before you crop anything, you need to open your image in Inkscape. You can open your photo from the start screen that appears when you open Inkscape. If you are already in the program, you can open an image by pressing Control + O on Windows or Command + O on Mac.
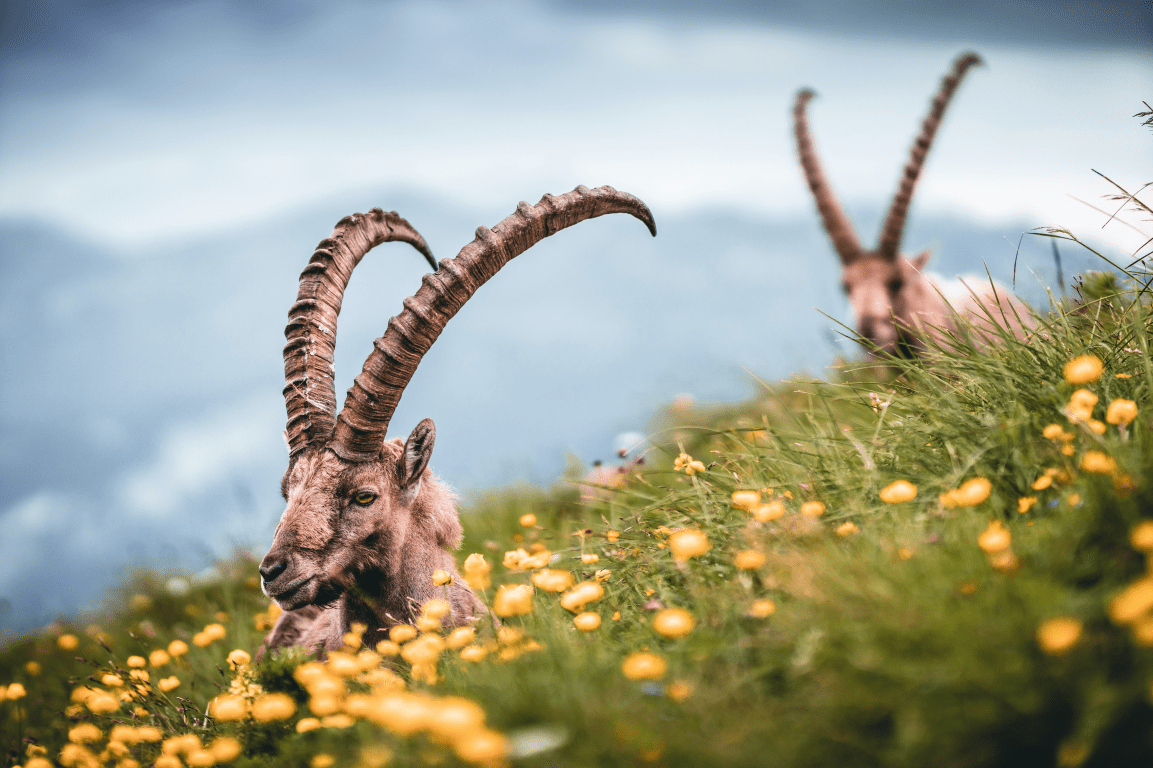
I am using this Selective Focus Photo of Rams I sourced from Pexels.
Select a Vector Shape
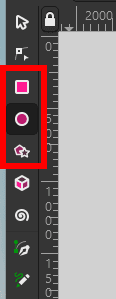
Once your image is open, you can select the type of shape you want to use to crop the image. You can use the rectangle shape if you are going for a standard crop. However, if you want a more creative crop, you can use a circle, star, or polygon shape. Select the shape from the lefthand toolbar. I will select the circle.
Add the Shape to the Canvas
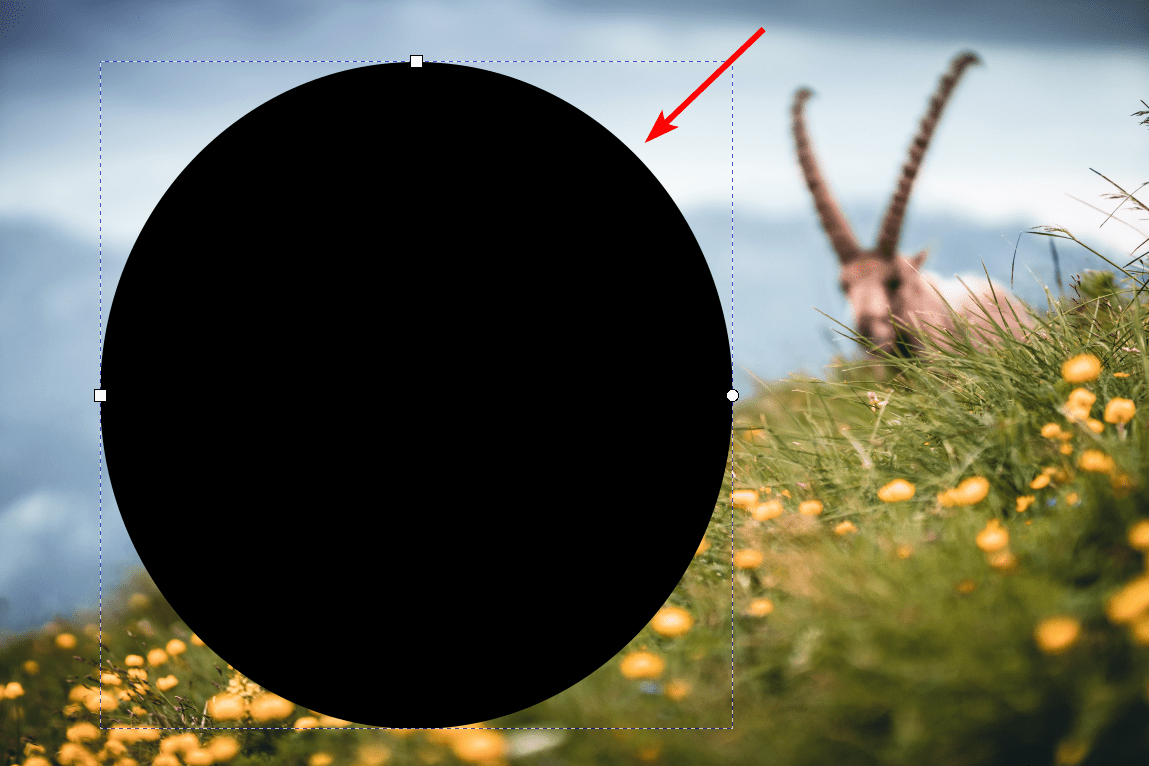
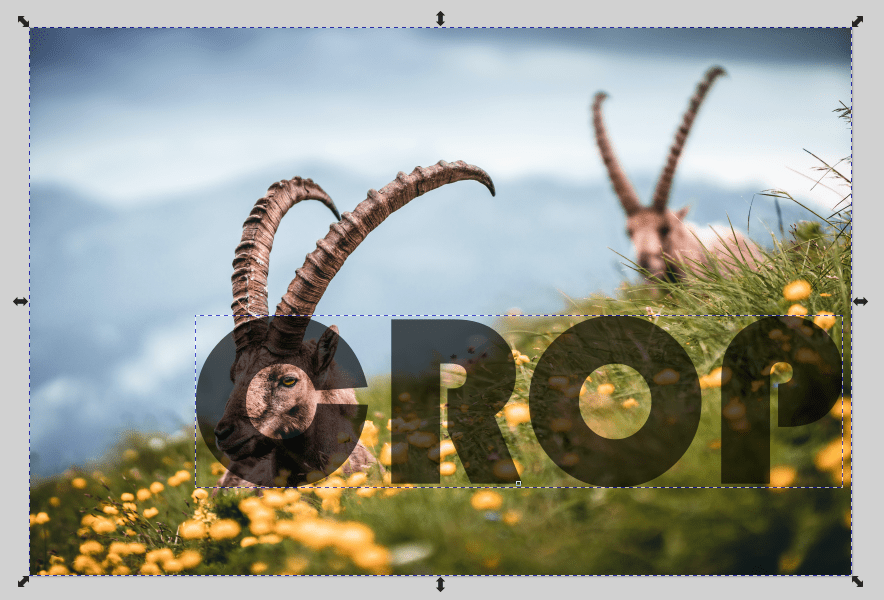
Once you have selected your desired shape, add it to the canvas by clicking and dragging over the part of the image you want to keep after the crop. This means that whatever is hidden by the shape will remain after you crop the image. The color of the shape doesn’t matter for this method.
Reduce the Shape Opacity to Position the Crop
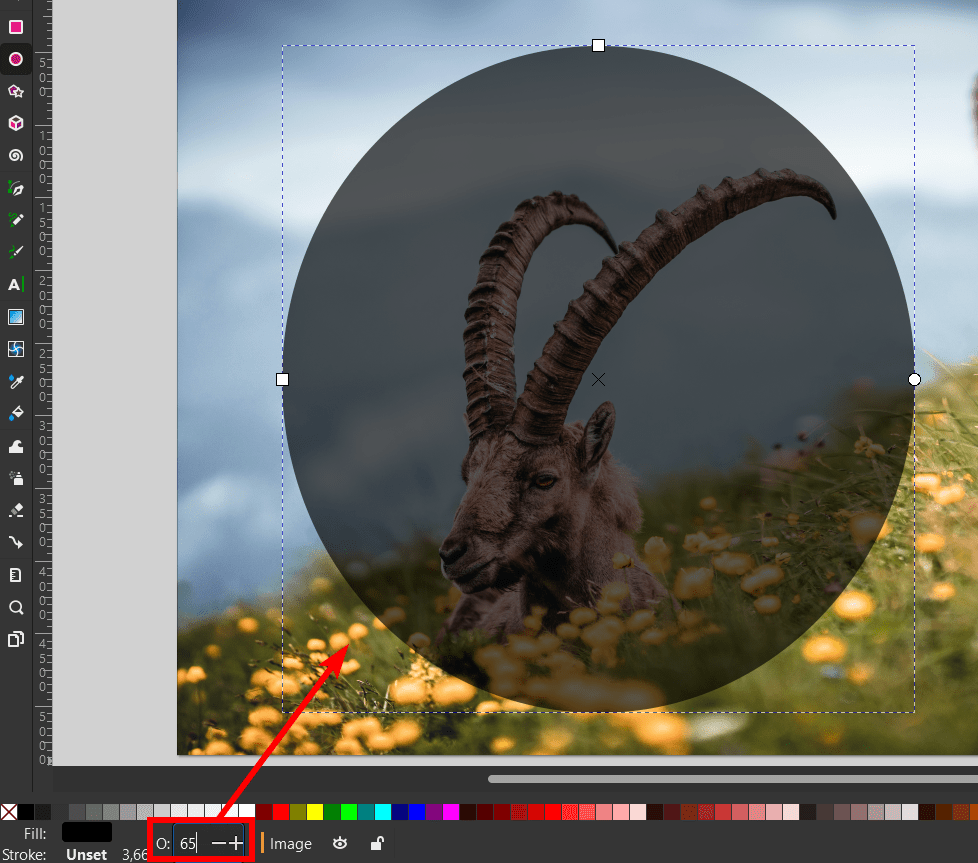
If you aren’t sure if the shape is covering the areas you want it to, you can reduce the opacity slightly to re-position the shape until you are satisfied with the area you will crop.
To reduce the opacity, keep the shape selected and use the Opacity box at the bottom of the screen and lower it to about 65. You can then move and resize the shape to get the right crop.
Select the Shape and the Image Together
Once the shape is in the correct position, you must ensure the shape and the image are selected together. To select both objects, click on the shape, hold in Shift, and click on the image. You will see a dotted line around both objects, indicating that they are both selected.
Go to Object > Clip > Set Clip
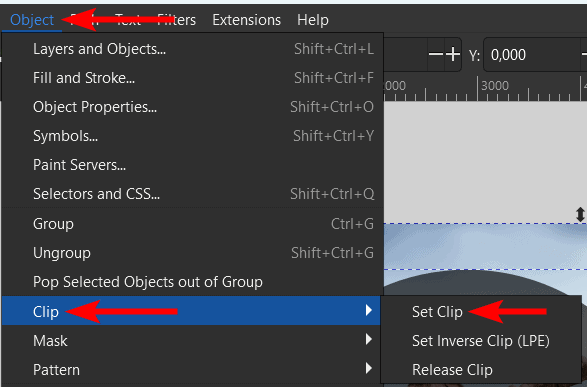
Now, you can add the clip to the image, which will crop it by going to Object > Clip > Set Clip.
Check the Crop
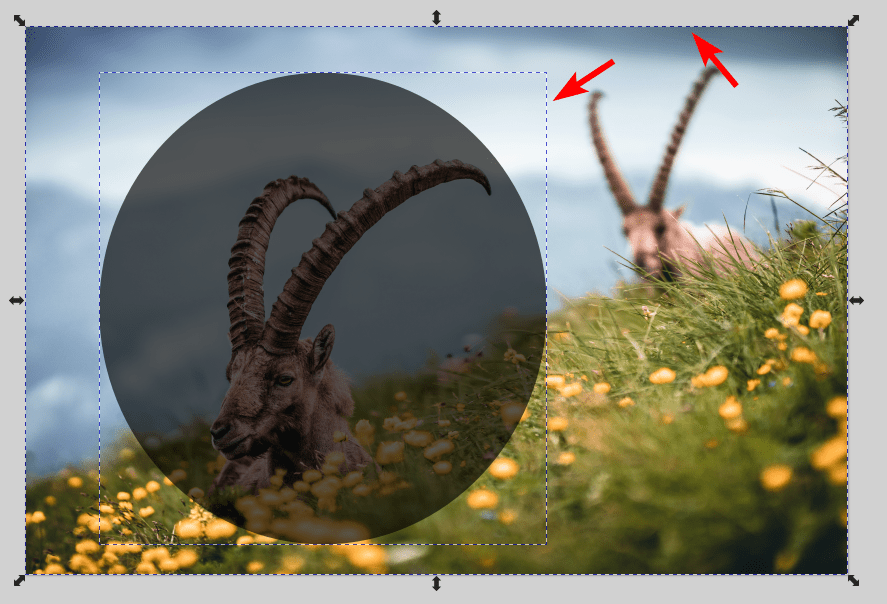
You can now see if the crop is correct on the canvas. You should only see the parts of the image that the shape covered.
Release the Clip (if Needed)
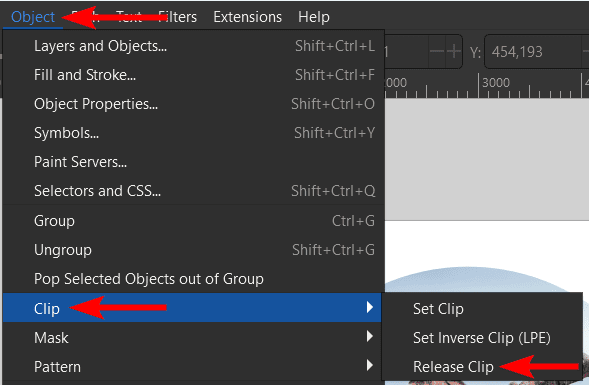
If you don’t like the crop, you can release the clipping mask and re-do the steps to create a new crop. To remove the clipping mask, go to Object > Clip > Release Clip.
Open the Document Properties Window to Resize the Document
Once you are happy with the crop, you can add more elements to the canvas to create a layout, or if you want to save the image in the cropped size, you will need to resize the document before exporting.
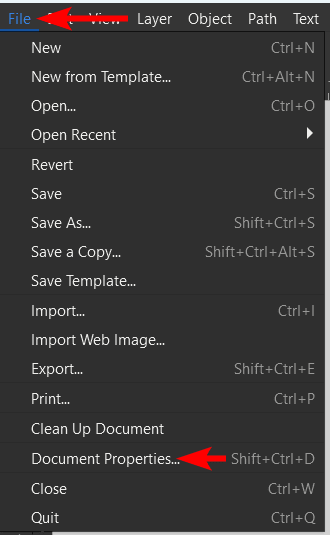
To resize the document, go to File > Document Properties. You can also use the shortcut Shift + Control + D on Windows or Shift + Command + D on Mac.
Resize the Document to Content
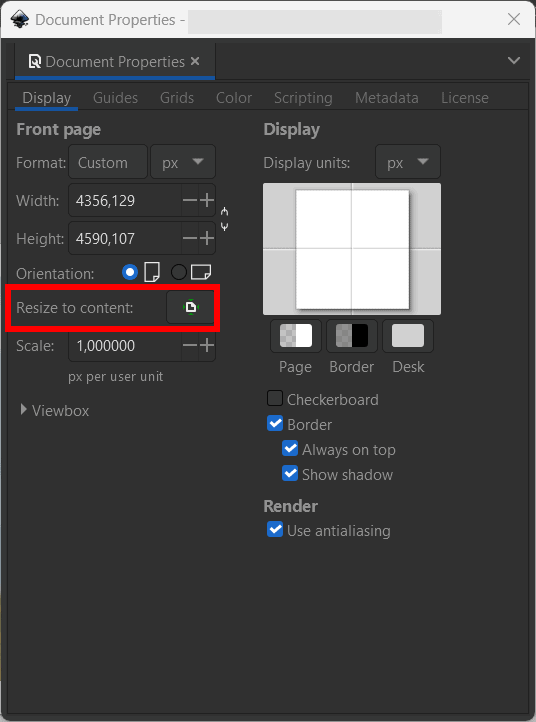
To resize the document, so the canvas surrounds the cropped image, click on the Resize to Content option in the Document Properties window.
Check the Document and Export

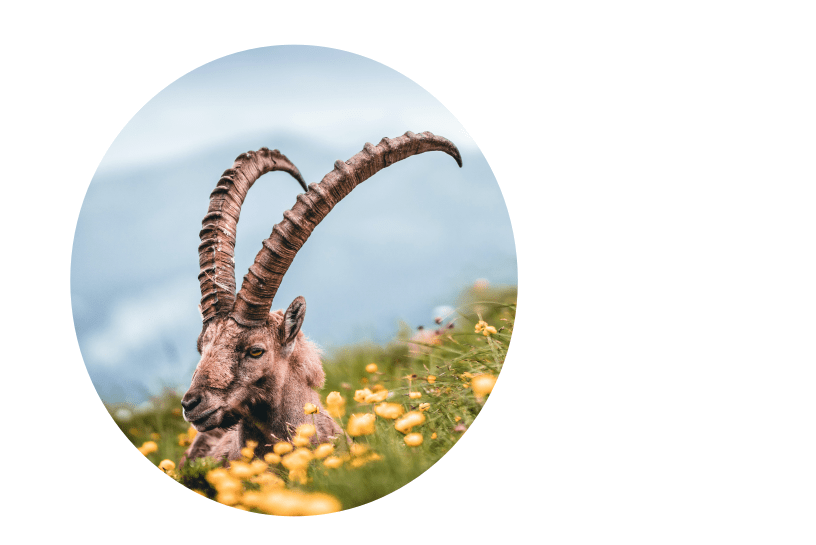
You can now check the canvas, and you will see the document is resized to the size of your crop. If you have created a circle crop as I did, export the document as a PNG so the white areas around the image don’t show in the saved image.
Tools:
- Inkscape
How to Use Text for a Creative Crop
If you want to crop an image creatively in Inkscape, you can use text to crop the image, which effectively fills the text with parts of your image. You can do this using the same method above, except by using text rather than a shape.
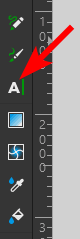
First, select the text tool from the toolbar.
Then, click and drag to create a text box on the image. You can then type in your text and adjust the text properties in the settings bar at the top. Be sure to use large text and bold font for the best results.

Once your text settings are set, move the text onto the parts of the image you want to keep. Then select the text and the image by holding in Shift and clicking on both objects.
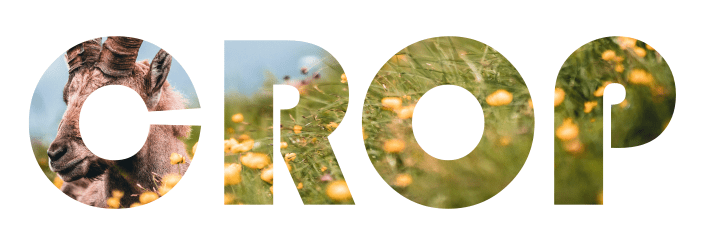
Then, go to Object > Clip > Set Clip.
Your image will now be cropped into the text, and you can move it around on the canvas and resize the document if needed.
How to Create a Feathered Crop
Another variation of the crop you can do is adding a feathered crop to the image. This method slightly blurs the edges of the crop, which works well in layout design. When creating a feathered crop in Inkscape, the process is similar to the regular crop, but you will use a blur filter, the mask function, and the shape color is essential here.
Before I get into the technique, it’s important to note how the mask function interacts with colors. You will add a shape to the document, but the shape's color affects how the mask interacts with the image below it. You can use three colors when masking, black, grey, or white.
- Black: Any black shapes will hide the object or image below it
- Grey: All shapes with shades of grey will partially reveal the object or image below it in varying opacities.
- White: Any white shapes will reveal the object or image below it
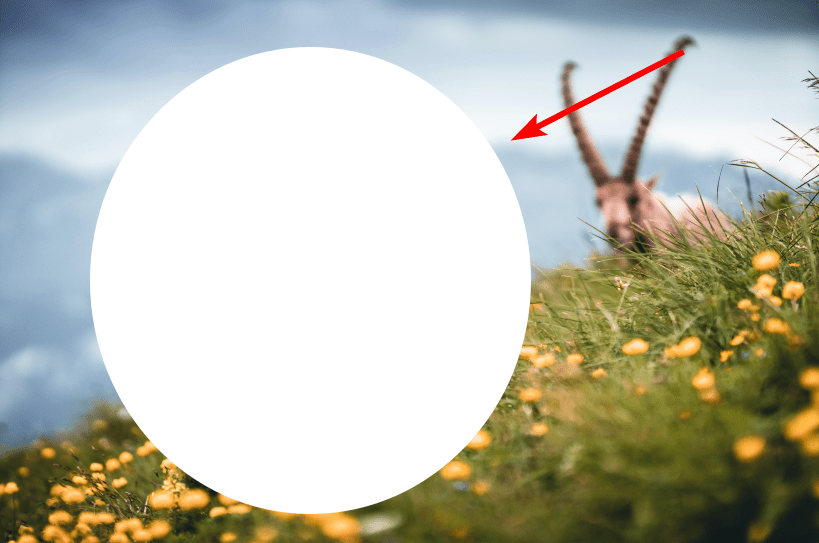
Now that you understand the colors, you can decide on the shape color based on your desired outcome. You can use the above section to see how to add a shape to the canvas. If you want to keep the area of the image below the shape, ensure you make the shape white.
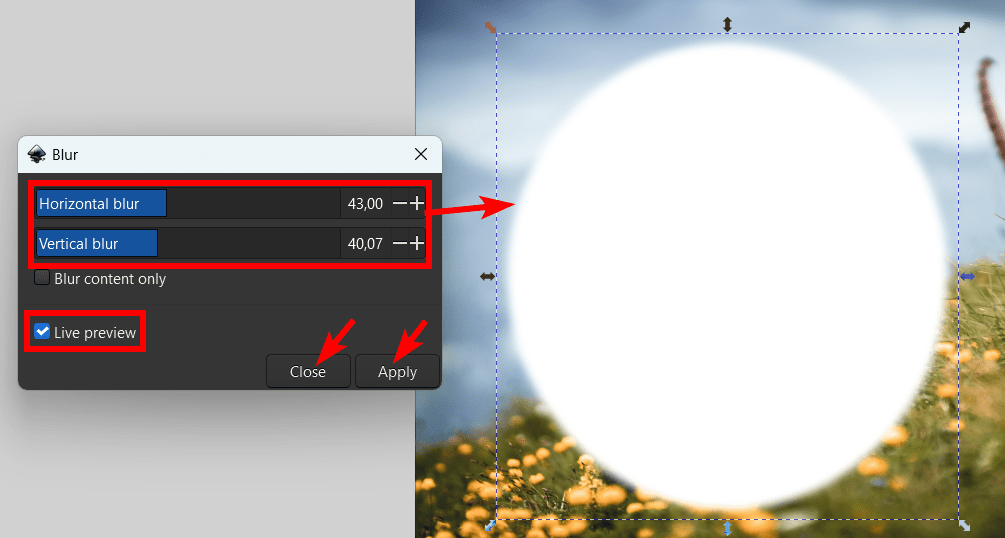
Next, you need to add a blur filter to the shape to create the feathered crop effect. To add a blur to the shape, select the shape and go to Filters > Blurs > Blur.
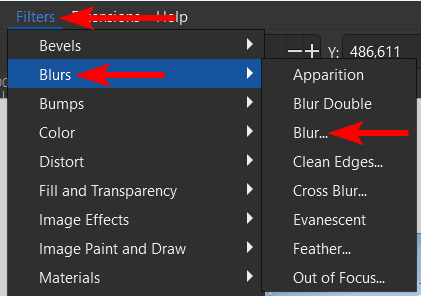
Add blur to the shape using the sliders and the Live Preview to see how much blur is added. The more blur you add, the more feathered your crop will be. Click Apply, then Close to add the blur.
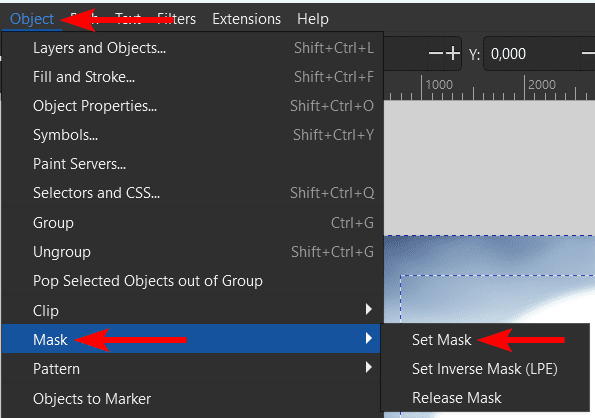
Once you have added the blur, select both the shape and the image, then go to Object > Mask > Set Mask.
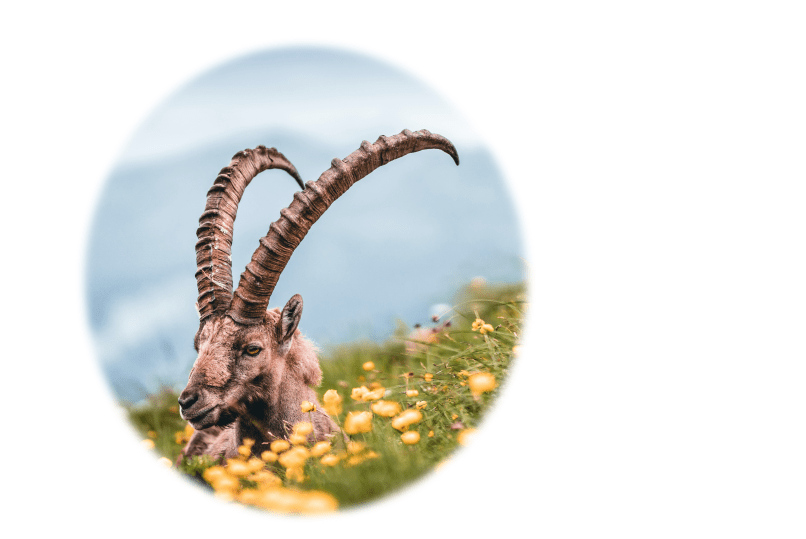
You will now see that your image has been cropped into the shape with a soft feathered edge.
👍 Support Us: Subscribe to our channel and help us continue providing these tutorials.
🌟 Regular Updates: We publish how-to videos for Inkscape regularly!
🔧 Expert Guidance: Learn Inkscape from our professionals and uncover exclusive tips!
