
While you can accomplish multiple tasks on Inkscape, including editing raster images, it’s primarily a vector-based editing and creation platform. The ability to create, edit, and work with vectors makes Inkscape an excellent tool for preparing work for laser cutting.
Whether you are designing artwork to use on your own laser cutting machine or if you will be sending the work to a professional laser cutter, you can do it all on Inkscape. Here are the basics for using Inkscape to prepare your artwork for laser cutting.
Table of Contents
How to Use Inkscape for Laser Cutting Overview
- Download and install the laser cutting plugin (optional)
- Create a New Document in Inkscape
- Set the correct canvas size and units
- Add shapes to the canvas
- Add text to the canvas
- Reduce the line point size based on the laser cutting requirements
- Convert the objects to paths
- Check the nodes
- Open the laser cutting plugin
- Set the appropriate settings
- Go to File > Export
- Export the file as an SVG
Download and Install the Laser Cutting Plugin
If you plan on using the artwork in your own laser cutting machine at home, you will likely need a plugin to prepare the file. You should only be doing this if you have a good understanding and some experience with laser cutting.
I will show you where and how to install a suitable plugin for Inkscape. However, this article primarily describes how to prepare your artwork for laser cutting.
J Tech Photonics developed a laser cutting plugin for Inkscape that you can download on their website using this link.
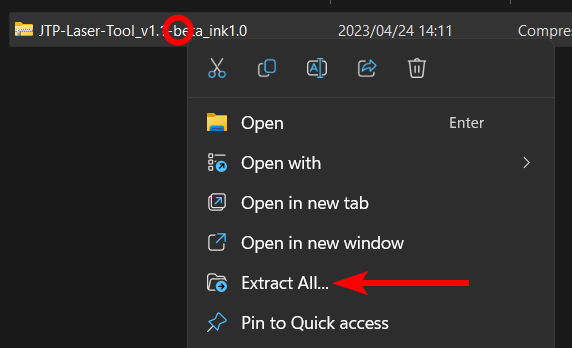
Once the plugin is downloaded, open the zip file by double-clicking on it or right-clicking and selecting Extract All.
Close Inkscape if you have it open, copy the unzipped folder, and paste it into Inkscape’s Extensions folder, which you can find by following the menu paths below.
On Mac:
Go to Applications, right-click on Inkscape, and select Show Package Contents. Then, go to Contents > Resources > Share > Inkscape > Extensions.
On Windows:
Acer > Program Files > Inkscape > Share > Inkscape > Extensions.

Once you’ve pasted the plugin into the folder, you can open Inkscape and find the plugin under the Extensions menu.
Step-by-Step of Using Inkscape for Laser Cutting
Whether you are laser cutting a design yourself or sending it to a professional laser cutter, you must ensure the artwork is prepared correctly to avoid any issues during the cutting process. Here are the basics to prepare your artwork.
Create a New Document in Inkscape
Once you open Inkscape, go to File > New or press Control + N on Windows or Command + N on Mac. You will need the canvas to be the correct size for your artwork.
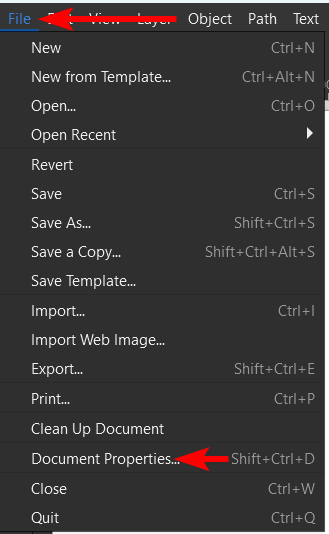
Once you have a canvas, you need to change the dimensions by going to File > Document Properties or pressing Shift + Control + D on Windows or Shift + Command + D on Mac.
Set the Correct Canvas Size and Units
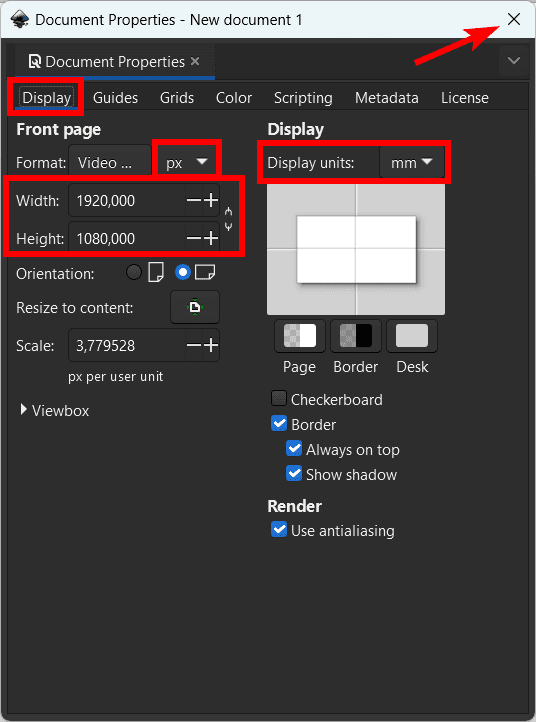
Once you are in the Document Properties panel, you can set the Width and Height values and the units, such as Inches or Millimeters. You should also change the Display units to match your document units to avoid confusion. You must ensure the document is the exact size needed for the laser cutting.
If you are sending the design to a professional and aren’t sure of the correct size, phone and find out to avoid delays later on.
Once you have set the dimensions, click on the X icon to close the panel and start designing.
Add Shapes to the Canvas

You can now start designing your artwork. You can add any shapes to the canvas by selecting one of the shape tools from the toolbar and then clicking and dragging to create the shape on the canvas.
Add Text to the Canvas
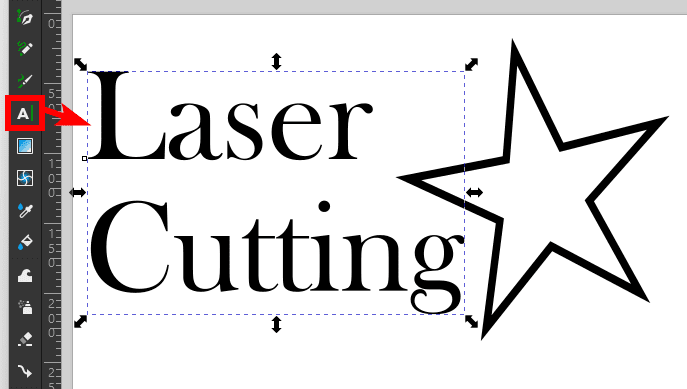
You can also select the Create and edit text tool to add some text if you’d like for the laser cutting. Once you click and drag to add the text box, you can type some text in and then customize the text using the settings in the top bar.
Open the Fill and Stroke Panel
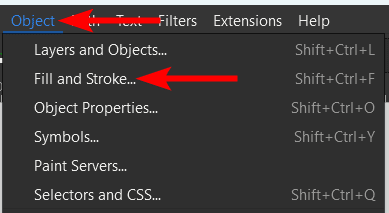
A necessary step when creating artwork for laser cutting is to ensure that the lines are at the correct thickness. The line thickness will depend on your requirements, and if you are unsure, you will need to contact the laser cutters to find out what line weight you should use for your design.
Go to Object > Fill and Stroke or use the shortcut Shift + Control + F on Windows or Shift + Command + F on Mac to adjust the line thickness.
Reduce the Line Point Size Based on the Laser Cutting Requirements
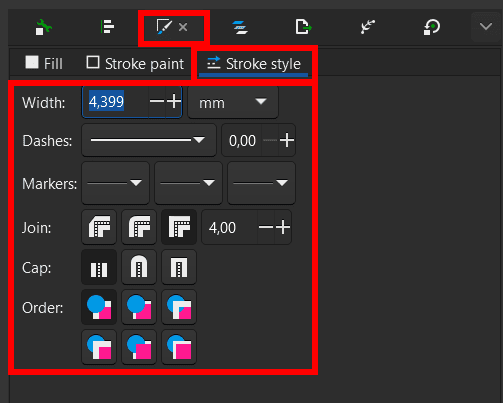
When the panel opens on the right-hand side, open the Stroke Style tab, and adjust the line thickness as needed.
Convert the Objects to Paths

Once you have created your artwork and set the line thickness to the correct weight, you must convert all the objects to paths. If you use a raster image as the base, you must convert the image to a bitmap.
However, if you create the artwork with shapes and text, you can convert the objects to paths by selecting them all and then going to Path > Object to Path or using the shortcut Shift + Control + C on Windows or Shift + Command + C on Mac
Check the Nodes
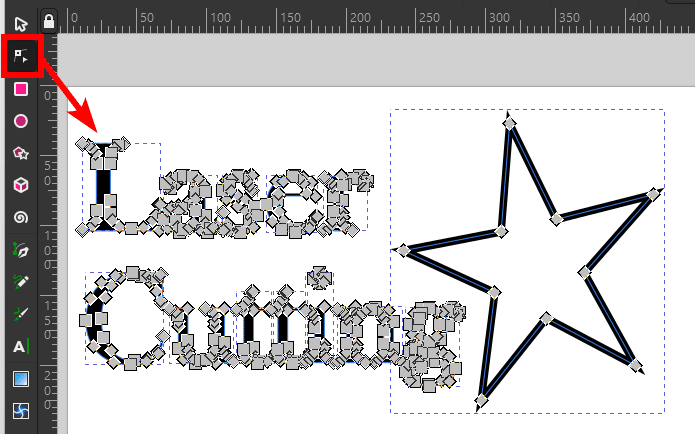
Once you have converted the objects, you can check that they are correctly converted by checking the nodes. To do this, select the Edit paths by nodes tool from the toolbar or press N.
Then, you can select the objects on the canvas, and if there are gray blocks around the object, they have been converted to paths.
Open the Laser Cutting Plugin
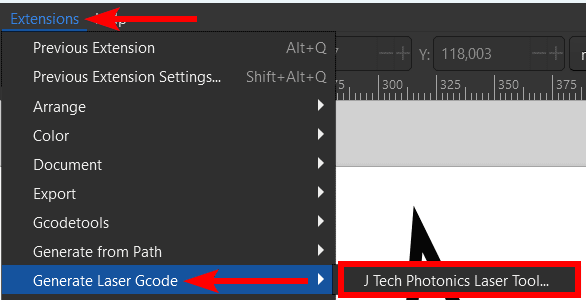
You can skip to the exporting steps if you are sending the file to a professional laser cutter or follow these steps if you need to add parameters for your own laser cutter. To access the plugin, ensure you have followed the downloading and installing steps in the first section.
Then, go to Extensions > Generate Laser Gcode > J Tech Photonics Laser Tool.
Set the Appropriate Settings
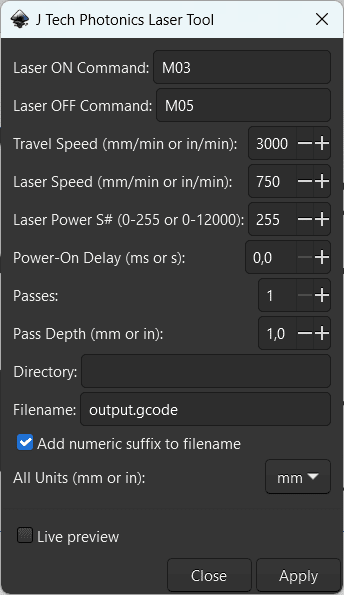
Once you follow the menu path, the plugin window will pop up. You can then adjust all the settings as needed. Click Apply when you are done to generate the Gcode.
Go to File > Export
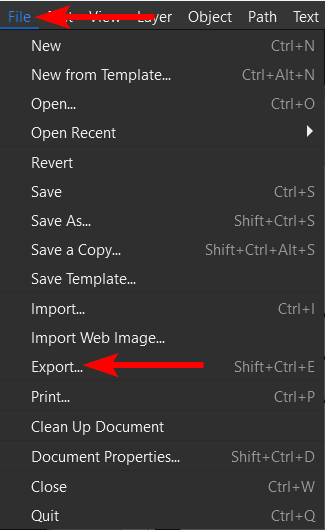
Once you have completed the artwork and applied the laser tool settings, you can export the file. To do this, go to File > Export or use the shortcut Shift + Control + E on Windows or Shift + Command + E on Mac.
Export the File as an SVG
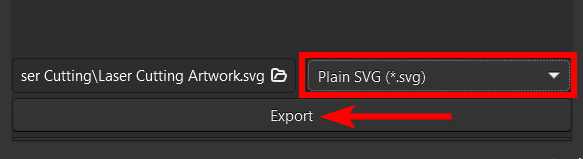
When the Export panel opens on the right, use the drop-down menu at the bottom to select Plain SVG as the file format. You can set the save location on the left and then click Export.
Tools:
- Inkscape
👍 Support Us: Subscribe to our channel and help us continue providing these tutorials.
🌟 Regular Updates: We publish how-to videos for Inkscape regularly!
🔧 Expert Guidance: Learn Inkscape from our professionals and uncover exclusive tips!
