
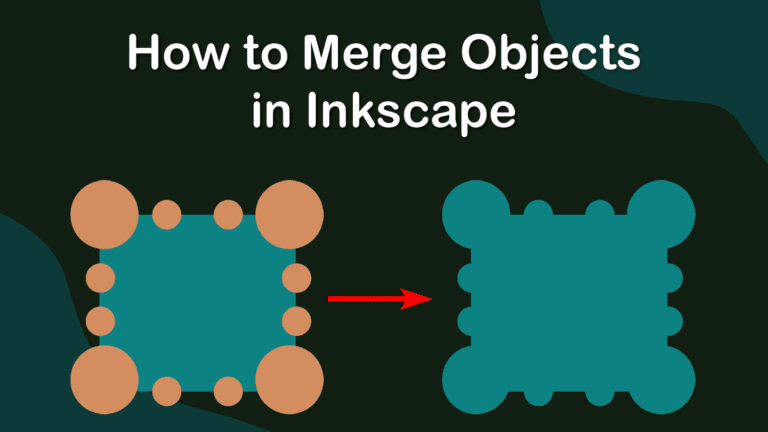
When working with multiple shapes in Inkscape, a neat trick to learn is how to merge the objects together. Once you combine two or more objects, you can edit them together and create a new custom shape.
There are a few different ways to merge objects in Inkscape, and I will show you my three favorite methods. Each method offers a slightly different result, so check them out to find the one that helps you achieve your desired outcome.
Table of Contents
Three Ways to Merge Objects in Inkscape
When merging objects in Inkscape, there are various ways to combine the elements together. However, each method creates a different type of new shape or grouping. While the shapes will all merge using these methods, the way you can edit and work with them is different.
Here are my top ways to merge objects and why each method is useful for a specific workflow.
Option 1: The Group Method
The quickest and easiest way to merge shapes in Inkscape is to group them. The result is not precisely merged in that the shapes become one. However, you can edit and move the shapes together as one.
The group method is best used when you want to quickly edit multiple shapes together, such as changing the color, or if you want to move various objects together to keep the spacing and alignment the same.
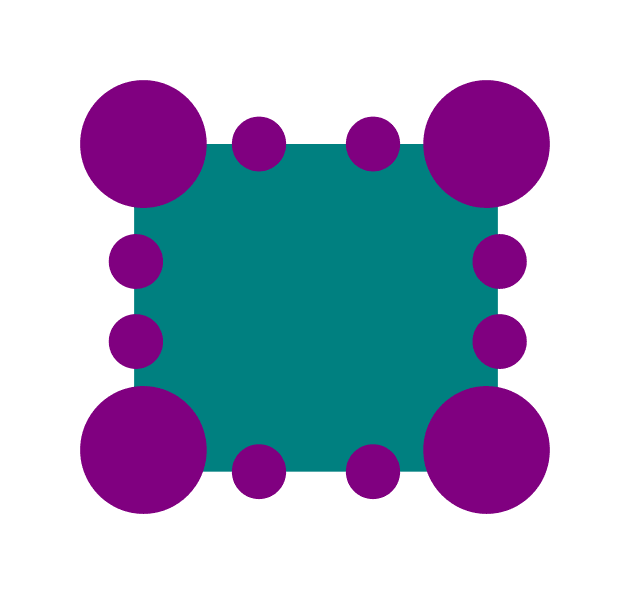
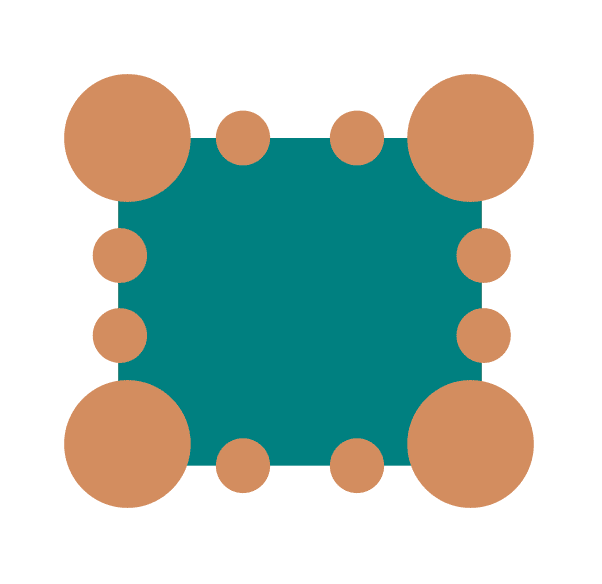
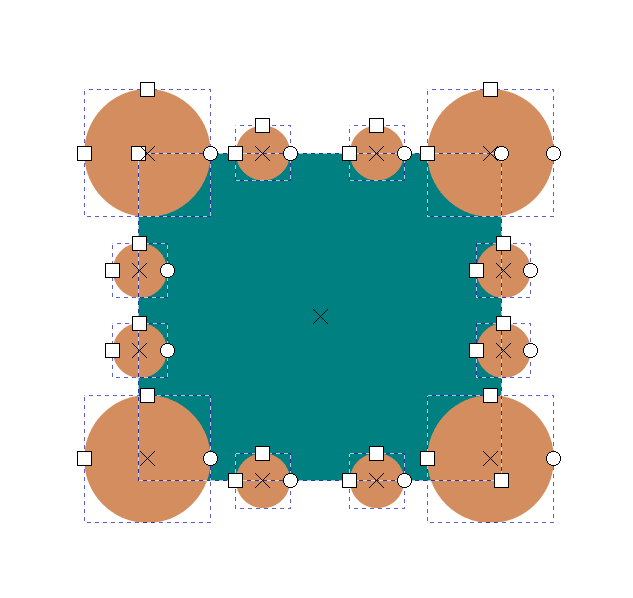
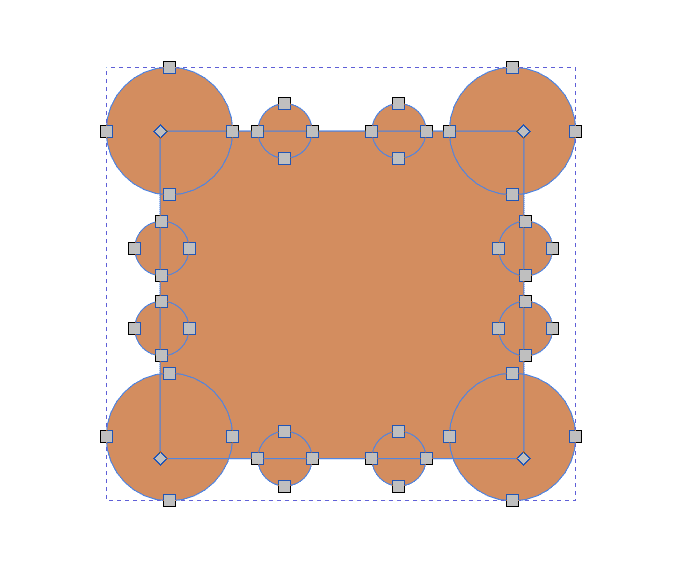
To group objects, first, add the shapes to your page. I will use the same design of a few circles around a rectangle shape throughout all three methods to show the different results.
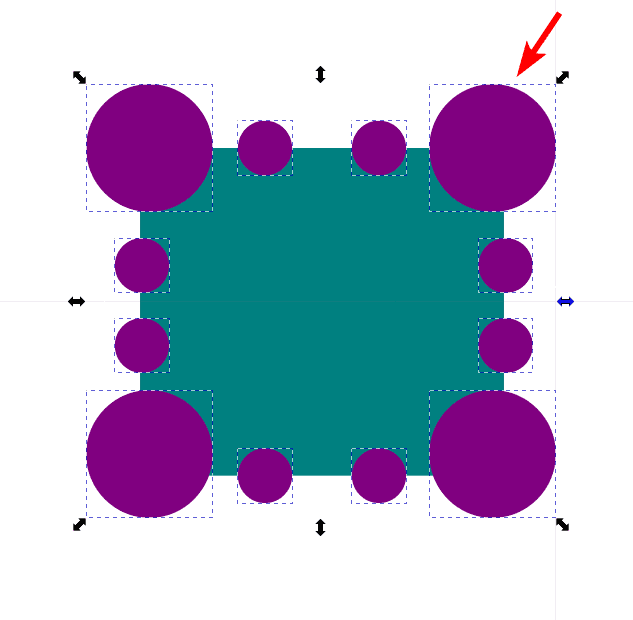
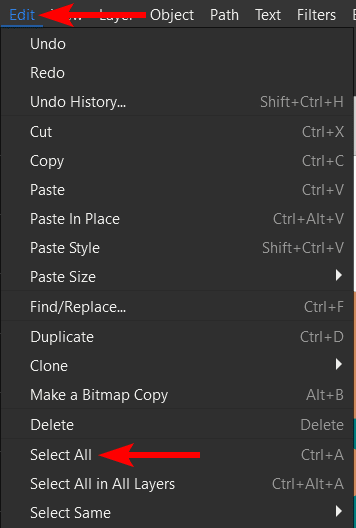
To group the shapes, first, select them all. You can select all the shapes in four ways. You can click and drag your mouse over all the shapes. Hold in Shift and click on the shapes you want to be selected. Or, you can press Control + A on Windows or Command + A on Mac or go to Edit > Select All to select every object on the page.
I only want to select the circles. To achieve this, I will Shift + click on all of them.
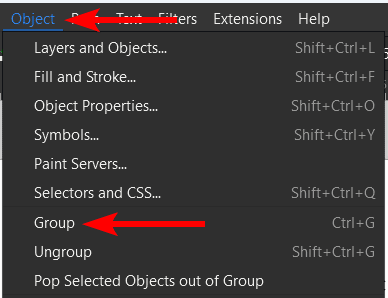
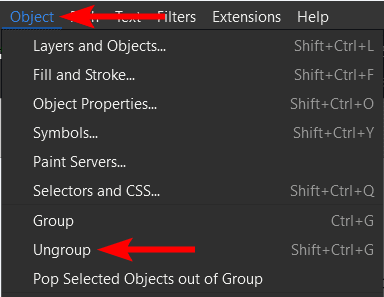
Once you select the shapes you want to group, go to Object > Group or use the shortcut Control + G on Windows or Command + G on Mac.
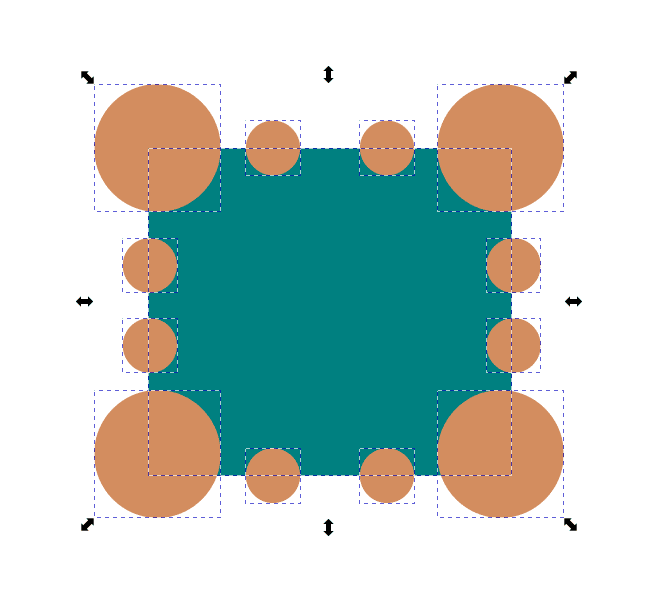
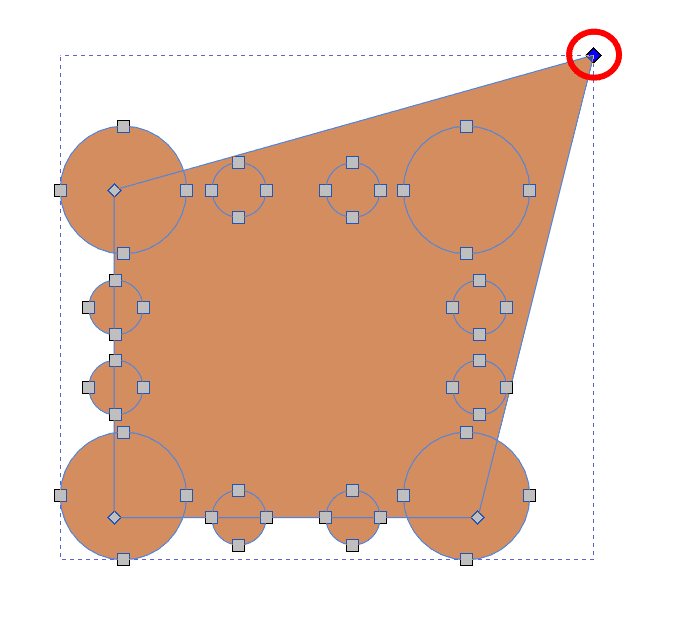
Now the selected shapes are all connected. The entire group is selected when you click on one of the shapes.

You can now edit the group together, such as moving the objects around or changing the colors of all the circles at once.
If you want to edit the shapes individually again, you can easily ungroup them by going to Object > Ungroup or using the shortcut Shift + Control + G on Windows or Shift + Command + G on Mac.
Option 2: The Union Method
If you want to combine shapes completely to make one new shape, you must use the Union or Combine method. The Union method merges the shapes so they become one shape.
The union method is best to use when you want to create a new custom shape. Once the objects are merged, you can’t edit the shapes separately, and the shape path is the outline of the entire new shape. The result is a stroke or silhouette of the shapes and is useful for preparing objects for laser cutting.
To use the Union method, select all the objects you want to combine. You can use any of the selection methods mentioned in the first option. However, if you want to select all the objects on the page, the easiest way is to go to Edit > Select All.
Ensure that all the objects you want to work with are selected. You will see the transform box surrounding all the objects that you have selected.
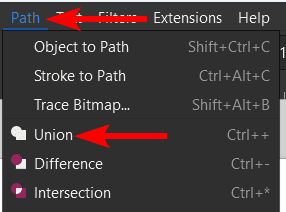
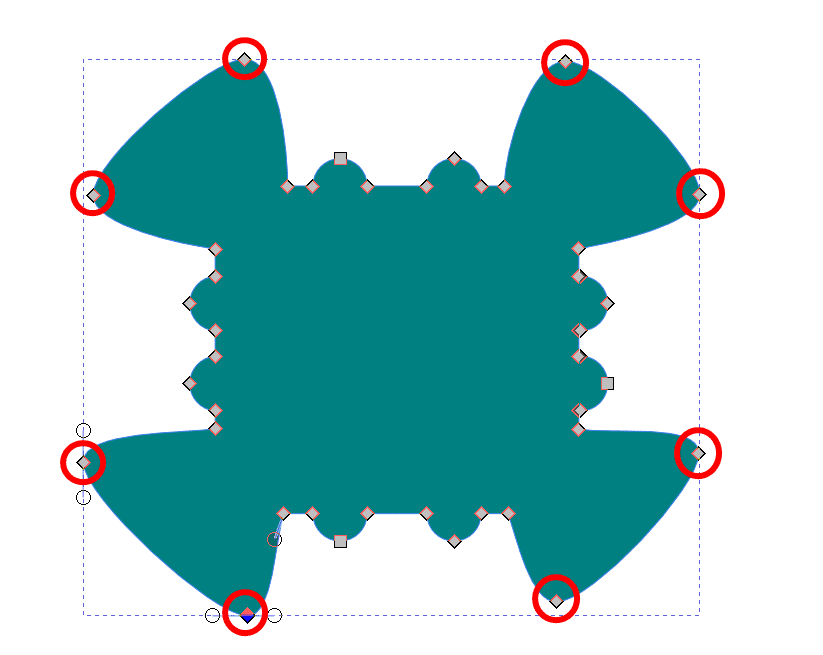
Then, to use the Union method, go to Path > Union or use the shortcut Control + + on Windows or Command + + on Mac.
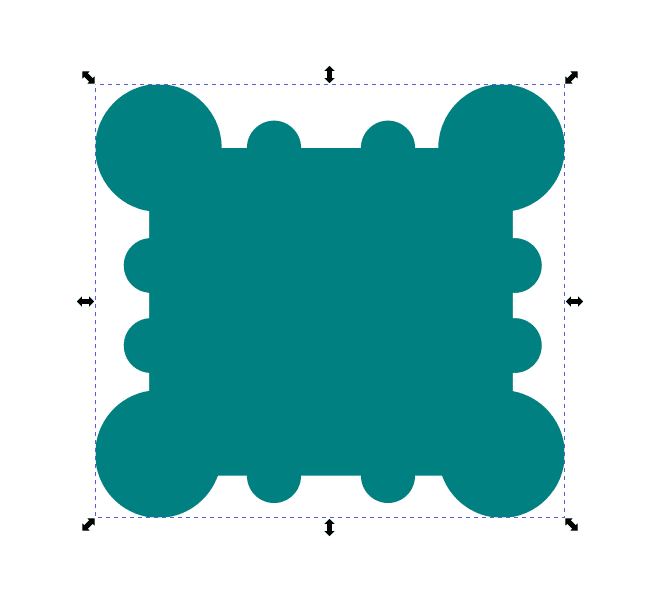
The shapes will all join together and take on the color of the largest shape.
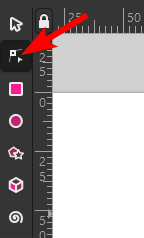
To see how the shapes have been merged, select the Edit paths by Nodes Tool from the toolbar or press N.
Then, click on the new shape. You will see the nodes surrounding the shape's outline, and the circles are no longer separate shapes. The nodes are added where the shapes overlap with each other.
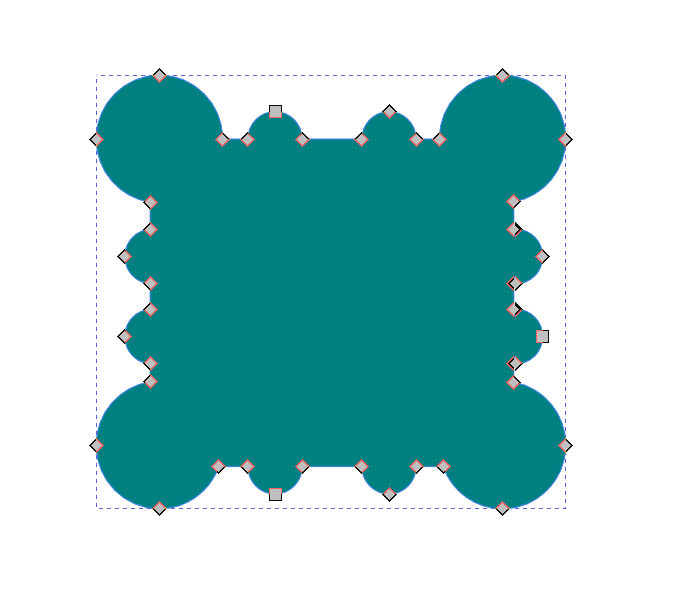
You can click on any nodes and edit them further if needed. But you can’t edit the shapes individually anymore.
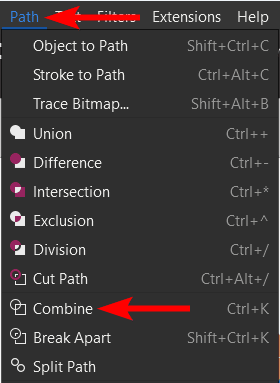
Option 3: The Combine Method
The final method to merge objects in Inkscape is the Combine method. This option is similar to the Union method. However, the paths are kept around the individual shapes in the result. This means you can edit the shape paths separately, even once the shapes are combined.
You can use this method if you still want control over individual objects and the ability to edit them as a whole. You can break the objects apart later, but they will remain paths and not revert to shapes.
To use the Combine Method, select all the objects on the page by pressing Control + A on Windows or Command + A on Mac to select everything, or use Shift + click to select a few objects.
Once the objects are selected, go to Path > Combine or use the shortcut Control + K on Windows or Command + K on Mac.
Once you combine the shapes, they will turn the top shape’s color. The result will look similar to the Union method.
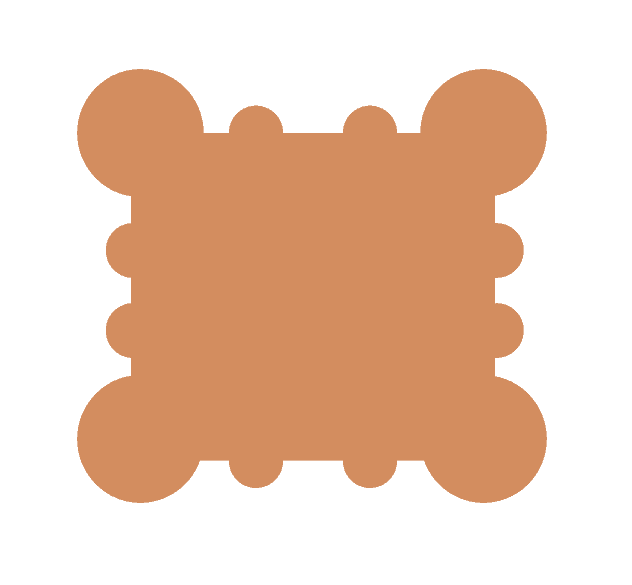
However, the difference is noticeable after you activate the Edit paths by Nodes Tool from the toolbar or by pressing N.
Then, click on the shape to view the nodes. You will see that the shapes each have their own paths instead of one combined path around the new shape.
You can edit the nodes of each shape’s path individually if needed. The path doesn’t act as one path but rather several. However, the object is combined into one object when editing, moving it around, or changing the color.
👍 Support Us: Subscribe to our channel and help us continue providing these tutorials.
🌟 Regular Updates: We publish how-to videos for Inkscape regularly!
🔧 Expert Guidance: Learn Inkscape from our professionals and uncover exclusive tips!
