
While there isn’t an arrow shape tool in Inkscape, you can still draw an arrow effortlessly. The arrow features in the program have been improved in recent versions, and you can easily add arrowheads to your lines, customize the arrowheads, and change the color of the entire arrow.
Here is how to make an arrow in Inkscape using the bezier tool and the stroke style settings.
Table of Contents
Overview of How to Draw an Arrow in Inkscape
- Select the Bezier Tool (B)
- Create a line by clicking to add Nodes
- Open the Fill and Stroke settings window (Shift + Control / Command + F)
- Add markers to the line
- Edit the arrow settings
- Add a second arrowhead
- Add a center marker
- Change the stroke and arrow color
Step-by-Step of Making an Arrow in Inkscape
To make an arrow in Inkscape, you must draw a stroke and then change the style, which offers markers for different styled arrows. You also have several customization options to create unique arrows that work for your project.
Use these steps as a guide, and get creative with your arrows.
Select the Bezier Tool (B)
To create an arrow, you first need to draw a stroke on the page with at least two nodes. You can draw a stroke with a starting and end point and then add the arrowhead(s).
To start, select the Draw bezier curves and straight lines tool from the toolbar or press B to activate it.
Create a Line by Clicking to Add Nodes
Add a line to the page by clicking on one spot to start the line, creating the first node.
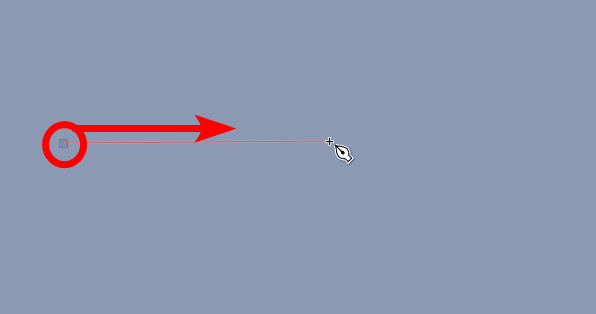
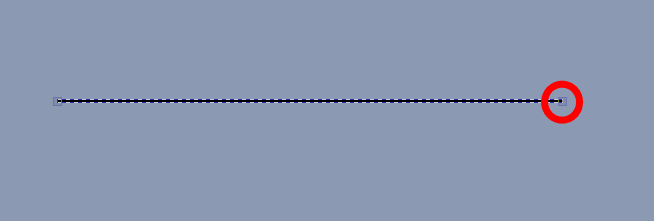
Then, drag your mouse across the page to where you want the line to end. Hold in Control (Win) or Command (Mac) to keep the line perfectly straight, and click to place the end node. Press Enter to confirm the line and turn off the tool.
You can also create a curved line by adding more nodes and dragging the mouse up or down when adding nodes to make the curves. I will keep this simple and use a straight line.
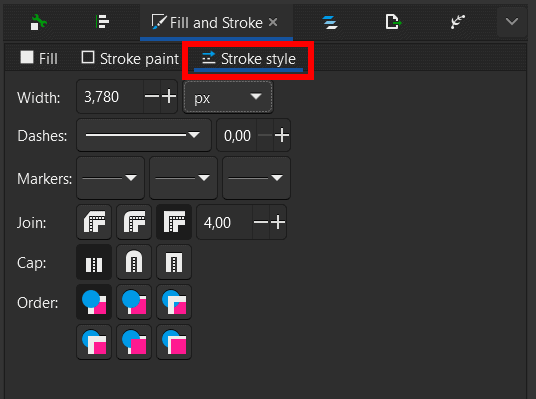
Open the Fill and Stroke Settings Window
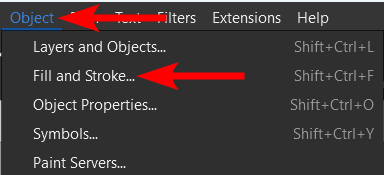
Once you’ve added your curved or straight line, open the Fill and Stroke settings panel. You can open the panel by going to Object > Fill and Stroke or pressing Shift + Control + F on Windows or Shift + Command + F on Mac.
You will see the settings open in the panel on the right. In this panel, you can change the Fill and Stroke color and adjust the Stroke Style by moving through the tabs.
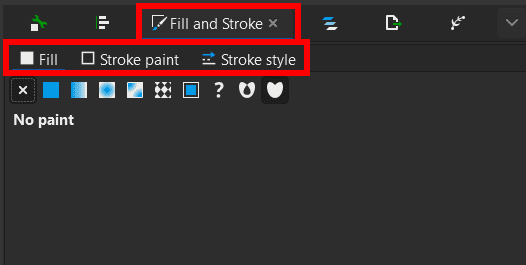
You can change the stroke color at this stage if you'd like or do it later. For now, open the Stroke Style tab to see how to change the style of the line you created.
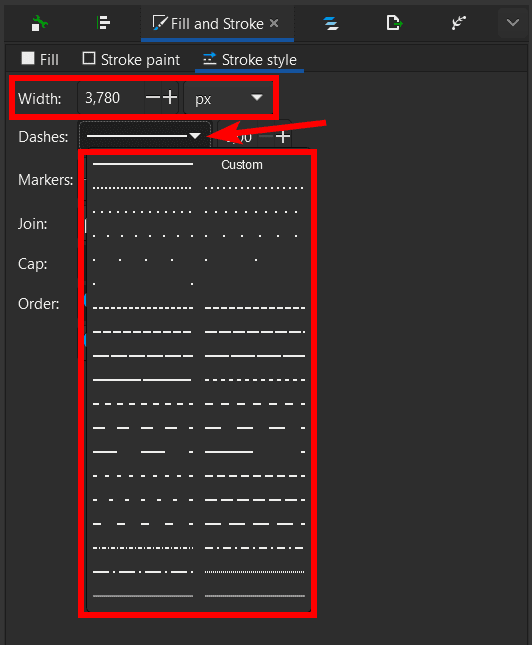
Before you add any markers, increase the width of the stroke by increasing the Width value. You can choose the unit of measurement and then increase the width. You can change the line style to dashes, dots, or a combination of both using the Dashes drop-down menu.
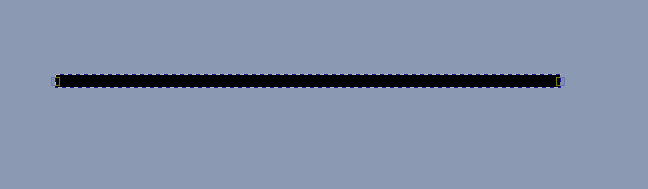
Once you have styled the line as you’d like, you can add the arrowhead(s). I have increased the width of the line to show the effects better.
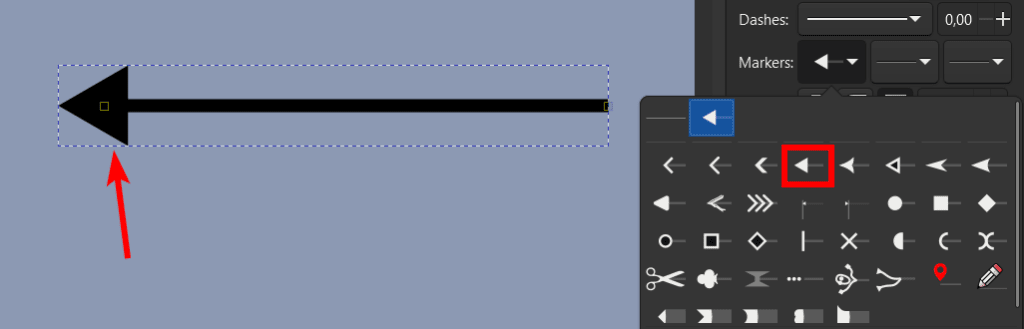
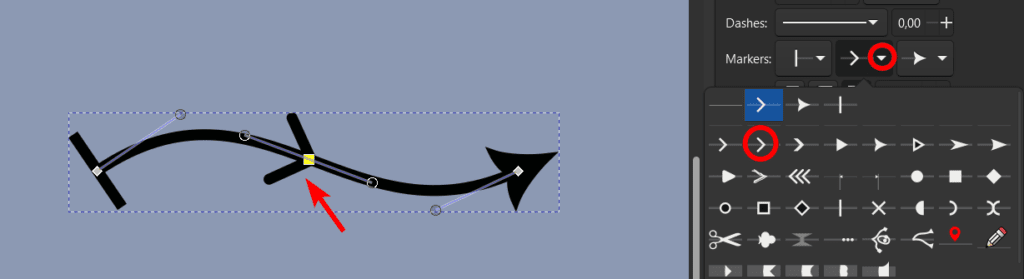
Add Markers to the Line
To add an arrowhead to the line, look at the markers options. You will see three marker options to add. The first drop-down menu adds an arrowhead to the start of the line, the center one adds markers to any middle nodes between the start and end point, and the last menu adds an arrowhead to the end of the line.
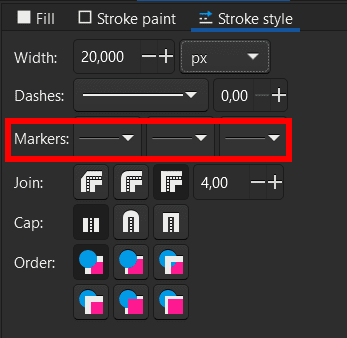
Open the first menu to add an arrowhead to the line's starting point. You can choose any style for the arrow in the menu.

Once you click on an arrowhead, it is added to the line's starting point.
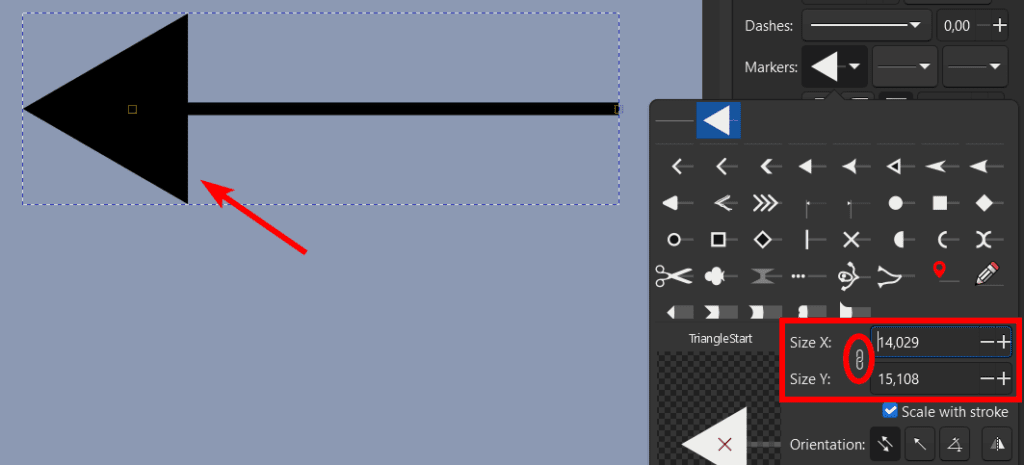
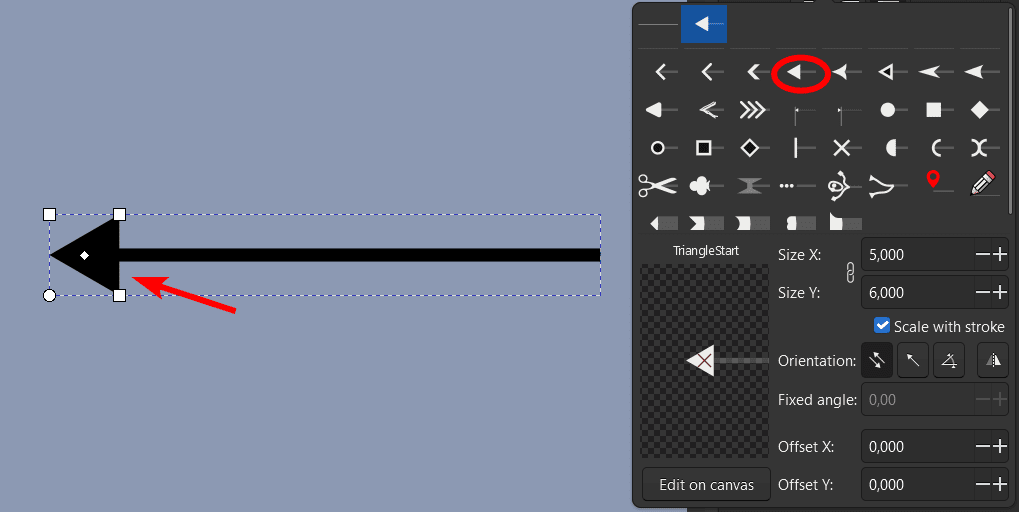
Edit the Arrow Settings
When a marker is added to the line, there are various settings you can adjust below the arrowhead styles.
Here is a quick breakdown of how these settings affect the arrowhead.
First, you can increase or decrease the arrowhead size by changing the Size X and Size Y values.
If you want the size to change equally while keeping the original dimensions of the arrowhead, keep the link icon active next to the value boxes. If you want the sizes to change independently, uncheck the link icon.
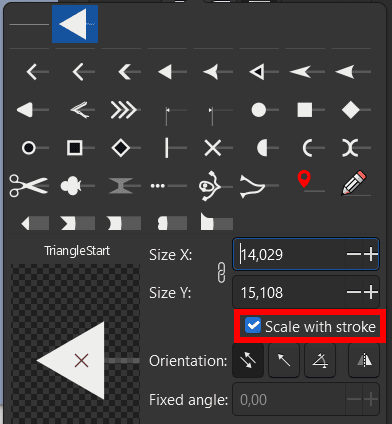
If you want the arrowhead to match the size of the stroke, check the box next to Scale with Stroke. This will adjust the arrowhead size whenever you change the stroke width. Uncheck this option if you want the arrowhead to remain a different size than the stroke.
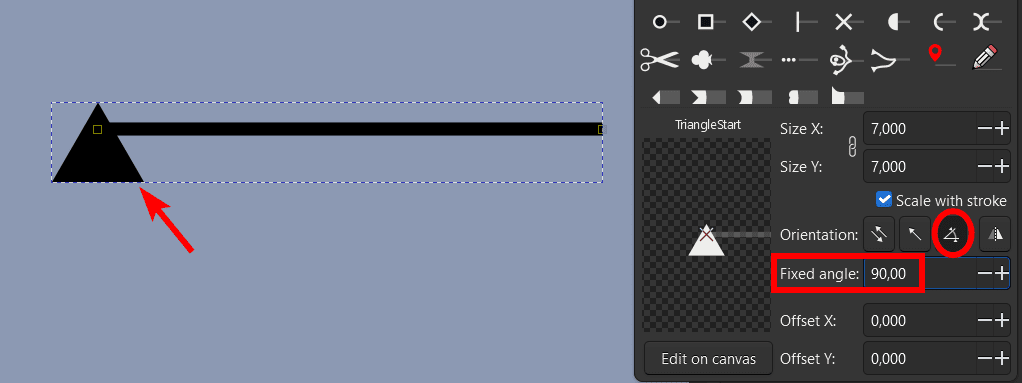
The next setting is the arrowhead orientation. By default, the orientation of the arrowhead is set to Orient along the path, reversing at the start. The default orientation means that the arrowhead faces away from the line.
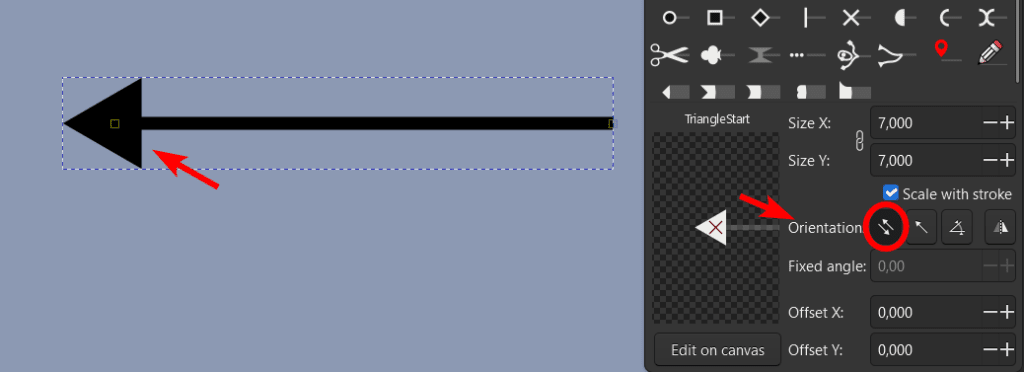
You can change the orientation to Orient along the path, the second icon, to turn the arrow around so it faces the line.

You can set the orientation to Fixed specified angle if you want to rotate the arrowhead to a different angle. You can then add an amount in the angle value box to turn the arrowhead.
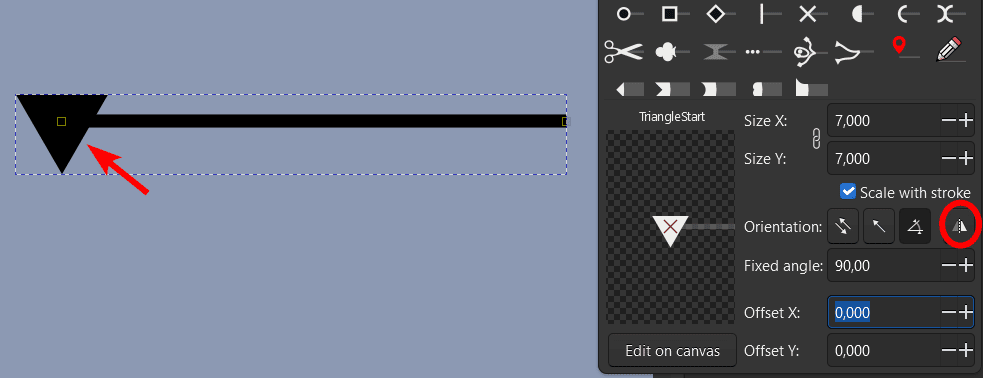
The last orientation you can select is Flip Marker Horizontally, which will flip the arrow in the opposite direction. Since I angled my arrowhead upward, if I flipped it, it would point down.
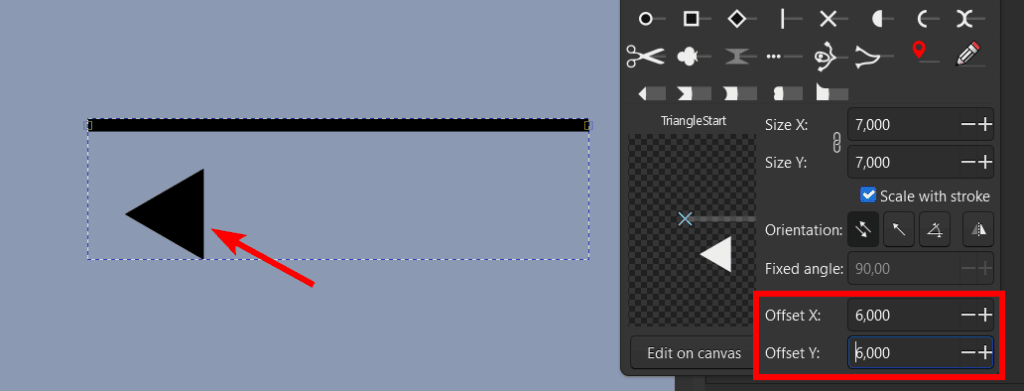
You can also shift the arrowhead up, down, left, or right to position it on top or away from the line. Adjust the Offset X value to move the arrowhead left or right, and adjust the Offset Y value to move the arrowhead up or down.
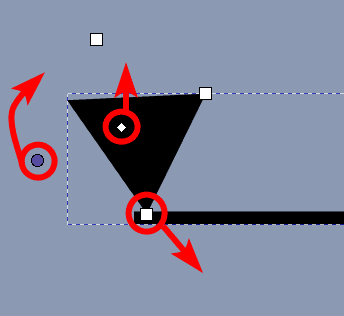
Lastly, you can edit the arrowhead on the canvas. To do this, click the Edit on Canvas button, and nodes will appear around the arrowhead.
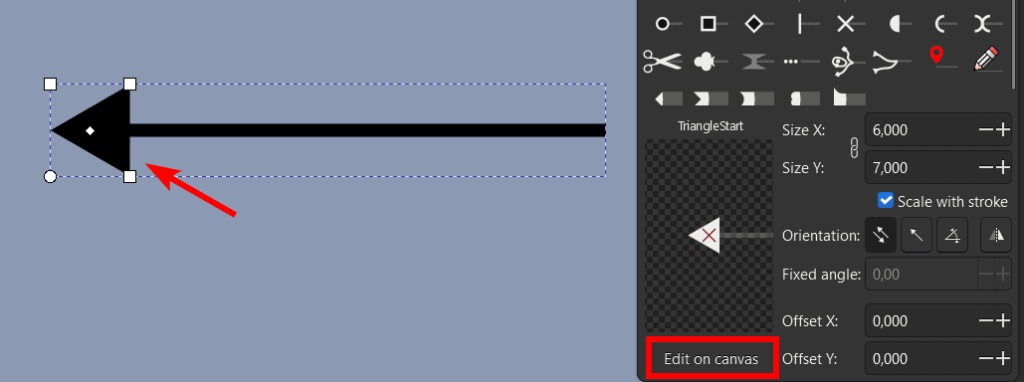
Use the square nodes to resize the arrowhead, the middle node to move the position, and the circle node to change the angle of the arrowhead.
If you want to reset the arrowhead to the original settings, click on the style in the marker settings, and the arrowhead will be replaced with the original.
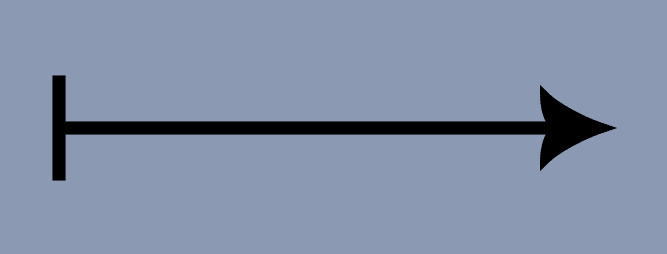
Add an Arrowhead to the End of the Line
You can choose whichever arrowhead you want for the start of the line. Then you can add an arrowhead to the end of the line by using the last marker option. Adjust the settings in the same manner as you did with the first arrowhead.
Add a Center Marker
If you want to add an arrowhead in the center of the line, you first need to add an extra node or nodes. To add more nodes, select the Edit paths by nodes tool (N).
Then, double-click on the path to add a node. You can also use this tool to curve the path if you’d like.
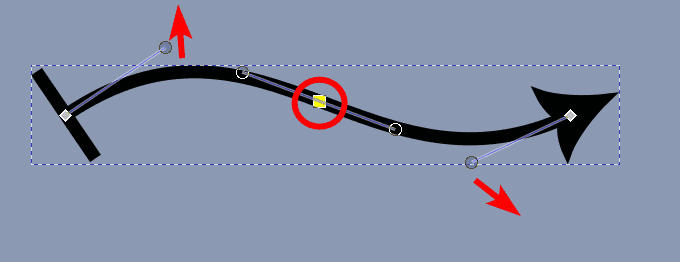
You can now use the center marker option to add another arrowhead and adjust the settings as needed. You can add as many nodes and arrowheads as you’d like.
Change the Stroke and Arrow Color
You can also edit the stroke and arrow color together by opening the Stroke paint tab and choosing a new color from the options.
You now have a completed arrow on your canvas.
👍 Support Us: Subscribe to our channel and help us continue providing these tutorials.
🌟 Regular Updates: We publish how-to videos for Inkscape regularly!
🔧 Expert Guidance: Learn Inkscape from our professionals and uncover exclusive tips!
