
After working for several hours on an animation project and finally completing your work, it is frustrating if you’re unsure how to export an animation in Krita. You may also encounter a problem when exporting animation, especially if you don’t have the proper codec installed.
To export an animation from Krita, you first need to download the free FFmpeg program, then go to File > Render Animation and select the correct settings.
I will show you how to export your animation, what codec you need to download, and how to change the animation file format when exporting. I also offer recommendations for the best video format for the web.
Table of Contents
How to Export an Animation in Krita
- Download the third-party application, FFmpeg
- Link FFmpeg to Krita
- Go to File > Render Animation
- Change export type to Video
- Select the FFmpeg file
- Adjust the settings as needed
- Export your animation
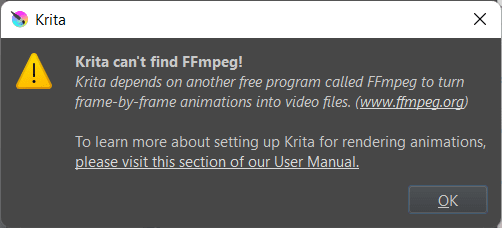
Before exporting an animation from Krita, you must have FFmpeg installed on your computer. If you don’t have the codec on your computer, you will receive an error message when trying to export your animation.
If you receive the error message, skip to the next step to install the program, then repeat the following steps to export the animation.
Once you have installed FFmpeg using the next section, if you don’t have it installed, you can move on to export your animation. If you already have the FFmpeg codec on your computer, simply export the animation by doing the following.
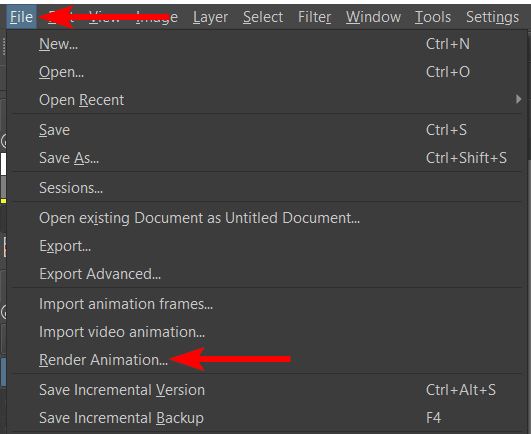
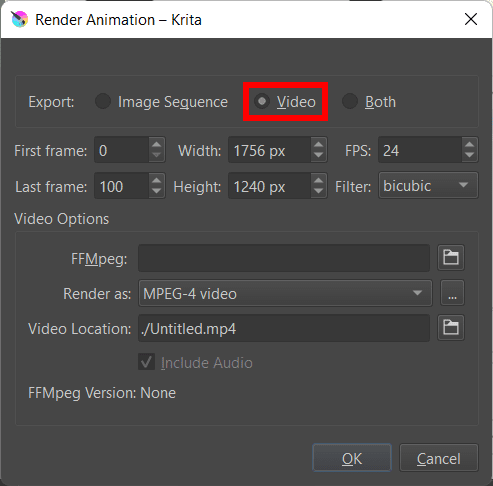
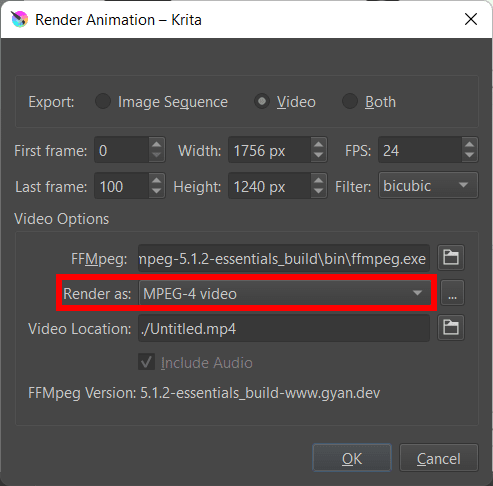
Go to File > Render Animation.
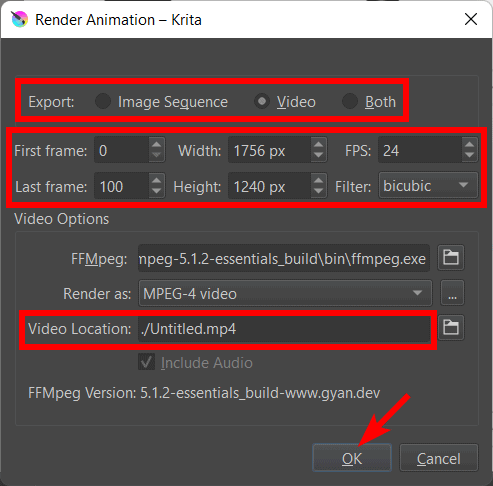
Then, select Image Sequence, Video, or Both next to Export, depending on how you want to save your animation. You can then adjust the rest of the settings as you need for your animation. Choose the Video Location and press OK to export the animation.
You now have your animation downloaded as a MPEG-4 video file. Jump to the export as GIF section if you want to export the animation using another file format.

Download FFmpeg if Not Installed
If you don’t have the free program FFmpeg installed on your computer, download the program before exporting an animation.
To download the program, follow the following instructions on Windows or Mac.
On Windows
To download the program, go to the FFmpeg Build website. Then navigate to the Release Builds section by clicking the link on the left.
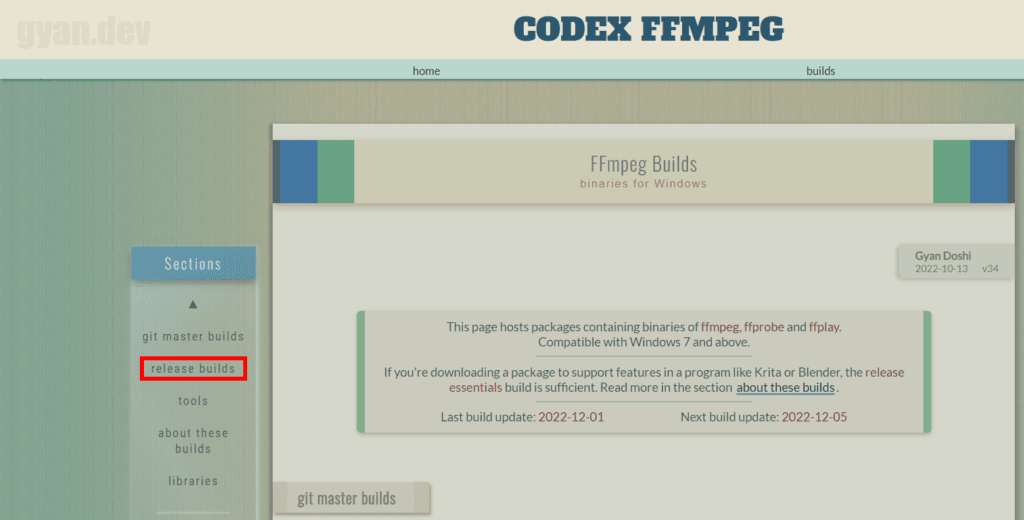
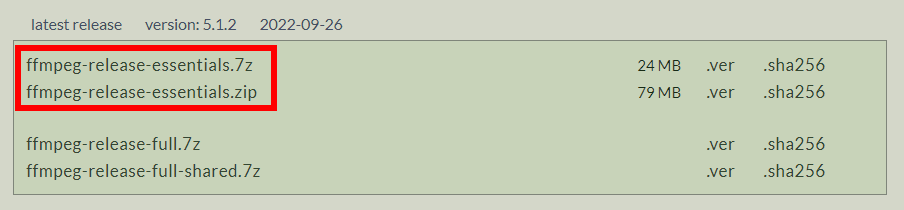
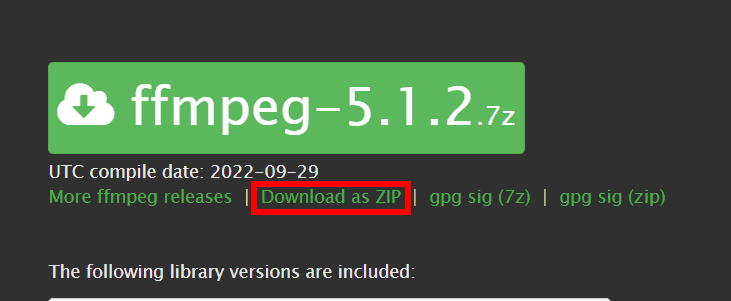
Select and download the latest version with .7z if you have a program to open 7zip archives, or choose the .zip archive to open the files using Windows built-in extractor.
Note: Don’t download the file that contains the word “shared,” as this version won’t work with Krita.
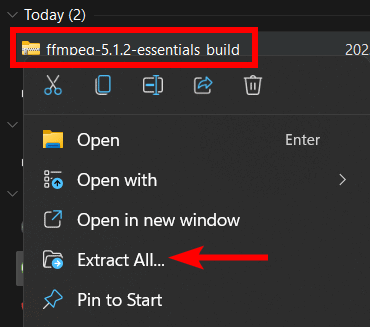
Once the file is downloaded, locate it on your computer, right-click on the archive, and select Extract All.
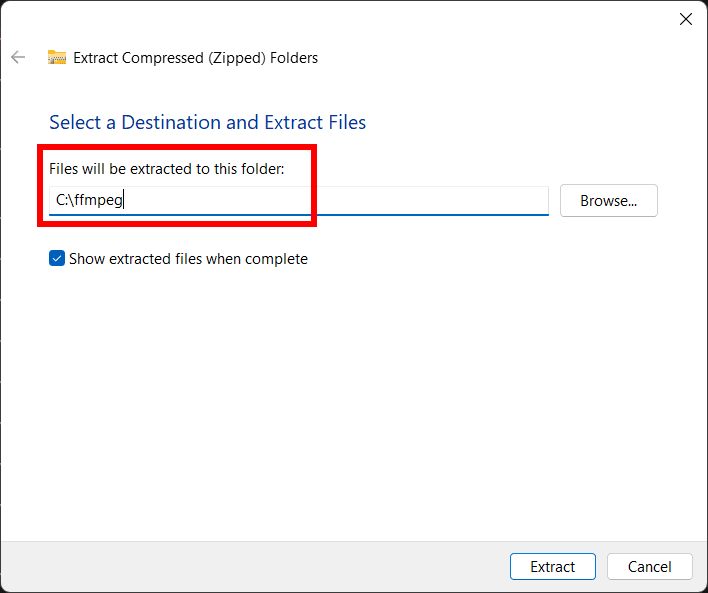
Then, in the extract window, select the C: drive as the location and change the name to ffmpeg.
To link the program with Krita, follow the export instructions in the previous section by opening Krita and going to Fie > Render Animation. Then select the Video option.
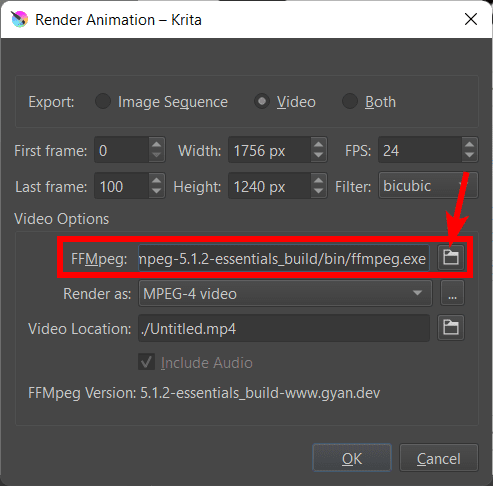
Next, click on the file icon next to FFMpeg and find the file C:/ffmpeg/bin/ffmpeg.exe. You can find this file by opening your C: drive, going into the ffmpeg folder, then the bin folder, and then selecting the ffmpeg file.
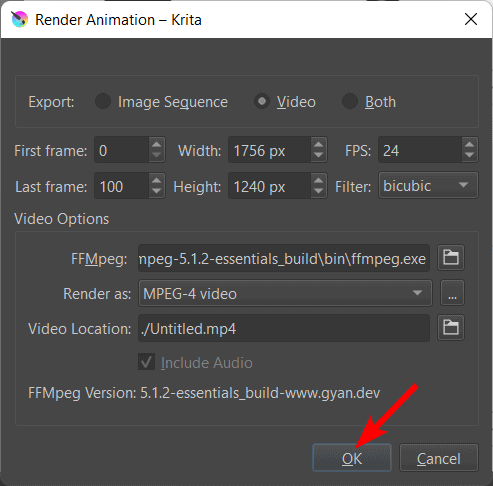
Then click OK. This will export your animation correctly. You can now export animations using the previous section without worrying about the FFmpeg codec.
On macOS
To set up the FFmpeg codec on Mac, download the files from this site, then download the archive by clicking on the Download as ZIP button below the large green ffmpeg-[version number]. 7z button.
Save the file in your Downloads folder and extract it using the Finder by double-clicking on the Archive file.
Once the file is extracted, open Krita and go to the export window by clicking on File > Render Animation. Then select the Video option.
Next, link FFmpeg to Krita by selecting the folder icon next to FFMPeg in the Render Animation window and locating your extracted file in /Users/user/Downloads/ffmpeg. Click OK to export the animation.
What is the location of the FFmpeg file?
The location of the FFmpeg file depends on where you save it once you extract the zipped file. However, it’s recommended that you save the ffmpeg folder on the C: Drive if you’re using Windows or in your Downloads folder when using Mac.
However, you can save it anywhere, as long as the hard drive it’s on is connected to the computer whenever you want to export an animation from Krita.
How Can I export an animation in GIF?
You can export an animation using various formats depending on how you want to use your project after exporting. To save the animation as a GIF, follow the same path as you would export an animation to MP4 format. Go to File > Render Animation, and choose your settings.
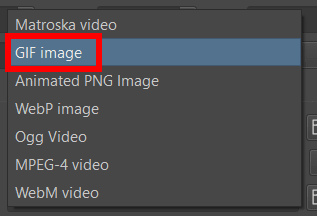
Then, use the drop-down menu next to Render as:, and you will see the various export options.
Select GIF image from the list of options.
Once you have set the format, choose the location and click OK.
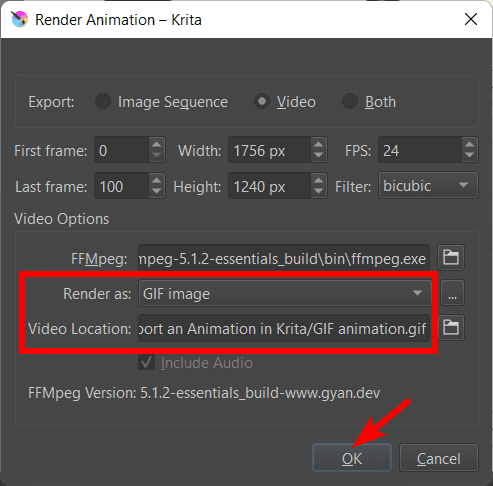
You will now have a GIF file of your animation.

What is the recommended video format for Web?
When exporting an animation in Krita, you can currently choose from several options, such as Matroska video, GIF image, Animated PNG Image, WebP image, Ogg video, MPG-4 video, and WebM video. However, not all of these formats will translate well on the web.
MP4 videos were the standard video format for a while and were often used on the web. However, there are now several other formats competing to offer a better user experience. The WebM format, developed by Google along with its sister image format, WebP, is a great alternative.
The WebM format was designed to compress files into smaller sizes while retaining enough quality, which helps speed up website load times. I recommend using WebM for the web unless you need a super high-quality video.
👍 Support Us: Subscribe to our channel and help us continue providing these tutorials.
🌟 Regular Updates: We publish how-to videos for Krita regularly!
🔧 Expert Guidance: Learn Krita from our professionals and uncover exclusive tips!
