

When you add elements to a layer, they are stacked in the order you create them, which means the first object you add is at the bottom of the stack, followed by the next item. The last object you add is at the top of the stack.
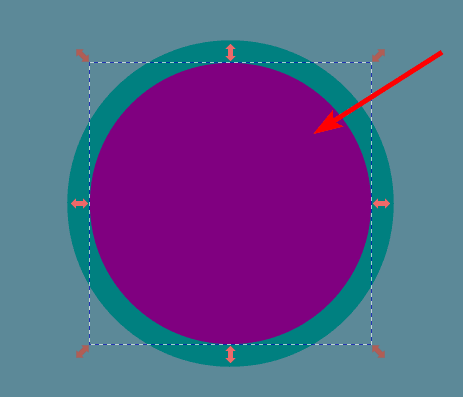
For instance, I have added some text and shapes to the page. I added the text first, then the rectangle, and so the rectangle covers the text. I also added three circles of different sizes, but I created the smallest circle second and the medium circle last, so my smallest circle is hidden in the middle.
I want to re-order the elements to ensure all the elements are visible. For this, I can use the Send to Back function.

Table of Contents
How to Send an Object to the Bottom of a Design
To send an object to the back of a design, I need to lower the object to the bottom. There are a few ways you can achieve this.
First, you need to select the object you want to send to the back. To select the object, activate the Select and transform objects tool (S) and then click on the object.
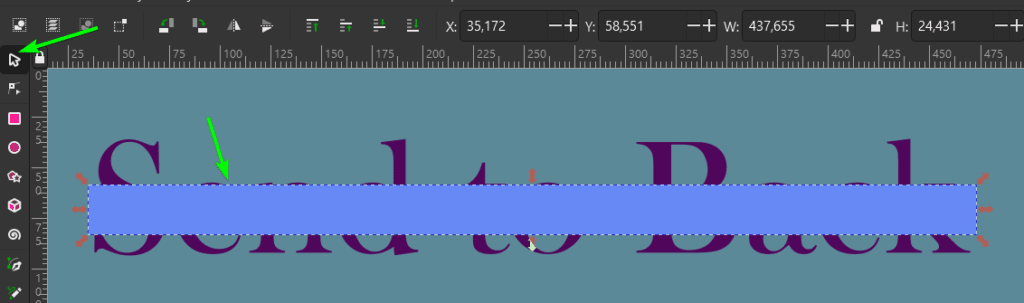
Once the object is selected, to you send it to the back by clicking on the Lower selection to bottom icon in the top settings bar.
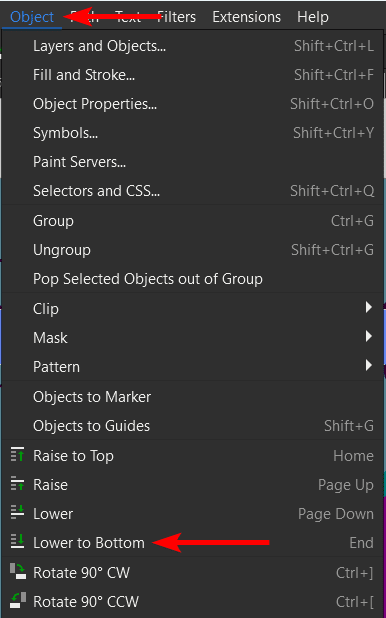
You can also find this option in the menu path by going to Object > Lower to Bottom or using the shortcut by pressing the End key.
Once you have selected one of the lower to bottom options, the object will move to the bottom of the stack (if you have changed the background color of your canvas, the object won’t go behind the color).

How to Send an Object Back One Level at a Time
Another way to send an object back is to lower it by one layer at a time, which means it won’t go to the back of the stack automatically but will move one object down. In this case, I know the smallest circle is below the top circle, and I want the top circle to move to the middle, so I only need to drop it down one level.
Select the object using the Select and transform objects tool (S).
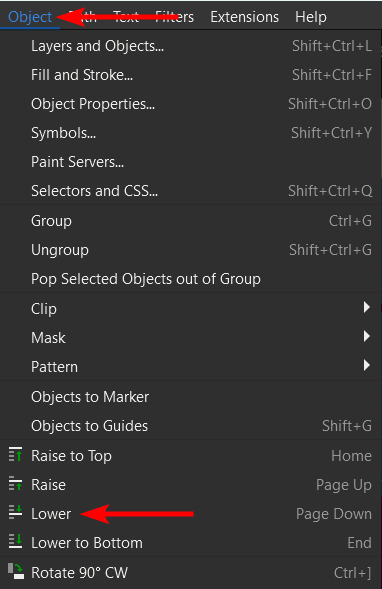
Then, you can click on the Lower selection one step icon in the top settings bar.
You can also use the menu path by going to Object > Lower or the shortcut by pressing the Page Down key.
The object will move one step down rather than moving to the bottom of the layer stack, so the circles are now in order so they are all visible.

👍 Support Us: Subscribe to our channel and help us continue providing these tutorials.
🌟 Regular Updates: We publish how-to videos for Inkscape regularly!
🔧 Expert Guidance: Learn Inkscape from our professionals and uncover exclusive tips!
