
Once you have completed your design in Inkscape, you need to export it as a specific file type. There are a few different file formats to save your project as, but today I will show you how to export your project as a PDF in Inkscape.
A PDF, Portable Document Format, is a versatile file type that lets users open a document without needing professional design software. This file type is also compact and perfect for sending artwork for print.
Here’s how to save your file as a PDF.
Table of Contents
How to Export as a PDF in Inkscape
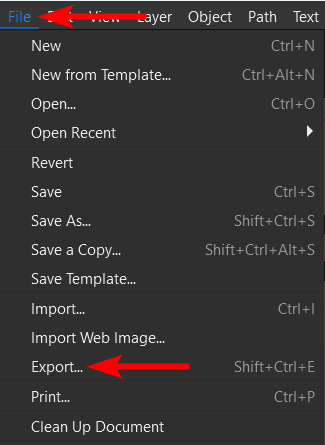
- Go to File > Export
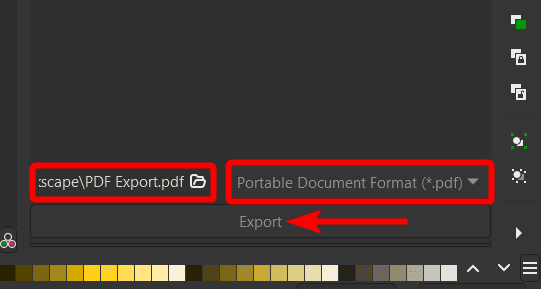
- Select PDF from the drop-down menu at the bottom of the Export window
It only takes two steps to save your file as a PDF. First, open the export panel by going to File > Export or use the shortcut Shift + Control + E on Windows or Shift + Command + E on Mac.
Then, adjust the size and resolution settings in the Export window that appears on the right of the screen.
Most importantly, select Portable Document Format (*.pdf) from the dropdown menu at the bottom of the panel. Then choose the save location and file name with the dropdown menu next to it.
Click Export to save the file, and you’re done.
How to Save As a PDF in Inkscape
Another method you can use is the Save As function to export your file as a PDF. This method offers more settings you can adjust for the PDF, such as converting the text to paths (which preserves the font on all devices).
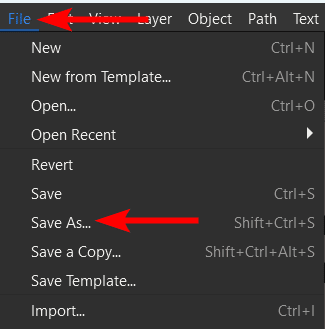
To save your file as a PDF, go to File > Save As or use the shortcut Shift + Control + S on Windows or Shift + Command + S on Mac. You can also choose the Save a Copy option, and the process is the same.
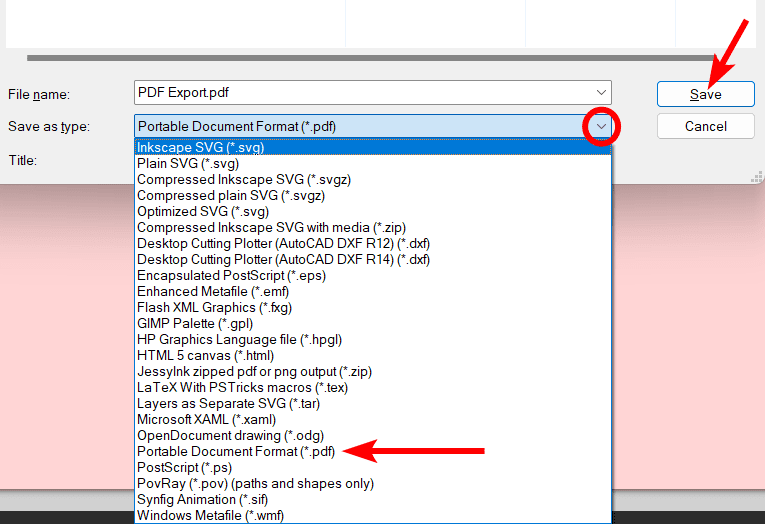
In the window that opens, use the drop-down menu next to Save as Type to select Portable Document Format (*.pdf) from the options. Then, click Save.
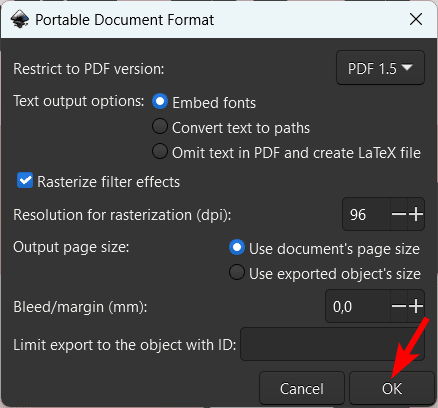
Another window appears with a few settings for you to adjust:
- You can choose the PDF version in which to save the file
- You can embed fonts or convert the text to paths, which is helpful if you want to send the document to another device that doesn’t have the same fonts saved. These two options will ensure the fonts display the same across every device
- You can rasterize the filter effects and choose the resolution for the rasterization
- You can change the output size
- You can add a bleed to the document, which is useful when sending the PDF to print to ensure no information is cropped during printing
Choose your settings and click OK to save the document.
👍 Support Us: Subscribe to our channel and help us continue providing these tutorials.
🌟 Regular Updates: We publish how-to videos for Inkscape regularly!
🔧 Expert Guidance: Learn Inkscape from our professionals and uncover exclusive tips!
