
Inkscape allows you to add editable pixel-based text to your project, which you can adjust by changing the font, size, and color. However, in some cases, you may want to manipulate the text more, as you would when editing or creating a vector graphic. Luckily, you can do this by converting text to a path in Inkscape.
A path is the base of a vector, consisting of straight or curved line segments with editable nodes that alter the direction or curvature of each segment.
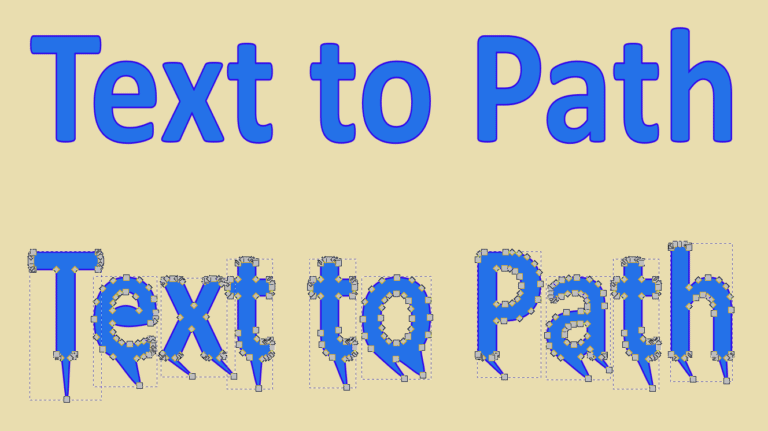
Once you change the text to a vector path, you won’t be able to re-type the text or change the font. You will be able to move the nodes on the text to distort and edit the structure of the letters to form new shapes or text effects.
Here is how to convert text to a path with a few ideas of what you can do with the path.
Table of Contents
Text to Path in Inkscape: Overview
- Type the text using the Text Tool (T) and format it as needed
- Select the text using the Select and Transform Objects Tool (S)
- Convert the text with Path > Object to Path
- Edit the path nodes as needed
How to Convert Text to Path in Inkscape

You can convert text to a path in a few simple steps in Inkscape. This technique lets you further distort and edit text, such as when creating logos and unique text layouts.
Converting text to a path is also essential when sending a layout to print to preserve the text so it doesn't change on the printer's computer if they don’t have the same font installed.
Type the Text Using the Text Tool (T)
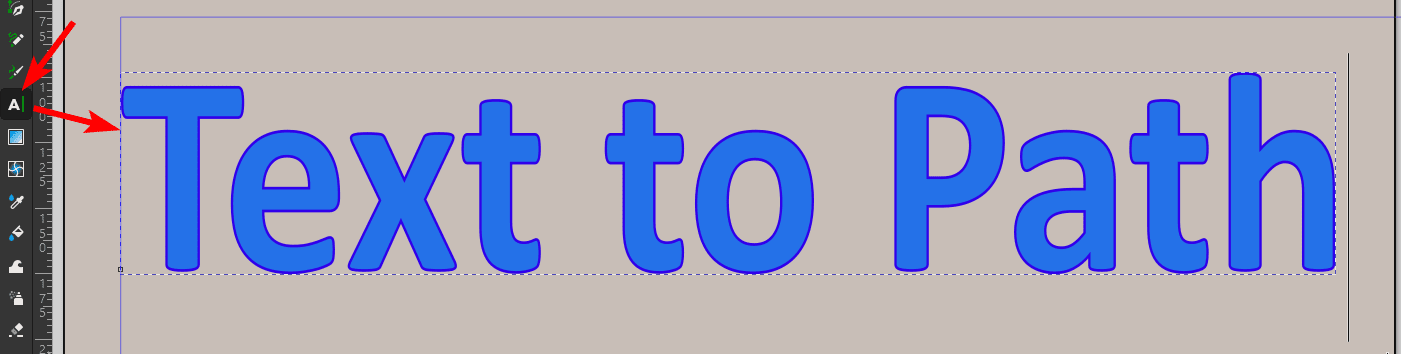
Once your canvas is open in Inkscape, you can add text to the page by selecting the Text Tool from the toolbar or pressing T on your keyboard. Then, click on the canvas to type your text on it.
Format the Text

Once you convert the text to a path, you won’t be able to edit it by changing the font or the actual text. So ensure that you format your text using the font, size, and weight options in the Settings bar near the top of the screen.
Also, ensure that the text is correct and free of spelling errors. You can also make a copy of the text layer so you can edit and restart the conversion process later on if needed.
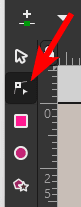
Select the Text Using the Select and Transform Objects Tool (S)
Then, activate the Select and Transform Objects Tool from the toolbar or press S to activate it. Then click on the text on the canvas to select it.
Convert the Text Using Path > Object to Path
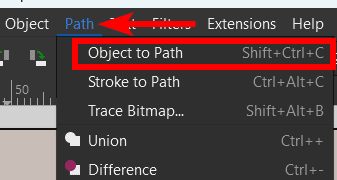
Once you have selected the text, click on the Path menu at the top and select Object to Path. You can also use the shortcut Shift + Control + C on Windows or Shift + Command + C on Mac.
Test the Path

To confirm whether the text is converted, select the Text Tool (T) again and try editing the text. If it’s not editable, then you know the process has worked.
You can also check the Layers and Objects panel, and if you see a list of paths underneath the text layer you initially created, the process has worked.
Select the Node Tool
Now, you can edit the text path by selecting the Edit Path by Nodes Tool from the toolbar or by pressing N.
Click on a Letter or Path to View the Nodes
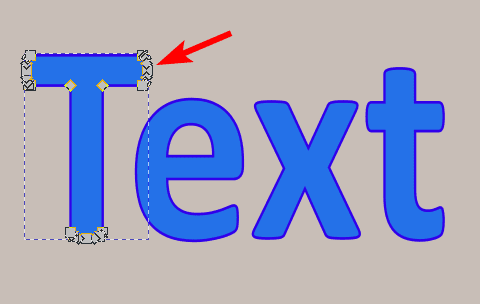
You can click on a letter once you have activated the Nodes Tool to see the nodes on each letter. You will see gray blocks around the letter.
Edit the Path

You can now click and drag the individual nodes to distort the letter and create a new shape or design on the text. First, click on the node to select it, then drag it to distort it.
Continue Editing Nodes
You can continue clicking and dragging to edit nodes across the entire text path to create the look you are going for. For example, I clicked and dragged nodes down at the bottom of the letters to create a dripping effect on the text.
There are much more design opportunities with these paths, so get creative!
Tools:
- Inkscape
👍 Support Us: Subscribe to our channel and help us continue providing these tutorials.
🌟 Regular Updates: We publish how-to videos for Inkscape regularly!
🔧 Expert Guidance: Learn Inkscape from our professionals and uncover exclusive tips!
