
Shortcuts help speed up your workflow by offering a quicker method of achieving what you want. There are several Krita shortcuts for Windows to add to your workflow. You can activate specific tools or menu actions by clicking a few buttons on your keyboard, whether a combination of keys or individual keys.
Here are the essential shortcuts for using Krita on a Windows device. I have also created a downloadable cheat sheet if you want to save the shortcuts on your device or print it out to keep it next to your computer while you work to learn the shortcuts.
I also detail the process of changing shortcut keys if the default shortcuts aren't working for you. You can access the menu to find the entire list of shortcuts. You can also fully customize the Krita shortcuts by changing existing shortcuts or adding new shortcuts to ones that suit you and your workflow.
Table of Contents
Download Our Cheatsheet
Use our printable PDF:
General Shortcuts
| Shortcut | Action |
|---|---|
| Ctrl + N | New |
| Ctrl + O | Open |
| Ctrl + S | Save |
| Ctrl + Shift + S | Save As |
| Ctrl + Alt + S | Save Incremental |
| F4 | Save Incremental Backup |
| Ctrl + W | Close |
| Ctrl + Shift + W | Close All |
| Ctrl + Q | Quit |
| Ctrl + Z | Undo |
| Ctrl + Shift + Z | Redo |
| Ctrl + X | Cut |
| Ctrl + C | Copy |
| Ctrl + Shift + C | Copy Merged |
| Ctrl + V | Paste |
| Ctrl + Shift + N | Paste into New Image |
| Ctrl + Shift + R | Paste as Reference Image |
| Delete | Clear |
| F1 | Krita Handbook |
Shortcuts for Painting
| Shortcut | Action |
|---|---|
| B | Freehand Brush Tool |
| Q | Multi-Brush Tool |
| [ | Decrease Brush Size |
| ] | Increase Brush Size |
| I | Decrease Brush Opacity |
| O | Increase Brush Opacity |
| Insert key | New Paint Layer |
| F2 | Rename Current Layer |
| Page Down key | Activate the Previous Layer |
| Page Up key | Activate the Next Layer |
| Ctrl + J | Duplicate Layer |
| Ctrl + E | Merge Down |
| Ctrl + Shift + E | Flatten All |
| Ctrl + G | Create a New Layer Group |
| Shift + Delete | Remove Layer |
| Shift + Backspace | Fill with Foreground Colour |
| Backspace | Fill with Background Colour |
| X | Switch Foreground and Background Color |
| D | Reset Foreground Color to Black and Background Color to White |
| Mouse right-click | Show Pop-Up Color Palette |
| K | Darken Color |
| L | Lighten Color |
| Ctrl + Shift + U | Desaturate |
| C | Show Common Color |
| H | Show Color History |
| Ctrl + B | Color Balance |
| Ctrl + U | HSV or HSL Adjust |
| Ctrl + L | Levels |
| W | Wrap-Around Mode |
| / | Switch to the Previous Preset |
Shortcuts for Tools
| Shortcut | Action |
|---|---|
| B | Freehand Brush Tool |
| Q | Multi-Brush Tool |
| T | Move Tool |
| C | Crop Tool |
| Ctrl + T | Transform Tool |
| G | Gradient Tool |
| E | Eraser Mode |
| P | Color Select Tool |
| Ctrl + R | Rectangular Select Tool |
| J | Elliptical Select Tool |
| F | Fill Tool |
| M | Horizontal Mirror Tool |
Shortcuts for Selections
| Shortcut | Action |
|---|---|
| Ctrl + A | Select All |
| Ctrl + Shift + A | Deselect |
| Ctrl + Shift + D | Reselect |
| Ctrl + Shift + I | Invert Selection |
| Ctrl + H | Show/Hide Selection |
| Ctrl + Shift + J | Cut Selection to New Layer |
Shortcuts for Navigation and Canvas
| Shortcut | Action |
|---|---|
| Tab | Show Canvas Only |
| Ctrl + Shift + F | Full-Screen Mode |
| Ctrl + + / = | Zoom In |
| Ctrl + - | Zoom Out |
| 1 | Zoom 1:1 |
| 2 | Zoom to Fit |
| 3 | Zoom to Fit Width |
| Ctrl + ] or 6 | Rotate Right |
| Ctrl + [ or 4 | Rotate Left |
| 5 | Rotate Reset |
How to Change Shortcut Keys in Krita
If you are looking for a shortcut that wasn’t on the list above, it could be because it was difficult to include every single shortcut available or because the action you want to do doesn’t have an assigned shortcut key(s).
Luckily, you can access the shortcut preferences and either find the shortcut you want or assign a new shortcut to a specific action. You can also change existing shortcuts if they don’t suit you.
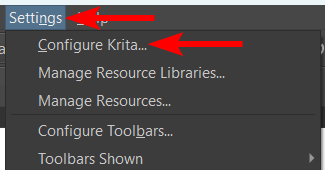
To change shortcut keys, you need to open the shortcut menu. To do this on Windows, open Krita. Then, go to Settings > Configure Krita.
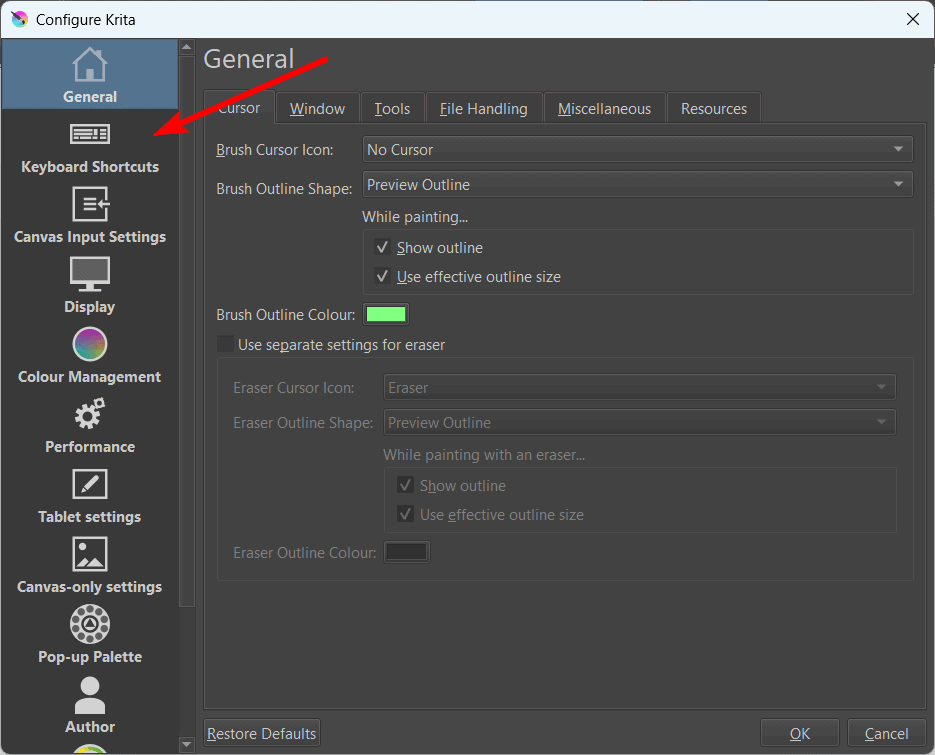
Go to the Keyboard Shortcuts tab by clicking on it in the left-hand panel.
Here, you will find the entire list of shortcuts, including actions that don’t currently have shortcut keys assigned to them. You can move through the list and open tabs to find the shortcut you are looking for.
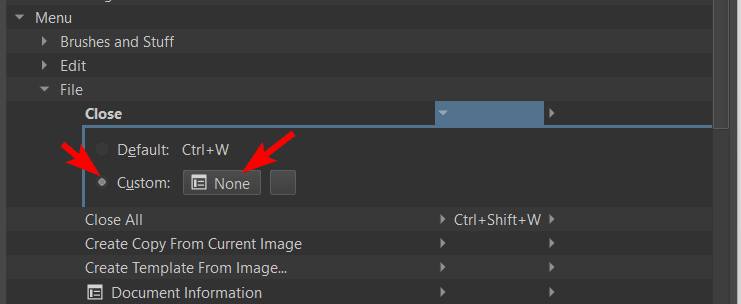
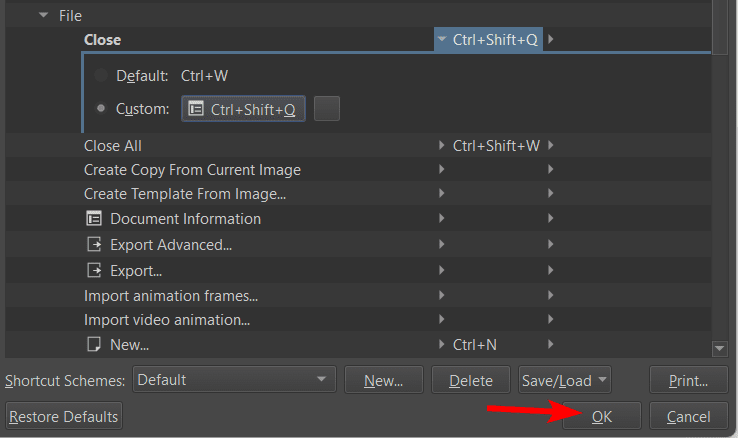
To change or add a shortcut, go to the action. Whether the action already has an assigned shortcut or not, you can use the same method. First, open the action, and click on the arrow in the shortcut column to access the shortcut options.
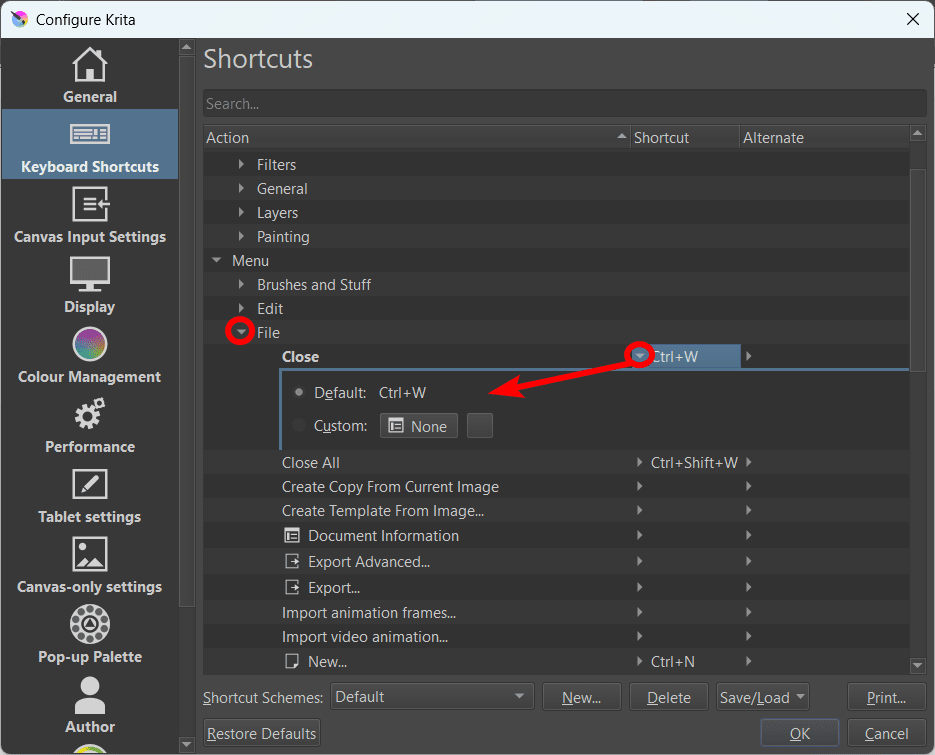
You will see whether there is a default shortcut, such as in my case, which is Ctrl + W for the Close action. To change the shortcut, click the circle next to Custom to select it, then click on the box that says None.
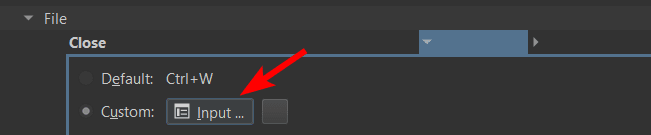
When you click on None, the box will change to Input, indicating that you can press the keys that you want the new shortcut to be.
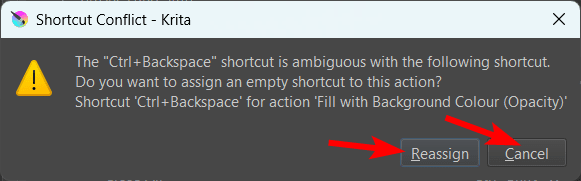
You won’t be able to assign the same shortcut to two different actions, so if you click on the keys you want and they are already assigned to a different shortcut, you will receive an error message. You can either reassign the shortcut to this new action or press Cancel and add different shortcut keys.
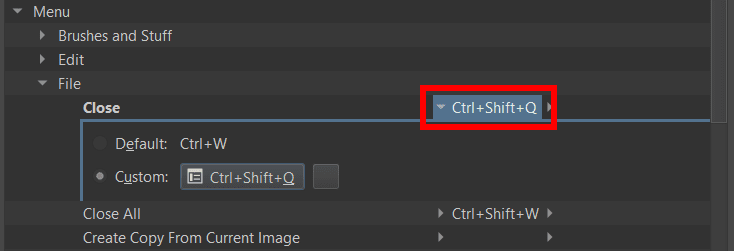
Once you have entered valid shortcut keys, the new shortcut appears in the shortcut column.
You can change as many shortcut keys as you need. Then click OK to confirm the changes, and you can now use your new shortcuts going forward.
👍 Support Us: Subscribe to our channel and help us continue providing these tutorials.
🌟 Regular Updates: We publish how-to videos for Krita regularly!
🔧 Expert Guidance: Learn Krita from our professionals and uncover exclusive tips!
