
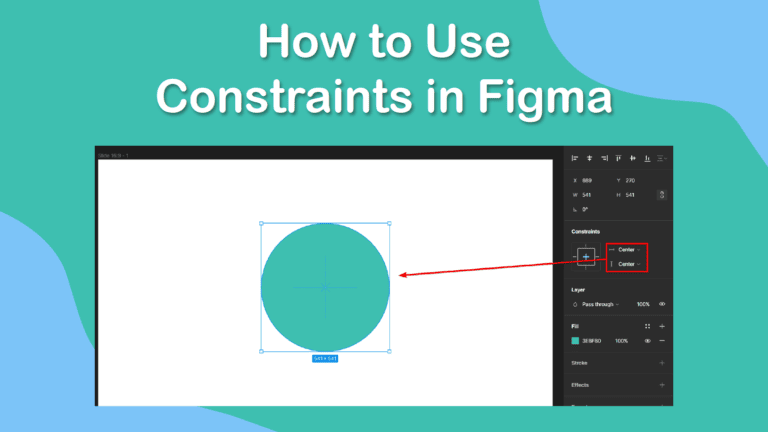
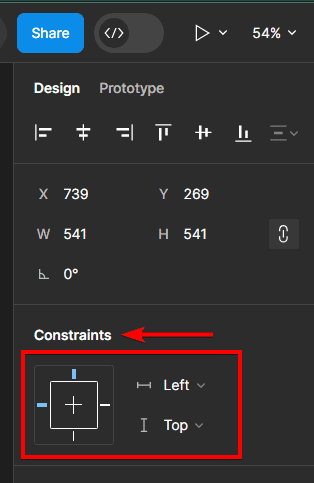
To use constraints in Figma, select a layer and open the Design panel on the right side of the screen. Under the Constraints section, you will see two drop-down menus for horizontal and vertical constraints. You can choose the option that suits your needs or use the icons to switch between the options quickly.
Constraints are an essential feature for creating responsive designs in Figma. Here is all you need to know about constraints, including what they are, how to apply them, and tips on streamlining your workflow when using constraints.
Table of Contents
What Are Constraints?
Constraints are rules that define how a layer behaves when its parent frame is resized. Constraints allow you to control the size and position of a layer relative to its parent frame, as well as its alignment and pinning. Constraints are applied to individual layers, not to groups or components.
There are two types of constraints in Figma: horizontal and vertical. Horizontal constraints control how a layer resizes and aligns horizontally, while vertical constraints control how a layer resizes and aligns vertically. You can set different constraints for each axis or use the same constraint for both axes.
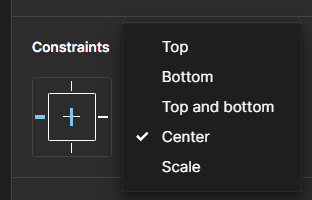
There are four options for each type of constraint:
- Left/Top: The layer will keep its distance from the left or top edge of the parent frame and will not resize.
- Right/Bottom: The layer will keep its distance from the right or bottom edge of the parent frame and will not resize.
- Center: The layer will stay in the center of the parent frame and will not resize.
- Scale: The layer will resize proportionally to the parent frame and keep its aspect ratio.
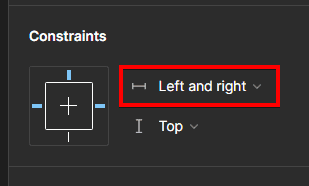
You can also use a combination of these options to create more complex constraints, such as left and right, top and bottom, or left and scale.
How to Apply Constraints in Figma?
To apply constraints to a layer in Figma, select the layer and open the Design panel on the right side of the screen. Under the Constraints section, you will see two drop-down menus for horizontal and vertical constraints. You can choose the option that suits your needs or use the icons to switch between the options quickly.
You can preview how the constraints affect the layer by resizing the parent frame or using the device preview mode. You can also use the prototype mode to test how the constraints work on different devices and platforms.
For instance, I will set the constraints of the circle to center on the horizontal and vertical axis.
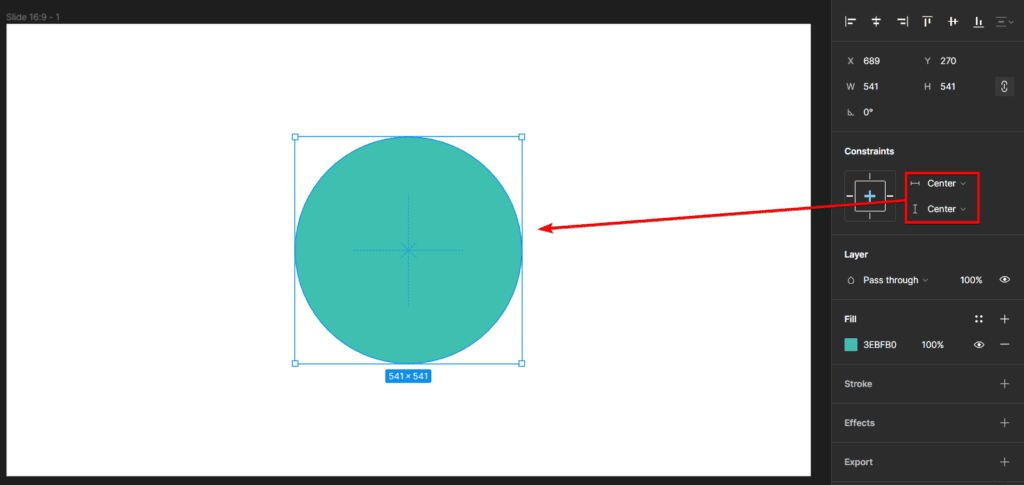
When I resize the frame, the circle remains in the center.

Tips for Using Constraints in Your Workflow
Constraints are a powerful feature for creating responsive designs in Figma, but they can also be tricky to use correctly. Here are some tips to help you use constraints in your workflow:
Use frames as containers: Frames are the basic building blocks of Figma, and they are the only layers that can have children. Frames are also the only layers that can have constraints applied to them. Therefore, you should use frames as containers for your UI elements and apply constraints to the frames and their children. This will allow you to create flexible and scalable layouts that adapt to different screen sizes and devices.
Use auto layout for dynamic content: Auto layout is another feature that allows you to create flexible layouts that adjust to the content and the container. Auto layout is a feature that will enable you to create frames that automatically resize and reposition their children based on padding, spacing, and alignment settings. You can also use auto layout in combination with constraints to create more complex layouts that respond to both the content and the container size.
Use components and variants for reusable elements: Components and variants are features that allow you to create reusable elements that can have different states and properties. Components are instances of a master component that can be edited and updated across your project. Variants are different versions of the same component with different properties, such as size, color, or visibility.
You can use components and variants to create responsive elements with different appearances and behaviors based on different scenarios, such as hover, active, disabled, or selected. You can also use components and variants in combination with constraints and auto layout to create more flexible and consistent UIs.
Use plugins for inspiration and guidance: Plugins are resources that can help you create and test responsive designs in Figma. Some of the plugins and community files that can help you use constraints in Figma are:
- Auto Constraints: This plugin automatically creates constraints based on the logical positioning of the element. For instance, a button placed near the top left-hand corner will automatically get Top Left constraints. The plugin offers various ways to set constraints automatically and offers easy Mac shortcuts for these features.
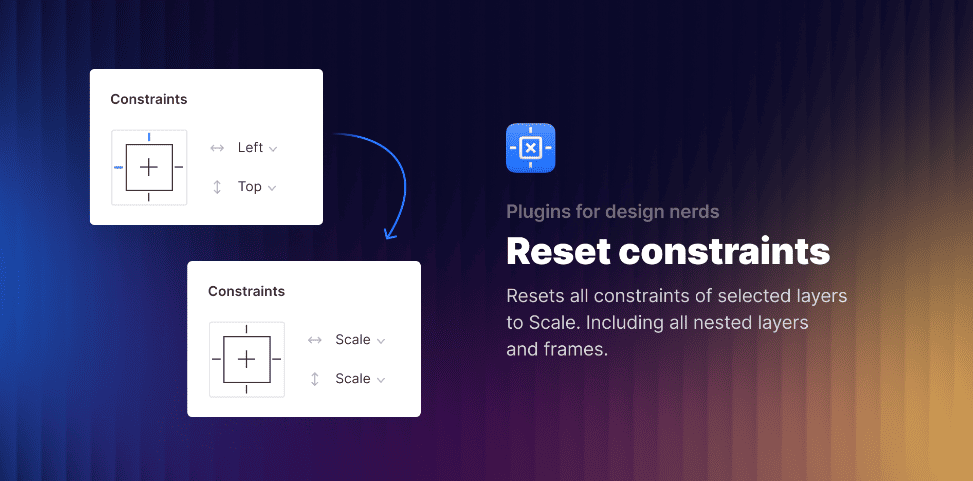
- Reset Constraints: When you need to scale a complex object consisting of nested layers, it can be tedious to reset the constraints of each layer. This plugin lets you reset all the constraints to Scale in one go, removing the need to go through each frame and layer. Simply select the object you want to scale, run the plugin, and resize the object.
- Breakpoints: This plugin allows you to create breakpoints for different screen sizes and devices. You can define the breakpoints by pixel values or device types, and the plugin will create frames for each breakpoint. You can also preview the UI on different devices and export the breakpoints as CSS media queries.

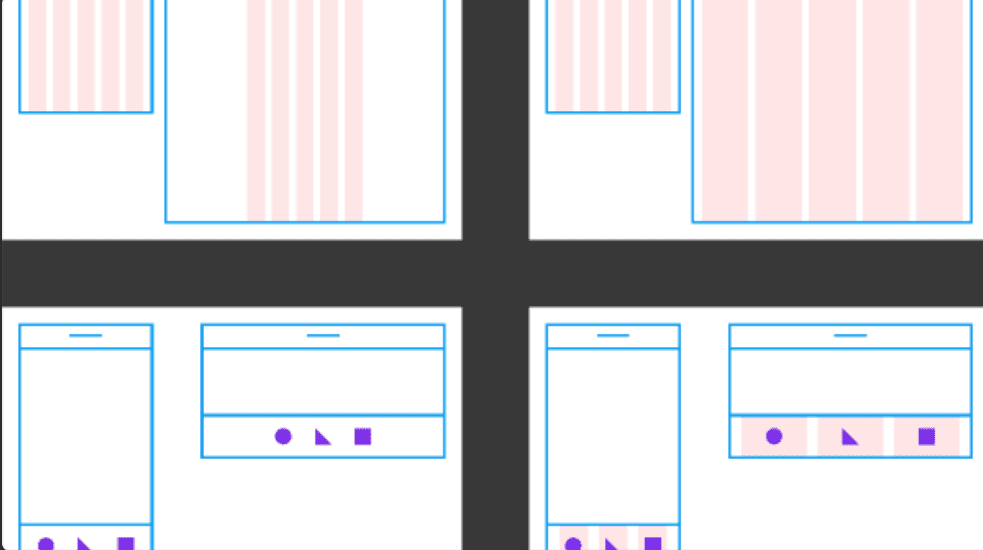
- Using Constraints With Layout Grids: This community file provides a demo to show how constraints can be aligned to a layout grid. This process creates an even distribution of objects with fixed spaces around them. Use this file for information and inspiration when working with constraints and layout grids.
Constraints are a feature that allows you to create responsive UIs in Figma, using rules that define how a layer behaves when its parent frame is resized. You can apply constraints to individual layers, not to groups or components. You can also set different constraints or combinations for each axis or use the same constraint for both axes.