Like most other digital design and drawing programs, FireAlpaca has a built-in autosave function, which is included in version 1.7.0 and above. This feature is not a substitute for saving your files but works as a crash recovery system.
The autosave feature periodically saves your work that's open in FireAlpaca to ensure that you have a relatively recent copy of your work if you experience a power outage, your system crashes, or you experience other unexpected technical difficulties.
Here is all you need to know about how this feature works and how to recover an unsaved file in the event of a crash or something similar.
Table of Contents
How Does the Autosave Feature Work in FireAlpaca?
The autosave feature was added to FireAlpaca in version 1.7.0 and updated and improved in later versions. If you don’t have the most recent version, download it from the official FireAlpaca download page to access the latest features.
The autosave feature saves a separate copy of any open documents in the program at certain times during your workflow. The program will autosave a document when the original file has been edited but not recently saved.
This is not a substitute for saving your files, and any autosaved files are deleted when you manually save the original version.
The autosave feature runs when a file is edited but not saved, and it has been a while since someone edited it. This ensures that the autosave feature doesn’t disrupt work in progress by lagging the program and that you have a backup of your recent work if a crash happens.
Crashes often happen when there is insufficient memory in the device running the program or if the operating system is unstable for some reason.
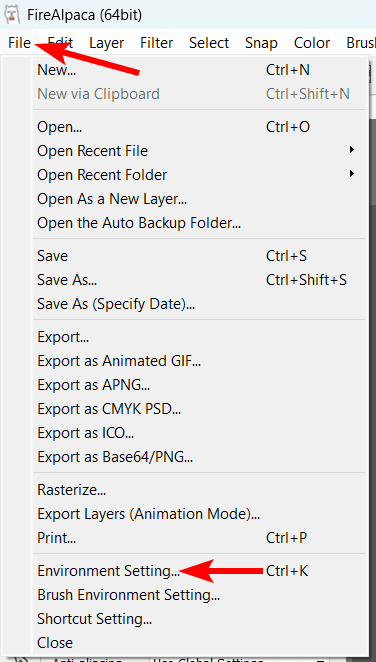
To ensure that the autosave feature protects your work, you can check that the function is turned on. To turn autosave on, go to File > Environment Setting or press Control + K on Windows or Command + K on Mac.
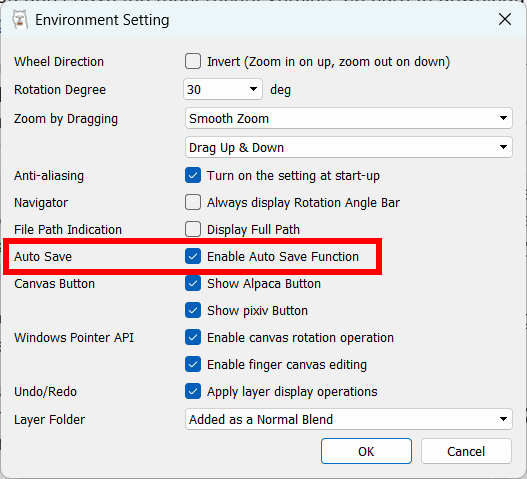
In the Environment Setting window, ensure that the box next to Enable Auto Save Function is checked. If it wasn’t turned on, check the box, click OK, then restart FireAlpaca to confirm the new settings.
How to Recover an Unsaved File?
If you experience a crash before you save your recent work, there is a chance you will be able to recover your unsaved file. This depends on when the autosave feature worked last.
You may not be able to recover the work as it was right before the crash, but it will likely be relatively recent, meaning you may be missing a few edits only.
Re-open FireAlpaca
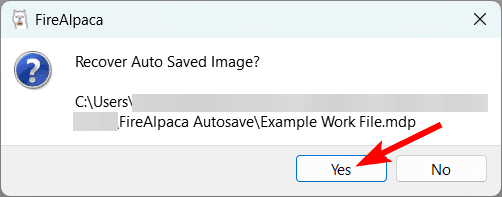
In most cases, if the program or your system crashes, you can simply re-open FireAlpaca, and you will receive a message asking if you want to Recover Auto Saved Image. You can click Yes, and the most recent autosaved document will open.
Open The Config Folder

If the autosaved file doesn’t appear when you open the program, you can find the Autosave folder yourself. To open FireAlpaca’s autosave folder, go to Help > Open Config Folder.
Open The Autosave Folder
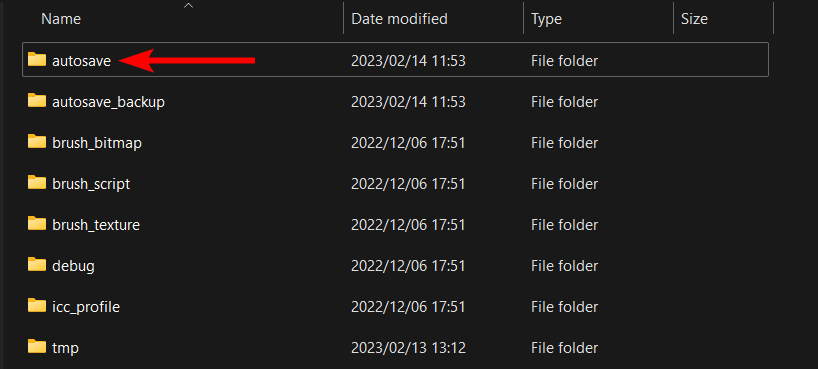
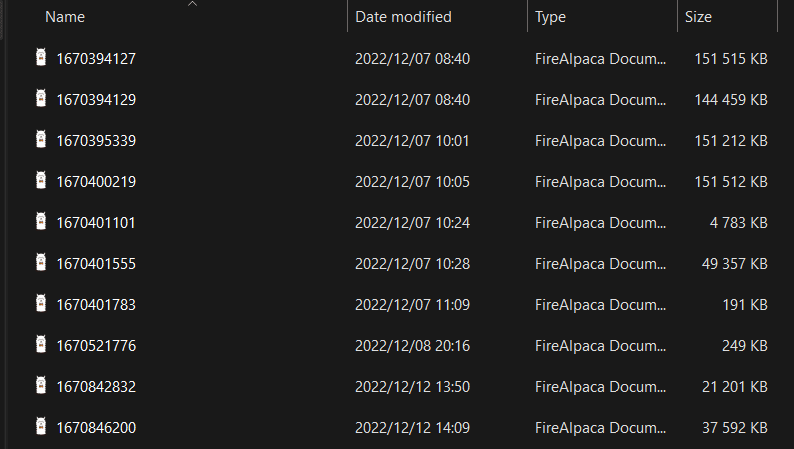
The folder containing FireAlpaca’s configuration settings will open in your File Explorer or Finder. Here you will find a folder at the top called autosave. Open this folder to find the most recently autosaved files.
Open The FireAlapaca Document
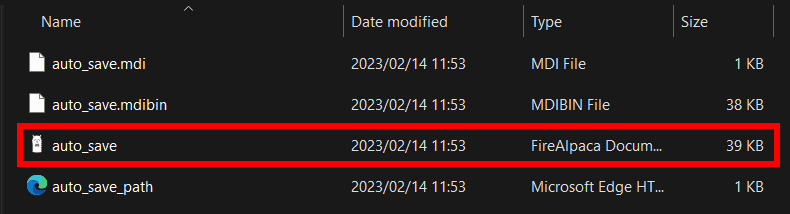
You will find another folder inside named with a string of numbers. Open this folder as well to find the autosaved document. Click on the FireAlpaca Document to open the autosaved file.
Locate The Autosave Backup Folder
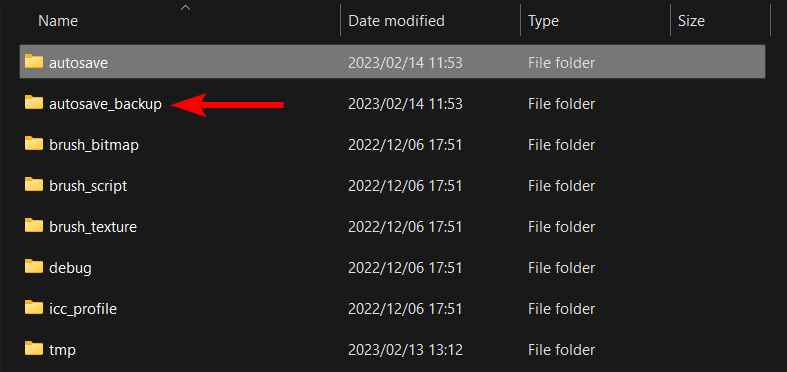
If you can’t find your most recent document here, you may need to look in the autosave backup folder, which holds the autosaved files for much longer, even when you have manually saved over the original.
You can find the autosave_backup folder in the main Config folder underneath the autosave folder.
Find And Open The Necessary Autosaved File
You will find many of your autosaved documents in this folder, even ones that aren’t too recent.
Tools:
- FireAlpaca
- Windows Explorer or Mac Finder
👍 Support Us: Subscribe to our channel and help us continue providing these tutorials.
🌟 Regular Updates: We publish how-to videos for FireAlpaca regularly!
🔧 Expert Guidance: Learn FireAlpaca from our professionals and uncover exclusive tips!