
Suppose you suddenly find that FireAlpaca is not working correctly. In that case, you should reset the entire program to solve any issues it may have or recover deleted default brushes and presets. If you download the latest version of the program, it will save over the version you have. You can also uninstall and then reinstall the program.
However, these two methods will keep the brushes and presets that you have in the program and won’t bring back any default brushes that you may have deleted. To recover the original brushes, settings, and presets, you must follow these steps to reset FireAlpaca to its original state.
I will guide you through the steps to reset the program, including recovering default brushes and settings, as well as how to reinstall the software. Using this information, you'll be able to get your FireAlpaca back in working order with all the brushes you need.
Table of Contents
Reset FireAlpaca
- Download the latest version of FireAlpaca
- Open the Config Folder for the program
- Uninstall FireAlpaca
- Delete the Config Folder
- Reinstall FireAlpaca using the downloaded installer
- Restart your device
How to Reset FireAlpaca: Step by Step
Resetting FireAplaca to its original state takes more time than a simple reinstall process. However, this method will ensure that any default settings are reinstated and any corrupted brushes you may have added are deleted. Be sure to save any brushes or custom color palettes that you want to save before moving forward.
Download the Latest Version of FireAlpaca

Before you delete your current version of the program, download the latest version from the FireAlpaca website. Be sure to find it on the official website, not third-party downloaders, as these may contain viruses and malware that could harm your system.
Open the Config Folder for FireAlpaca
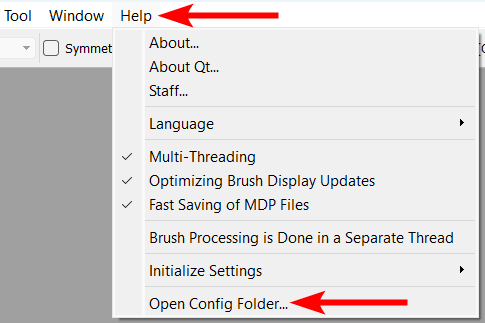
Now you need to locate the program’s config folder on your device. You can find it in various ways depending on your operating system. If you are on Windows, you can open the program, navigate to Help, and click on Open Config Folder.
View the Config Folder
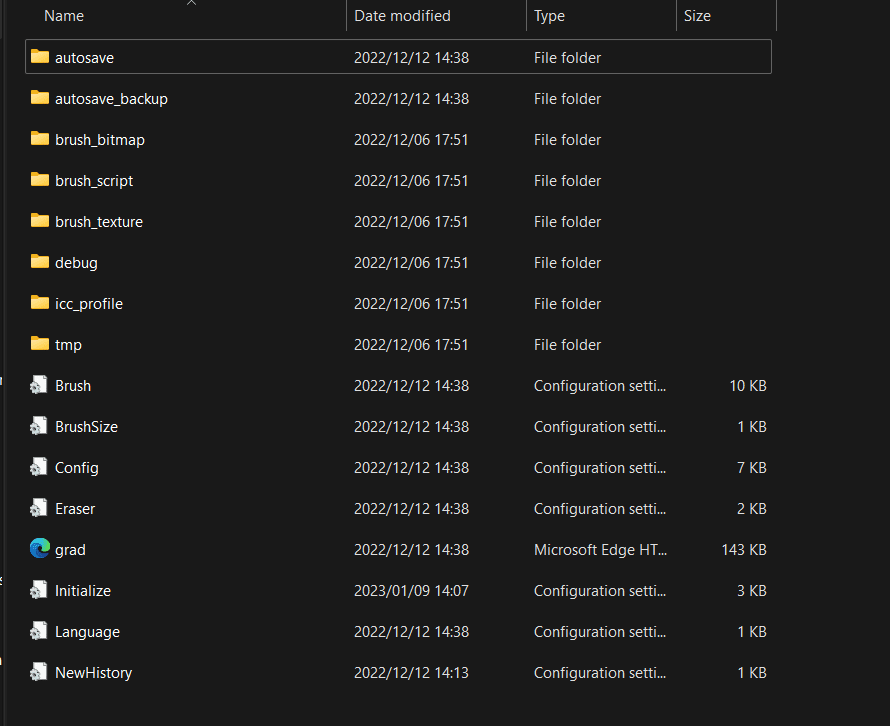
This will automatically open the config folder on your computer containing all the necessary files for FireAlpaca.
Manually Open the Config Folder
If you can’t open the program at all, you can locate the config folder by following this menu path on your computer:
C:\Users > USERNAME > AppData > Local > FireAlpaca
If you are using a Mac, you can locate the folder by opening the Finder. Then, click on Go while holding the Option key. Next, select Library and go to Application Support, where you will find the FireAlpaca folder, which is the config folder.
Once you have located the config folder, minimize it, but leave it open as you will need it for a step later on.
Uninstall FireAlpaca

You can now uninstall the program using the process based on your operating system. Give your device a few minutes to uninstall the program, then move on to the next step.
Delete the Config Folder
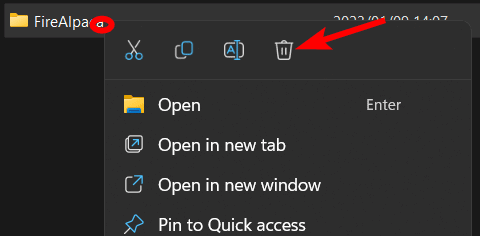
You can now delete the config folder that you located earlier. Move to the folder that the entire config folder is in and delete the folder, which is usually named FireAlpaca.
Reinstall FireAlpaca
Now, you can find the installer you downloaded from the FireAlpaca website and reinstall the program by following the instructions based on your operating system.
Restart Your Computer
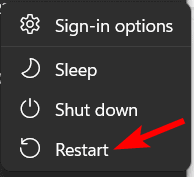
Once you have followed all the instructions to install the program correctly, you need to restart your computer before you attempt to open FireAlpaca. Restarting your computer tells it to create a new config folder containing all the default settings, brushes, and presets needed to run FireAlpaca correctly.
Tools:
- FireAlpaca
👍 Support Us: Subscribe to our channel and help us continue providing these tutorials.
🌟 Regular Updates: We publish how-to videos for FireAlpaca regularly!
🔧 Expert Guidance: Learn FireAlpaca from our professionals and uncover exclusive tips!