

As any designer knows, having an extensive font library for your designs is essential. If you are limited with font choices, you can easily add fonts to Inkscape to give yourself more variety.
The text tool in Inkscape is useful if you want to create a digital poster or advert and need to add text to it. You can also use the text tool to name your artwork and add descriptions. Once you have added text to the canvas and formatted it as you’d like, you can even change the text to a path to warp and edit the text for unique results.
Here is how to add fonts to Inkscape, whether using a Windows or Mac device. You can only use fonts in Inkscape that are installed on your device, so here I will mainly be detailing how to install the font to your device.
Table of Contents
How to Add Fonts to Inkscape in Windows
Quick Steps
- Download the font folder
- Unzip the folder
- Open the font by double-clicking
- Click on Install
- Restart Inkscape
Step by Step
Download the Font Folder
Before you can use a new font in Inkscape, you must ensure the font is installed on your computer. First, you need to download the font unless you have the font copied from another hard drive.
There are several online sites where you can download free fonts for your design programs. My favorite sites are Dafont and Font Squirrel. Also, be sure to read the license information before downloading and using any fonts in your projects.
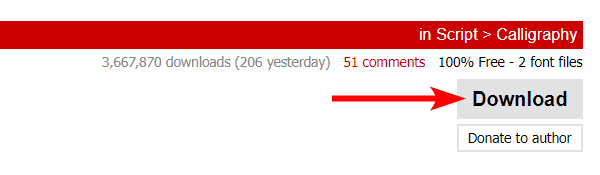
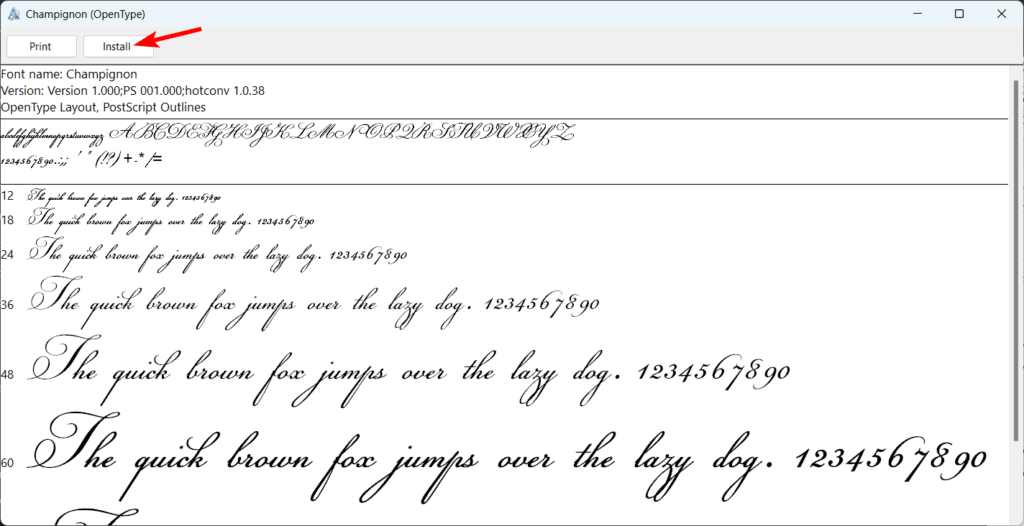
I will download the Champignon font from Dafont to use in this example.

On the website, click the Download button, then save it in a location on your device, such as the Desktop or Downloads folder.
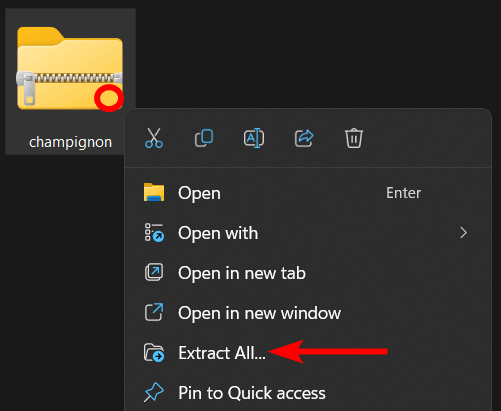
Unzip the Folder
The folder will save as a zipped folder. Once you have downloaded the folder onto your device, locate and unzip it. You can unzip the folder on Windows by right-clicking and selecting Extract All.
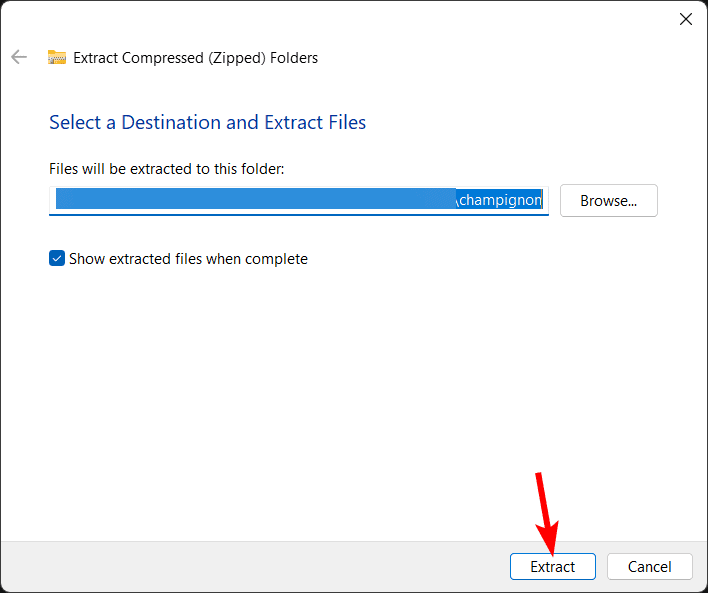
Then, select Extract in the window without changing the location to save it in the same folder as the zipped folder.
Open the Font by Double-Clicking
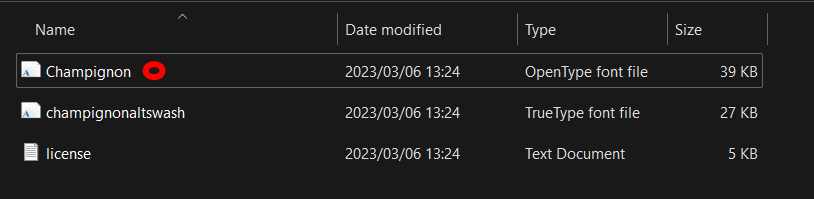
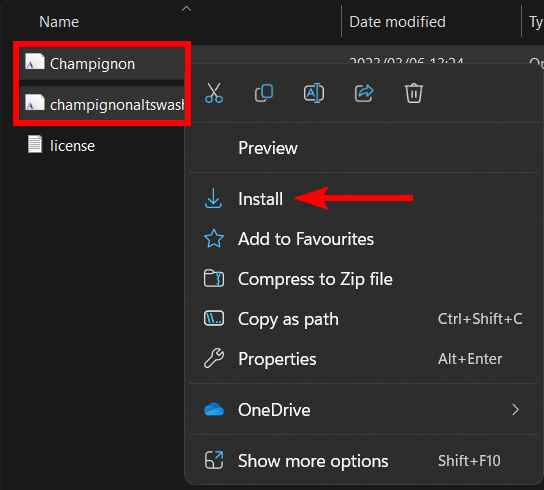
Open the unzipped font folder, and you will see the font files or multiple font files if there are various font weights and styles. You may notice an OpenType font file (OTF) and a TrueType font file (TFF).
You don’t need to install both files. Select the one that works best for you. I recommend using the OTF file if there is one.
Double-click on the font file to open it.
Click on Install
Once the font file opens, click Install at the top of the window. If you are sharing a device, ensure that you install the font as an administrator so all users can access and use the font file.
Install Multiple Fonts
If there are multiple fonts that you want to install, such as the different weights and styles, you must select all the files together by holding in Control. Then right-click and click Install to allow all the fonts to install simultaneously.
Restart Inkscape
Once you have installed the font on your device, close Inkscape and restart it if it was open while you were installing the font. The program needs to restart to load the font into the program.
How to Add Fonts to Inkscape in Mac
Quick Steps
- Download the font folder
- Unzip the folder
- Double-click on the font file
- Click on Install
- Restart Inkscape
Step by Step
Download the Font Folder
When adding a font to Inkscape on Mac, you need to have the font installed on your computer before it is available in Inkscape. You can get a font folder on your device from another hard drive or download a free font from Dafont or Font Squirrel.
Unzip the Folder
Once the file is downloaded onto your device, locate it and unzip the folder by double-clicking on it. Then, open the folder by double-clicking on it again.
Install the Font File
Once you are in the folder, double-click on the font file to open it. Then, in the open file window, click Install to install the font on your device.
Restart Inkscape
If Inkscape was open while you were installing the file, restart it to ensure the font is added to the library so you can use it in the program.
How to Find And Use the Font in Inkscape
Once you have installed your new font(s) on your device, you can find it and use it in Inkscape using the same process whether you are on Windows or Mac.
First, create a new document in Inkscape, then click on the Create and edit text objects tool or press T.
Click and drag on the canvas to create a text box.

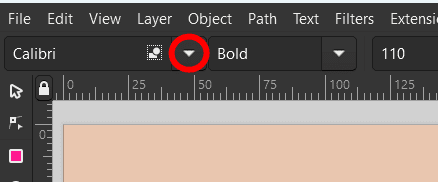
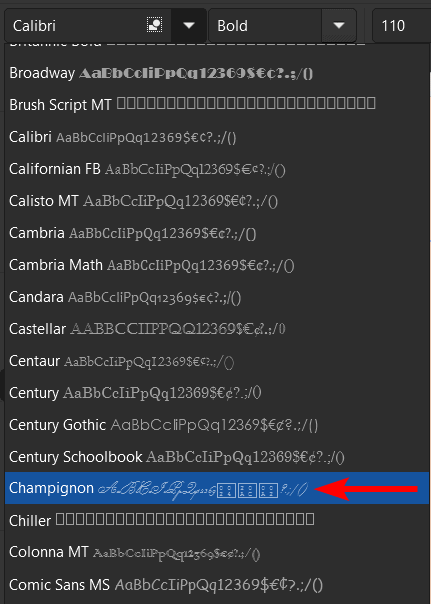
Select your new font from the font drop-down menu in the top settings bar.
Scroll down until you locate the new font you installed, and click on it to select it.
You can then type in the text box with your new font.

👍 Support Us: Subscribe to our channel and help us continue providing these tutorials.
🌟 Regular Updates: We publish how-to videos for Inkscape regularly!
🔧 Expert Guidance: Learn Inkscape from our professionals and uncover exclusive tips!
