
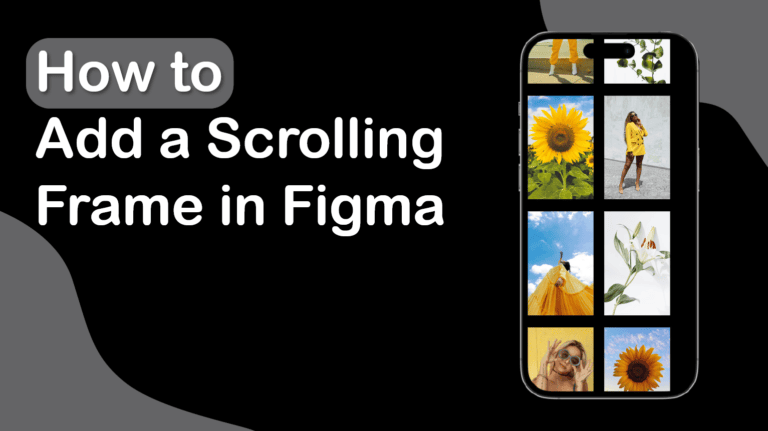
Figma is an excellent interface design tool allowing you to create interactive interfaces for various devices. When creating an interactive layout, you can elevate your project by adding a scrolling frame in Figma.
You would need to add scrolling frames to your design for various reasons, such as creating scrolling filters below an image or adding the ability to scroll down a page to view multiple photos on a cell phone.
Adding a scrolling frame can be confusing for those new to the platform, but following these simple steps will have you adding vertical and horizontal scrolling to your designs in no time.
Table of Contents
Overview of Adding a Scrolling Frame in Figma
- Add your images to the layout
- Select all the images
- Frame the selection
- Resize the frame to the page
- Open the prototype tab
- Change the scroll behavior
- Press the play button
- Test the scroll in the new tab
Step-by-Step to Add a Scrolling Frame in Figma
Whether you want to add a scrolling frame to a horizontal line of filters or a vertical gallery of images, you can use the following steps to achieve this. Once you have added your scrolling frame or multiple frames, you can test the final design and see how it will look on the device you are designing for.
I will demonstrate the process using images sourced from Unsplash.
Add Your Images to the Layout

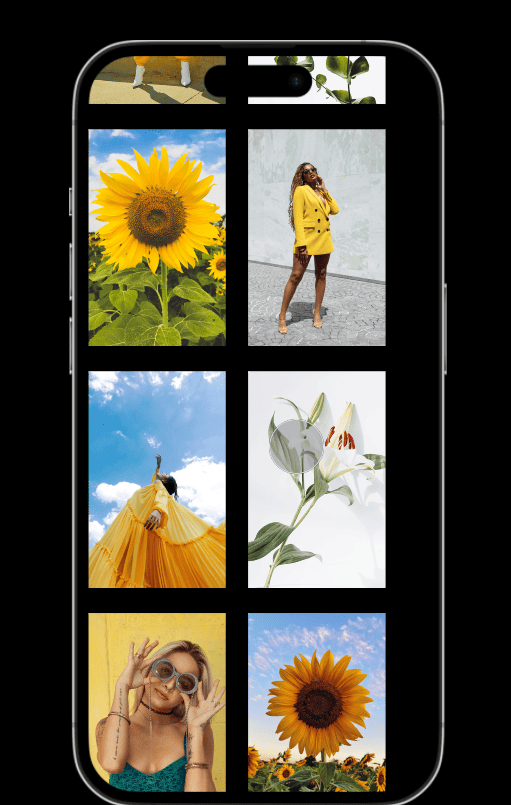
Before you add the scrolling frame, you need to complete the design elements that will make up the frame. First, select the document you want to work on based on what your end design is for. In my case, I have used the iPhone 14 Pro template to create a design that fits the phone.
Once you have the document, add the images or elements you want included in the scrolling frame. These are all the elements that will move across the screen to make way for new elements.
You should have elements placed outside the document that will move into the field of view as you scroll. The images that sit outside the white canvas won’t be visible until you scroll on the page.
Select All the Elements/Images
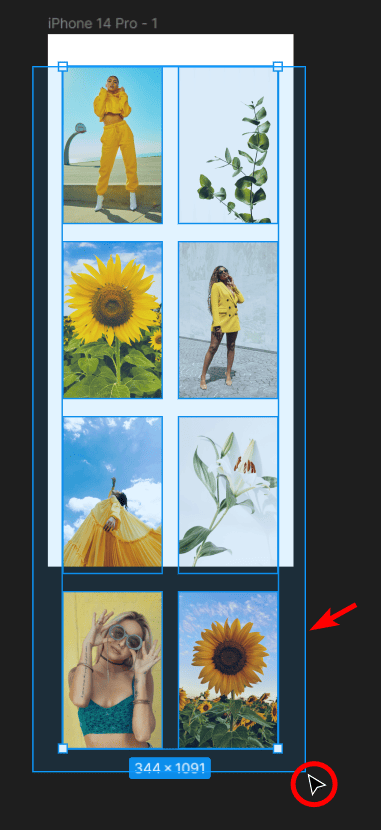
Once you have your elements or images on the canvas, you must select all the ones you want to be visible when using the scrolling feature. To select multiple elements, either click on each one while holding in Shift or click and drag over all the elements.
Frame the Selection

When all the elements have been selected, you can frame the selection to indicate which elements you want to move when a person scrolls the screen. These elements should only be the images or elements that will move and will include the elements on and off the document.
Frame the selection by right-clicking and selecting Frame Selection or using the shortcut Control + Alt + G on Windows or Command + Option + G on Mac.
Resize the Frame to the Page
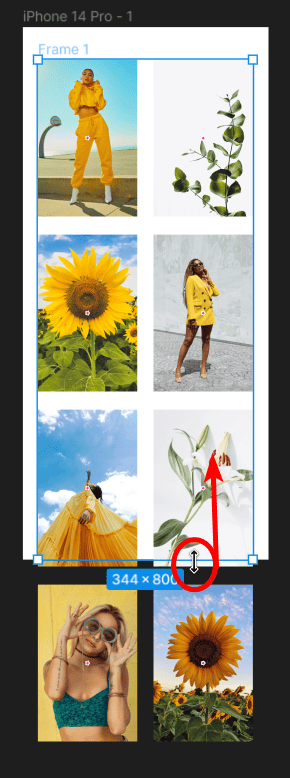
The frame will fit around all the elements and will be shown as a blue line with the name at the top left, which in this case, is Frame 1. Now, you need to resize the frame to confine the visible space on the design.
The frame will show the content, and anything outside will be hidden until triggered by scrolling the page. Here, you will drag the frame toward the edge of the canvas based on where you want the visible elements.
If you are creating a vertical scroll, move the frame to the bottom edge of the page. If you are making a horizontal scroll, move the frame to the right edge of the canvas.
To resize the frame, hover over one edge until the double-arrow icon appears, then click and drag it upward or sideways to meet the edge of the canvas.
Open the Prototype Tab
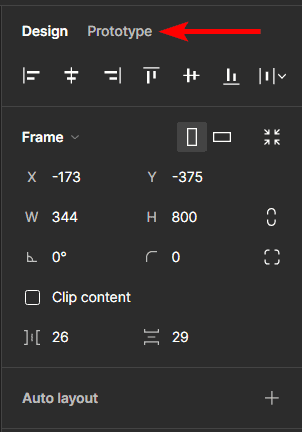
You can now set how the frame behaves by opening the Prototype Tab. To open the tab, click on Prototype near the top of the Properties panel.
Change the Scroll Behavior
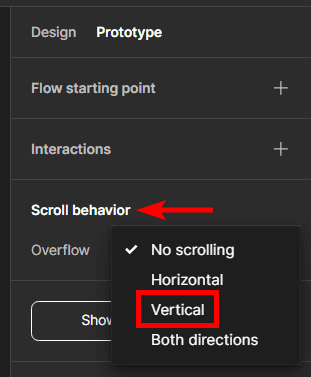
Ensure that the frame is still selected, and then locate the Scroll Behavior section in the Prototype tab. Here, you can set how the frame behaves when you scroll on the page.
Click on the arrow next to Overflow, which is set to No Scrolling by default, then select which way you want your page to scroll. In my case, I want it to scroll vertically, so I choose Vertical.
Press the Present Button
Once you have set the scroll behavior, you can test whether your design works on the device you are designing for. To do this, click the Present button, which looks like a Play icon, at the top-right of the Figma workspace. This will open a new tab in your browser with your design on a mock-up of the device you set the template for.
Test the Scroll in the New Tab
You can now click and drag up or down or to the side to test how well the scrolling frame works correctly and to see how the images will look when scrolling along the page on the device.
Tools:
- Figma