
By default, the background color of an Inkscape document is transparent but appears as white. If you were to add objects and save the default page as a PNG, you would have a transparent background. However, you may want to change this to have a specific color as the background.
You can easily change the background color in Inkscape to export your design with a color behind your objects. You can choose any color with any amount of transparency for your background, and here is how to do it.
Table of Contents
Overview of How to Set the Background Color
- Go to File > Document Properties
- Locate the Page color block
- Select a new color from the picker
- Close the color picker and the document properties panel
- Check your canvas
Step-by-Step to Set or Change the Background Color
You can change the background color when creating a new document or during your project at any time. You can change the color in the Document Properties window, which pops up when creating a new document.
Go to File > Document Properties
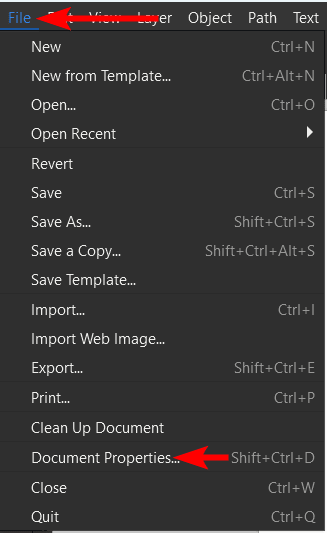
Suppose you are working on a document already and want to change the background color. In that case, you must open the properties window by going to File > Document Properties or using the shortcut Shift + Control + D on Windows or Shift + Command + D on Mac.
Locate the Page Color Block
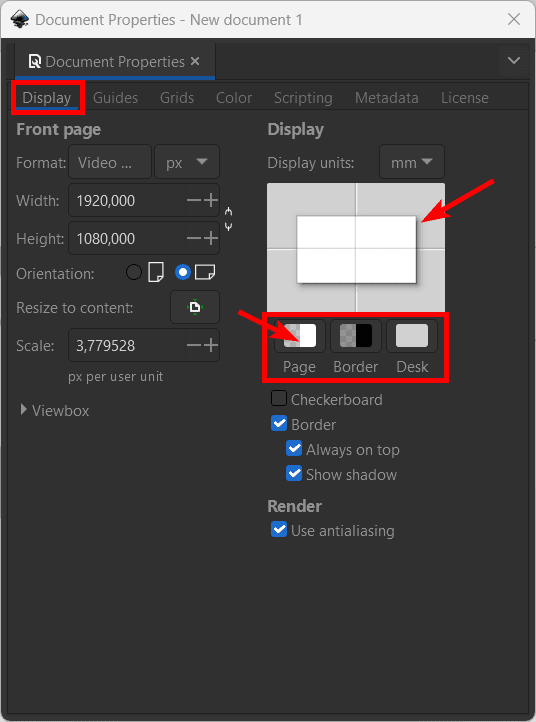
Once the Document Properties window opens, stay in the Display tab, and locate the Page block. You will see three color blocks: Page, Border, and Desk. You can adjust the blocks to change the background color (page), the color around the border of the page (border), and the workspace color behind the page (desk).
You will see the page color preview above the three blocks. Click on the Page block to change the background color.
Select a New Color From the Picker
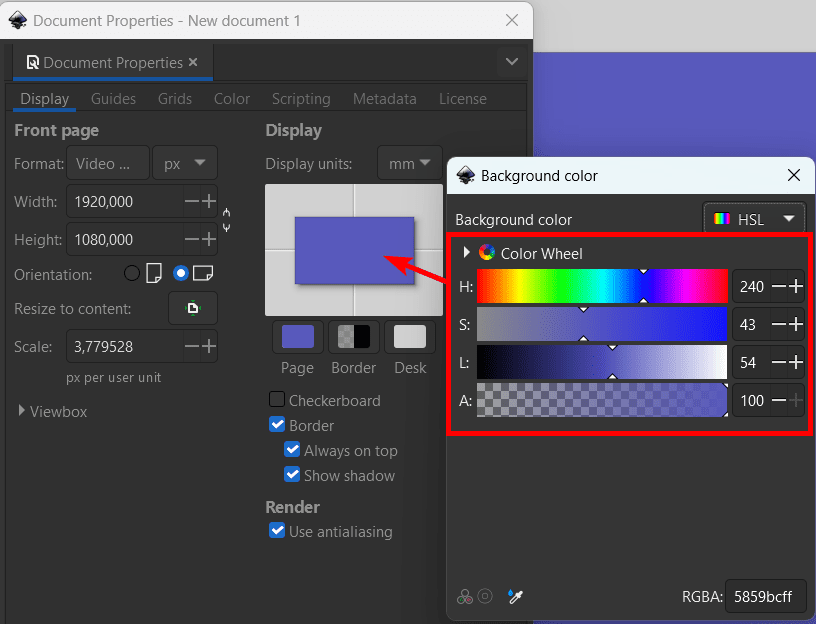
When you click on the page block, the Color Picker appears, where you can select the new background color. Remember to adjust the Transparency slider (marked A) as well to increase the opacity of the color so that you can see it.
Adjust all the sliders until you have a color you are happy with. You will see the new background color in the preview box in the Document Properties window.
Close the Color Picker and the Document Properties Panel
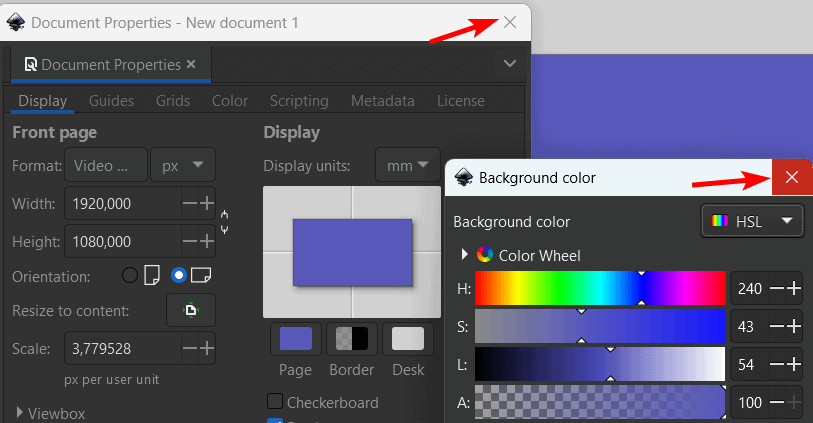
Once you have selected your new color, close the Color Picker and the Document Properties windows using the X icons.
Check Your Canvas
You will see the new background color on the canvas.
Tools:
- Inkscape
Alternative Method to Change the Background Color
There is an alternative method to change the background color in Inkscape, but it’s only suitable in certain situations, such as if you want to temporarily change the background color or add a gradient to the background color.
You can do this by adding a rectangle at the bottom of your design. To do this, select the Create rectangles and squares tool from the toolbar or press R.

Then, click and drag out to create a rectangle over the entire canvas.

Since the rectangle is covering the content on the canvas, you need to send it to the back by going to Object > Lower to Bottom or pressing the End key.

You can then change the shape’s color using the options at the bottom of the workspace or by using the Fill and Stroke panel.

You can also use Create a gradient on the background shape if this is the intention.
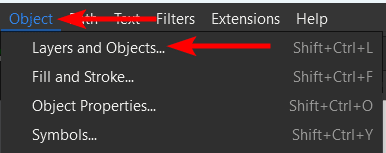
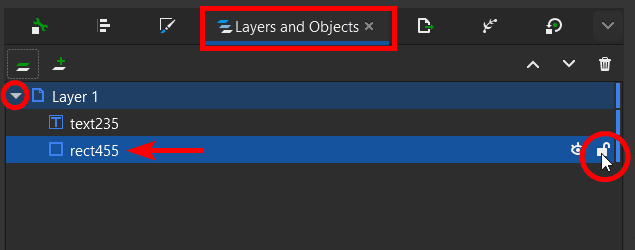
Since the background is an object, you may select and move it accidentally while working. To prevent this from happening, open the Layers and Objects panel by going to Object > Layers and Objects or using the shortcut Shift + Control + L on Windows or Shift + Command + L on Mac.
In the Layers and Objects panel, click the arrow next to Layer 1 and find the rectangle layer, which should be named rect[number]. Hover over the righthand side of the rectangle layer until the lock icon appears, and click it to lock the layer.
Once the layer is locked, you can’t edit or move it until you unlock it using the same process.
👍 Support Us: Subscribe to our channel and help us continue providing these tutorials.
🌟 Regular Updates: We publish how-to videos for Inkscape regularly!
🔧 Expert Guidance: Learn Inkscape from our professionals and uncover exclusive tips!
