
While cropping images is more of a task for Photoshop or our online image cropper, you can easily do basic crops in Adobe Illustrator to save time.
You can use any shape to crop the picture, but I will show you using a circle for this example.
Step-by-Step to Crop a Photo Into a Circle
- Go to File > Place
- Place the Image Into the Document
- Select the Ellipse Tool (L)
- Click and Drag to Add a Circle to the Page
- Select the Circle and Image With the Selection Tool (V)
- Go to Object > Clipping Mask > Make
- Use the Fly-Out Menu Shortcut
- Check Your Canvas
There are a few ways to crop images in Illustrator, such as using the Crop function. However, if you want to trim the shape into a circle, you will need to follow the clipping mask method below. I will demonstrate by cropping this lady wearing sunglasses image from Unsplash.
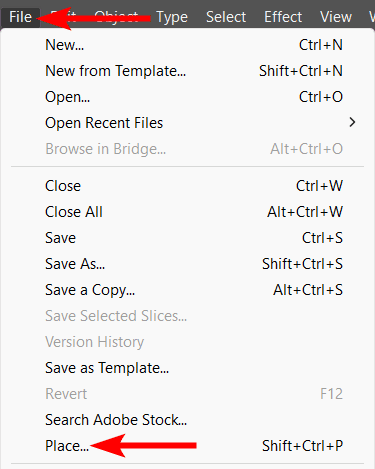
Go to File > Place
First, you need to open an image in Illustrator or place the image onto the page of your project. Go to File > Place or use the shortcut Shift + Control + P on Windows or Shift + Command + P on Mac to place an image.
Place the Image Into the Document
You can select your image from your hard drive using Windows Explorer or Finder and click Place to add it to the document. Then, click and drag to add the image to the page in the space you want it to go.

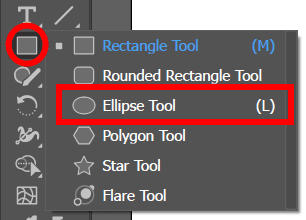
Select the Ellipse Tool (L)
Next, activate the Ellipse Tool by clicking and holding on to the Rectangle Tool to access the fly-out menu in the toolbar. You can also press L to activate it.
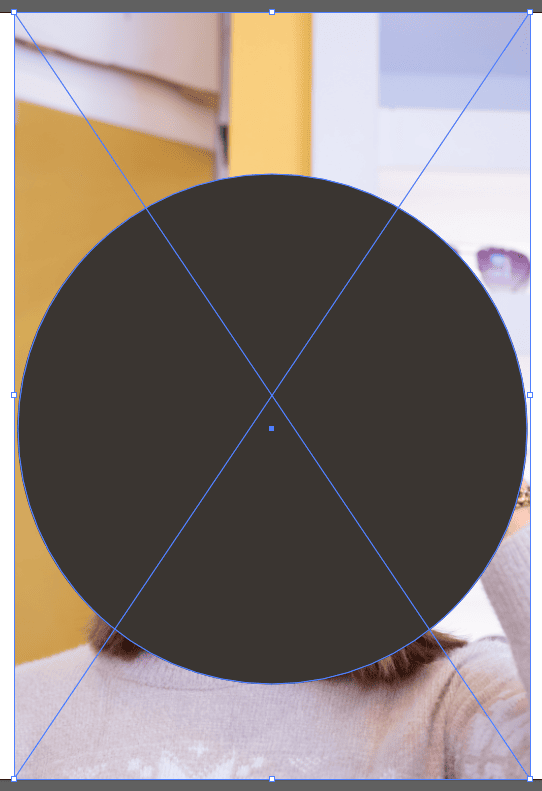
Click and Drag to Add a Circle to the Page
Click and drag on the page to create a circle. Hold in Shift to create a proportional circle, or just drag to create an oval. Use the Selection Tool (V) to move the circle over the image.
The parts of the image covered by the circle are the areas that will be visible after cropping. The other areas outside of the circle will be cropped off. Ensure the circle sits on top of the photo, or the clipping mask won’t work. The circle can be any color, as the color won't be visible after clipping.

Select the Circle and Image With the Selection Tool (V)
Use the Selection Tool (V) to select the image and the circle together. You can click one, hold in Shift, and click the other object. You can also click and drag the mouse over the two objects to select them both.
Go to Object > Clipping Mask > Make
You can now create the clipping mask by going to Object > Clipping Mask > Make or use the shortcut Control + 7 on Windows or Command + 7 on Mac.

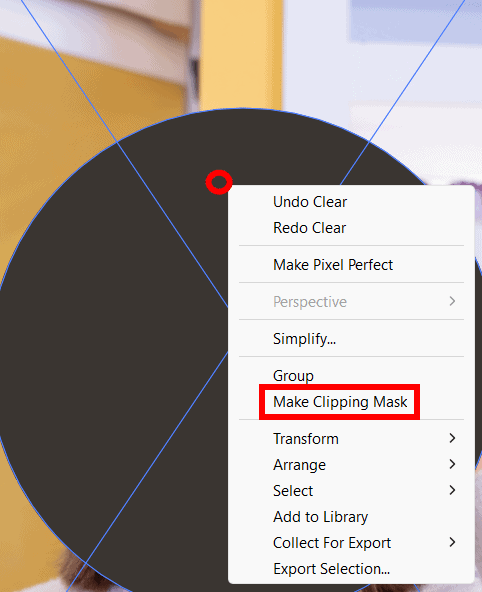
Use the Fly-Out Menu Shortcut
Instead of using the menu path above, you can create a clipping mask faster by right-clicking or Control + clicking on the two objects and selecting Make Clipping Mask.
Check Your Canvas
Once you have used the menu path or the fly-out menu to make a clipping mask, the image will be cropped into a circle, and you can use it in your designs as needed.

👍 Support Us: Subscribe to our channel and help us continue providing these tutorials.
🌟 Regular Updates: We publish how-to videos for Adobe Illustrator regularly!
🔧 Expert Guidance: Learn Illustrator from our professionals and uncover exclusive tips!
