
Figma offers many easy-to-use design tools to make basic designs for interfaces. One of the simple tools is the Arrow Tool, which lets you create an arrow by simply clicking and dragging the line out. However, you may want to customize the arrow by curving it.
Once you have an arrow on the page, you can easily bend it to create a simple curve. If you want a more wavy curve, you can also use the Pen Tool to create a wavy line before adding an arrow point. Whichever outcome you are after, I will show you how to achieve them.
Table of Contents
Overview of Curving an Arrow in Figma
- Activate the Arrow Tool
- Click and drag to add an arrow to the page
- Click the Edit Object button
- Select the Bend Tool
- Click on the arrow line and drag to bend it
- Adjust the handles as needed
- Click Done in the Edit options
Step-by-Step to Curve an Arrow in Figma
Here you can learn how to curve a simple arrow you created using the Arrow Tool. This method adds a bend to the arrow’s line, which you can adjust to make the type of bend you want the arrow to have.
Activate the Arrow Tool
First, you need to add an arrow to the canvas. You can do this by selecting the Arrow Tool, which is found under the Rectangle Tool options, or by pressing Shift + L on Windows or Mac to activate it.
Click and Drag to Add an Arrow to the Page
Once the tool is active, click and drag on the canvas to create an arrow at the size and in the direction you want. The end of the line will have the arrow point.
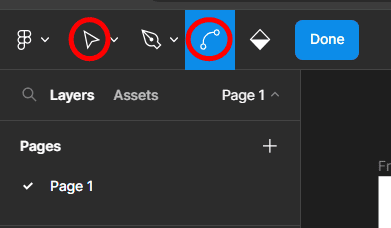
Click the Edit Object Button

When you have the arrow on the canvas, you can open the editing options by clicking the Edit Object button above the canvas. Ensure that the arrow is still selected from when you created it.
Select the Bend Tool
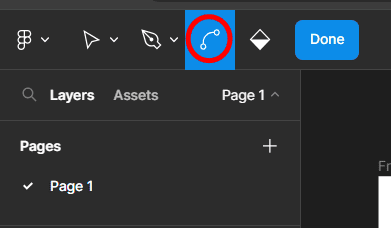
From the editing options, select the Bend Tool or press Control on Windows or Command on Mac to access it.
Click on the Arrow Line and Drag to Bend It
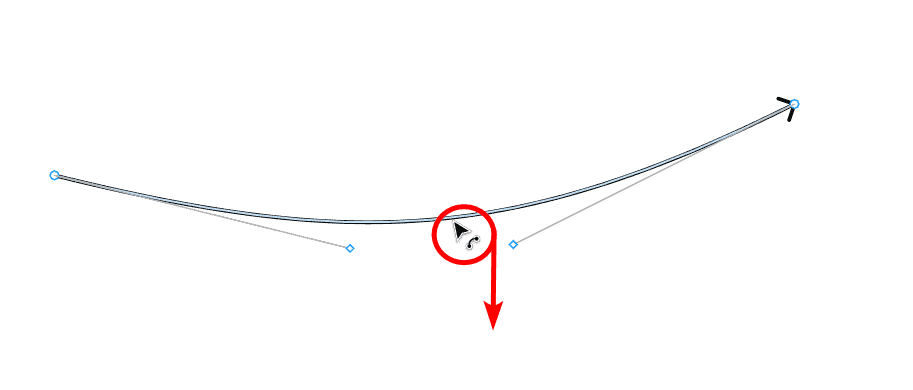
When the Bend Tool is active, you can click anywhere on the arrow line and drag it up or down to curve the arrow line. Dragging the line up creates an upward bend, and pulling the line down makes a downward bend.
Adjust the Handles as Needed
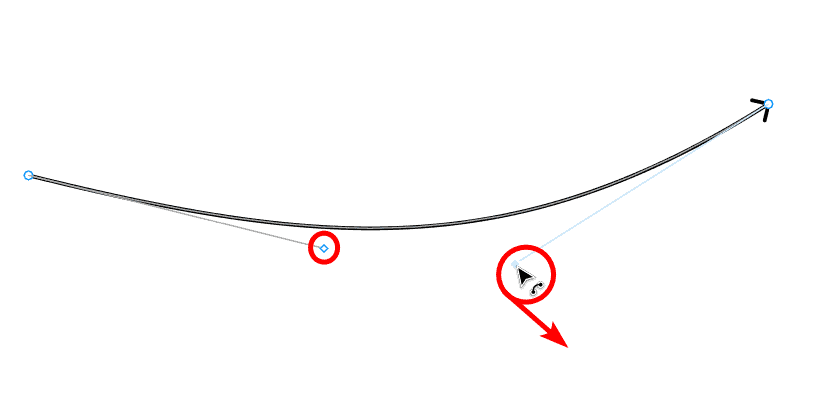
To further customize the bend, you can use one of the two handles that appear near the line to bend the line in different directions.
Click Done in the Edit Options
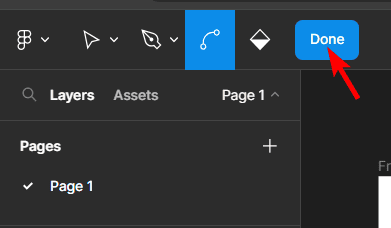
Click on the Done button in the edit options to accept the changes you have made.
Check the Canvas
When you click off the arrow, you will now have a curved arrow on the canvas.
Tools:
- Figma
How to Create a Wavy Arrow Using the Pen Tool
If you want to create a unique arrow, you can make a wavy one using the Pen Tool and add an arrow endpoint. This method gives you more customization options for your arrow.
To create a wavy arrow, select the Pen Tool from the tool options or press P to activate the tool.
Once the tool is active, create your custom line on the canvas by clicking to add anchor points. Once you click to add an anchor, hold down the mouse and drag to create a curve in the line. You can continue this process to make a wavy line by adding as many anchor points as needed.
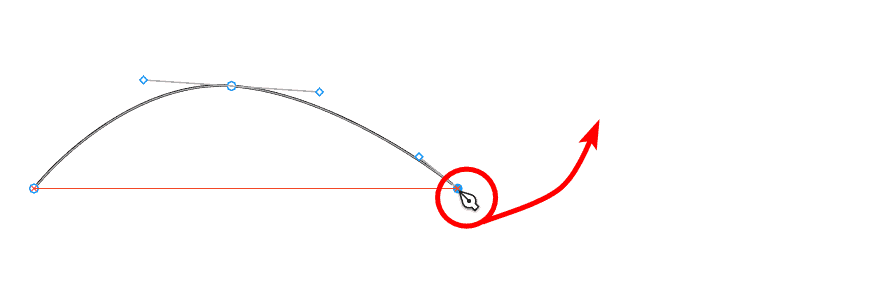
To end the line, click to add the last anchor point, then press Enter or double-click to add the final anchor point.
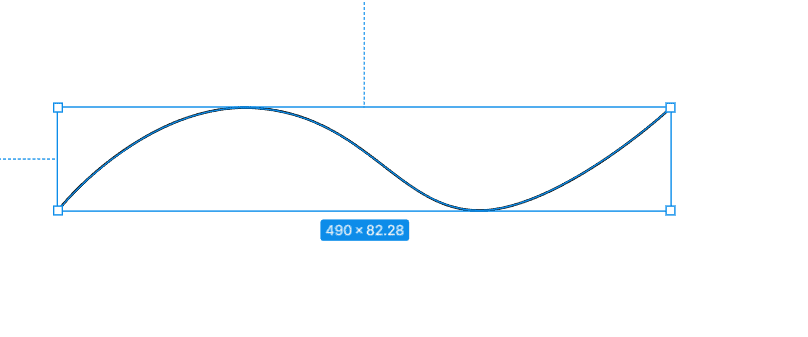
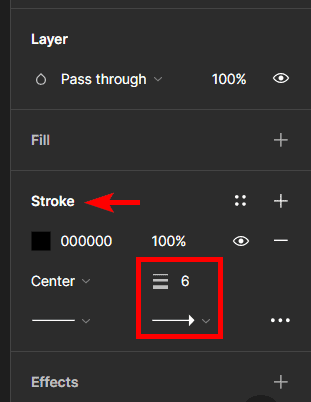
When the line is drawn, use the endpoint option to select an arrow point and adjust the line width if you’d like to by using the width setting. Both these settings can be found in the right-hand panel under the Stroke options.
You can further edit and customize your arrow using the Bend Tool option or the Move Tool option in the Edit Object options as used in the previous method. This allows you to edit the handles and anchor points.
You now have a wavy arrow on the canvas to use in your design projects.