
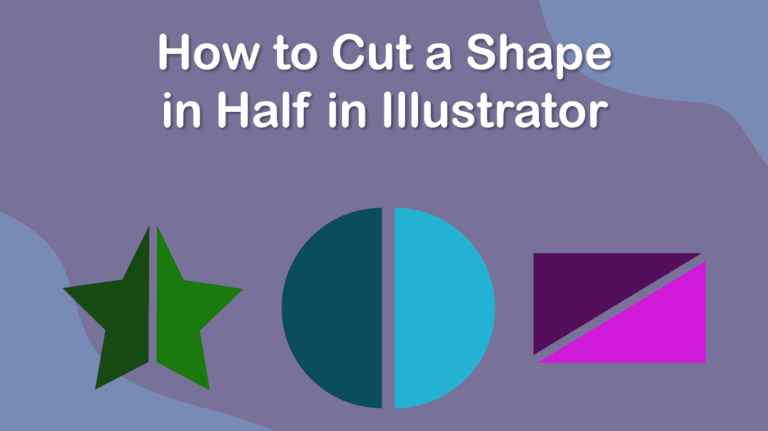
Illustrator has several useful tools for manipulating vector objects, and one is the Scissors Tool (C), which allows you to cut a shape in half quickly. You can split an object directly down the middle in a few simple clicks and then edit the two halves separately.
I will show you the few simple steps to cut a shape in half in the first section, then below, I will detail how to use the Knife Tool for a more freehand cutting method if that is what you’re looking for.
Table of Contents
Overview of How to Cut a Shape in Half
- Add a shape to the canvas
- Select the object using the Selection Tool (V)
- Activate the Scissors Tool (C)
- Click on the middle anchor point
- Click on the opposite anchor point
- Move half the shape
- Change the colors of each half
- Repeat the process on any shape
Step-by-Step of Cutting a Shape in Half in Illustrator

If you want to cut a shape directly in half, the quickest and easiest way to do this is using the Scissors Tool. You can cut the shape at any angle or point and in the middle. Here is how to cut it using a circle, but the same process works on any shape.
Add a Shape to the Canvas
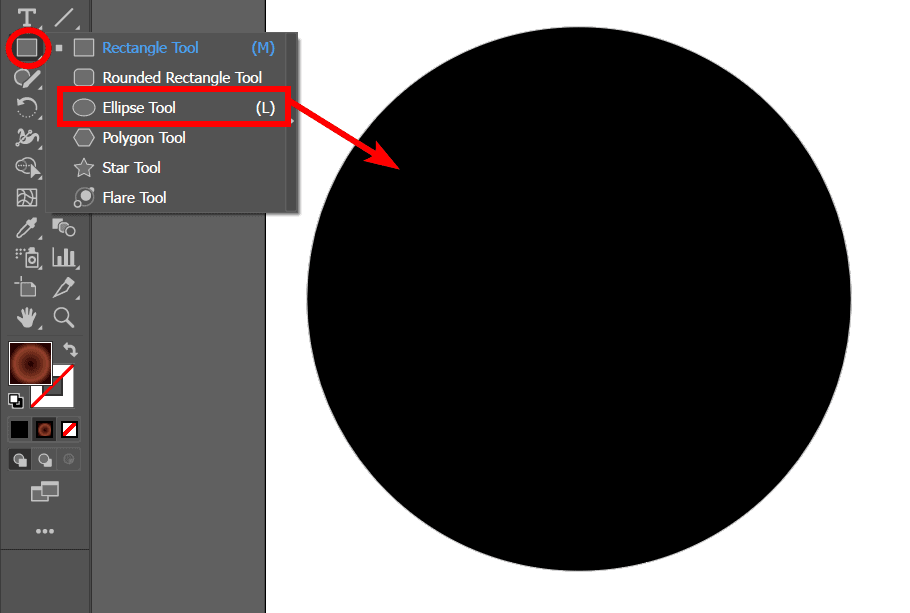
First, you must add a shape to the canvas. This process works on any vector shape, meaning you can use any shape tools under the Rectangle Tool fly-out menu. I will add a circle to the page using the Ellipse Tool (L).
Select the Object Using the Selection Tool (V)
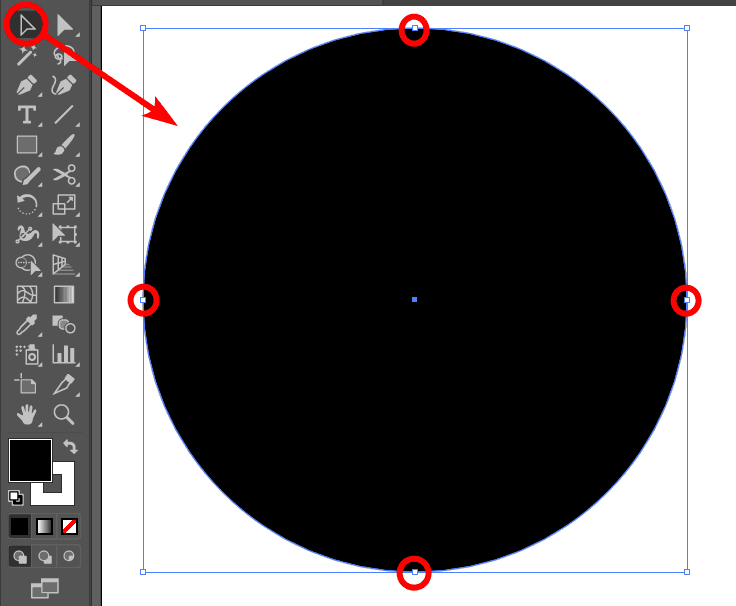
Once the shape is on the page, activate the Selection Tool by selecting it from the toolbar or pressing V. Then click on the shape to select it. You will see anchor points around the shape when it’s selected.
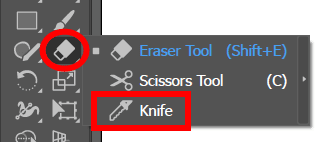
Activate the Scissors Tool (C)
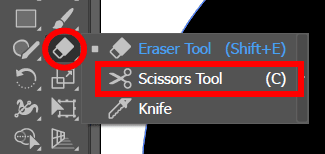
Once the tool is selected, activate the Scissors Tool from the toolbar, which you can find by clicking and holding on the Eraser Tool to open the fly-out menu. You can also press C to activate the tool.
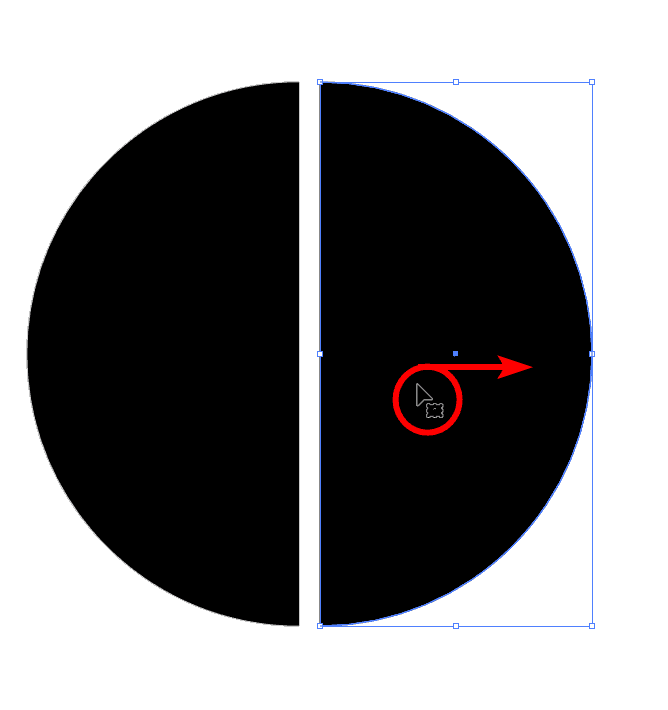
Click on the Middle Anchor Point

With the Scissors Tool, click on one of the middle anchor points. If you want to cut the shape vertically, click on the top anchor point. If you're going to cut the shape horizontally, click on one of the middle side anchor points. I will click on the top anchor point.
You can click anywhere on the outline of the shape. It doesn’t have to be on an anchor point. The anchor point is the best way to ensure you cut the shape equally in half.
Click on the Opposite Anchor Point

Next, click on the opposite anchor point to make the cut through the shape's middle. In my case, I click on the bottom anchor point.
Move Half the Shape
Once you have clicked both anchor points, the shape will be cut in half. To check that the shape was cut correctly, activate the Selection Tool (V). Then click inside one half of the shape. You can then drag the half away or use the arrow keys to shift the half away from the other half.
Change the Colors of Each Half

You can then edit the two new shapes separately. For instance, I can leave the two halves next to each other and change the colors individually.
Repeat the Process on Any Shape

You can use this same process on multiple shapes, including rectangles, polygons, and stars.
Tools:
- Illustrator
How to Use the Knife Tool in Illustrator for Freehand Cutting
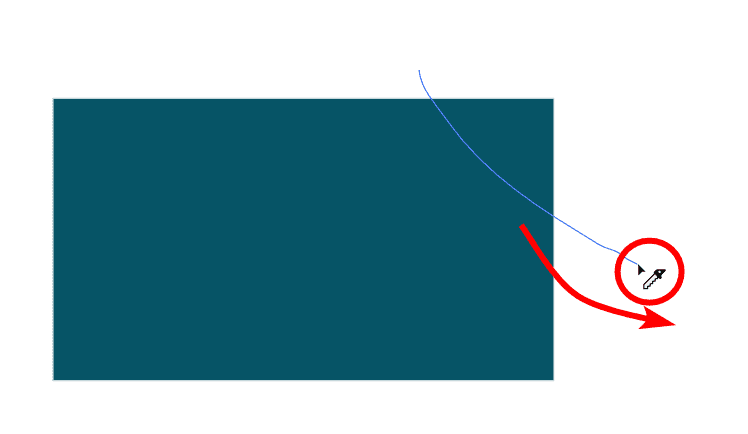
If you want to cut a shape freehand, you will need to use a different tool. When using the Scissors Tool, you have to cut on the shape’s path. When using the Knife Tool, you can cut anywhere across the shape, which allows you to make freehand cuts.
To use this method, add a shape to the canvas and select it using the Selection Tool (V) as you would when using the previous method.

Then, activate the Knife Tool, which is located in the Eraser Tool fly-out menu.
You can now click and drag across the shape to cut it wherever you want. The cut will follow the path you create with the knife.
You can then double-click on the cut piece using the Selection Tool (V) and move and re-color it. You can make as many cuts on the shape as you’d like.

👍 Support Us: Subscribe to our channel and help us continue providing these tutorials.
🌟 Regular Updates: We publish how-to videos for Adobe Illustrator regularly!
🔧 Expert Guidance: Learn Illustrator from our professionals and uncover exclusive tips!
