
When working in Inkscape, there is no obvious way to cut objects in half since there isn’t a scissor or slice tool. However, using an easy workaround, you can easily cut an object in half in Inkscape.
All you need is the object you want to slice, which needs to be made up of paths, and a line drawn in the way you want to cut the object.
To demonstrate, I will show you how to cut a simple shape in half. You can use this technique on more complex paths, such as text, as long as you have converted the object to paths before following along.
Table of Contents
Overview of Cutting an Object in Half
- Draw the shape or add the object to the page
- Activate the Bezier Tool (B)
- Draw a straight line on the page
- Align the object and the line
- Go to Path > Division
- Get creative
Step-by-Step to Cut an Object in Half in Inkscape

You can cut any type of object in half as long as it is made up of paths, meaning that it’s a vector object. This includes shapes you create in Inkscape, text you convert to a path, or other elements you draw using the bezier tool. Here is how to cut any of these objects in half.
Draw the Shape or Add the Object to the Page
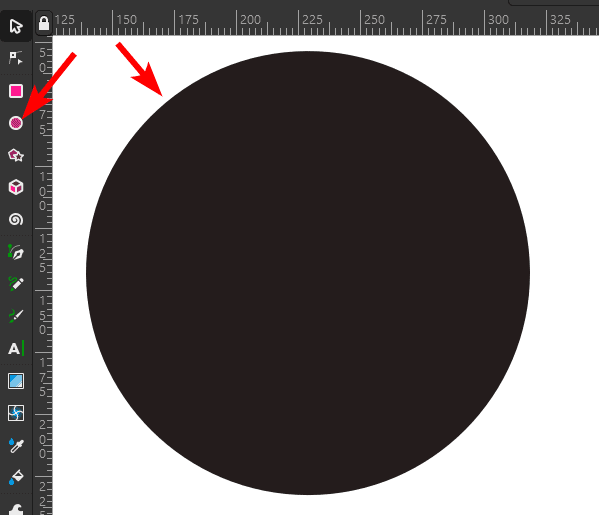
First, add your object or shape to the page. To simplify the tutorial, I’ll cut a circle in half. To do this, I select the Create circles, ellipses, and arcs tool (E) and click and drag to create it on the page. You can choose the stroke and fill colors at this stage or after cutting the object.
Activate the Bezier Tool (B)
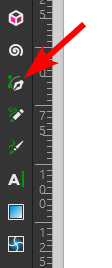
Next, select the Draw Bezier curves and straight lines tool from the toolbar or press B.
Draw a Straight Line on the Page
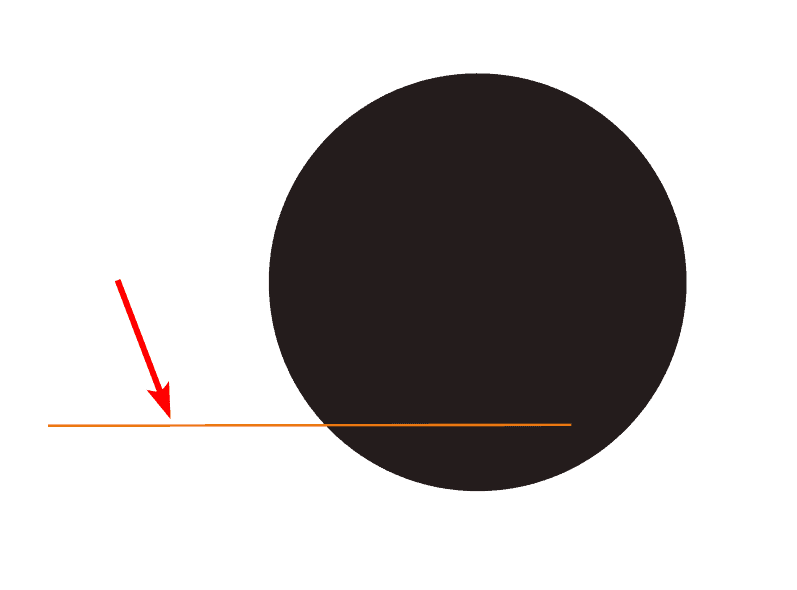
Once the tool is active, draw a straight line on the page by clicking once to add the first node, then hold in Control on Windows or Command on Mac, and click again to add the endpoint while keeping the line perfectly straight. You can draw the line anywhere on the page.
Draw a vertical line to cut the circle from top to bottom or a horizontal line to cut the shape from left to right.
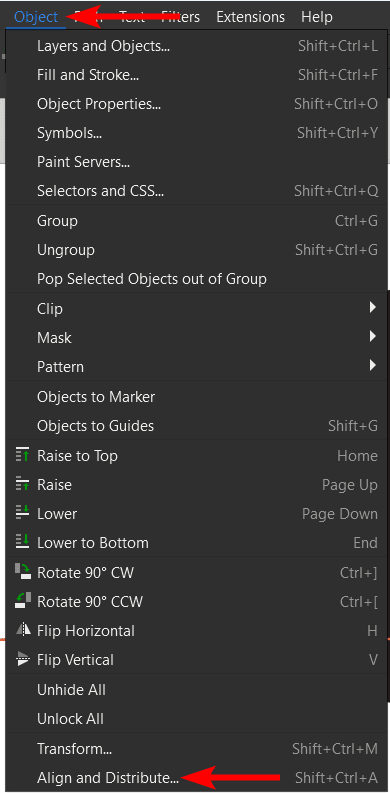
Open the Align and Distribute Panel
Before you cut the object in half, you need to move the line to where you want to cut the shape. If you don’t want the shape precisely in half, you can place the line wherever you want. However, you must align the two shapes if you want the object to be cut directly in the middle.
First, open the Align and Distribute panel by following the menu path; Object > Align and Distribute. You can also use the shortcut Shift + Control + A on Windows or Shift + Command + A on Mac.
Align the Object and the Line
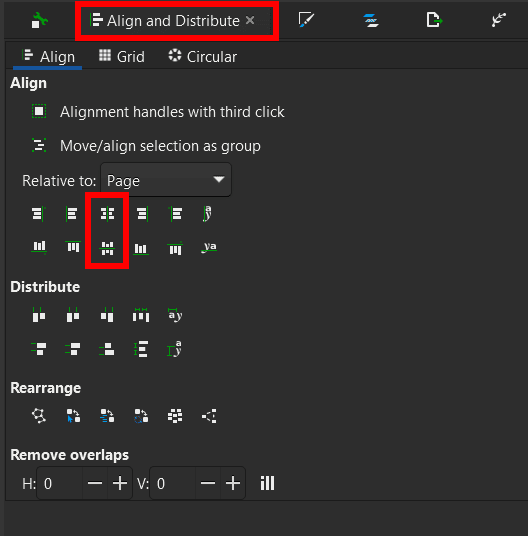
Once the panel is open on the right, select both objects by clicking one, then holding in Shift and clicking the other. Then, use the panel to align the line into the object's center.
You can use the Center on Vertical Axis or Center on Horizontal Axis (or both) to center the line depending on whether you have a vertical or horizontal line.
Check the Canvas
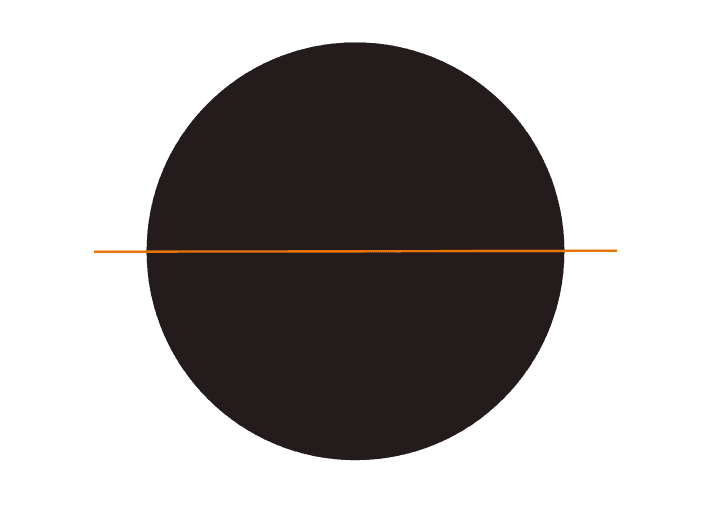
Ensure that the line is sitting across the object and going past the edges so that it will slice through the entire object and not only halfway.
Go to Path > Division
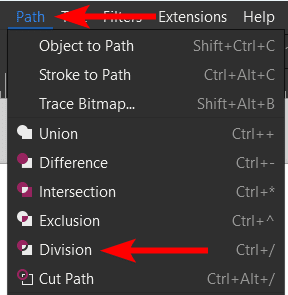
Cut the object in half by selecting both the object and the line again and then going to Path > Division. The line will disappear, and the object will now have two separate parts, cut through where you previously placed the line.
Click One Half and Move it Away
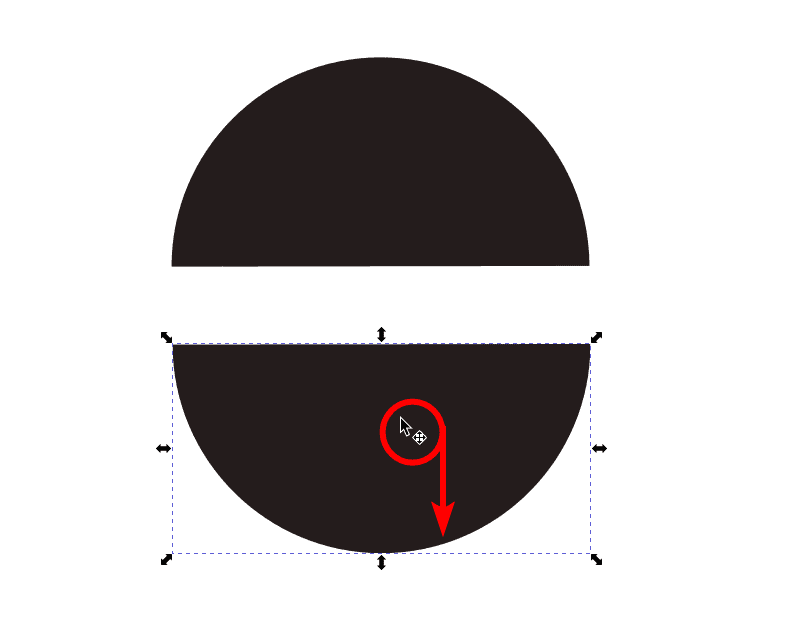
To check whether the object was cut, click on one half of the object and drag it away from the other, and you will see the object was cut in half.
Get Creative
You can now apply this technique to various objects. You can cut a corner off a rectangle, use the Draw freehand lines tool (P) to draw a curved line through a shape to cut it in half, or convert text to a path and then cut the letters up.
After cutting them in half, you can change the stroke and fill color of the separate objects.
Tools:
- Inkscape
👍 Support Us: Subscribe to our channel and help us continue providing these tutorials.
🌟 Regular Updates: We publish how-to videos for Inkscape regularly!
🔧 Expert Guidance: Learn Inkscape from our professionals and uncover exclusive tips!
