
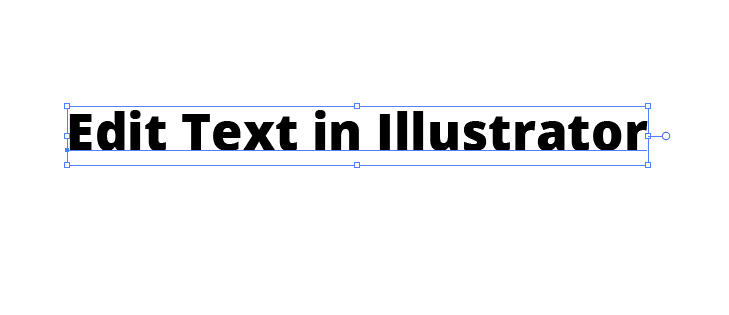
There are multiple ways to edit text in Illustrator, depending on what aspects of the text you want to adjust. You can:
- Use the Type Tool to add, delete, or change text
- Use the Character Panel to change the font, size, kerning, tracking, leading, text alignment, and more
- Use the Touch Type Tool to move, scale, or rotate individual characters within the text
- Use the Appearance Panel to change the stroke and fill color, the opacity, and add various effects to the text
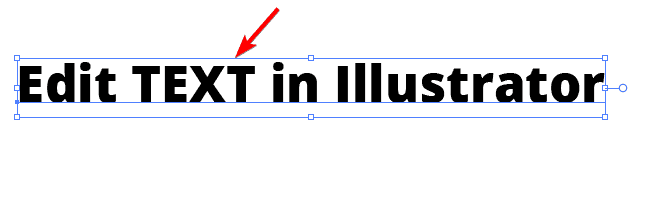
Follow the first method to learn how to add text to the canvas, which you can then edit in various ways.
Method 1: Using the Type Tool
- Select the Type Tool (T) from the toolbar
- Click on the canvas to add point text (drag to create paragraph text)
- Click on the text where you want to edit it
- Use the keyboard keys to add, delete, or alter the text as needed
- Press Esc or select another tool to finish editing
Select the Type Tool From the Toolbar
Select the Type Tool from the toolbar or press T on your keyboard.

Click on the Canvas to Add Point Text (Drag to Create Paragraph Text)
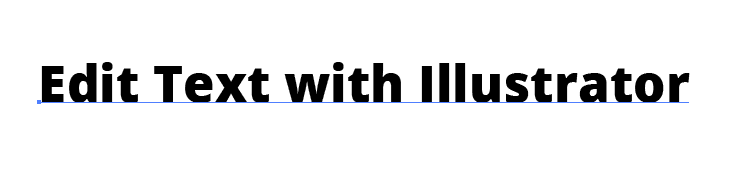
To create point text, click anywhere on the artboard and start typing. To make paragraph text, click and drag on the artboard to draw a text box and start typing inside it.
Remember, point text is a single line of text that expands horizontally as you type, while paragraph text is a block of text that wraps within a defined area.
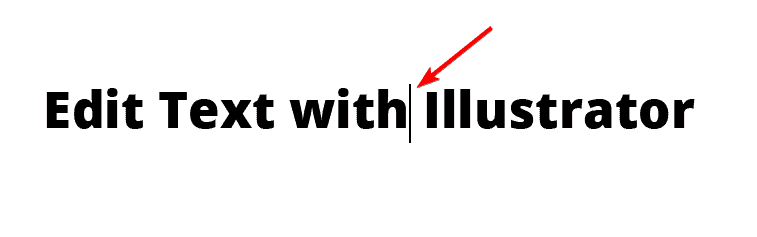
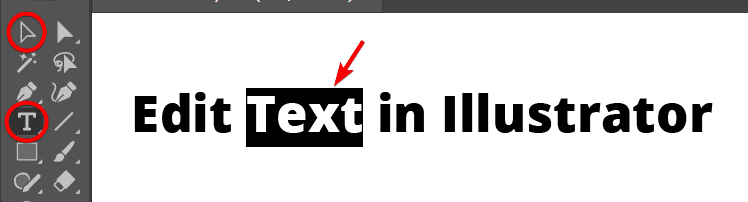
Click on the Text Where You Want to Edit It
To edit the existing text, click on the text object with the Type Tool (T) or double-click on it with the Selection Tool (V). You will see a blinking text cursor that indicates where you can edit the text.
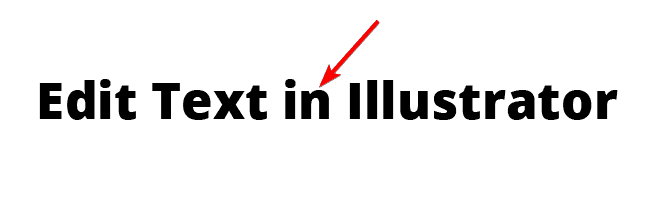
Use the Keyboard Keys to Add, Delete, or Alter the Text as Needed
To add, delete, or change text, use your keyboard as you normally would. You can also use the arrow keys to move the text cursor or the mouse to select a portion of the text.
Press Esc or Select Another Tool to Finish Editing
To finish editing, click on another tool in the toolbar or press Esc on your keyboard.
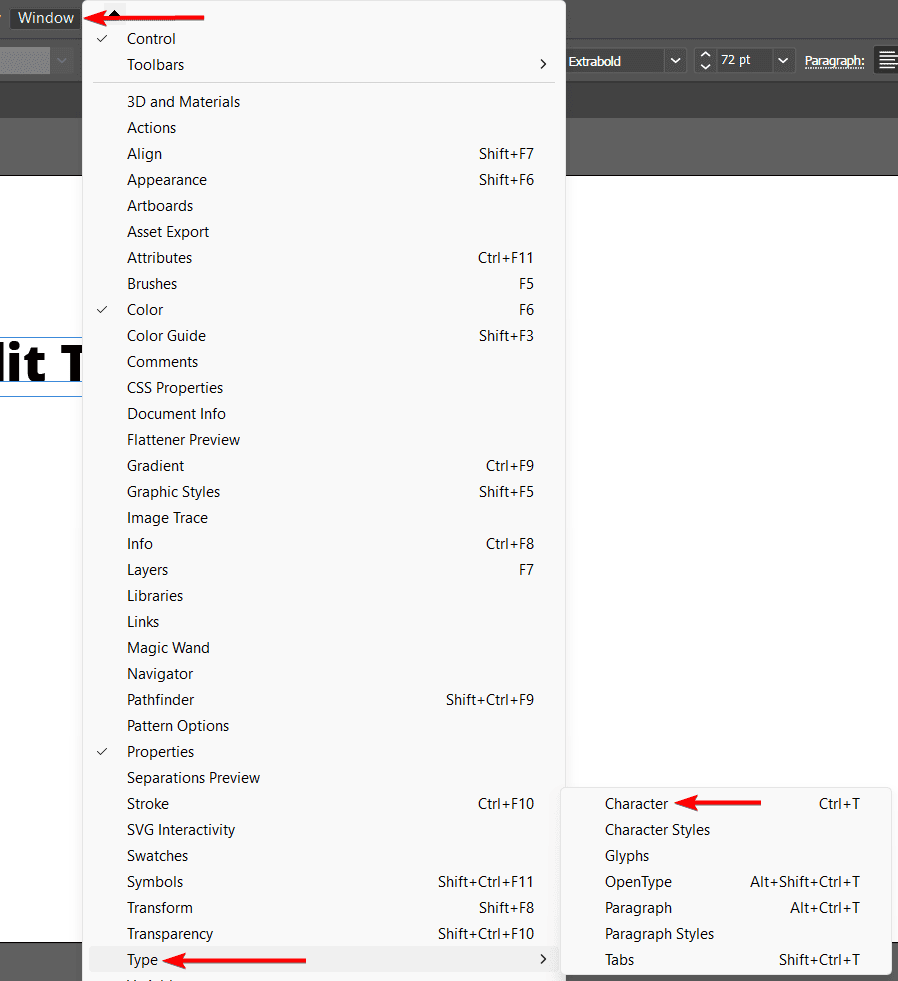
Method 2: Using the Character Panel
- Go to Window > Type > Character
- Select the Text using the Type Tool (T) or the Selection Tool (V)
- Edit the text using the options in the Character Panel
- Press Esc or select another tool to confirm changes
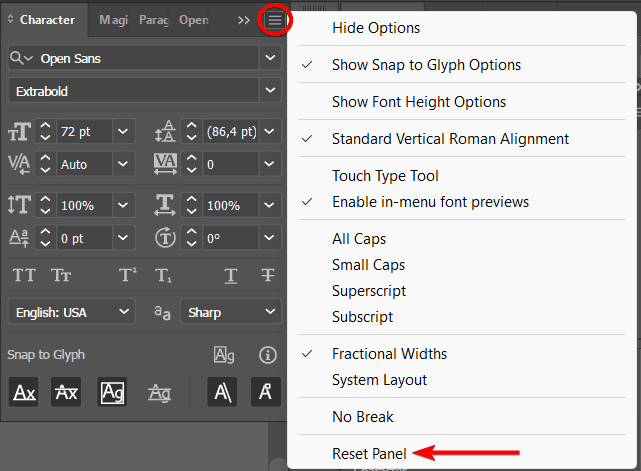
- Click on the menu icon in the Character Panel and select Reset Panel to undo changes
Go to Window > Type > Character
Open the Character Panel by going to Window > Type > Character or pressing Control + T on Windows or Command + T on Mac.
Select the Text Using the Type Tool or the Selection Tool
Select the text object or the portion of text that you want to edit with the Type Tool (T) or the Selection Tool (V).
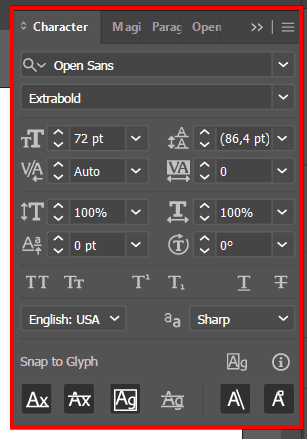
Edit the Text Using the Options in the Character Panel
In the Character Panel, choose the options that you want to change, such as the font family, font style, font size, leading, kerning, tracking, horizontal scale, vertical scale, baseline shift, and more. You can also use the buttons at the bottom of the panel to change the text alignment, capitalization, and language.
Press Esc or Select Another Tool to Confirm Changes
You can confirm the changes and move off the text by pressing Esc or selecting another tool and continuing to edit your project as needed.
Click on the Menu Icon in the Character Panel and Select Reset Panel to Undo Changes
To reset the text style to the default settings, click on the panel menu icon at the top right corner of the panel and choose Reset Panel.
Method 3: Using the Touch Type Tool
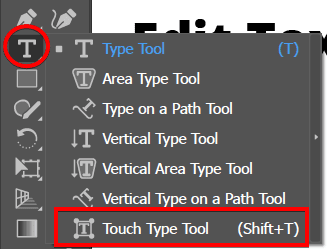
- Select the Touch Type Tool from the Toolbar
- Select the character you want to edit
- Edit the character by moving, dragging, or rotating
- To edit a different character, click on it and repeat the step above
- Press Esc or select another tool to confirm the changes
Select the Touch Type Tool From the Toolbar
Select the Touch Type Tool from the toolbar or press Shift + T on Windows and Mac. The Touch Type Tool is a tool that allows you to edit the text transformation, such as the position, rotation, and scale of individual characters. You can use it to create custom and dynamic text effects in Illustrator.
Select the Character You Want to Edit
Click on the character you want to edit with the Touch Type Tool. You will see a bounding box with four handles around the character.

Edit the Character by Moving, Dragging, or Rotating
To move the character, drag it to a new position. To rotate the character, drag the circular handle at the top of the bounding box. To scale the character, drag the corner handles of the bounding box.

To Edit a Different Character, Click on It and Repeat the Step Above
To edit another character, click on it with the Touch Type Tool and repeat the steps above. You can also use the arrow keys to switch between characters.

Press Esc or Select Another Tool to Confirm the Changes
To finish editing, click on another tool in the toolbar or press Esc on your keyboard.

Method 4: Using the Appearance Panel
- Go to Window > Appearance
- Select the text using the Type Tool (T) or Selection Tool (V)
- Use the Fill and Stroke swatches to change the colors
- Adjust the Opacity and add an effect (optional)
- Click on the menu and select Reduce to Basic Appearance (optional)
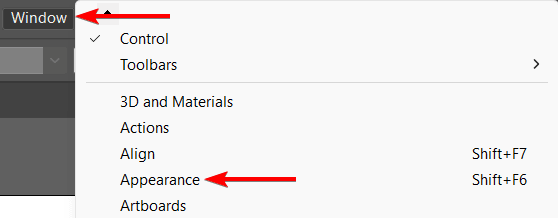
Go to Window > Appearance
Open the Appearance Panel by going to Window > Appearance or pressing Shift + F6 on Windows and Mac. You can use this panel to create multiple appearances for the same text object and apply them to different characters or groups of characters.
Select the Text Using the Type Tool or Selection Tool
Select the text object or the portion of text that you want to edit with the Type Tool (T) or Selection Tool (V)
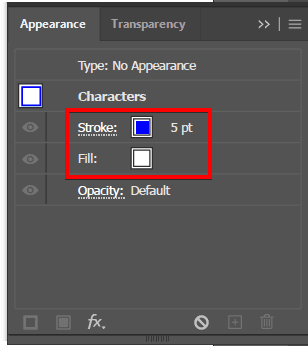
Use the Fill and Stroke Swatches to Change the Colors
In the Appearance panel, click on the Add New Fill or Add New Stroke Swatches to add a fill or stroke to the text.
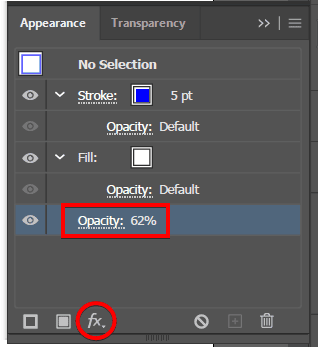
Adjust the Opacity and Add an Effect (Optional)
You can also click on the Opacity icon to change the opacity of the text or click on the Effects icon at the bottom of the panel to add an effect to the text, such as a drop shadow, a blur, or a warp.
To edit the fill, stroke, opacity, or effect, click on the corresponding item in the Appearance panel and adjust the settings in the dialog box that appears.
You now have edited the appearance of the text.

Click on the Menu and Select Reduce to Basic Appearance (Optional)
To apply different appearances to different characters or groups of characters, select them with the Type Tool (T) and repeat the steps above. You can also use the panel menu icon and choose Clear Appearance or Reduce to Basic Appearance to remove all the appearance attributes from the selected text.
👍 Support Us: Subscribe to our channel and help us continue providing these tutorials.
🌟 Regular Updates: We publish how-to videos for Adobe Illustrator regularly!
🔧 Expert Guidance: Learn Illustrator from our professionals and uncover exclusive tips!
