
Inverting colors in Illustrator creates unique and creative results, and the process is quick and easy. You can invert the colors of vector objects and raster images to drastically transform the look and feel of your designs. However, when inverting the colors of a raster image, you need to take a few extra steps to embed the photo.
Whether you want to invert a single shape or an entire composition, I’ve got you covered. So, dive in to discover how to creatively invert colors in Illustrator to elevate your designs and unleash your artistic vision.
Table of Contents
What Does Color Inversion Mean in Illustrator?
Color inversion is the process of converting a color to its opposite color. To determine the opposite color, you would need to look at the color wheel. However, the basics are if you have a black color on the page, it will change to white and vice versa.
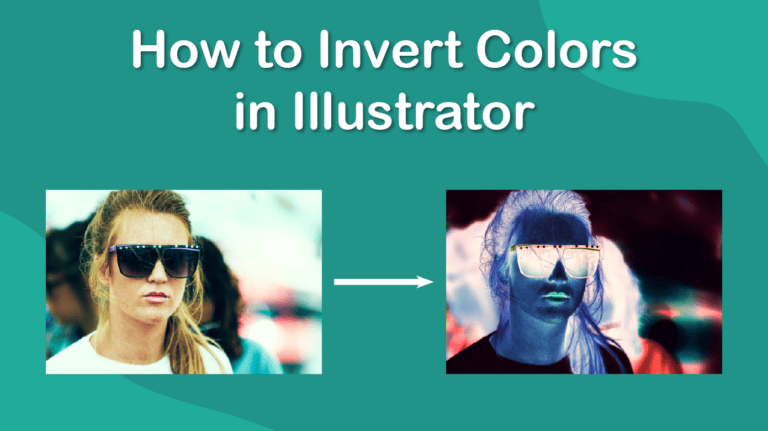
Color inversion on images is useful if you want to create a negative of the photo, which gives it a creative and unique look for the design.
How to Invert the Colors on Vector Objects
Inverting the colors only takes three steps when working with vector objects, such as shapes. You can select one object at a time to invert or select multiple objects that make up an entire composition to invert the whole design.
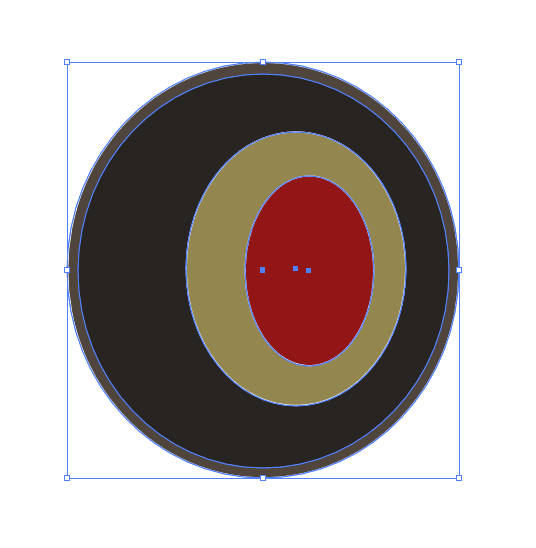
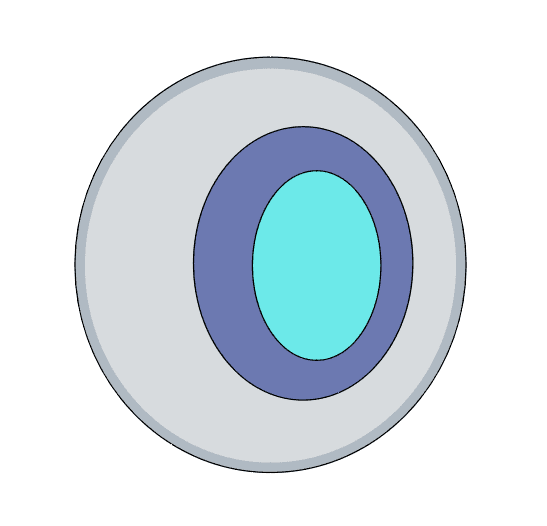
First, add your shapes to the page. This can be a simple shape on its own or multiple shapes that make up a composition. I will use the ellipse shapes I’ve added to the page.

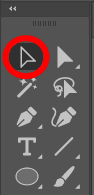
Once your objects are on the page, activate the Selection Tool from the toolbar or press V.
Select the object by clicking on it or drag your mouse over multiple objects to select them together.
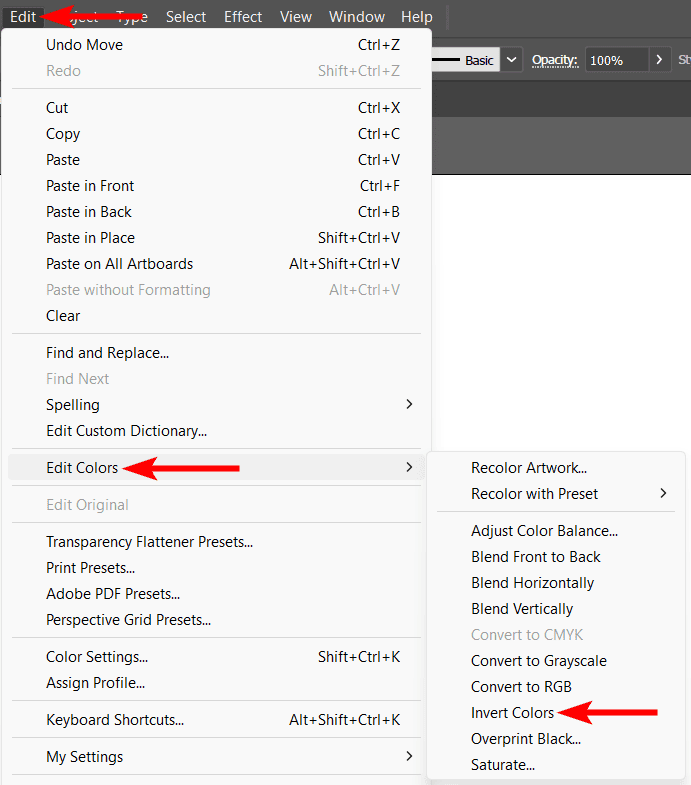
You can now invert the colors by going to Edit > Edit Colors > Invert Colors.
The colors will convert to the opposite colors.
How to Invert the Colors on Raster Images
If you want to invert the colors on an image, you will need to add a few extra steps to prepare the image. To understand this process, you need to know how images are added to Illustrator.
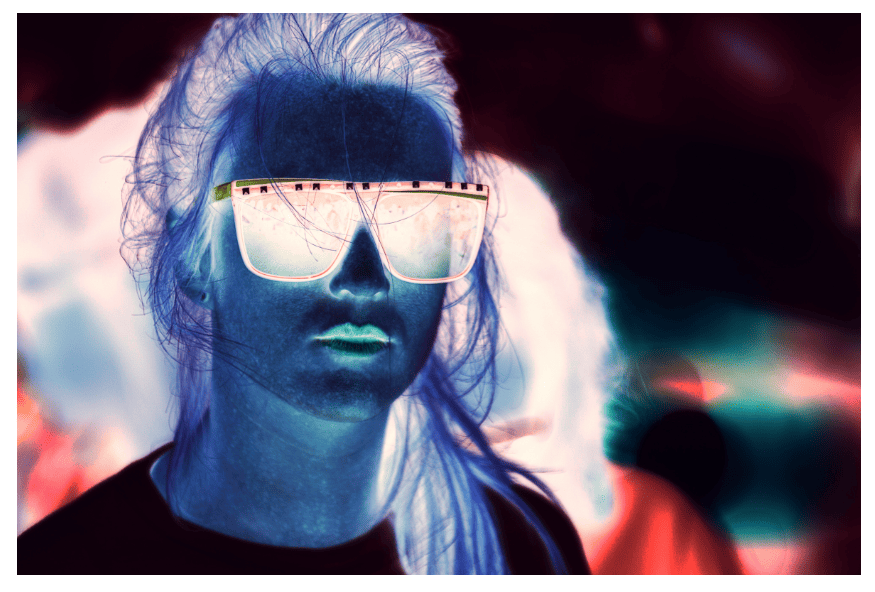
I will demonstrate using this shallow focus photography of a woman wearing oversized sunglasses image from Unsplash.
First, add an image to your page by going to File > Place or using the shortcut Shift + Control + P on Windows or Shift + Command + P on Mac.
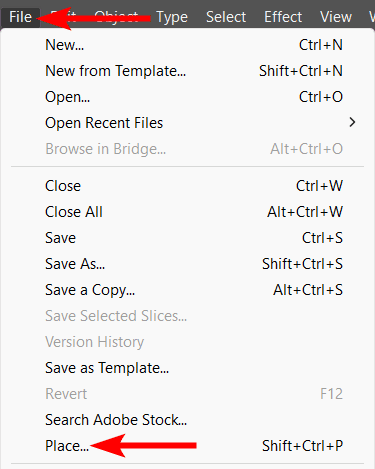
Select the image you want to use from your hard drive and click on Place.

You can then click and drag out to add the photo to the page.

Once the picture is on your canvas, the image is a linked preview, so any changes are made to the preview, and the linked image needs to remain in the same saved location. However, you can’t invert the colors of a linked image.
To invert the colors, you need to embed the photo into the document, which creates a copy of the image so you can make the changes.
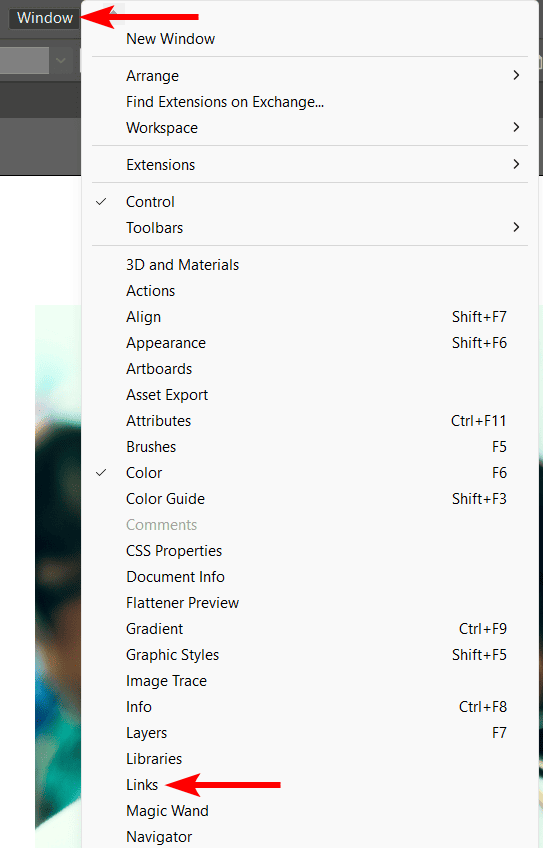
To embed the image, go to Window > Links to open the Links panel.
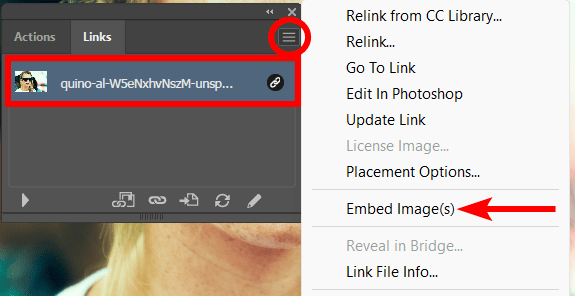
Select the photo you want to embed, then click on the hamburger menu at the top of the panel and select Embed Image(s).
Your image is now embedded, and you can invert the colors. To invert the colors, select the image using the Selection Tool (V). Then go to Edit > Edit Colors > Invert Colors.
The picture becomes negative as the colors are inverted.
👍 Support Us: Subscribe to our channel and help us continue providing these tutorials.
🌟 Regular Updates: We publish how-to videos for Adobe Illustrator regularly!
🔧 Expert Guidance: Learn Illustrator from our professionals and uncover exclusive tips!
