
To make a repeating pattern in Illustrator, add shapes for the base and then go to Object > Pattern > Make. Creating seamless patterns is as simple as that, and you no longer need to copy and paste to repeat the shapes or graphics manually.
Creating your own custom pattern can elevate your artwork for branding, marketing materials, and packaging designs. Here is all you need to know about seamless patterns in Illustrator, including what size document to work on and how to fix any issues with the pattern.
Table of Contents
Overview of Making a Repeating Pattern in Illustrator
- Create a new square document
- Add shapes to create the pattern
- Customize the base of the pattern
- Select all the shapes and objects
- Go to Object > Pattern > Make
- Set the New Pattern’s Name
- Select the Pattern Tile Tool
- Resize the pattern’s tile
- Adjust the pattern settings
- Customize the pattern on the canvas (Optional)
- Close the pattern settings window
- Save the pattern swatch
- Test the pattern
Step-by-Step to Make a Repeating Pattern in Illustrator

Illustrator has a pattern-making process that allows you to easily create your own custom pattern to use and save as a pattern swatch. While the process is easy, you should know a few things when creating a pattern, such as using the settings to create a seamless pattern.
Create a New Square Document
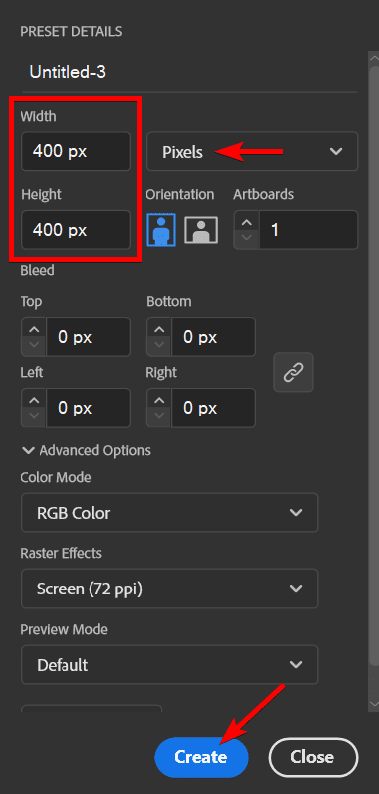
First, create a new document to create the base pattern. For the best results when making a pattern, use a square document at a small size.
To create a new document, click on New Document in Illustrator’s home screen. Then, in the new document window, set a square size for the document, somewhere around 400 px by 400 px. Click Create once you’ve set the rest of the new document settings as needed.
Add Shapes to Create the Pattern
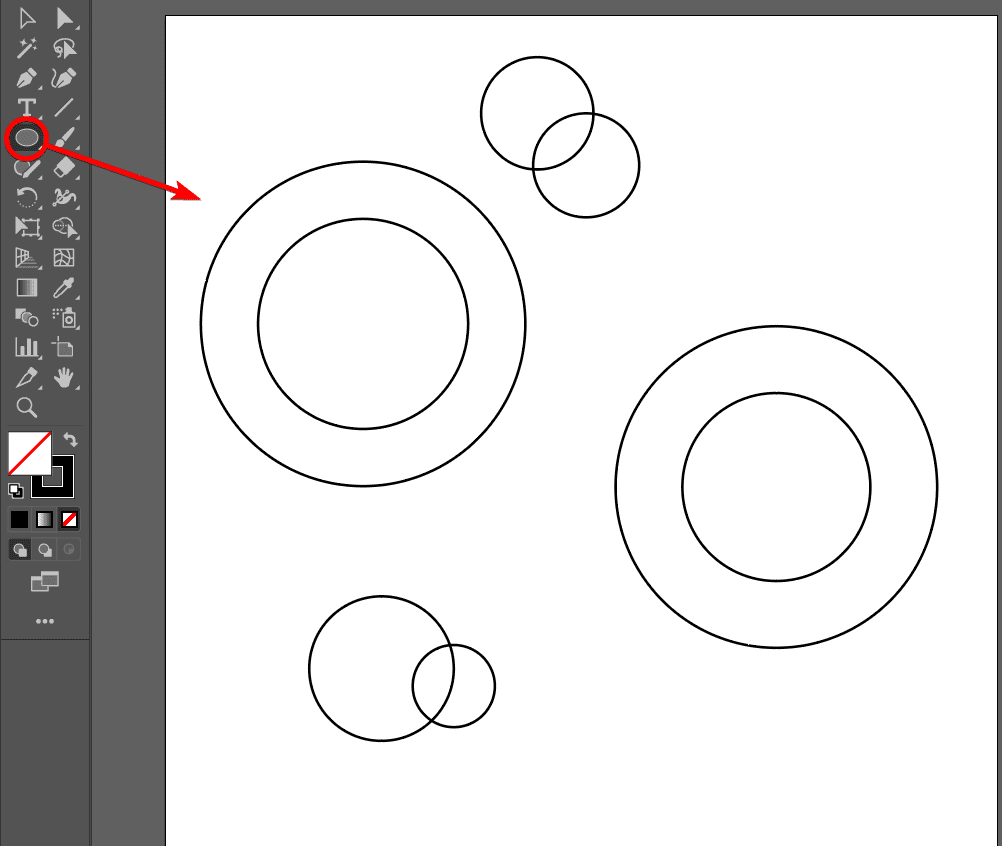
Now, add all the shapes or objects you want on the pattern. This will be the base of the pattern, so you don’t need to repeat any objects. You can use the shape tool to add shapes or create your own graphics using the Pen Tool.
I used the Ellipse Tool (L) to add some circles to the canvas.
Customize the Base of the Pattern

At this stage, ensure that you customize the base pattern by changing the object’s size and color. You can change the pattern later on, but it’s a good idea to have the pattern as close to the desired result as possible at this stage.
I added color to my circles and moved them around to new positions.
Select All the Shapes and Objects
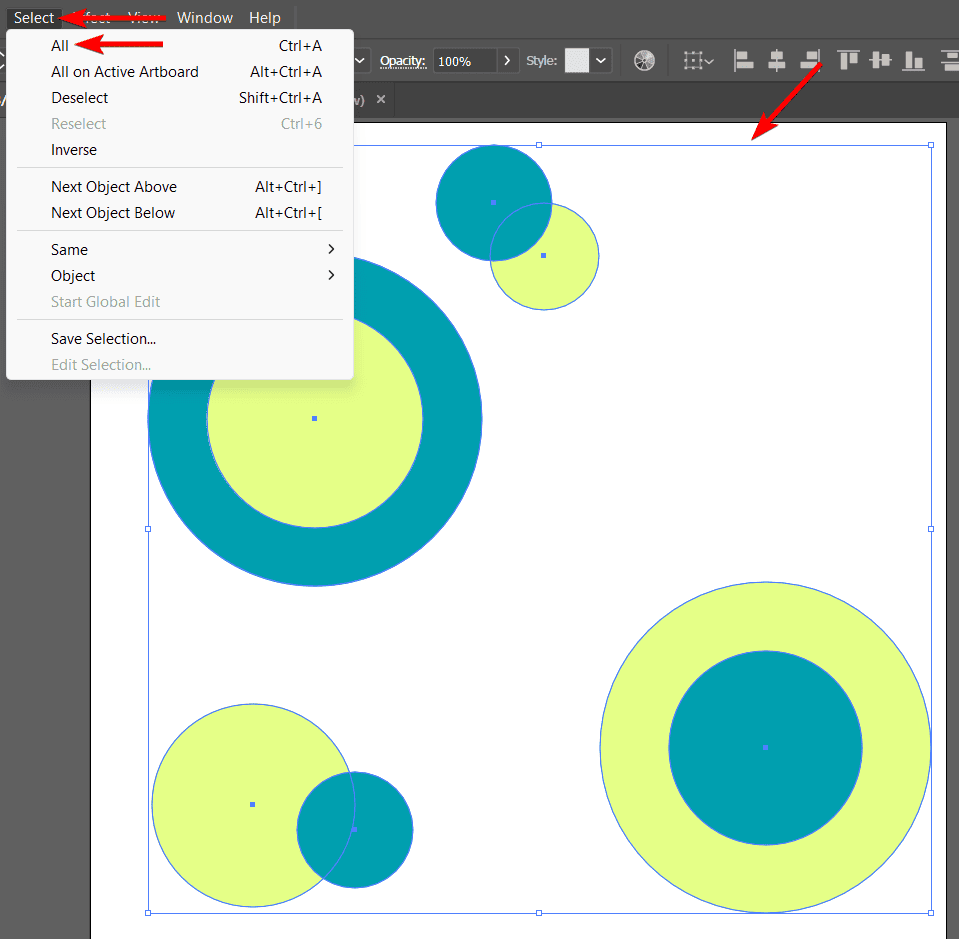
Next, select all the Shapes and Objects to show Illustrator what to use for the pattern. You can select everything on the canvas by going to Select > All or using the shortcut Control + A on Windows or Command + A on Mac. A blue block shows which objects are selected.
Go to Object > Pattern > Make
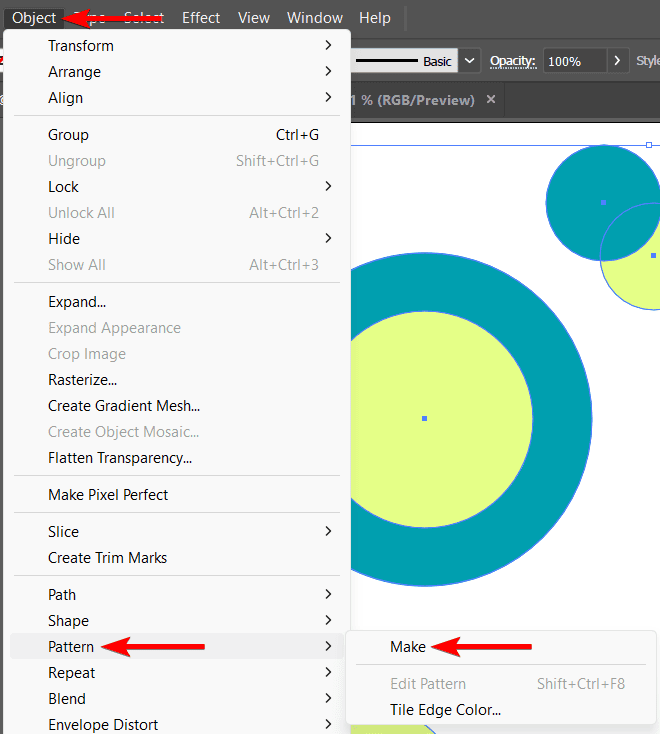
When all the shapes or graphics are selected, you can create the pattern. To do this, go to Object > Pattern > Make.
Set the New Pattern’s Name
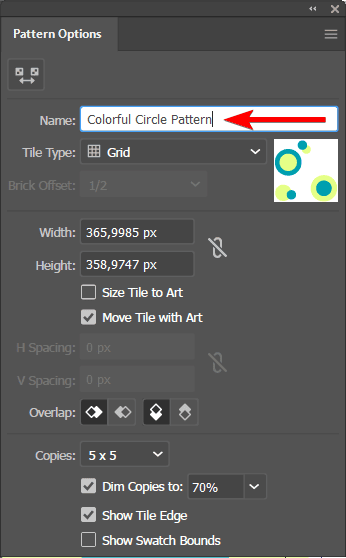
When you click make pattern, the pattern is automatically added as a pattern swatch and a settings box opens. First, add a new name for the pattern by typing in the Name box.
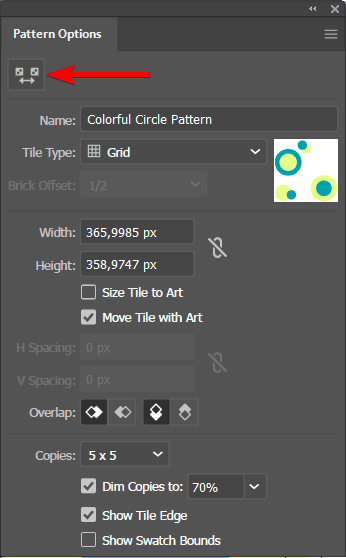
Select the Pattern Tile Tool
Next, you can set the tile for the pattern, which determines the area that is repeated. You can set the tile to fit the objects by checking the box next to Size Tile to Art. You can also set a custom size in the Width and Height boxes.
Lastly, you can manually set the tile size by clicking on the Pattern Tile Tool at the top of the window.
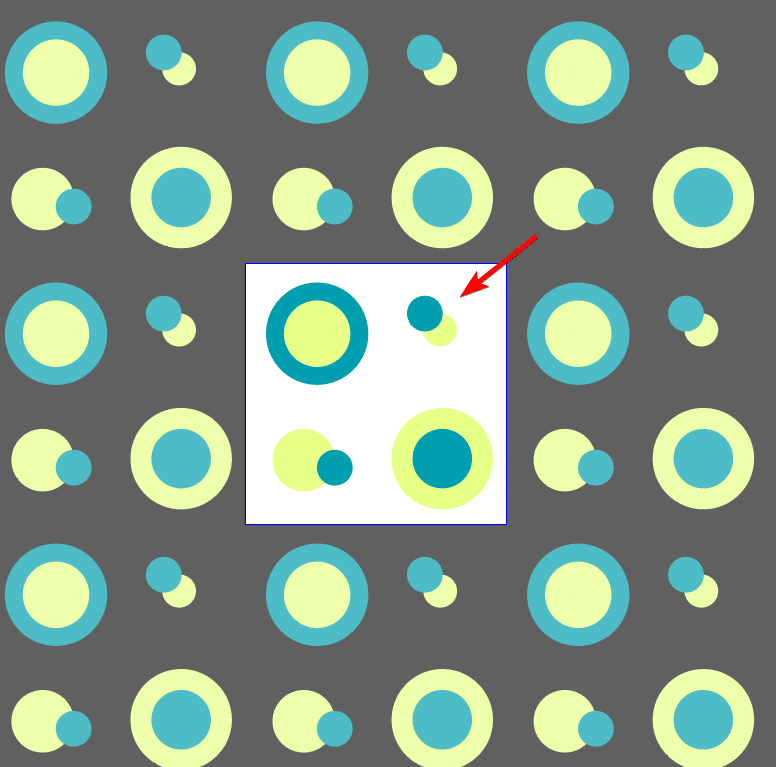
Resize the Pattern’s Tile
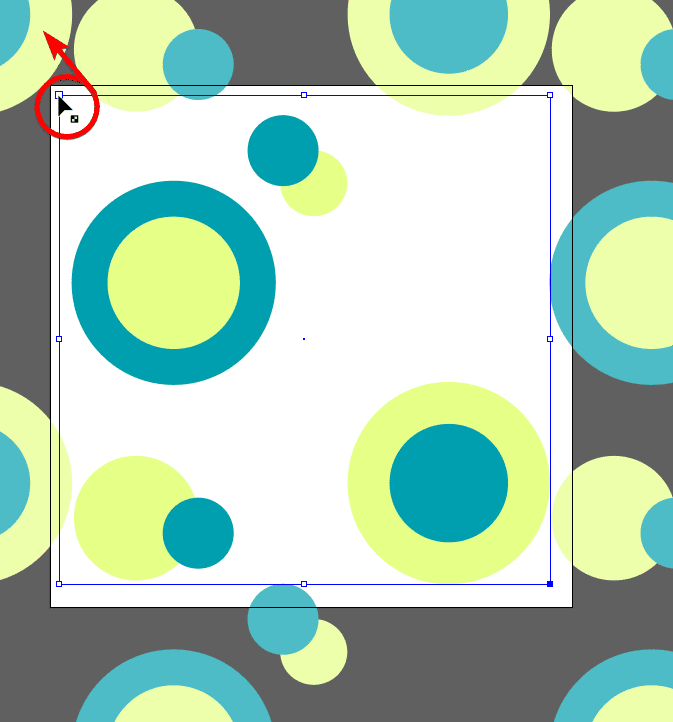
Once the Pattern Tile Tool is active, resize the tile box on the canvas by clicking and dragging the corner handles on the blue box. Everything outside the blue box is the repeated pattern.
To view the pattern better, zoom out using Control + - on Windows or Command + - on Mac.
Adjust the Pattern Settings
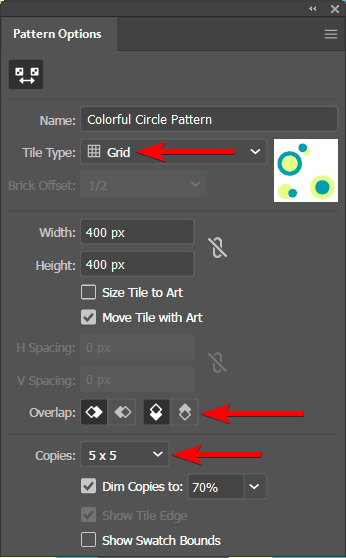
You can adjust the rest of the settings in the pattern window as needed, such as changing the tile type, the overlap, and how many times you want the pattern repeated.
Customize the Pattern on the Canvas (Optional)
Once you have adjusted the pattern settings, you can still customize the basic pattern if needed. This is helpful as you can see how the pattern looks when repeated. You can move the shapes/graphics around, resize them, and change the colors as needed.
Close the Pattern Settings Window
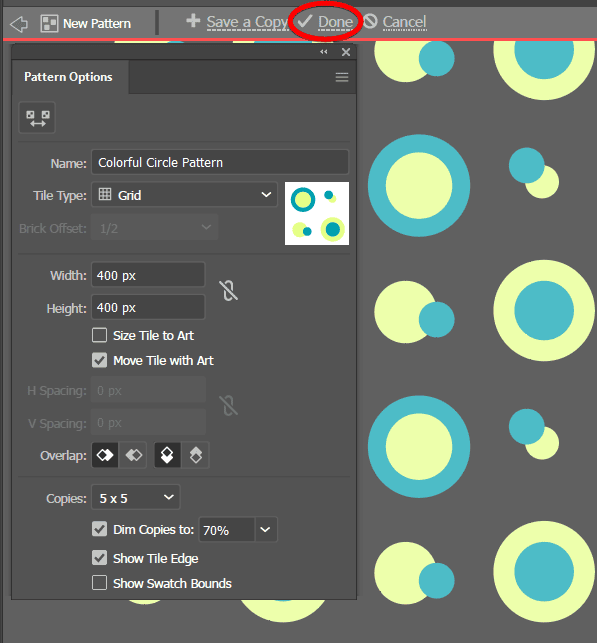
Next, to ensure you save the pattern, click the Done button at the top of the workspace. This ensures the pattern is saved with your changes and closes the pattern window.
Save the Pattern Swatch
The pattern swatch will be added to the swatches panel, but it won’t save it entirely. If you want the swatch saved completely so you can use it in other projects, select it in the Swatches Panel, click on the Swatch Libraries menu icon at the bottom of the Swatches Panel, and click Save Swatches.
You can then save the swatch file in the Illustrator folder on your computer, and it will be available in other documents you work on.
Test the Pattern
You can now use the pattern in any project by finding it in the pattern swatches tab. For instance, you can use the pattern as a fill in a shape.
Tools:
- Illustrator
👍 Support Us: Subscribe to our channel and help us continue providing these tutorials.
🌟 Regular Updates: We publish how-to videos for Adobe Illustrator regularly!
🔧 Expert Guidance: Learn Illustrator from our professionals and uncover exclusive tips!
