

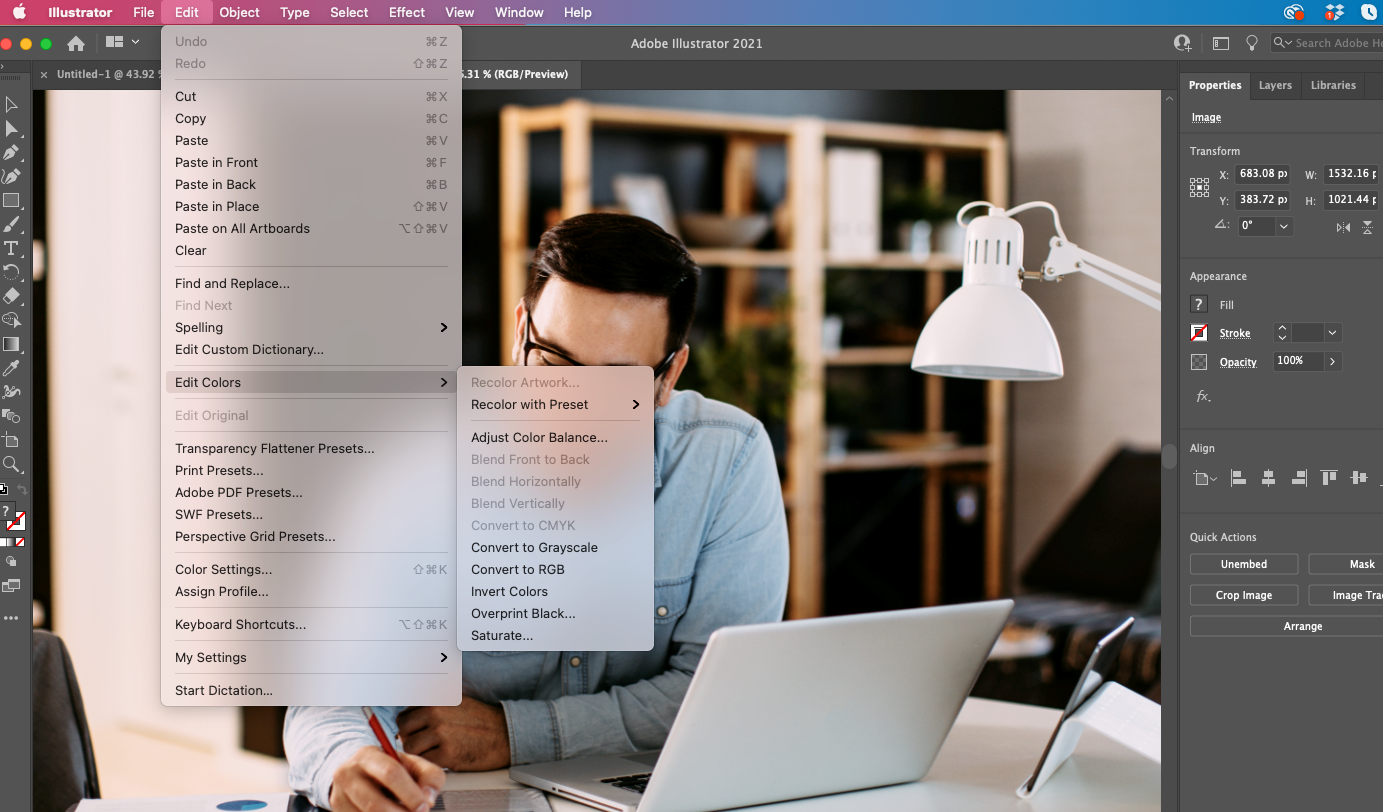
To convert the entire image to grayscale quickly, select all objects by going to 'Select' on the main toolbar and choosing 'All'. Then, navigate to 'Edit', select 'Edit Colors', and click 'Convert to Grayscale'. Your image will turn black and white.
This article also covers several additional methods for converting your image to black and white, providing step-by-step instructions for each approach. Additionally, we guide you through the process of recoloring your image.
Table of Contents
Convert to Grayscale
This is the fastest method to convert an image to grayscale in Illustrator. First, launch the program and open the image you want to convert.
Next, select all the objects in the image whose colors you want to make black and white. To do this, first select all objects in the file by going to Select on the main toolbar and choose All.
Then, go to Edit on the main toolbar as well, select Edit Colors, and then click Convert to Grayscale. Your image will now be in black and white.
Adjust the Color Balance
This option gives you more control over how dark you want the black in your image to be. This method automatically converts your image to grayscale while also allowing you to adjust the shades of gray.
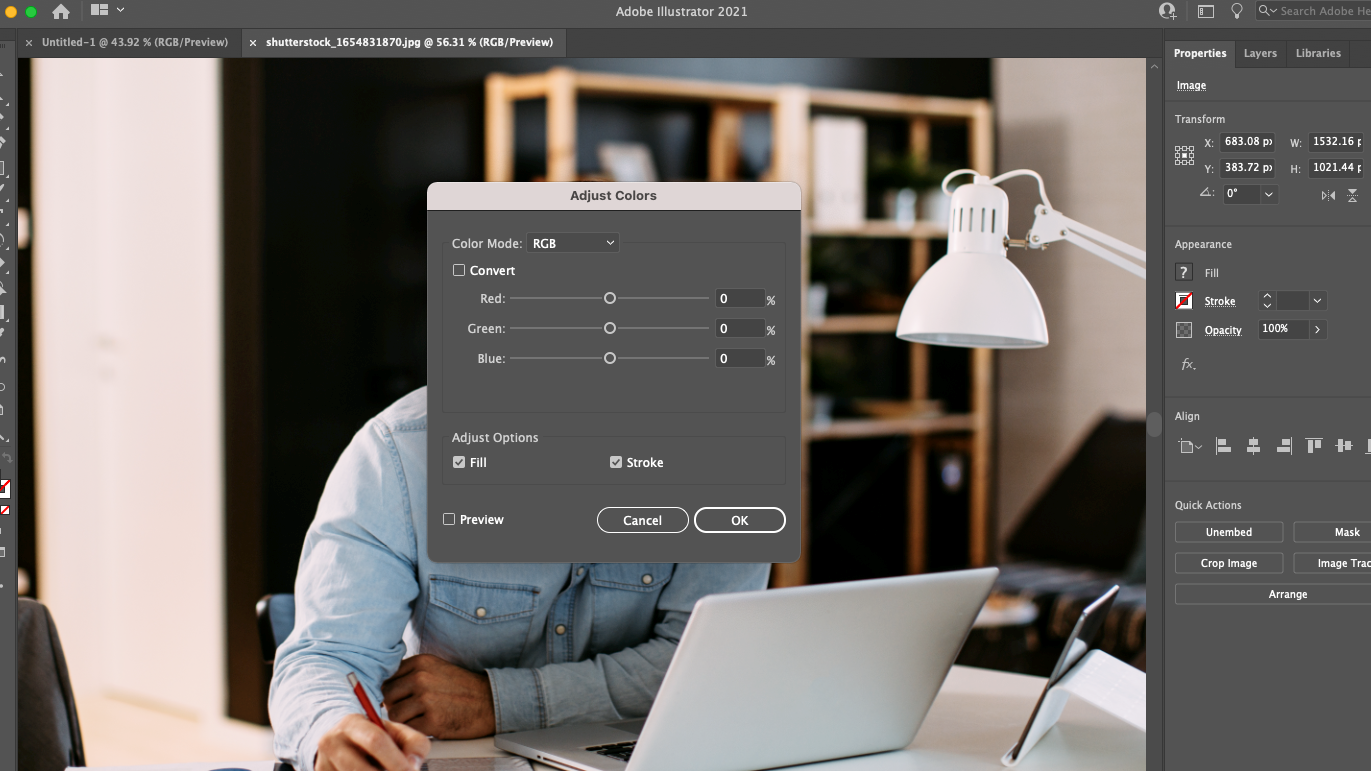
Go to the Edit menu on the main toolbar, select Edit Colors from the drop-down list, and then click Adjust Color Balance.
In the window that pops up, check both the Preview and Convert boxes, and then use the slider to adjust the percentage of black in your image. Once you’re satisfied with the result, click OK.
Desaturate the Image
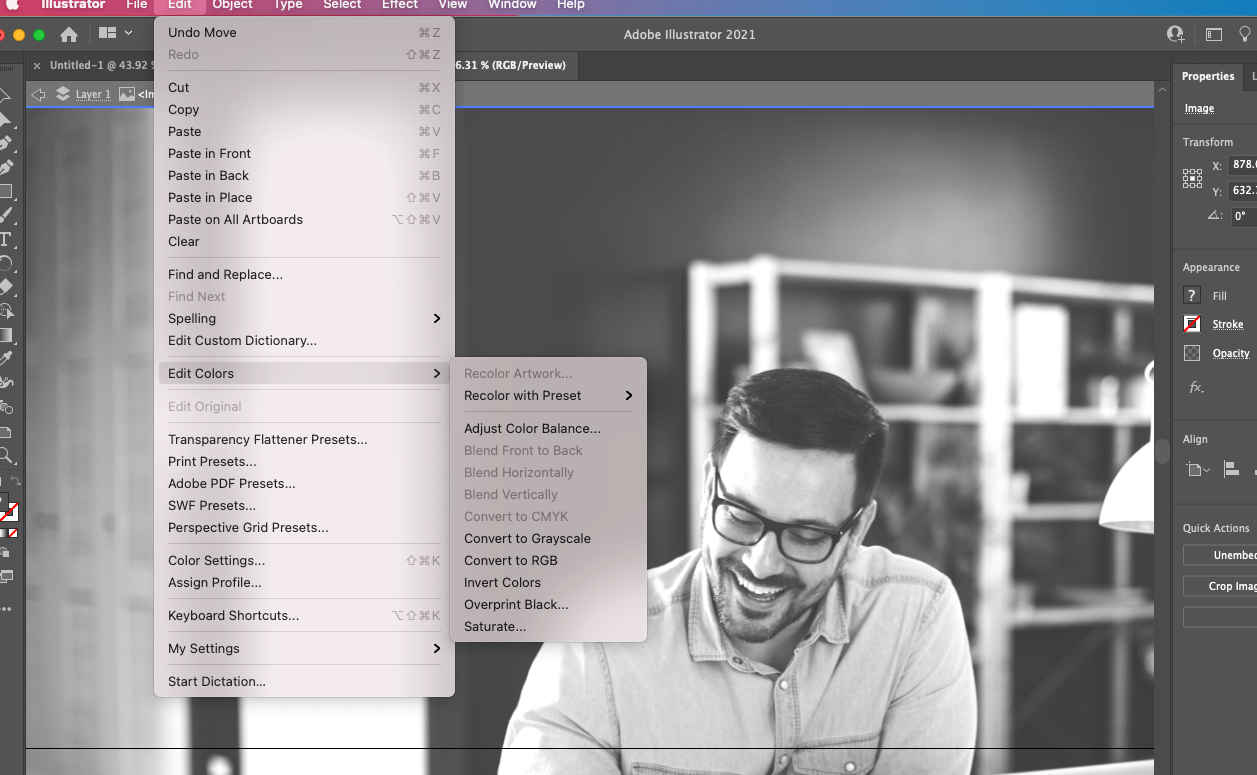
This option gives you even more control over the shades of gray in your image. Go to the Edit menu on the main toolbar and select Edit Colors from the drop-down list provided.
Next, click Recolor Artwork to launch the Live Color window. Alternatively, you could click on the color wheel icon displayed on the control panel for a faster way to launch the dialog.
You will then see sliders at the bottom of the window and two buttons on their right. Click on the one that looks like a play button.
Next, select Global Adjust from the drop-down list that appears, and then move the Saturation slider to its leftmost position (-100). This converts the image to black and white. You can also adjust the sliders marked Brightness, Temperature, and Luminosity for different results.
Recolor the Image
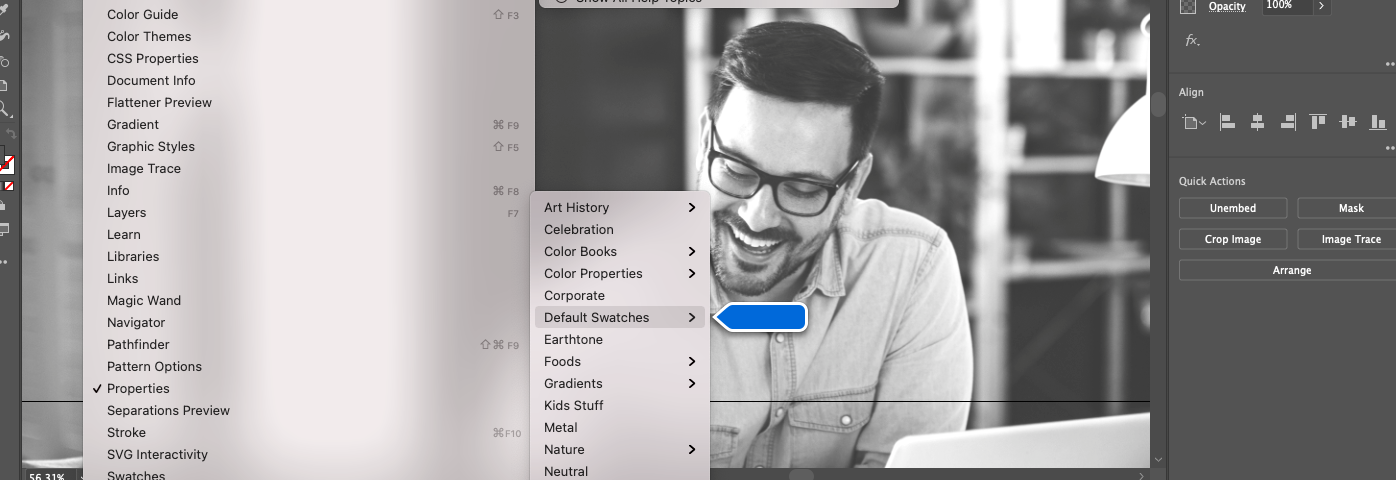
If the previous three options don’t deliver the results you want, you can use the Recolor Artwork option instead. First, click on the Swatch Libraries menu located on the Swatch panel.
Next, on the drop-down list that appears, select Default Swatches, and then click Print. Once the swatches load, drag the grayscale folder into the Swatch panel.
Next, go to the Edit menu on the main toolbar, select Edit Colors from the drop-down list, and click Recolor Artwork to launch the Live Color dialog.
You can now adjust the grayscale swatches corresponding to the original colors they are assigned to. To do this, you’ll need to go to the sliders at the bottom of the window and select CMYK.
Then, go to the Current Colors column and select the original color you want to modify. Once you do, go to the K slider and move it to adjust the black percentage to your liking. Click OK once you’re satisfied with the results.
There you have it – 4 easy ways on how to make image black and white in Illustrator. We hope you found this guide helpful for your next project.
👍 Support Us: Subscribe to our channel and help us continue providing these tutorials.
🌟 Regular Updates: We publish how-to videos for Adobe Illustrator regularly!
🔧 Expert Guidance: Learn Illustrator from our professionals and uncover exclusive tips!
