
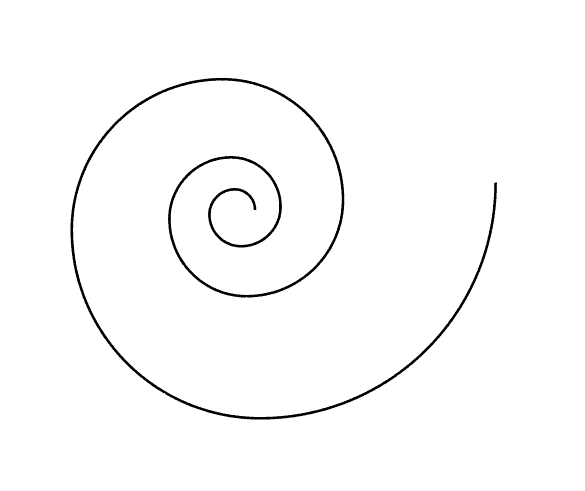
To make a spiral in Illustrator, select the Spiral Tool from the toolbar, click once on the canvas to open the settings, adjust as needed, and click OK to add the spiral to your page.
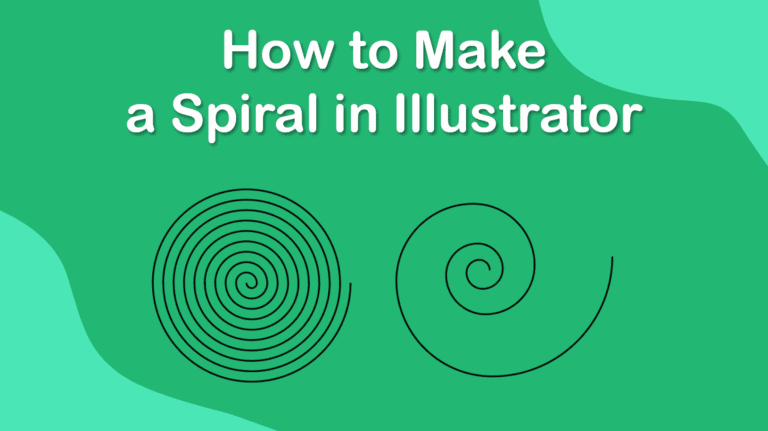
Spirals are fascinating shapes that can be used to create interesting designs and effects in Adobe Illustrator.
While creating a basic spiral is simple, there is a more complex way to create an evenly-spaced linear spiral.
Here are the two different methods to make a spiral in Illustrator, as well as some tips to customize the shape.
Table of Contents
How to Make a Spiral in Illustrator
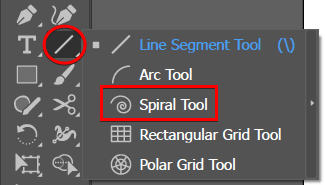
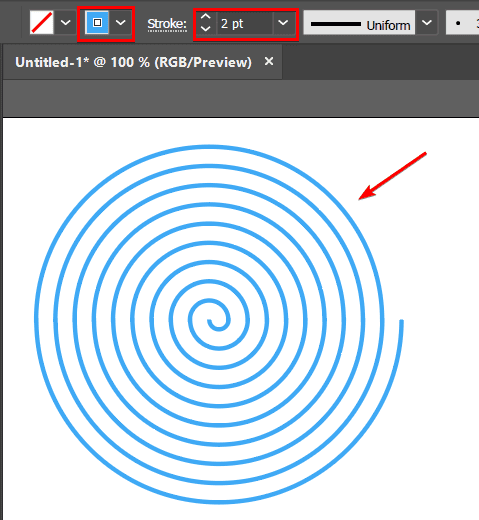
Select the Spiral tool from the toolbar. You will find it by clicking and holding the Line Segment tool until the pop-up menu appears.
Then, click anywhere on the artboard to open the Spiral dialog box, where you can customize the settings of your spiral.
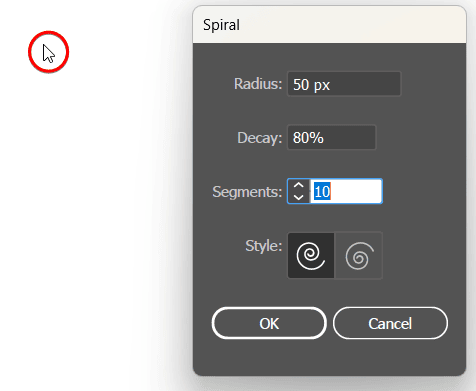
In the Spiral dialog box, you can adjust the following parameters:
- Radius: This sets the distance between the outermost segment and the center of the spiral. A larger radius will make the spiral more spread out, while a smaller radius will make it denser.
- Decay: This sets the ratio of the length of each segment to the previous one. A higher decay will make the spiral shrink more gradually, while a lower decay will make it shrink faster.
- Segments: This sets the number of segments that make up the spiral. A higher number of segments will make the spiral more smooth and detailed, while a lower number of segments will make it more rough and simple.
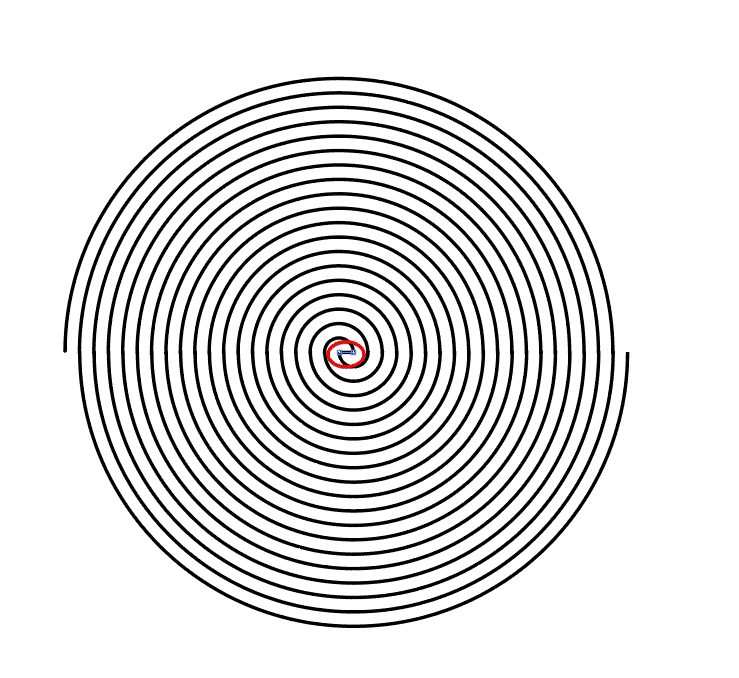
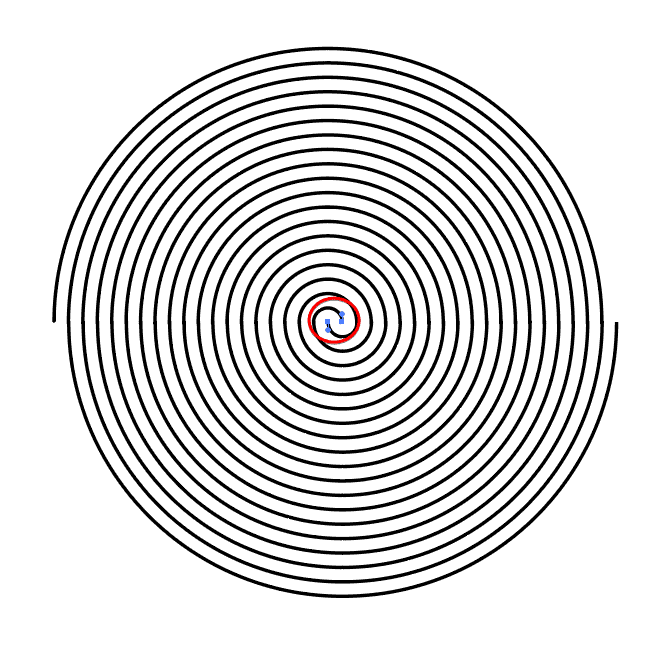
- Style: This sets the direction and orientation of the spiral. You can choose between clockwise or counterclockwise.
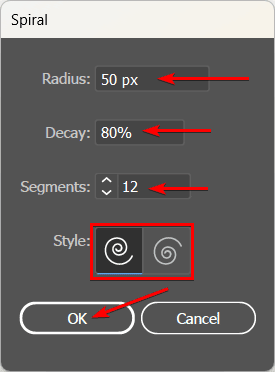
After you set the parameters, click OK to create the spiral. Instead of opening the settings first, you can drag on the artboard to draw the spiral interactively and use the arrow keys to change the decay and the segments while dragging.
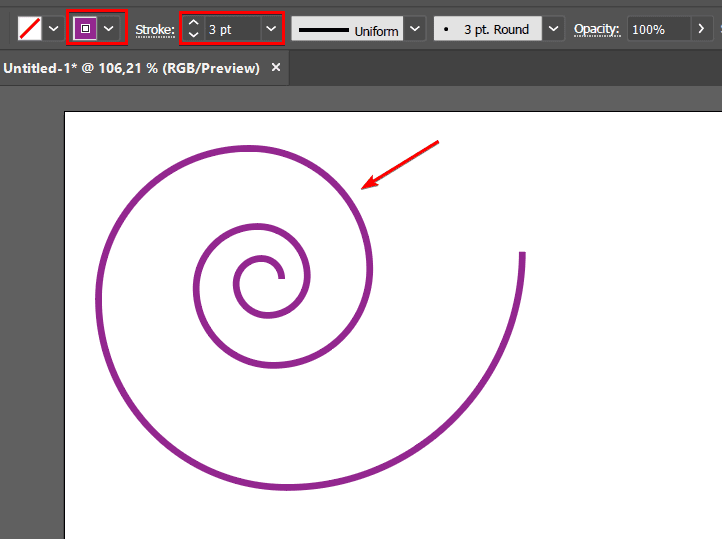
Once you have the spiral on the artboard, you can modify it further using the Direct Selection tool, the Width tool, or the Stroke panel. For example, you can change the color and weight of the stroke or adjust the width of the spiral at any point.
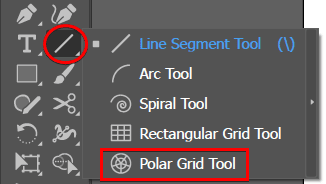
How to Make a Linear Spiral in Illustrator
If you want an evenly-spaced linear spiral, you can use a slight workaround with the Polar Grid tool and a few extra steps.
Select the Polar Grid tool from the toolbar, You can access it by clicking and holding the Line Segment tool in the toolbar and selecting the Polar Grid tool from the hidden menu.
Then, click anywhere on the artboard. This will open the Polar Grid dialog box, where you can customize the settings of your polar grid.
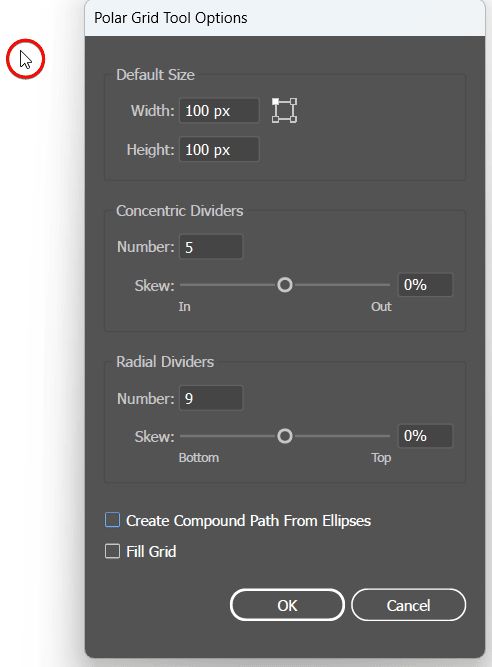
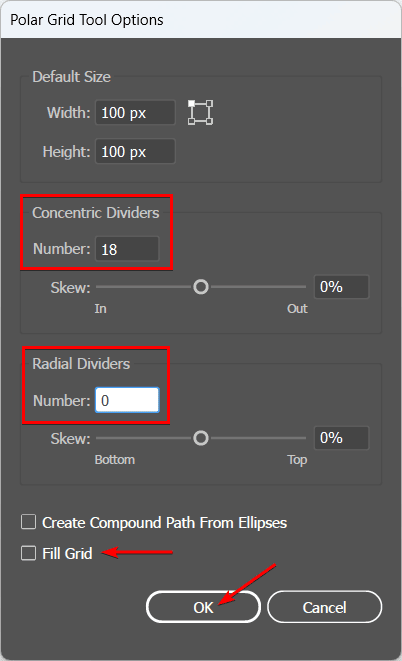
In the Polar Grid dialog box, you can adjust the following parameters:
- Width and Height: These set the size of the polar grid. You can also constrain the proportions by checking the Constrain box.
- Concentric Dividers: These set the number of concentric circles that divide the polar grid. This is the most important parameter for creating a spiral, as it determines the number of rings that the spiral will have. Double the amount of rings you want the spiral to have.
- Radial Dividers: These set the number of radial lines that divide the polar grid. You don’t need these for creating a spiral, so set this to zero.
- Fill Grid: This sets whether the polar grid is filled with color or not. You can leave this unchecked, as you only need the stroke of the polar grid.
After you set the parameters, click OK to create the polar grid.
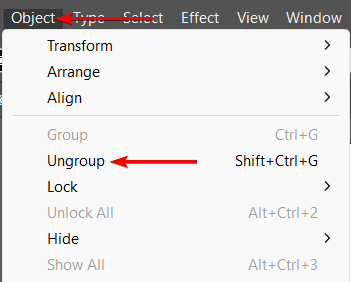
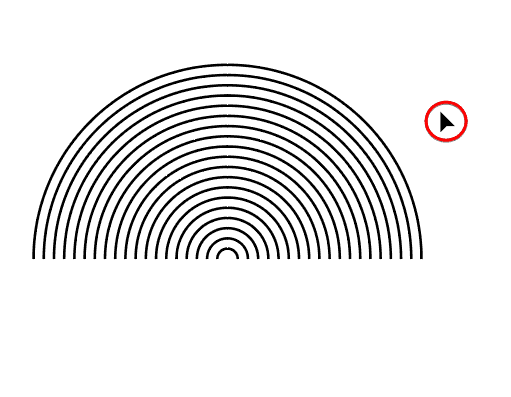
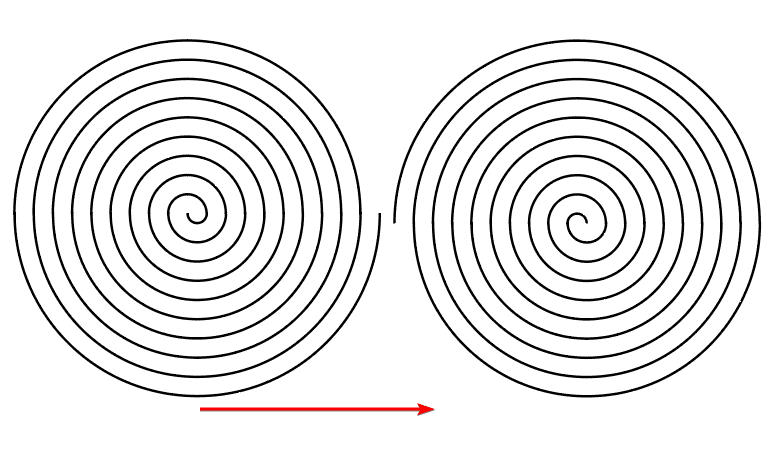
Once you have the polar grid on the artboard, you need to cut and paste the lower half of it to create a spiral. To do this, first, select the polar grid and go to Object > Ungroup or press Shift + Control + G on Windows or Shift + Command + G on Mac to ungroup the rings and the bounding box.
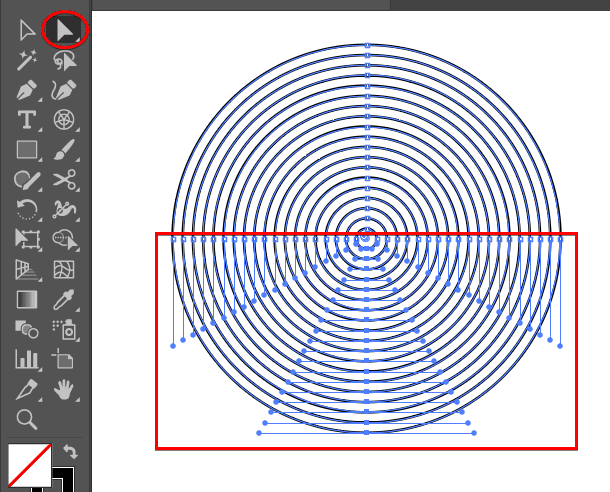
Select the Direct Selection tool and click and drag around the bottom half of the grid. This will select the lower half of the polar grid.
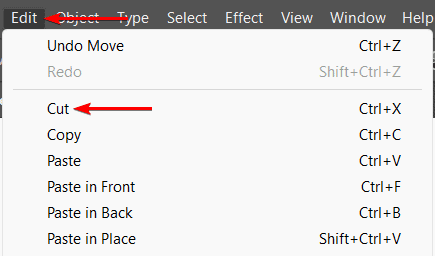
Go to Edit > Cut or press Control + X on Windows or Command + X on Mac to cut the lower half of the polar grid.
Deselect everything by clicking on an empty area of the artboard.
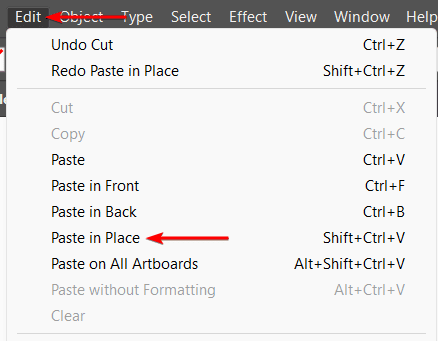
Go to Edit > Paste in Place or press Shift + Control + V on Windows or Shift + Command + V on Mac to paste the lower half of the polar grid in the same position.
Use the right arrow key to move the lower half a few steps to the right until the first ring meets up with the second ring (I used 5 steps). Make sure you have the Smart Guides enabled (View > Smart Guides) to snap the upper half to the lower half.
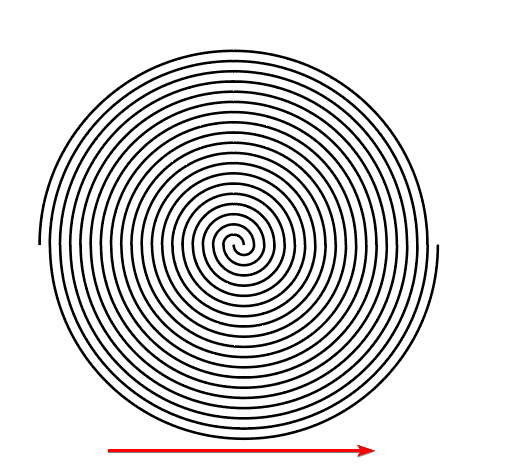
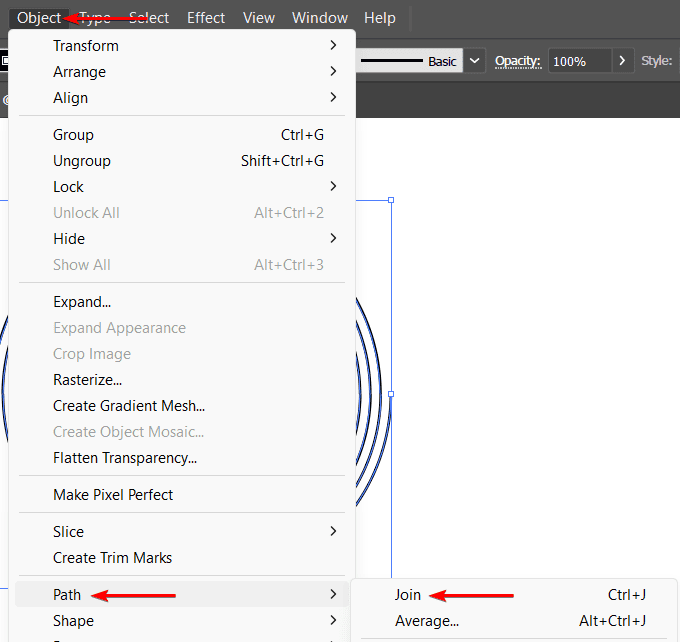
Select both the upper and lower halves of the polar grid and go to Object > Path > Join or press Control + J on Windows or Command + J on Mac to join them into a single path again.
Next, select the Scissors tool (C) from the toolbar.

Then, click on the two middle anchor points that form a bridge right in the center of the grid.
You can then press Delete to remove the bridge.
You now have two separate spirals. Use the Selection tool (V) to click on one spiral and move it away from the other.
Now you have a linear spiral on the artboard, you can modify it further as you’d like. For example, you can change the color and weight of the stroke or adjust the width of the spiral at any point.
I have shown you two different methods to make a spiral in Illustrator: using the Spiral tool and using the Polar Grid tool. The first method creates a traditional spiral, whereas the second method creates a linear spiral. Once you’ve created the spiral, you can experiment with different settings and effects to create different looks, such as adding a dotted stroke to the spiral or changing the width and color.
👍 Support Us: Subscribe to our channel and help us continue providing these tutorials.
🌟 Regular Updates: We publish how-to videos for Adobe Illustrator regularly!
🔧 Expert Guidance: Learn Illustrator from our professionals and uncover exclusive tips!
